Content may contain affiliate links. When you shop the links, I receive a small commission at no cost to you. Thank you for supporting my small business.
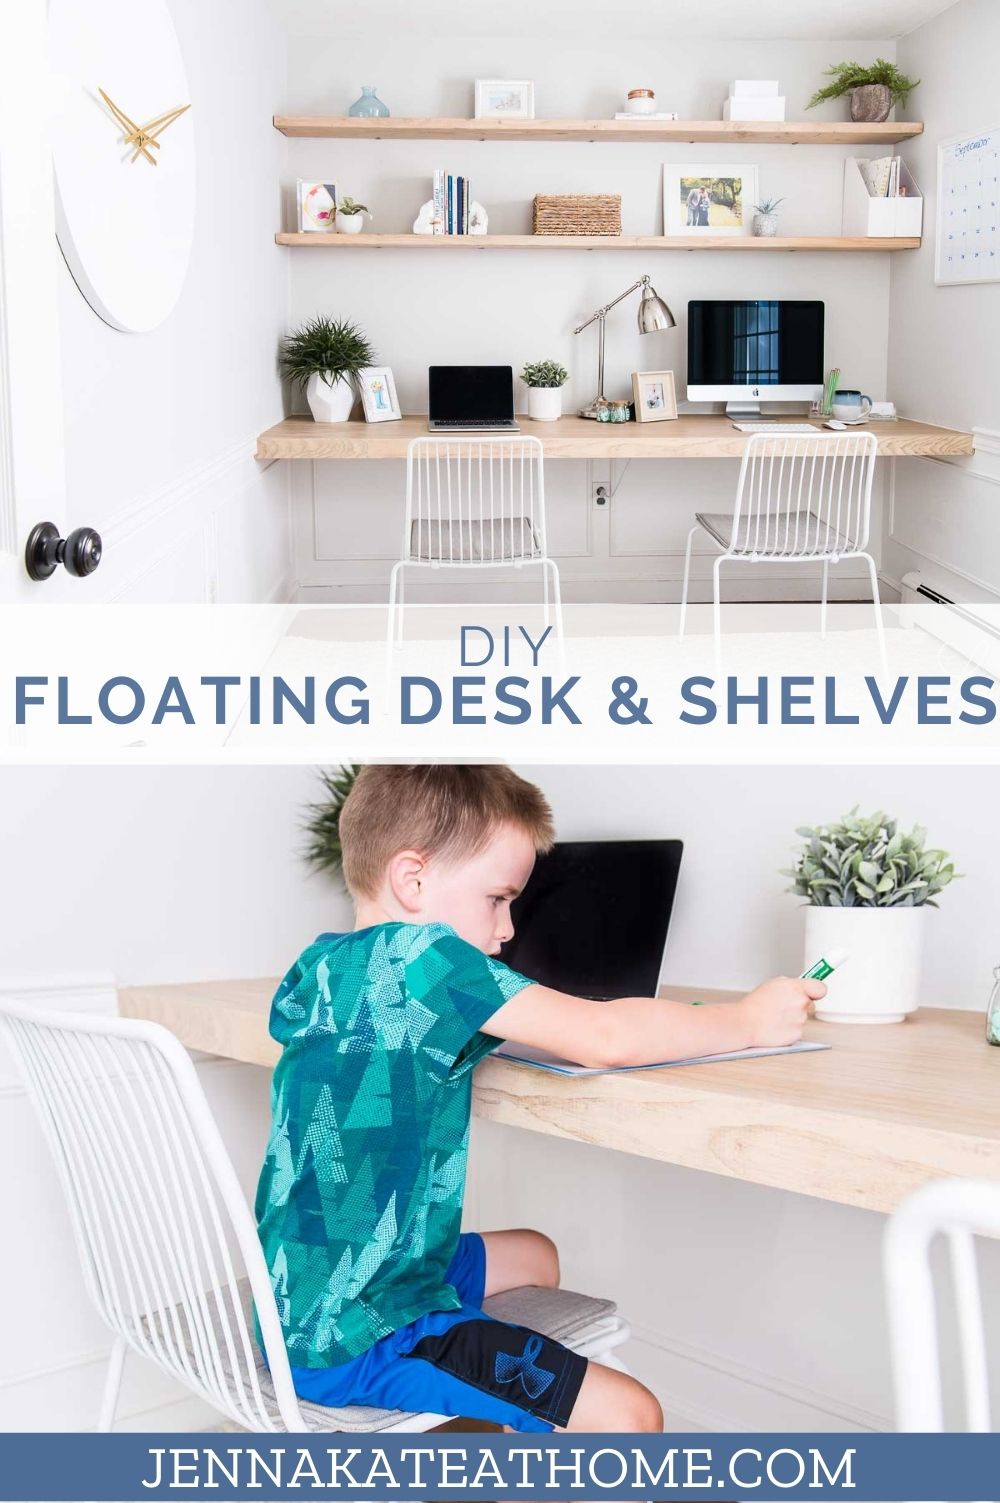
A simple and modern DIY floating desk is the perfect solution to create a home office or homeschooling space in any nook or small room in your home. Ditch the traditional desk and opt for a functional floating desk instead. This step-by-step tutorial will show you how to create this modern design!
With the possibility of remote schooling looming, it was time I figured out a desk solution for my kindergartener.
My office got a small makeover a few years ago, but in recent months had once again become a dumping ground. I knew the first thing I needed to do was purge all the extra stuff I no longer needed.
The upside? I sold almost all of it and it covered the cost of this new makeover!
Home Office Nook Design
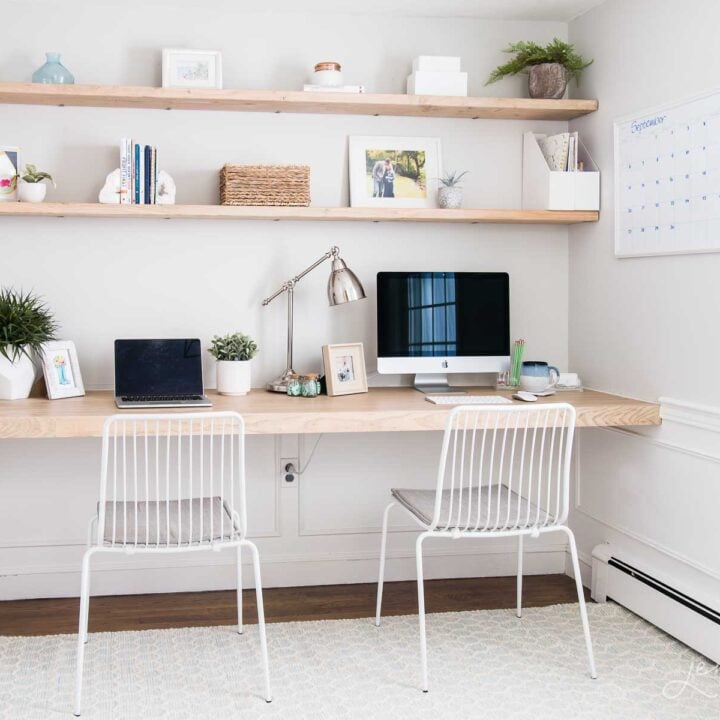
My vision for this small space was first and foremost that it needed to have ample space to work – a work desk that spanned the entire wall length, so that not only could my kindergartener and I work together, but that my 3-year-old could also fit in and work on his coloring books or other art projects alongside us.
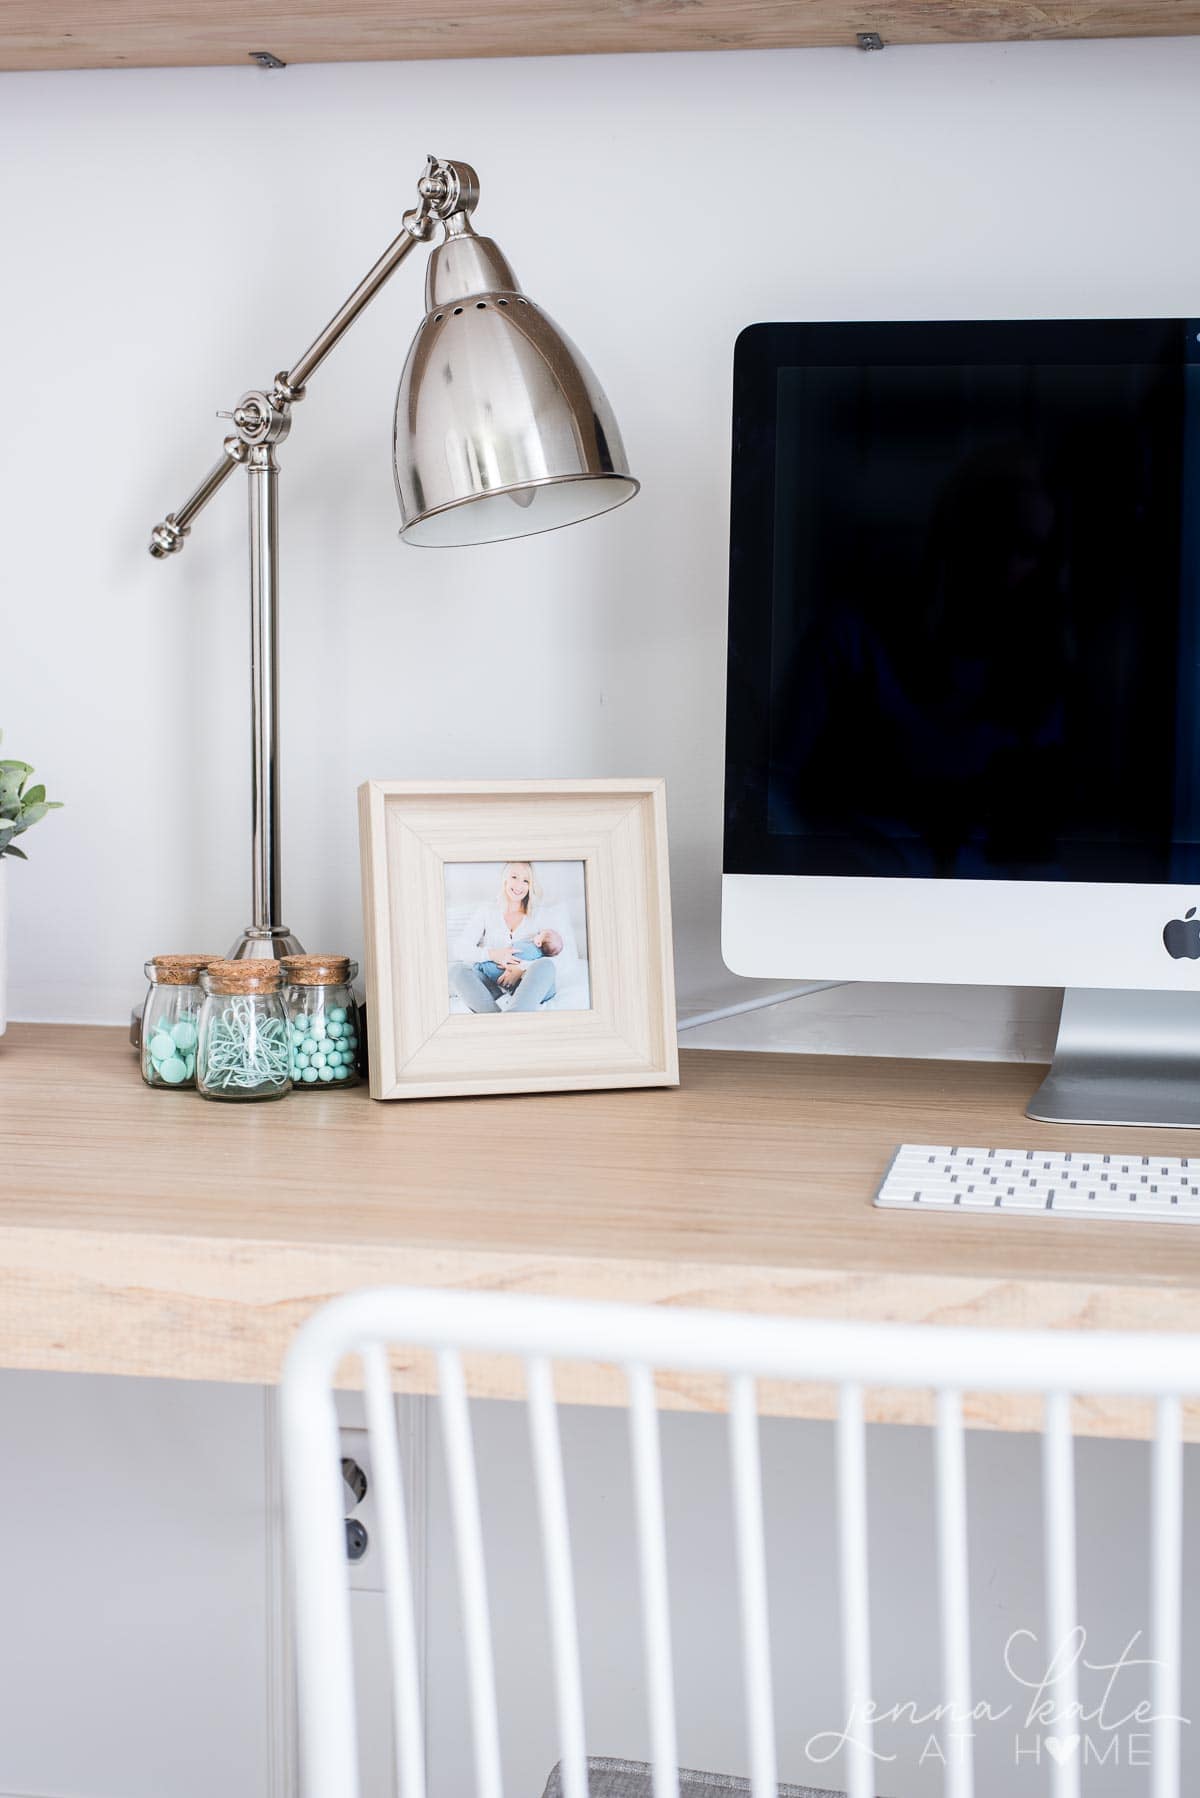
I needed a station for my desktop computer, a laptop, and of course a bit of decor to give it a homey feel.
Finally, I needed enough floor space so that the baby could also play in the same room and I not have to worry about him being “in” everything.
A DIY floating desk design seemed like a great solution and with a bit of work I knew I could make it happen.
Since everything needed to be up off the ground and mounted to the wall, the idea of the floating shelves also became part of the vision for the new room layout.
I would consider myself a very beginner DIYer. You might think that this wall-mounted desk is beyond what you are capable of doing, but trust me, it’s an incredibly easy installation process! Even if it’s your first time, I encourage you to give it a try!
You may need some help during certain points just to physically hold the wood in place and that sort of thing, but other than that, you can do this all by yourself.
This tutorial will work for a wall space 8 feet and under. My back wall is technically 93 inches, so just shy of 8 feet.
Because it is a floating desk, I’m not sure that I would go any larger than 8 feet without risking it being too much weight. Smaller is of course, perfectly fine. That’s why this is such a great DIY for small spaces. My desk is very sturdy, secure, and the perfect fit!
Supplies Needed
All the supplies are available from the Home Depot. You can order them online and do curbside pickup or have them delivered to your home. Just click on the links and add them to your cart for quick and easy shopping!

- 2 x 2 furring strips (to build the support frame)
- 3/4″ x 2ft white oak plywood (for the desk top)
- 1x 3 select pine (for the desk front)
- 3 inch wood screws (to attach support frame to the studs)
- (2) 2 x 10’s (for the wall shelves)
- 4 boxes of 1.5 inch angle braces (to hang the shelves)
- 2 inch wood screws (to attach angle brackets to shelves)
- Wood filler
- Caulk
- Clear furniture wax or Polycrylic (to protect the desk and shelves)
- Drill with hole saw attachment
- 2 inch white desk grommet (for cable management)
Tools Used
We already owned all these tools, so I have not factored them into the cost of making the desk and shelves. If you plan on doing any sort of DIY projects in the future, these are all tools that you will use time and time again.
- Miter Saw (for all the cuts)
- Kreg Jig (for the pocket holes)
- Stud Finder
- Brad Nailer
- Sander
How to Make The Floating Wall Desk and Shelves
Build the Floating Desk Support
The first step is to mark the studs in the wall using a stud finder. Everything will need to be screwed directly into the studs for the desk and shelves to be secure.
Build the frame to support the desk top. This frame support is very secure once it’s installed directly into the studs, so you don’t need heavy-duty brackets or anything like that.
I started by cutting the back and front pieces to size, then each smaller piece. Since the desk top was going to be 2 feet deep, I made sure that the total depth of the back piece + the small pieces + the front piece equaled 24 inches exactly.
Since I was using 2 x 2 boards, that meant the back piece was 1.5 inches, the front piece was 1.5 inch which left me needing 21 inches for the in-between smaller boards.
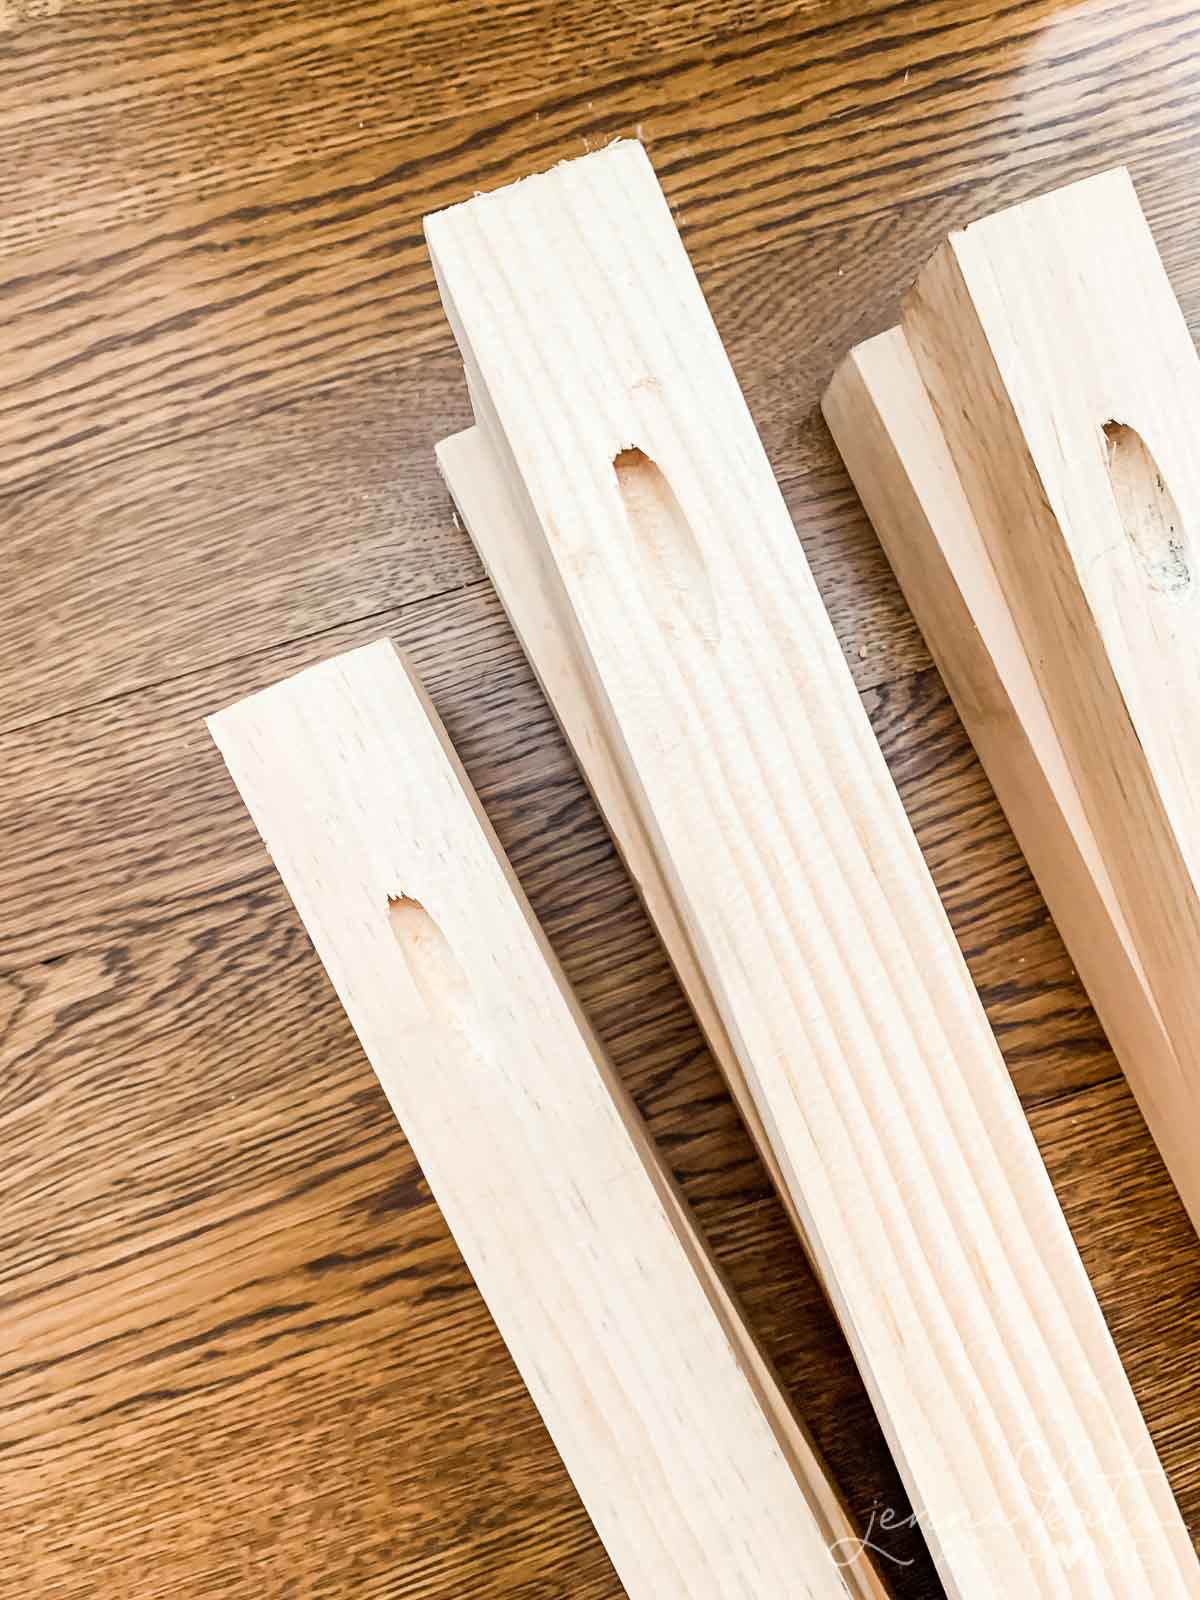
Each of 21 inch pieces of wood was cut to size and then drilled on both ends to accommodate a pocket hole using my Kreg Jig.
You could also pre-drill screw holes (pilot holes!) and just screw directly, but I recommend the pocket holes for a floating table because they are much more secure and create a tighter joint.
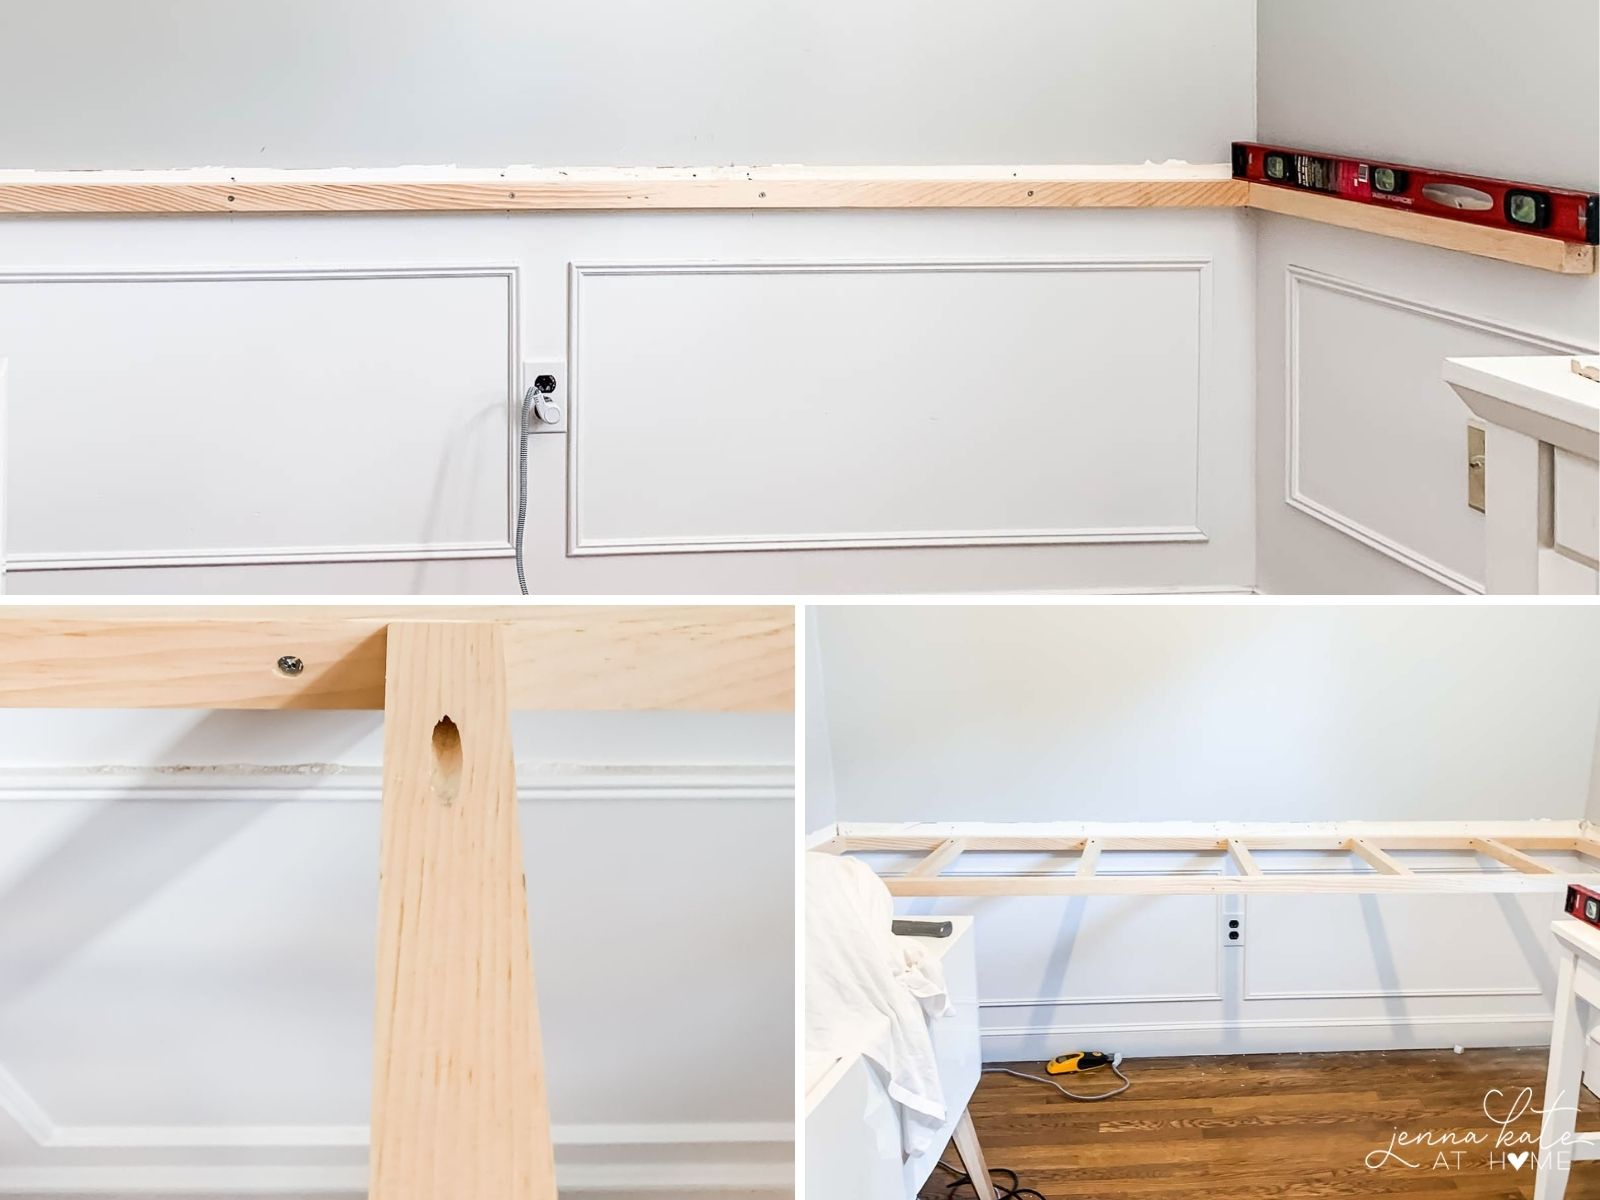
Attach the back piece of the wood frame using screws long enough to go through the 2 x2 wood. I used 3-inch screws.
The next step is to just start attaching each of the brace pieces, starting with the sides. We didn’t have any studs on the sides to attach to and the desk is still secure.
Finally, attach the front piece so that you have a box (alternatively, you can build the frame and then install it on the wall. However, if you’re dealing with a large space like mine, it would be very cumbersome).

Install the Desk Top
Measure the top of the desk and cut the oak plywood. Place the plywood down on top of the floating frame. Secure around the top using brad nails.
Attach the front trim 1 x 3 using brad nails. Then fill any nail holes or seams with wood filler (I used the “natural” color). Be sure to fill the seam where the desk top meets the 1×3.
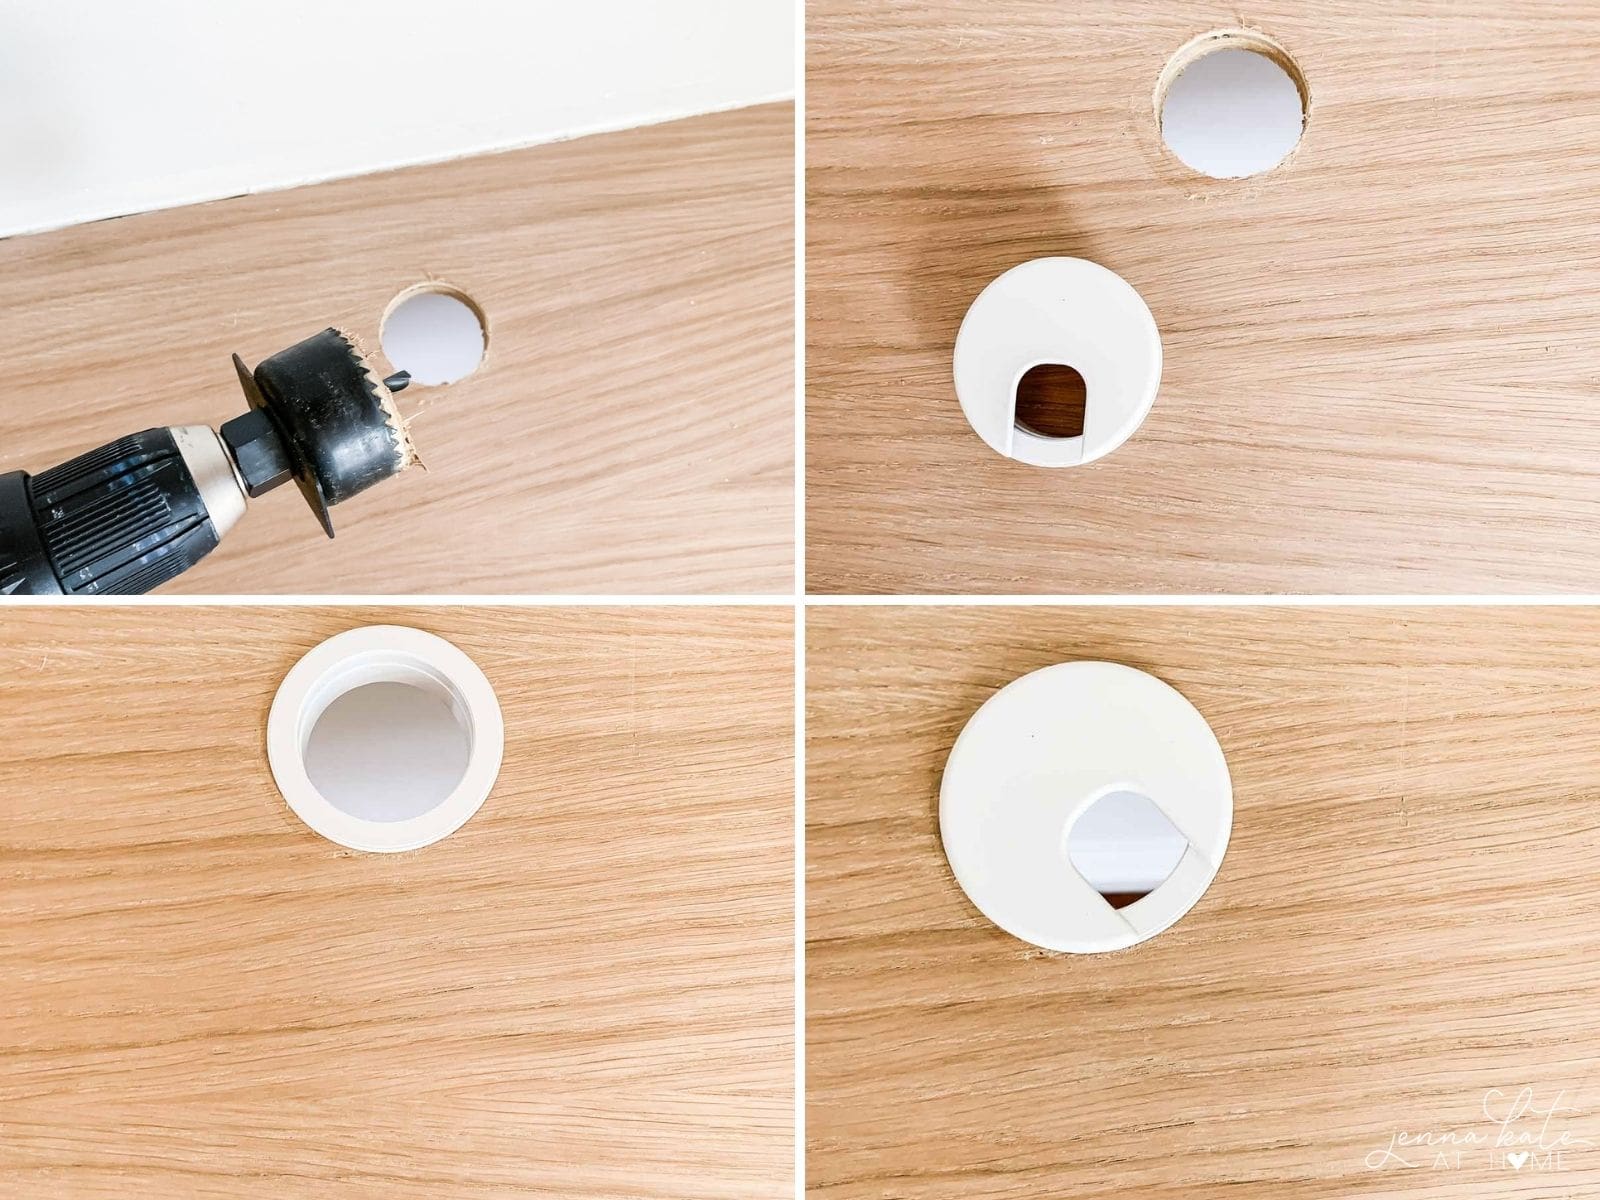
Drill a hole in the top of the desk for cables. I used a 2-inch hole saw and then inserted a white cable hole grommet so that it looks neat. (You could also do this prior to installing the desktop, but I wanted to be able to put my computer on top and figure it all out first. )
Caulk all the way around the edges of the desk where it meets the wall. Cover the surface of the desk with Frogtape first so that the caulk doesn’t seep into the grain of the wood.
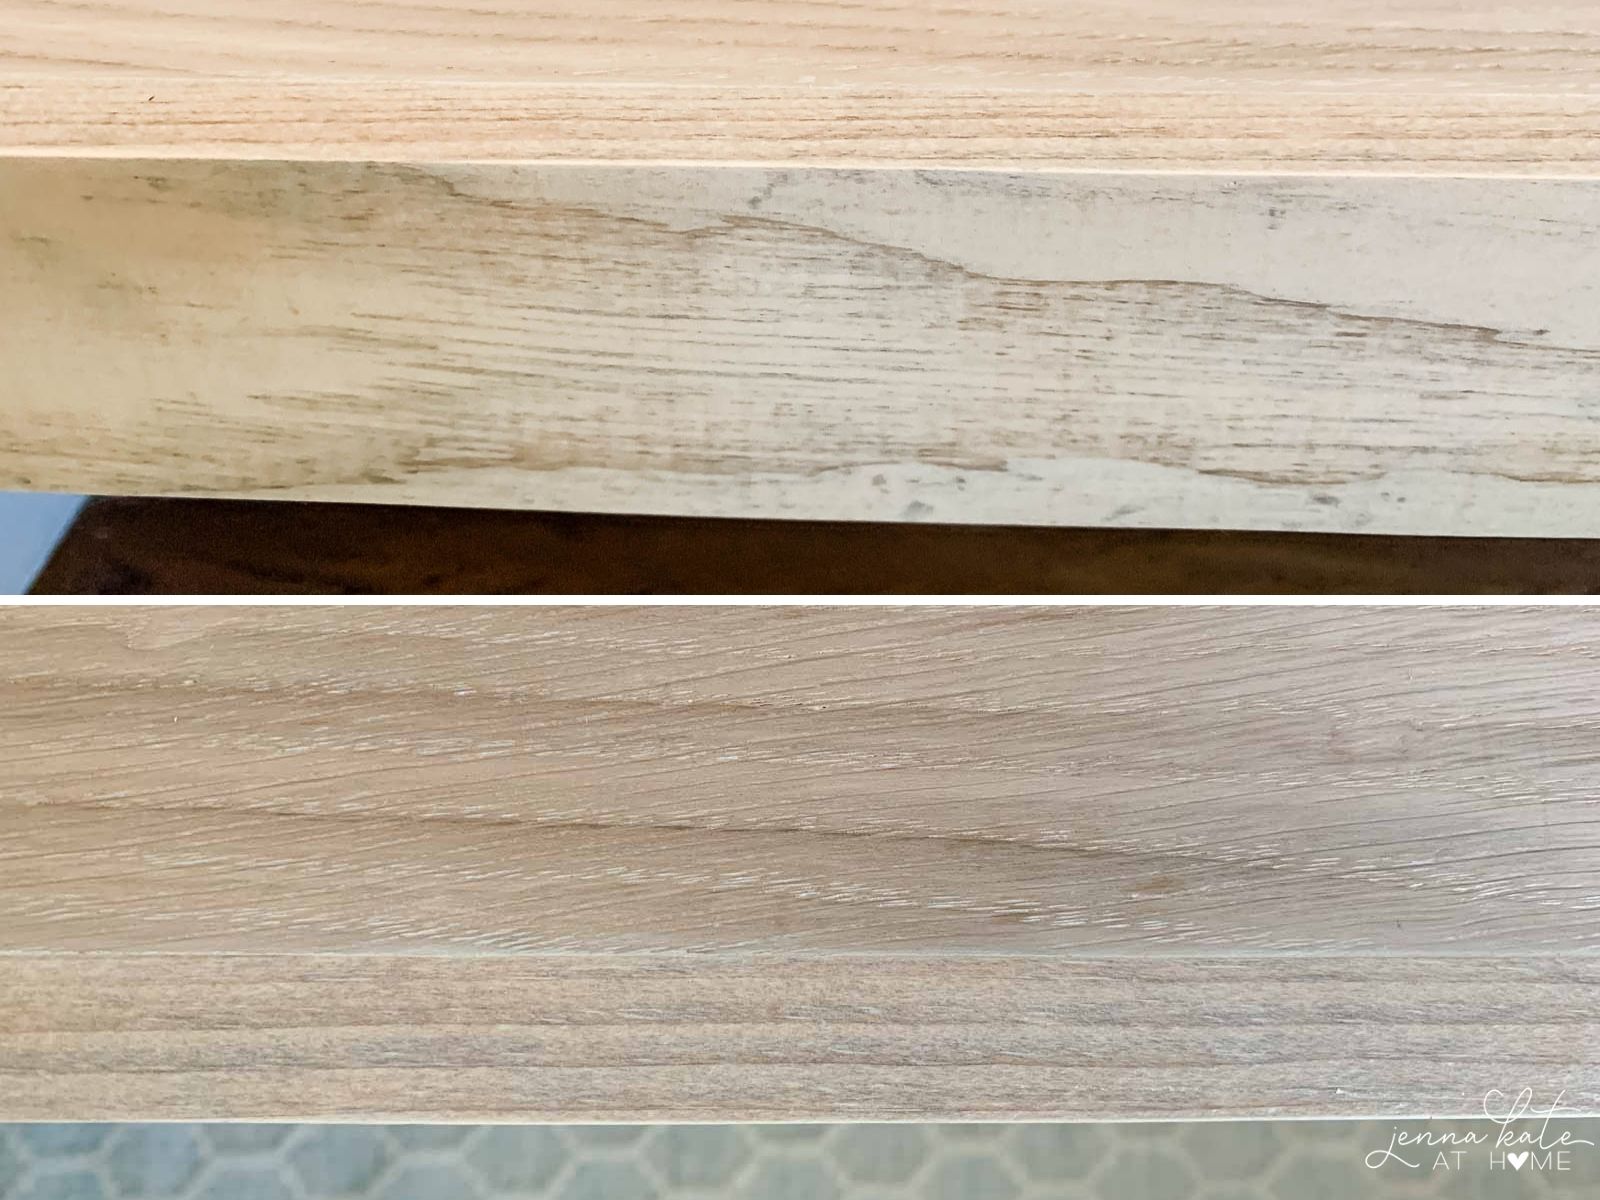
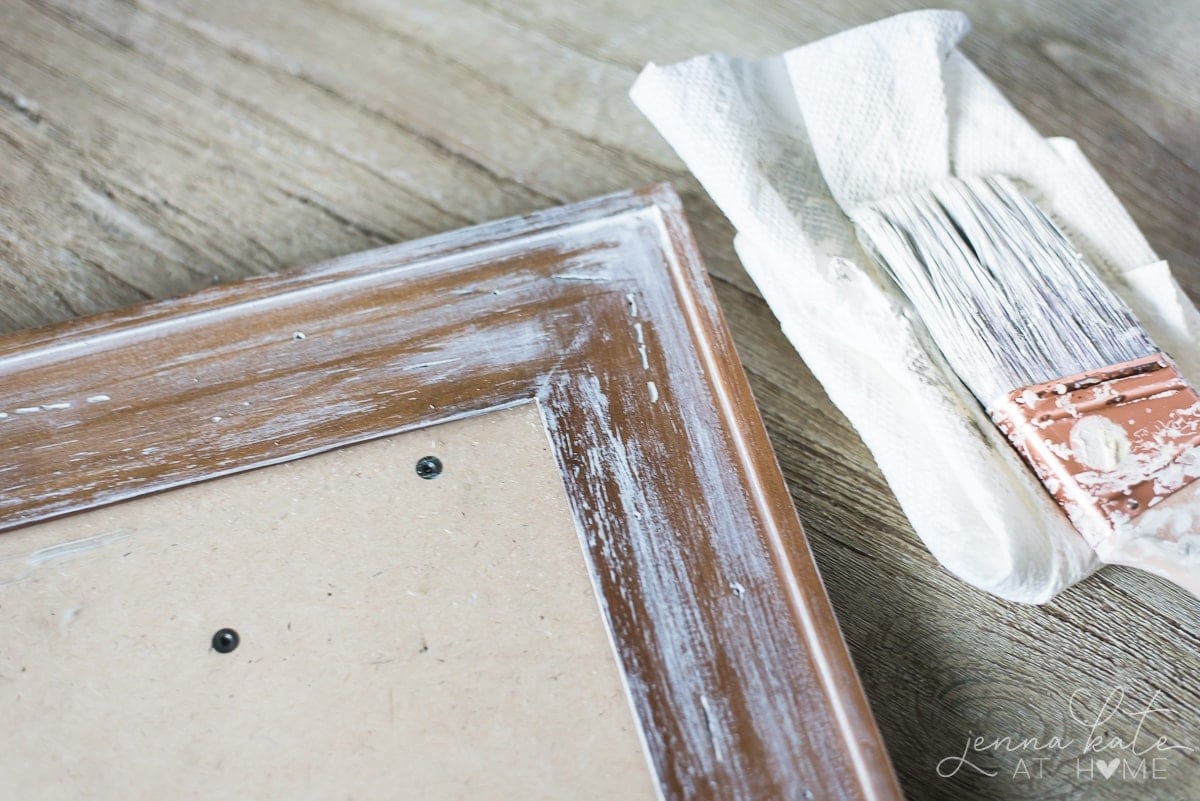
Sand and Stain the Shelves
Sand the wood pieces smooth. To stain the wood to match the white oak, first, apply pre-stain conditioner according to the directions on the can.
Then, apply Minwax Golden Oak stain and immediately wipe it off. Finally, apply a coat of Minwax Simply White stain. Once dry, compare it to the white oak plywood and determine if it needs a second coat.
Determine the height of the shelves and cut the wood to size.
Don’t assume that both pieces will be cut exactly the same length. There was 1/8 of an inch difference in the width of my walls between the two shelves.
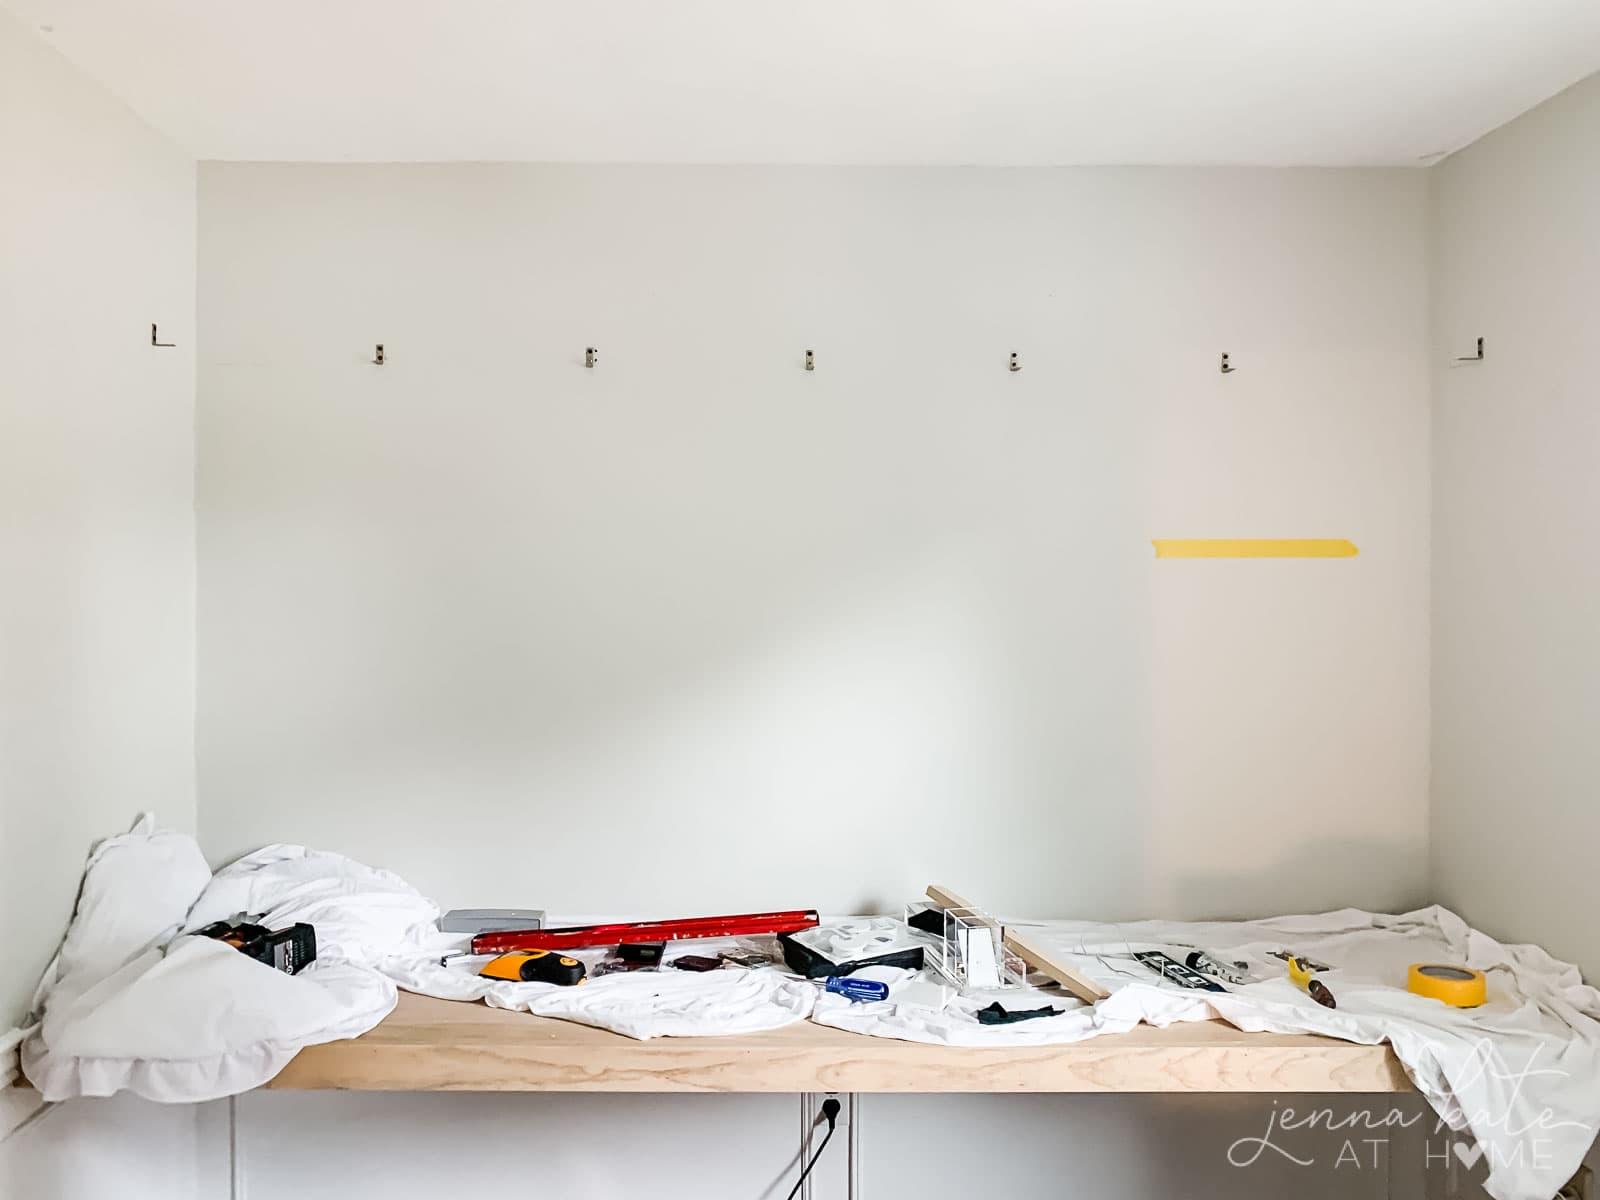
Attach the Floating Shelves to the Wall
Starting with the top wall shelf, attach the angle brackets to the walls where they will hit the studs, and one on each side (they probably won’t get a stud on the sides). The screws that come with the braces are too small, so you will need to use 1.5-inch wood screws.
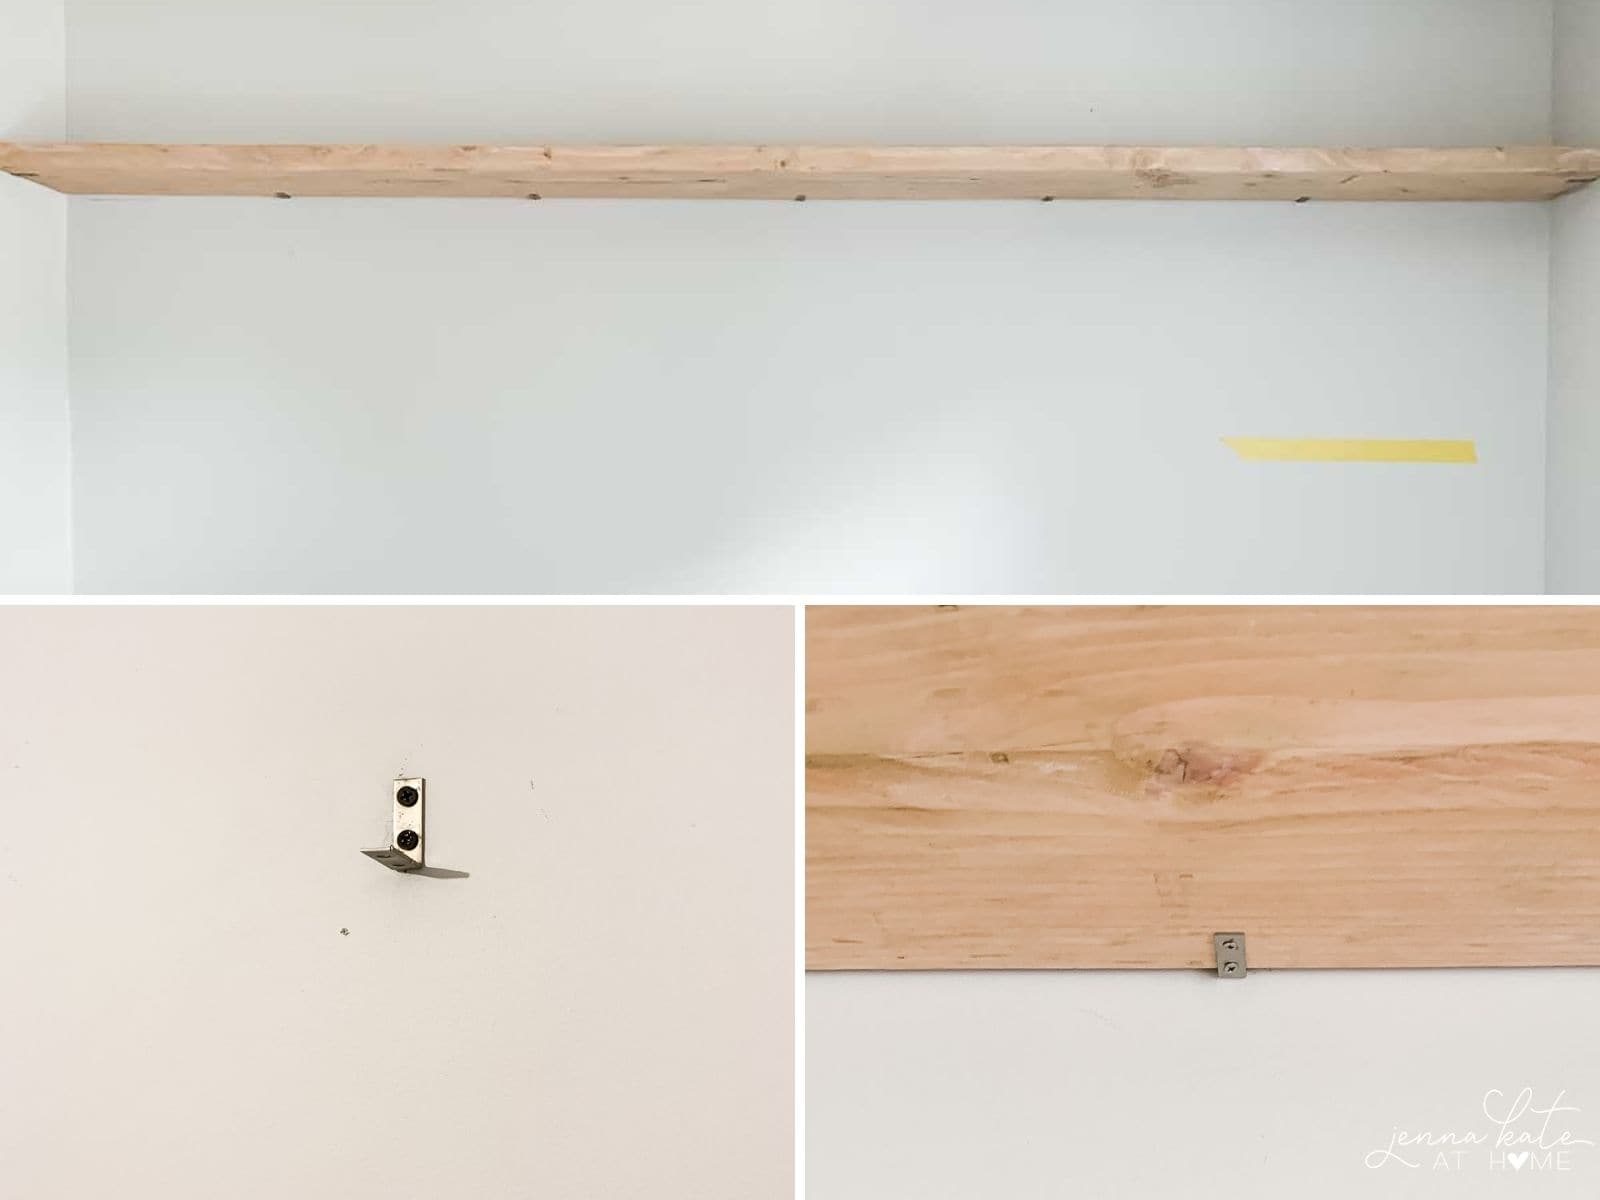
Place the shelf on the brackets and screw the brackets up into the shelves. You can use the screws that came with the brackets for this part.
Repeat for the bottom shelf.
Seal The Desk and Shelves
Seal both the desk top and shelves with clear furniture wax or matte polycrylic. I chose clear wax because I did not want the color of the oak to be darkened. If this doesn’t bother you, or you chose a different wood or stain to begin with, polycrylic will work great.
Then all that’s left to do is decorate, set up your computer, and enjoy!

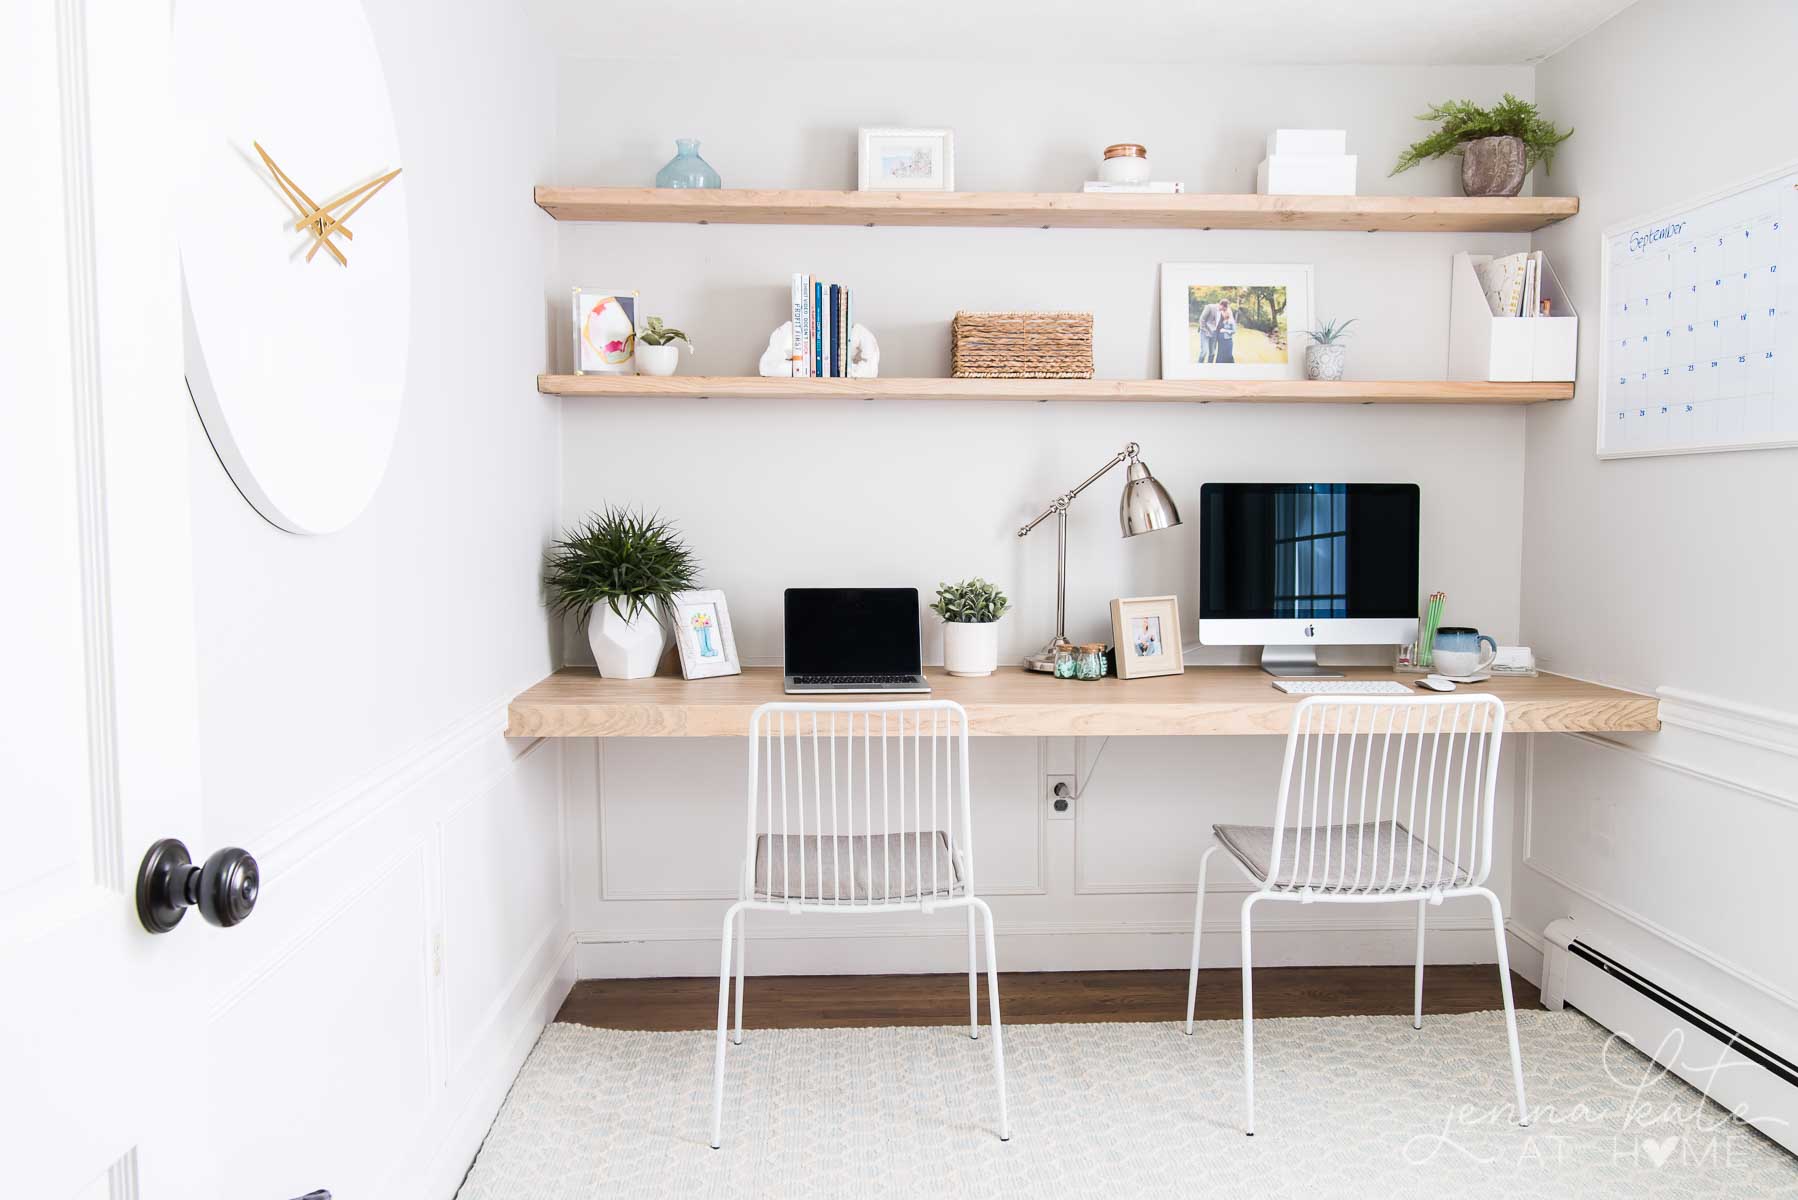
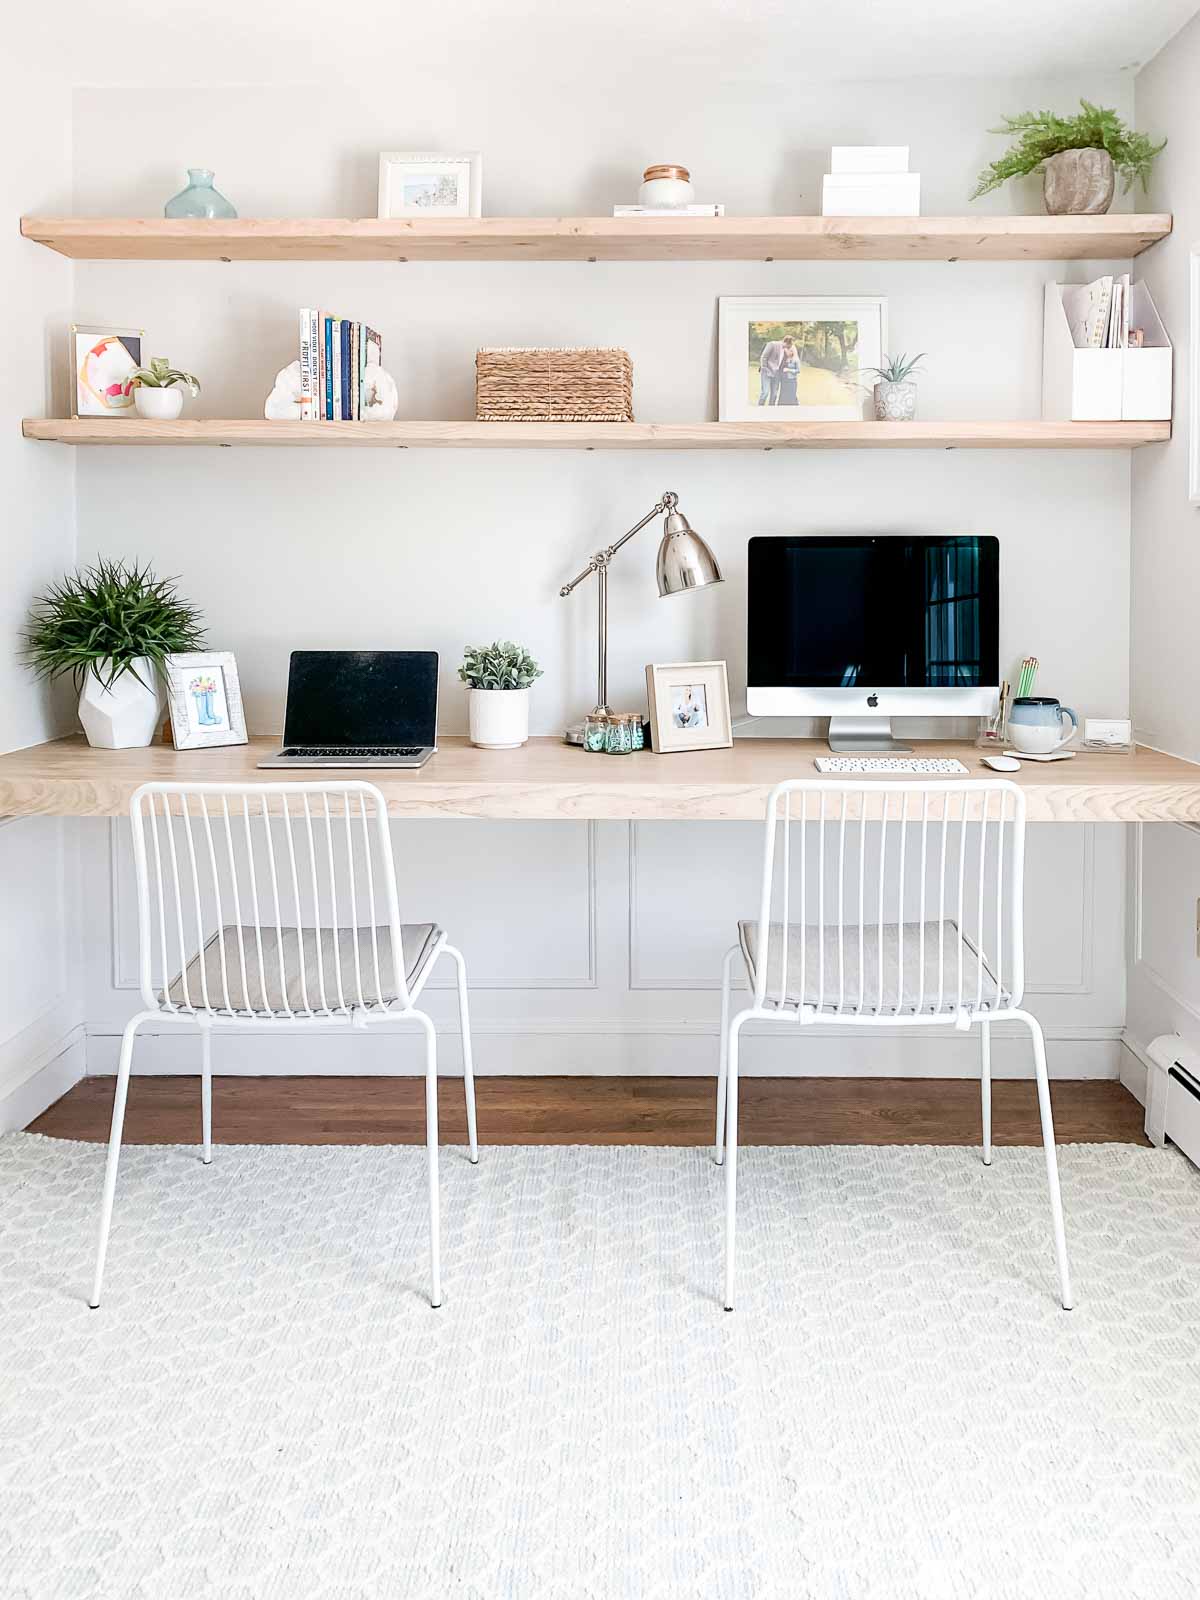
Simple Home Office Decor
The plan is to keep this space light, bright, and uncluttered. Since we have some storage space in the closet in this room, I chose to keep the shelves simple with just some books, my file folders, and a basket for miscellaneous office supplies.
I scan most of the paperwork we need into the computer to keep paper clutter at bay, which also really helps.

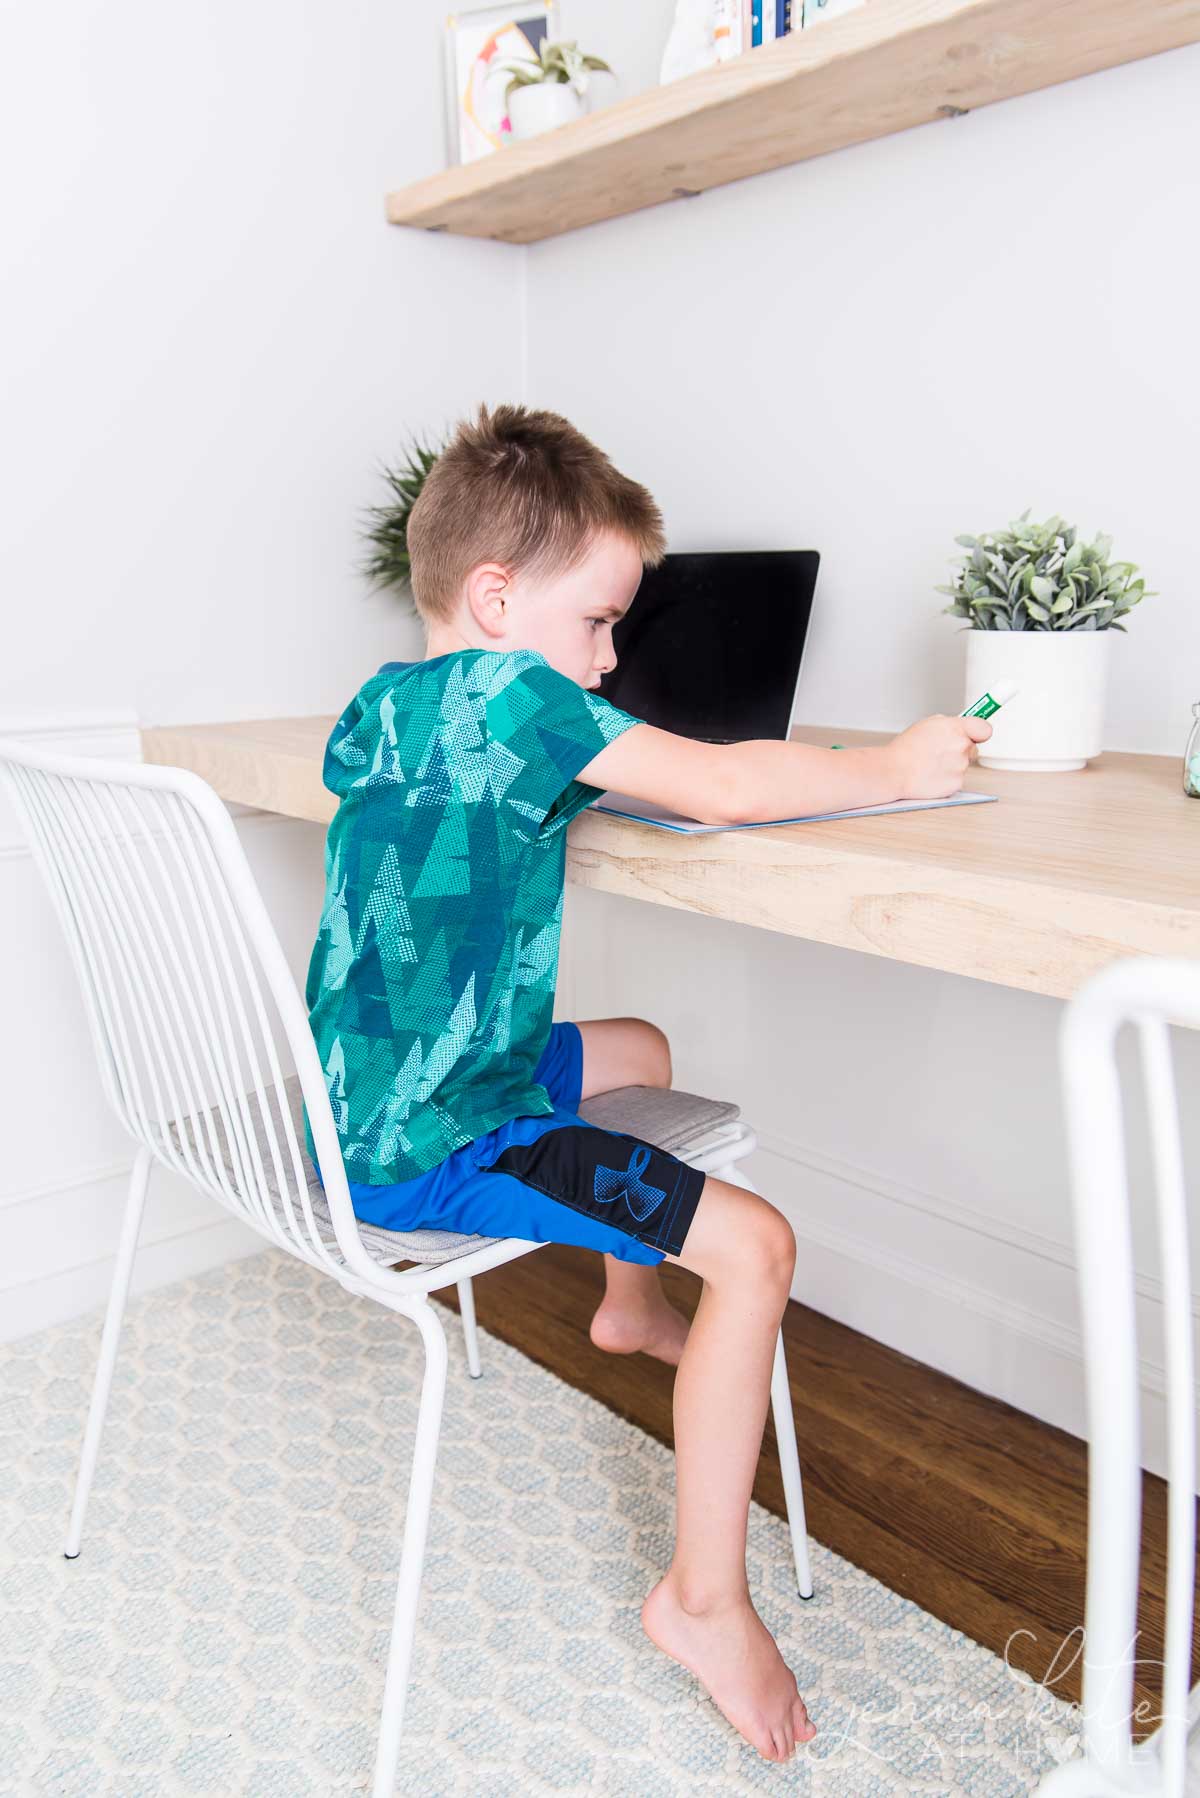
The chairs I chose for the space are surprisingly comfortable, despite their metal frame and thin pad. I’ve sat in them for hours and they conform nicely to my body and offer good support.
I do have a proper desk chair that I usually use, so the kids will mostly be using these white chairs on the remote-learning days.
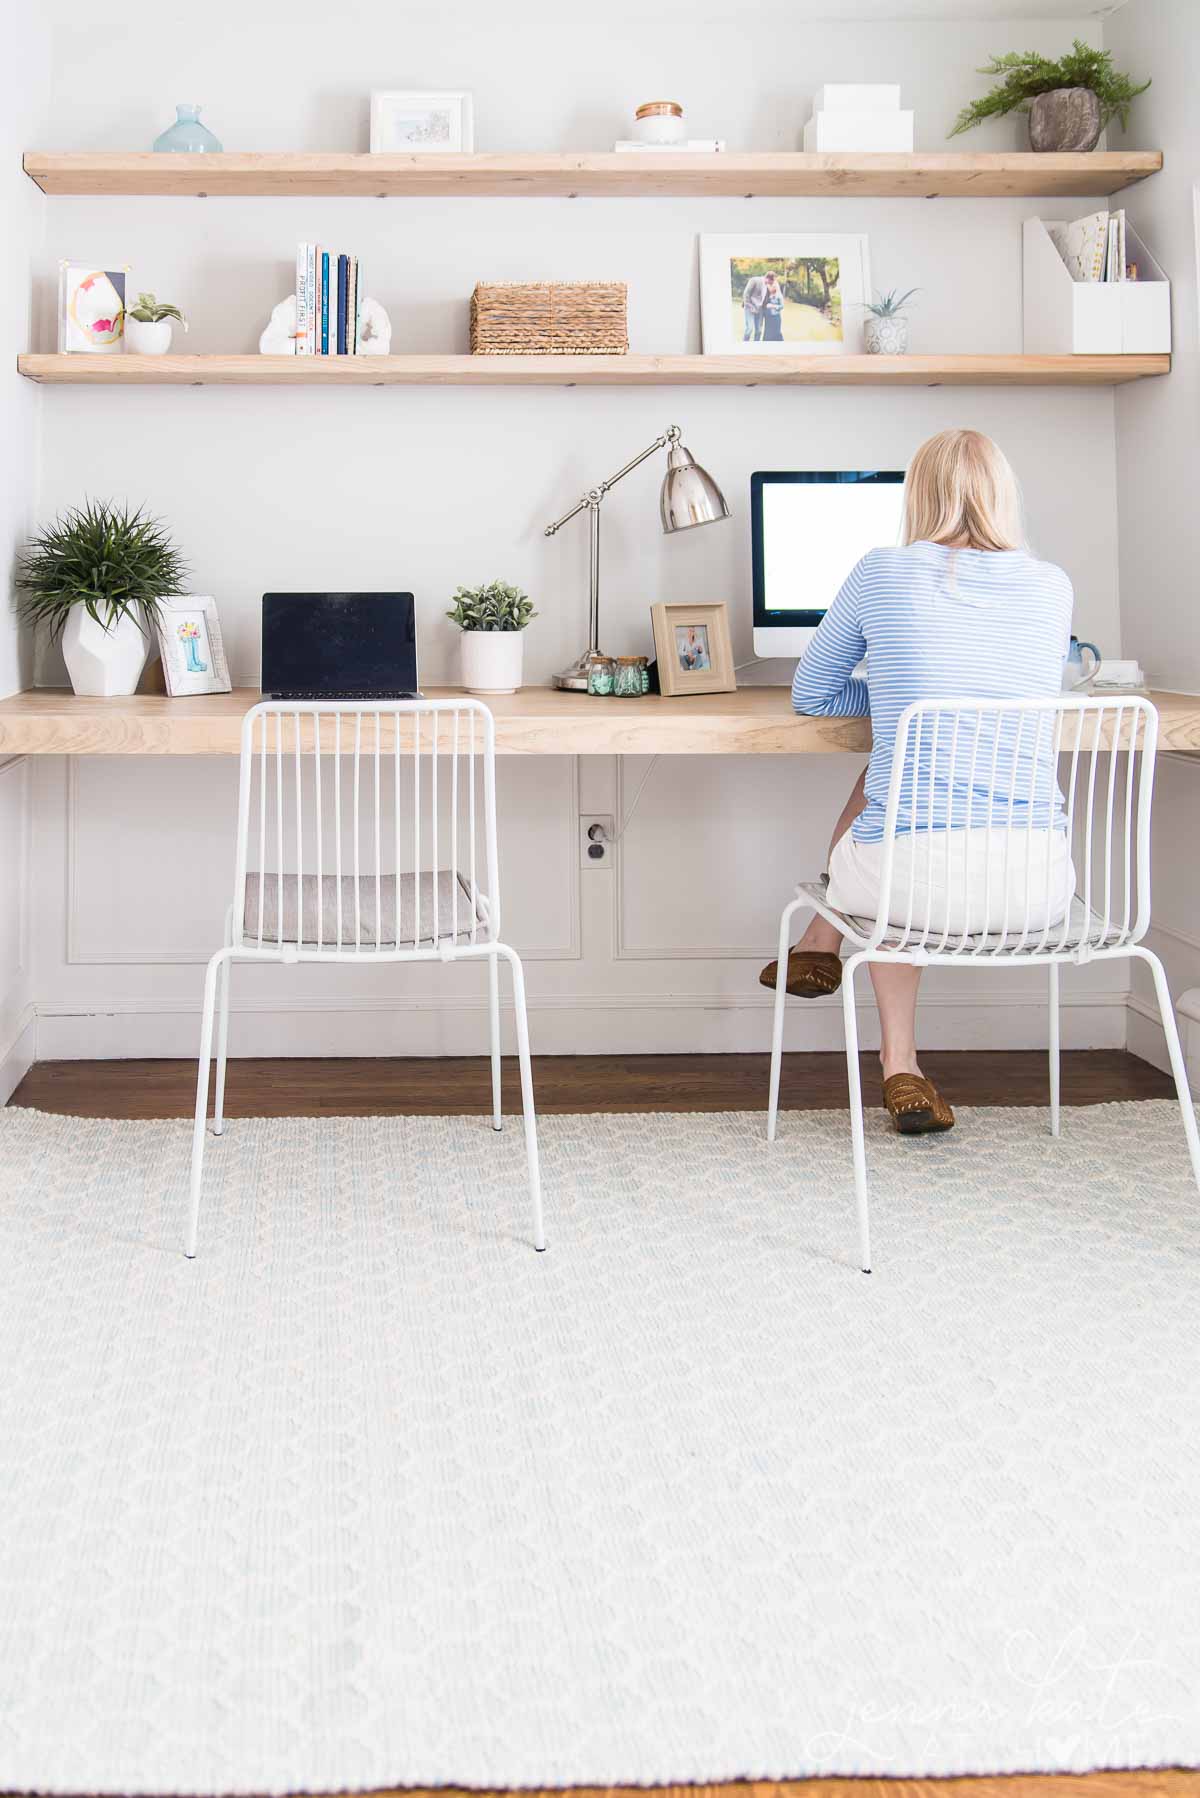
The new rug is stunning. It’s a soft baby blue with an off-white cross hatch weave and an almost “honeycomb” detail on it. It’s very soft and adds nice texture to the space.
Overall, I’m really happy with the finished look and feel like we have enough storage with the shelves to avoid having a mess on the floor which was the ultimate goal.
OTHER SOURCES
- Chairs
- Rug
- Task lamp: IKEA
- Wall clock: CB2 (no longer sold)
- Decorative pieces: HomeGoods
- Wall paint: Sherwin Williams Repose Gray at 50% strength
DIY Floating Desk and Shelves
A simple and modern DIY floating desk that is a simple and easy to build solution to create a home office or homeschooling space in any nook in your home.
Materials
- 2 x 2 furring strips (to build the support frame)
- 3/4" x 2ft white oak plywood (for the desk top)
- 1x 3 select pine (for the desk front)
- 3 inch wood screws (to attach support frame to the studs)
- (2) 2 x 10's (for the wall shelves)
- 4 boxes of 1.5 inch angle braces (to hang the shelves)
- 2 inch wood screws (to attach angle brackets to shelves)
- Wood filler
- Caulk
- Clear furniture wax
- Drill with hole saw attachment
- 2 inch white desk grommet
Tools
- Miter Saw (for all the cuts)
- Kreg Jig (for the pocket holes)
- Stud Finder
- Brad Nailer
- Sander
Instructions
How to Make The Floating Desk and Shelves
- Mark the studs in the wall. Everything will need to be screwed directly into the studs for the desk and shelves to be secure.
- Build the frame to support to desk top. I started by cutting the back and front pieces to size, then each smaller pieces. Since the desk top was going to be 2 feet deep, I made sure that the total depth of the back piece + the small pieces + the front piece equaled 24 inches exactly.
- Since I was using 2 x 2 boards, that meant the back piece was 1.5 inches, the front piece was 1.5 inch which left me needing 21 inches for the in-between smaller boards. Each of 21 inch pieces of wood was cut to size and then drilled on both ends to accommodate a pocket hole using my Kreg Jig. You could also pre-drill holes and just screw directly, but the pocket holes are much more secure.
- Attach the back piece of the wood frame using screws long enough to go through the 2 x2 wood. I used 3 inch screws. Then, start attaching each of the brace pieces, starting with the sides. We didn't have any studs on the sides to attach to and the desk is still secure. Finally, attach the front piece so that the frame is built. (Alternatively, you can build the frame and then install it on the wall. However, if you're dealing with a large space like mine, it would be very cumbersome.)
- Measure the top of the desk and cut the oak plywood. Place the plywood down on top of the floating frame. Secure around the top using brad nails.
- Attach the front trim 1 x 3 using brad nails. Then fill any nail holes or seams with wood filler (I used the "natural" color). Be sure to fill the seam where the desk top meets the 1x3.
- Drill a hole in the top of the desk for cables. I used a 2 inch hole saw and then inserted a white cable thing so that it looks neat. (You could also do this prior to installing the desktop, but I wanted to be able to put my computer on top and figure it all out first. )
- Caulk all the way around the edges of the desk where it meets the wall. Cover the surface of the desk with Frogtape first so that the caulk doesn't seep into the grain of the wood.
- Sand the 2 x 10 boards smooth. Stain the wood to match the white oak (see this tutorial more info).
- Determine height of shelves and cut the wood to size. Don't assume that both pieces will be cut exactly the same length. There was 1/8 of an inch difference in the width of my walls between the two shelves.
- Starting with the top shelf, attach the angle brackets to the walls where they will hit the studs, and one on each side (they probably won't get a stud on the sides). The screws that come with the shelves are too small, so you will need to use 1.5 inch wood screws.
- Place the shelf on the brackets and screw the brackets up into the shelves. You can use the screws that came with the brackets for this part.
- Repeat for the bottom shelf.
- Seal both the desk top and shelves with clear furniture wax or matte polycrylic.
- Then all that's left to do is decorate, set up your computer and enjoy!
Notes
The length of the desk can be shortened to accomodate your individual wall. The only difference will be the length you need to cut your boards and the number of angle brackets you will need to support the shelves.
Allow the stain on the shelves to dry overnight or for a minimum of 8 hours before installing or sealing. The clear furniture wax or polycrylic will also need to dry for 24 hours before placing objects on the desk or shelves.


Hi! Seeing this post was PERFECT timing. Doing the same project at home and our dimensions are the same too! Favor, can you tell me the depth of your shelves and how thick the wood measures? The desktop thickness was 3″? This is so helpful– thank you!
Hello! For the long edge, did you just screw into the studs every 16 or so inches or did you add additional anchored connections?
Thank you!
Just into the studs! It was very sturdy!
Hi Jenna! Following your lead and doing this in my kitchen. Could you tell me how high was your desk from the ground?
Thanks!
Hi Danielle! I don’t remember off hand (we since got rid of this entire office!) but I had it regular desk height! I just searched for a few desks and checked what their heights were.
Hello. I stumbled across your blog when looking for fall decor ideas. Then I found this desk. Amazing! But in reality how do you only have one plug going into the the outlet? (Not even your lamp is plugged in?) We have all kinds of cords and things associated with our desk…that go with the computer, printer and phone charging area. I can’t imagine if I made this desk it won’t look uncluttered from all cords.
Ahh I dream of such a desk.
Hi! Both the lamp and computer are plugged in. My printer is in a cabinet on the other side of the room and I have a charging station in my kitchen! You could add as many holes as you needed…that is all I needed! I’m not a fan of clutter.
Doing this project now! Did you stain the front piece of pine?
yes!