Content may contain affiliate links. When you shop the links, I receive a small commission at no cost to you. Thank you for supporting my small business.
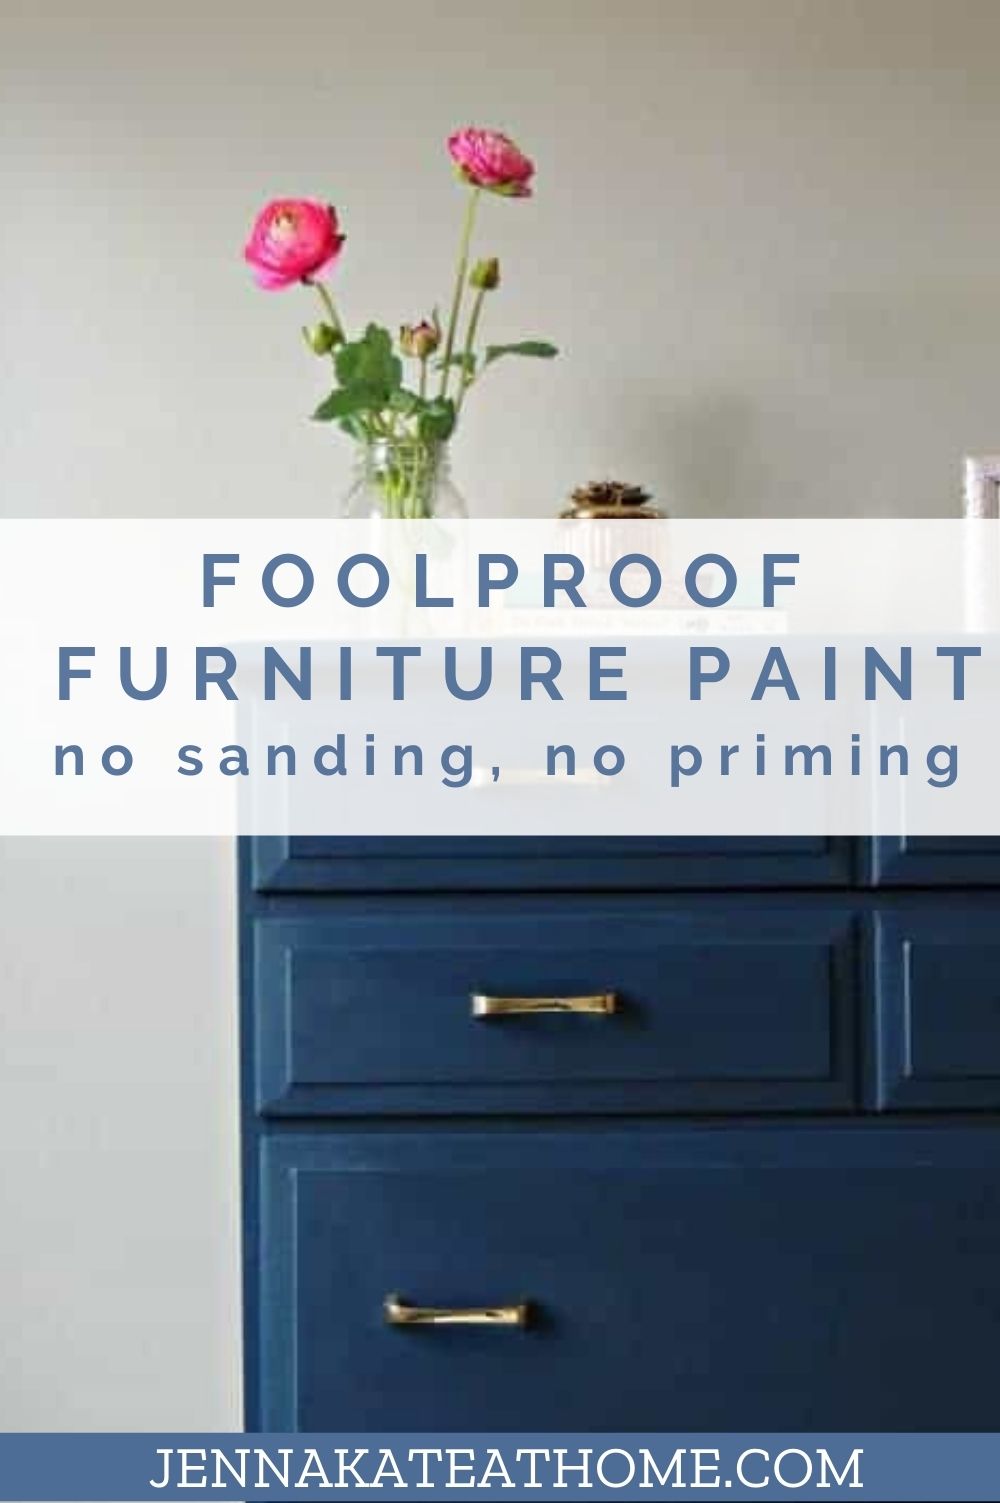
Have you always wondered how to paint furniture? Or do you have a piece of furniture that you want to paint but are dreading all the prep work that must be done beforehand? You know, sanding, priming, painting, sanding some more? UGH! It’s enough to make you give up before you’ve even started!
How about if I told you that you can skip ALL of those steps and end up with beautifully painted furniture? That’s right – no sanding, priming and a perfect brushstroke-free finish.
Have you heard about Velvet Finishes yet? It’s a revolutionary new paint line that makes painting furniture a cinch. Like, seriously, it’s completely foolproof, idiot proof….every single time!
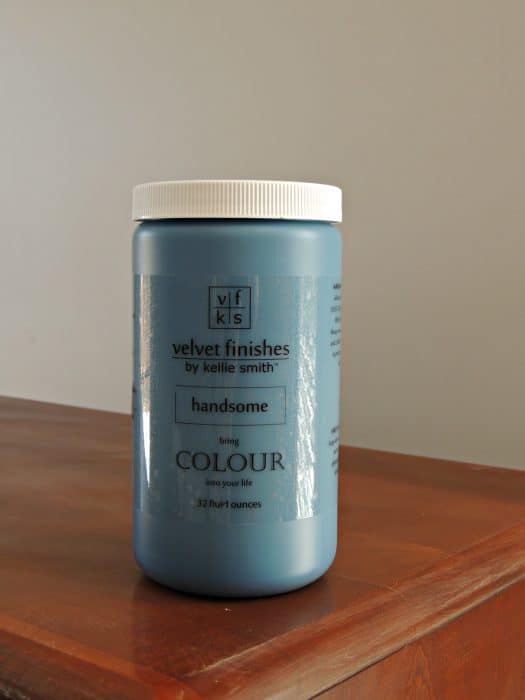
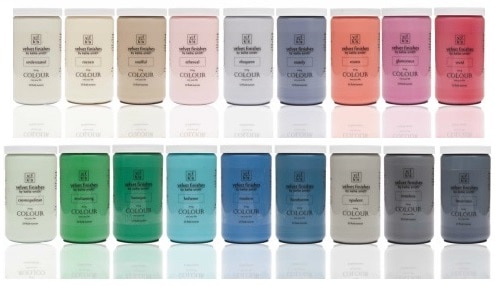
Velvet Finishes was created by interior designer Kellie Smith after not finding the finish and color palette she was seeking for a client. There are 21 amazing highly saturated colors in the line and the finish is that of a low matte sheen – like velvet!
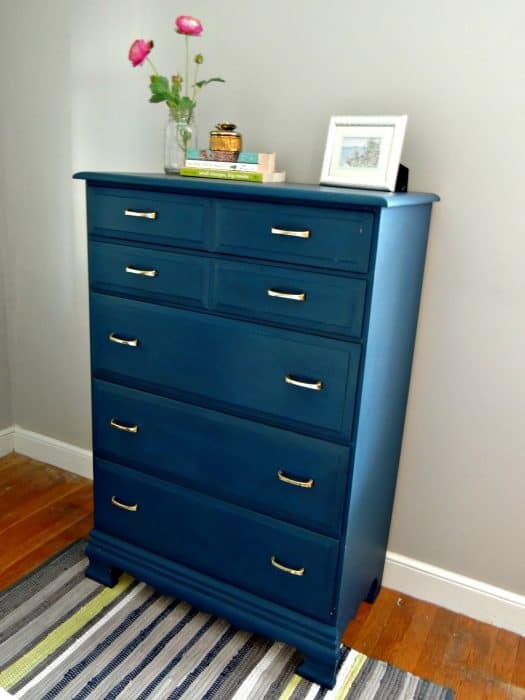
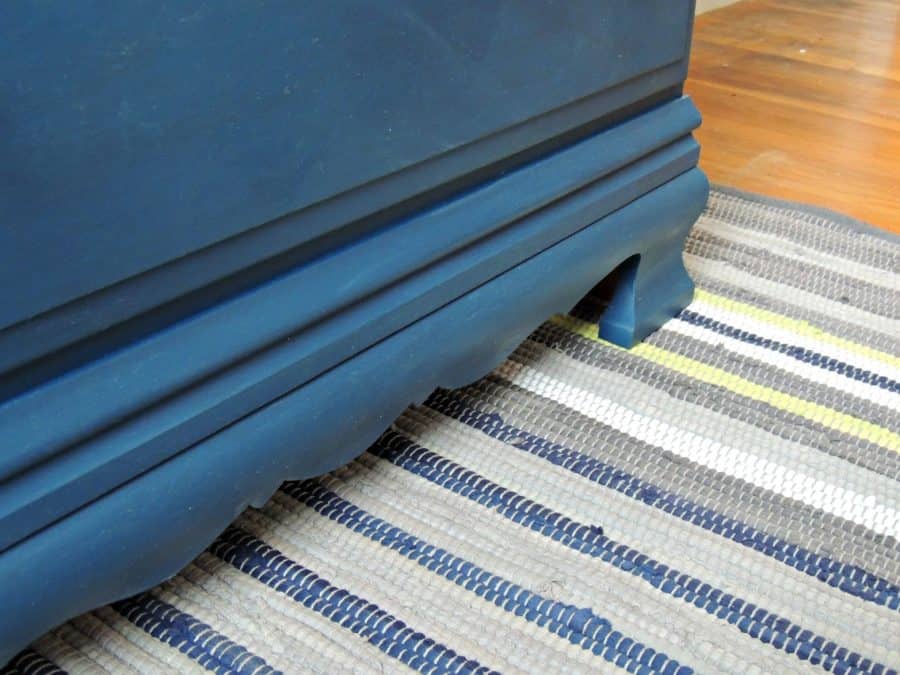
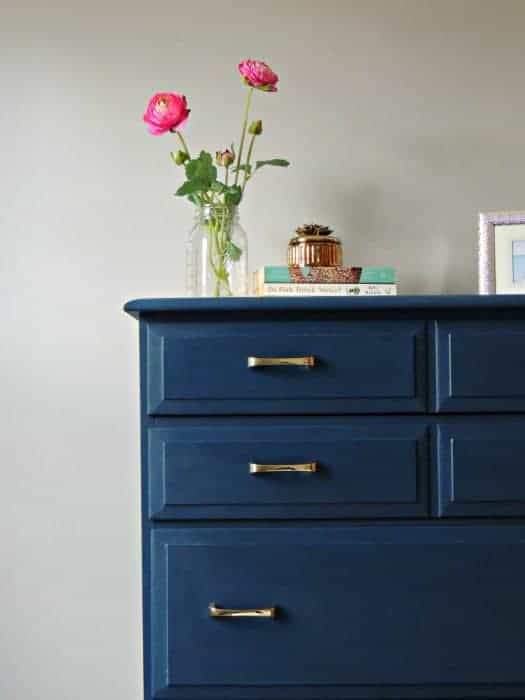
The color I chose was handsome which is a dark blue but not quite a navy. And handsome it is. I took an old beat up dresser from this…
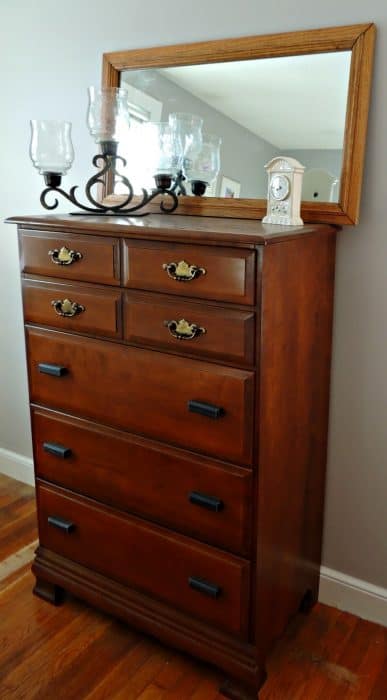
to this… in less than two hours
Velvet Finishes patent-pending formula is a DIYer’s dream. If you want to know how to paint furniture the right way, you’ll want to buy this paint!
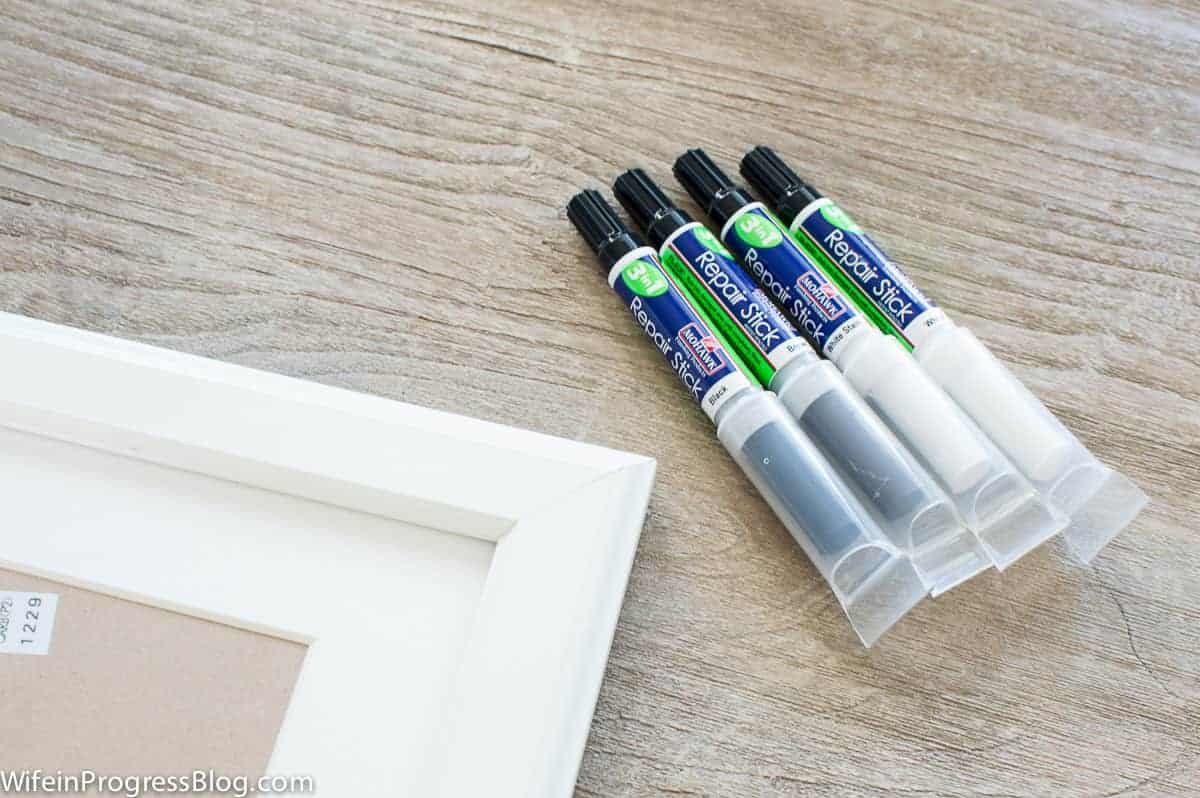
It’s super easy to use with minimal prep (that means no sanding!!!) and no waxing. I just gave it a quick wipe-down to remove any dust.
The darker colors tend to be thicker than the lighter. If you want to thin the paint simply add water. Apply thin, even coats and allow paint to dry thoroughly before applying another coat. Never apply more than 3 coats in 24 hours.
Instructions are on the website and can be downloaded for printing.
Did I mention you do not need to wax?? WooHoo!!
Kellie had told me that it would not leave any brush marks upon drying, so, despite the (wise) advice of applying thin coats I decided to really test to power of this paint and literally sloshed it on quickly thickly and probably not that evenly. Here’s some video evidence to prove it:
[youtube=http://youtu.be/CNAj-3dUWzE&w=400]
(Yes, the quality is awful. I tried to paint with one hand and record with the other.
It doesn’t work. But you get the idea!)
Even with such aggressive application, the final finish is, well, velvety. There is not a brush stroke in sight:
I picked up some new (and cheap) drawer handles on Ebay. I love how the brass looks against the blue. I also picked up some faux flowers at AC Moore (on sale!). Pink is another amazing color against this shade of blue.
I really love this paint. If you’ve never painted furniture before, go this route. It’s 100% foolproof and is guaranteed to provide richly-pigmented results in only a couple of coats.
Think this blue is handsome? Some of the 20 other shades are pretty fantastic too. You’re going to be majorly crushing on this line up:
Custom colors are easily achieved with recipes available on the website!
It’s so nice when a quick project can make such a huge transformation. My guest room feels much brighter and fun now!
Which Velvet Finishes paint color is your favorite? What furniture item would you like to makeover in your chosen color?
This fun rocking chair was painted with a custom mix of Velvet Finishes paints. Check out all the details here.

If you found this information helpful, you should download my FREE guide to perfectly painted furniture. It details all the steps I used here as well as other furniture I painted using Velvet Finishes – all in a printer friendly format!
Just enter your email address below and it will be sent right to your inbox.
I say yes to easy, no prep, and no brush strokes! I love that this paint has these great qualities!! pinning and sharing!! Visiting from Totally Terrific Tuesday No.106 :)
Hello Jenna: I have a weird question about the Velvet finishes paint. Would it be possible to use it on vinyl floor material? Here is my problem. We moved into an old house that the prior owners used vinyl flooring on the bathroom wall. The flooring from a distance looks like tile. We really can’t afford to strip it off the walls and put up new tile right now. Do you think I could use the paint to make it a bit more attractive? Would I then need to treat it for the moisture that is associated with a bathroom environment? Thanks for your great information.
Hi Margarita,
I would definitely try it! It seems to adhere to pretty much everything. I would definitely use the Prep product first and make sure your floor is completely spotless. When you’re done with the paint, you will need something stronger than the Protect product. You can purchase a polyurethane that’s made specifically for floors and I would recommend three coats of that. Of course, it’s always a good idea to try these things first…maybe go to your local Lowe’s or Home Depot and pick up a piece of vinyl tile and experiment before you commit :-)
Hi Jenna!
Ok….I am so new to the DIY group and have never painted furniture before. But, I have a bunch of solid wood furniture that is in good shape, just dated. I am gonna start small with an OAK end table and was thinking of doing it in Bold (yellow). Would that be a big enough contrast to warrant the use of READY? And really…..???? No prep work???
Hi Melissa,
With my dresser I literally did NOTHING before putting the paint on and it still looks great to this day. If you’re nervous, go ahead with the ready – but if there’s no sheen on your furniture you’ll be fine without it. I haven’t used Bold but I bet you will need 2 – 3 coats to get the coverage you want. Although, if it’s honey oak, maybe two coats will suffice. I would recommend protecting the finished product with Protect if it will be getting any bit of decent use.
Please let me know if you have any other questions and I’d be glad to help!
Hello. If I painted a dresser black with the Annie Sloan chalk paint and used the dark wax, will I be able to use one of the lighter colors on top of it?
Hi Prisilla, your best bet is to paint it dark, then add the light coat – using either a dry brush technique or then by sanding down to the darker color. You will want to finish your piece with the wax to protect it.
Is this paint suitable for outdoor furniture? I have an old picnic table that needs some help.
Hi Carrie,
I don’t know how well it would hold up outdoors. You could try it and add a protective coat of Spar Varathane (the protect wouldn’t be enough outdoors).
Carrie – I am curious as to how this turned out??
love how you transformed it! Would you be so kind to let me know what is the color you used for the wall behind the dresser? many thanks!
Hi Val,
It was Natural Gray by Behr :-)