Content may contain affiliate links. When you shop the links, I receive a small commission at no cost to you. Thank you for supporting my small business.
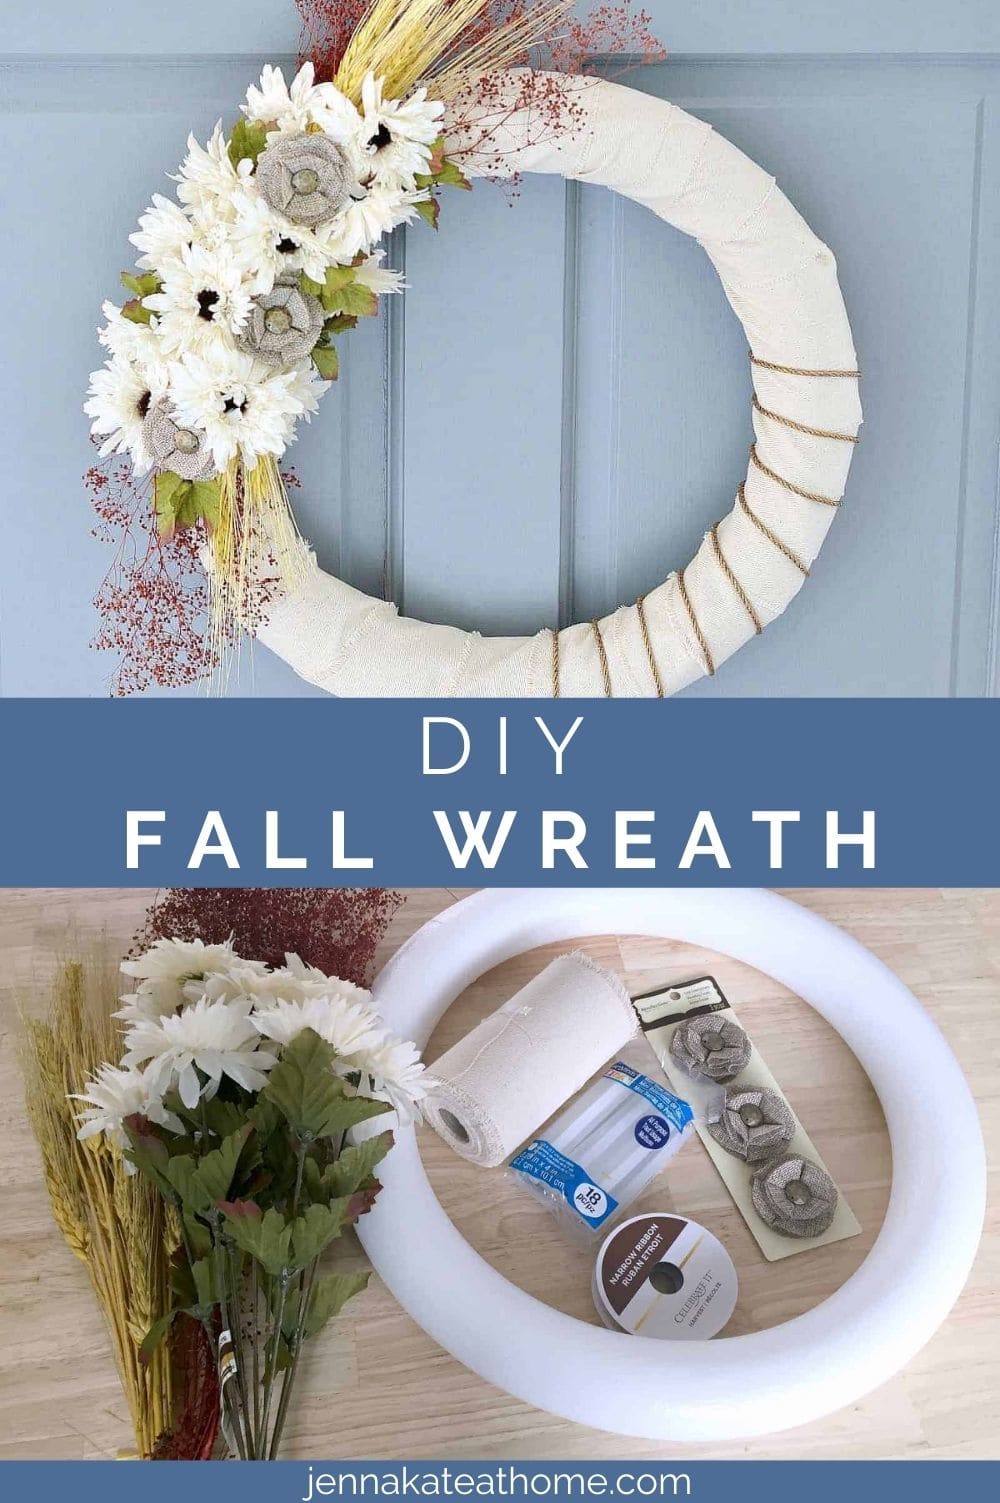
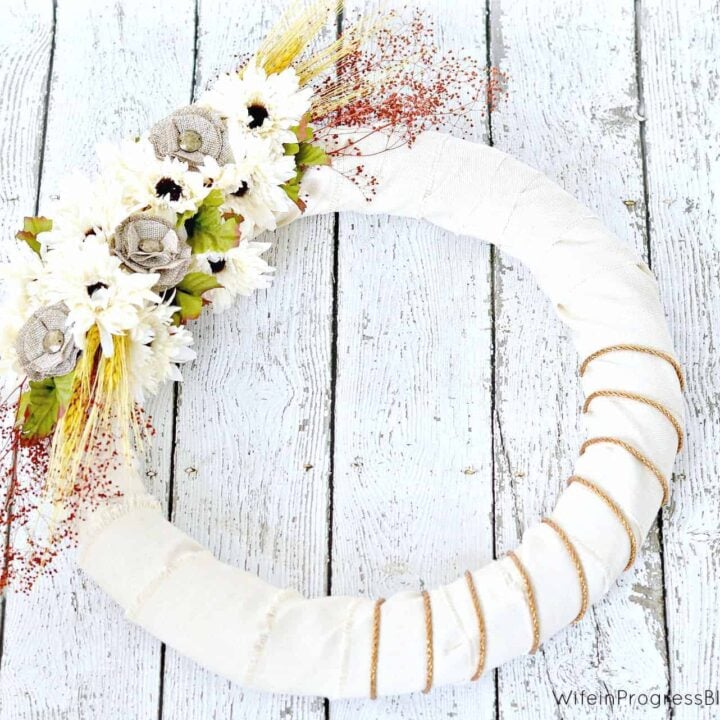
It’s officially fall and around this time of year I start itching to make a DIY fall wreath! Have you ever wondered how to make a beautiful burlap wreath?

This easy step tutorial will show you just how to make your own diy fall burlap wreath in no time! They are super easy to create and of course you can design it to suit your own tastes and home decor.
Why I Love This Project
As the cooler weather hits, I crave cozy craft projects I can do to amplify the season in my home without a lot of extra cost or loud decor. I love burlap for fall because it looks so stunning paired with faux florals, greenery, or even fake leaves adorning.
The creamy base color I used is also perfect paired with the rich colors of fall. Talk about the definition of subtle, sleek fall decor!
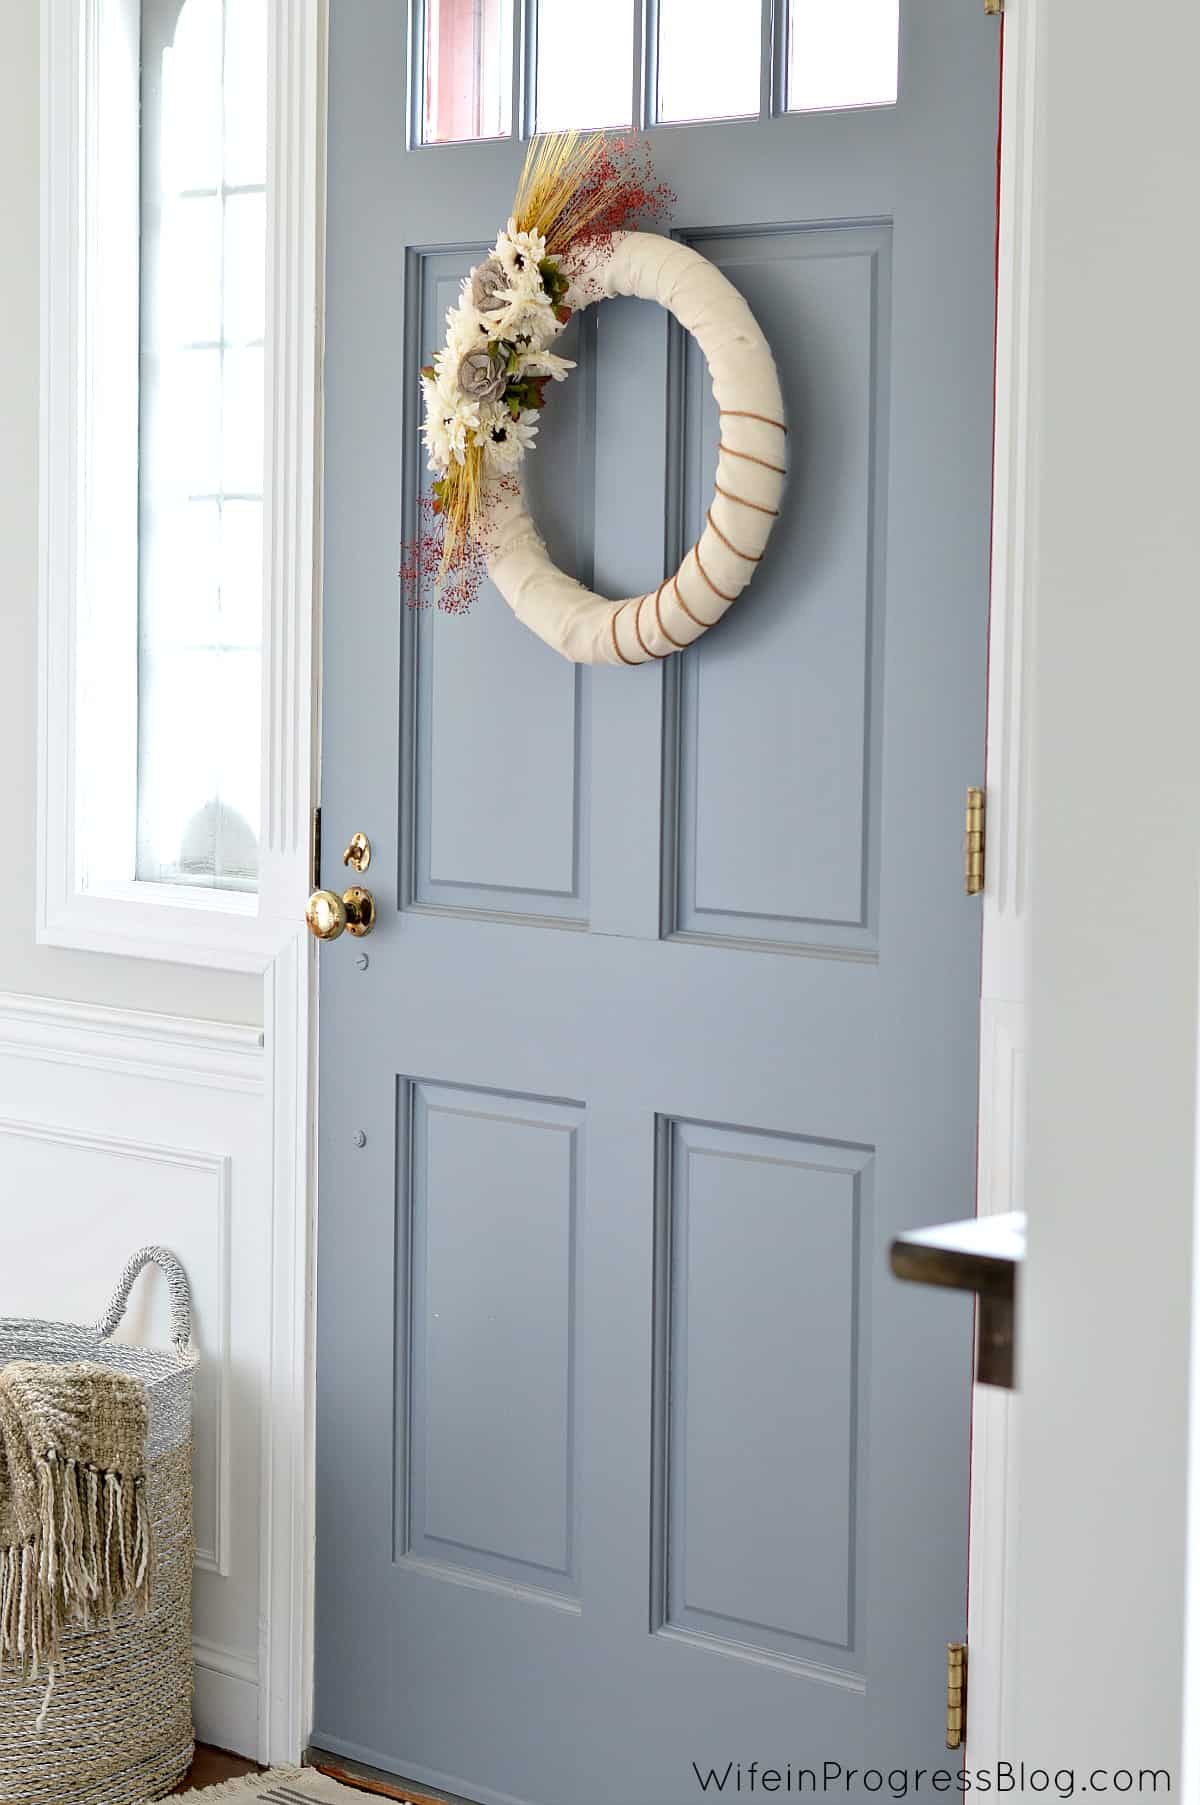
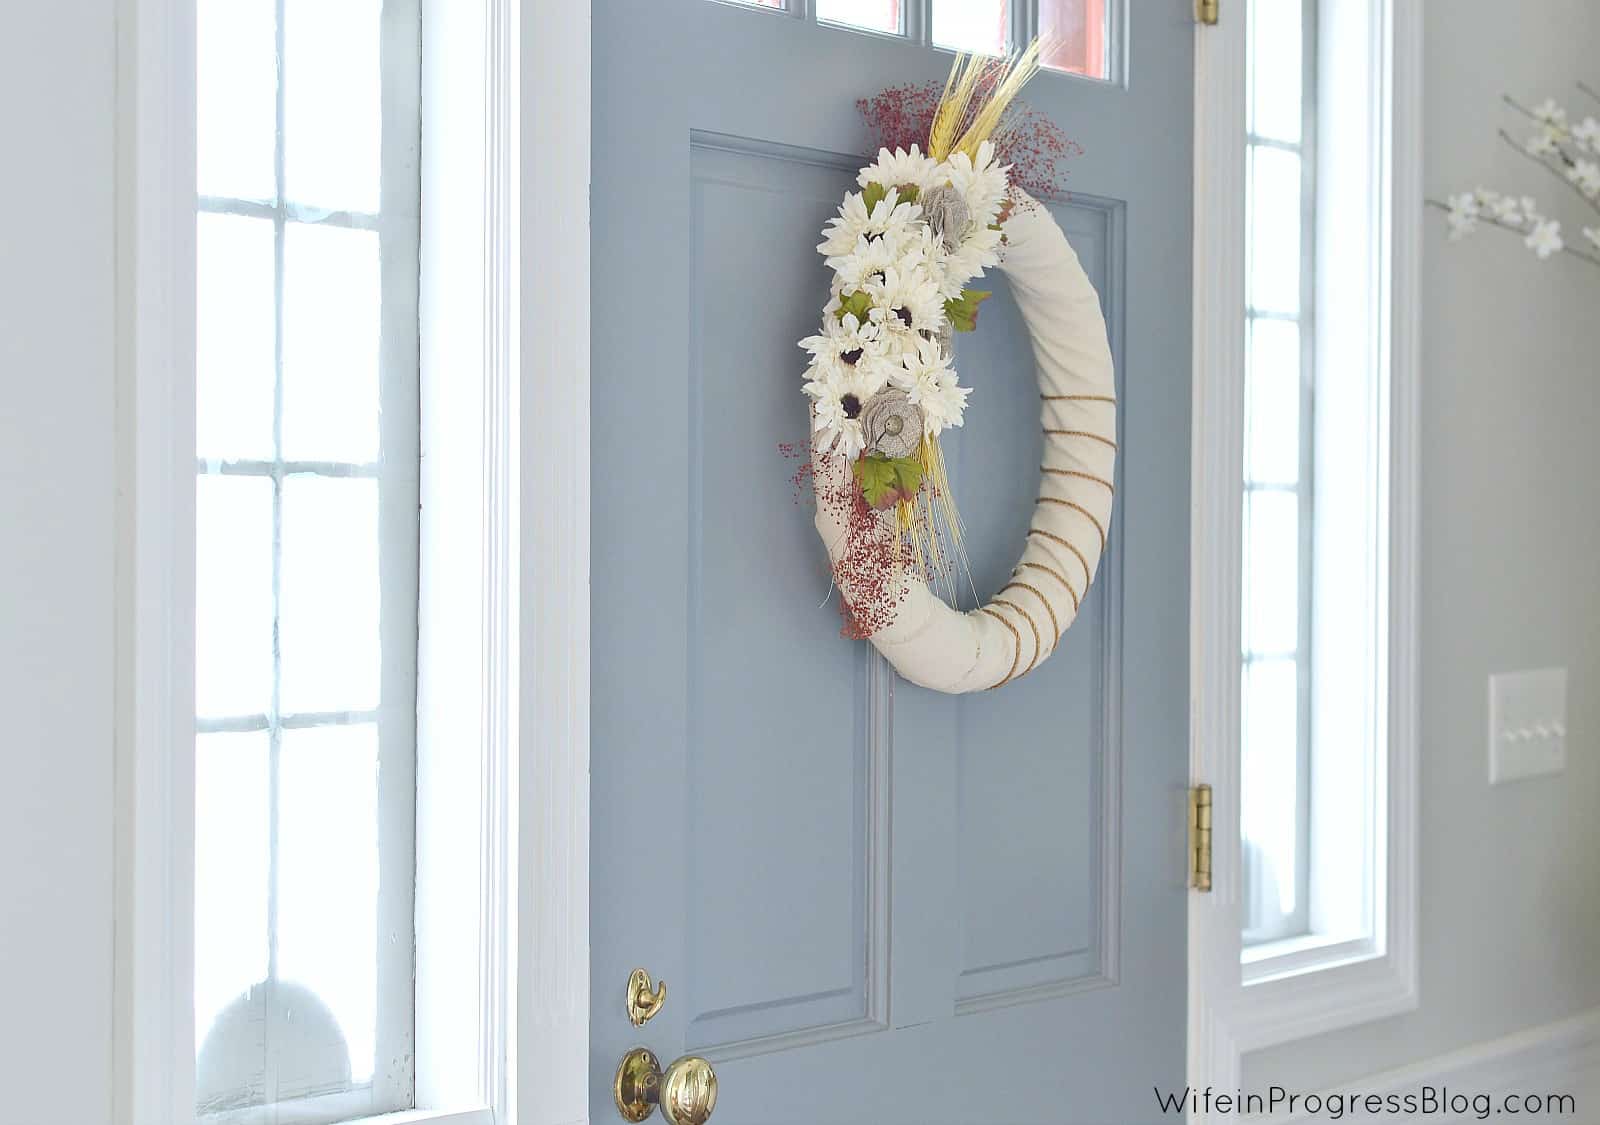
This burlap wreath tutorial is also super easy compared to most and can be completed in no time with just a few easy steps. It will look stunning displayed on your front door. Or, gift it to a friend.
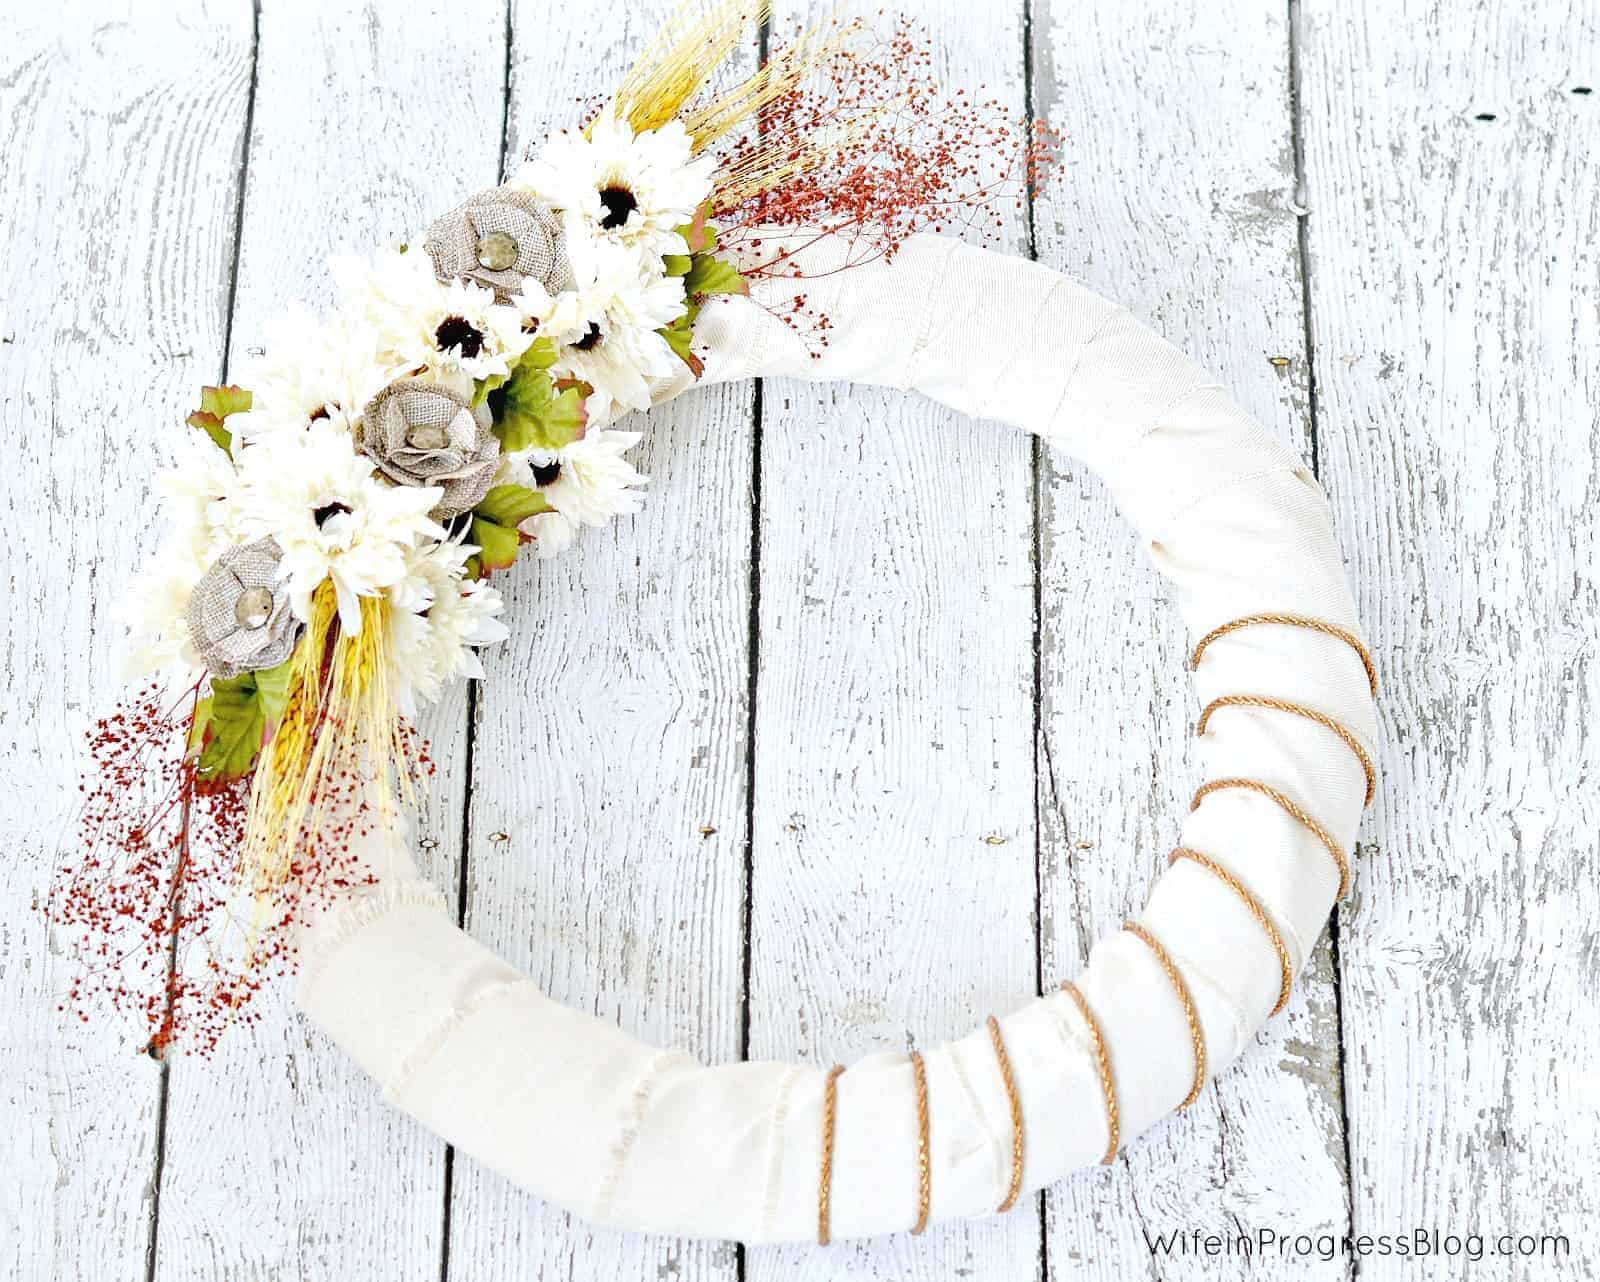
While I’ve opted for traditional fall colors with a cream burlap wreath, you can always explore other color shades! (Well, the wreath was meant to be cream burlap but I couldn’t find any and opted for cream denim instead.)
Materials Needed
I sourced all of the materials from my local Michael’s craft store but you can probably find all of these at Hobby Lobby, the dollar store, or any favorite local craft store.
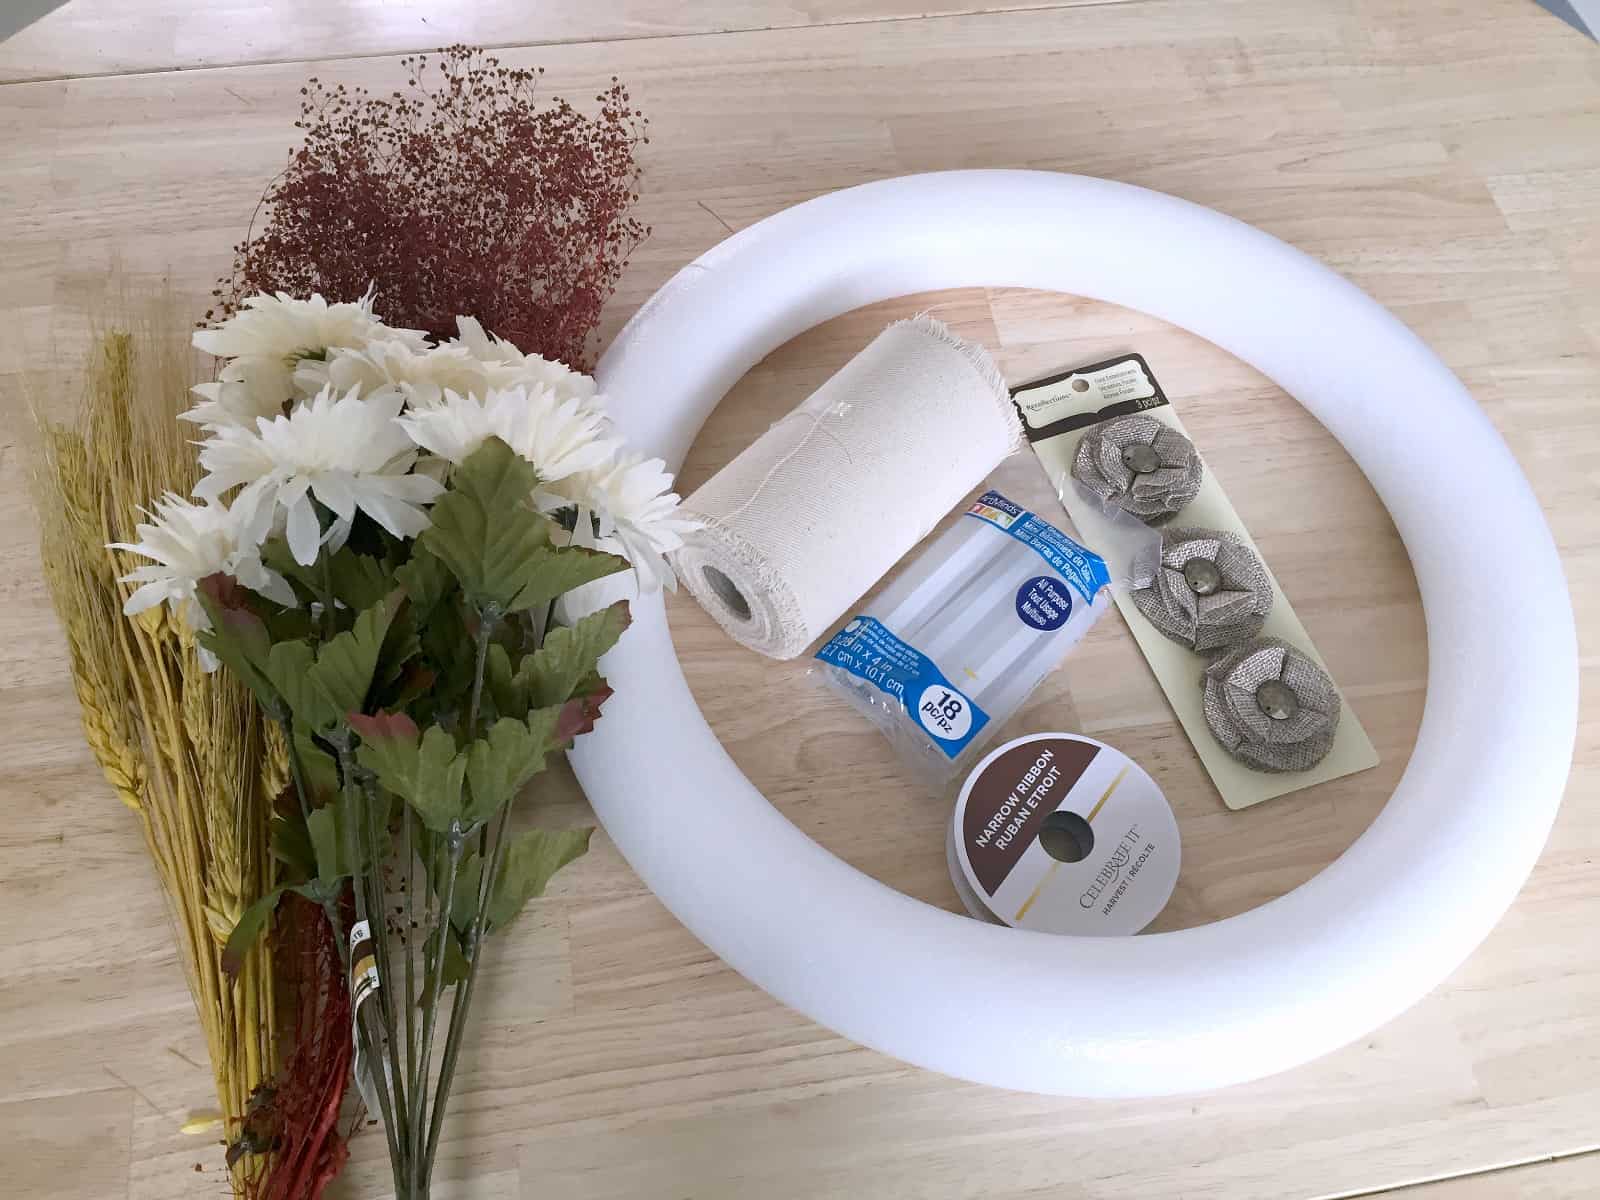
- Foam Wreath
- Cream burlap or denim
- Faux flowers (I picked white ones)
- Burlap flowers
- Yellow Wheat
- Crimson Red Twigs
- Hot Glue Glue
- String
Directions
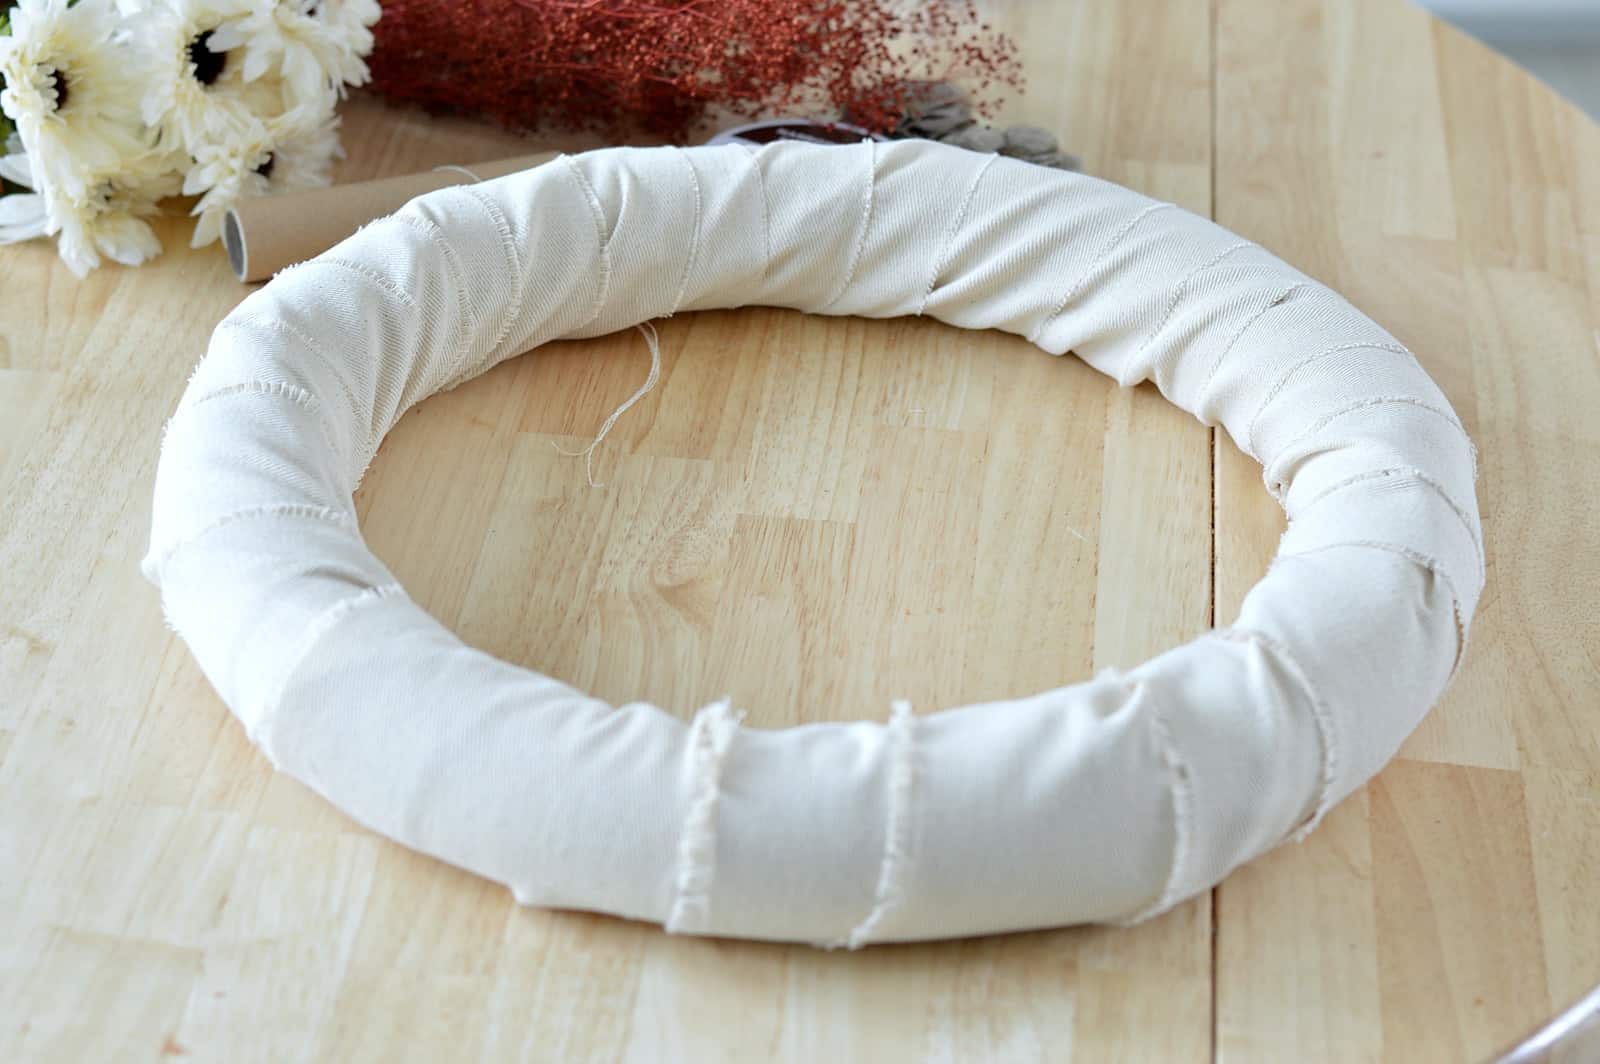
1. Cover the Wreath Form
First thing, wrap the foam wreath with your roll of burlap or denim, overlapping each piece slightly. You will want to use a hot glue gun to hot glue the first piece and the end of the burlap ribbon to the wreath.
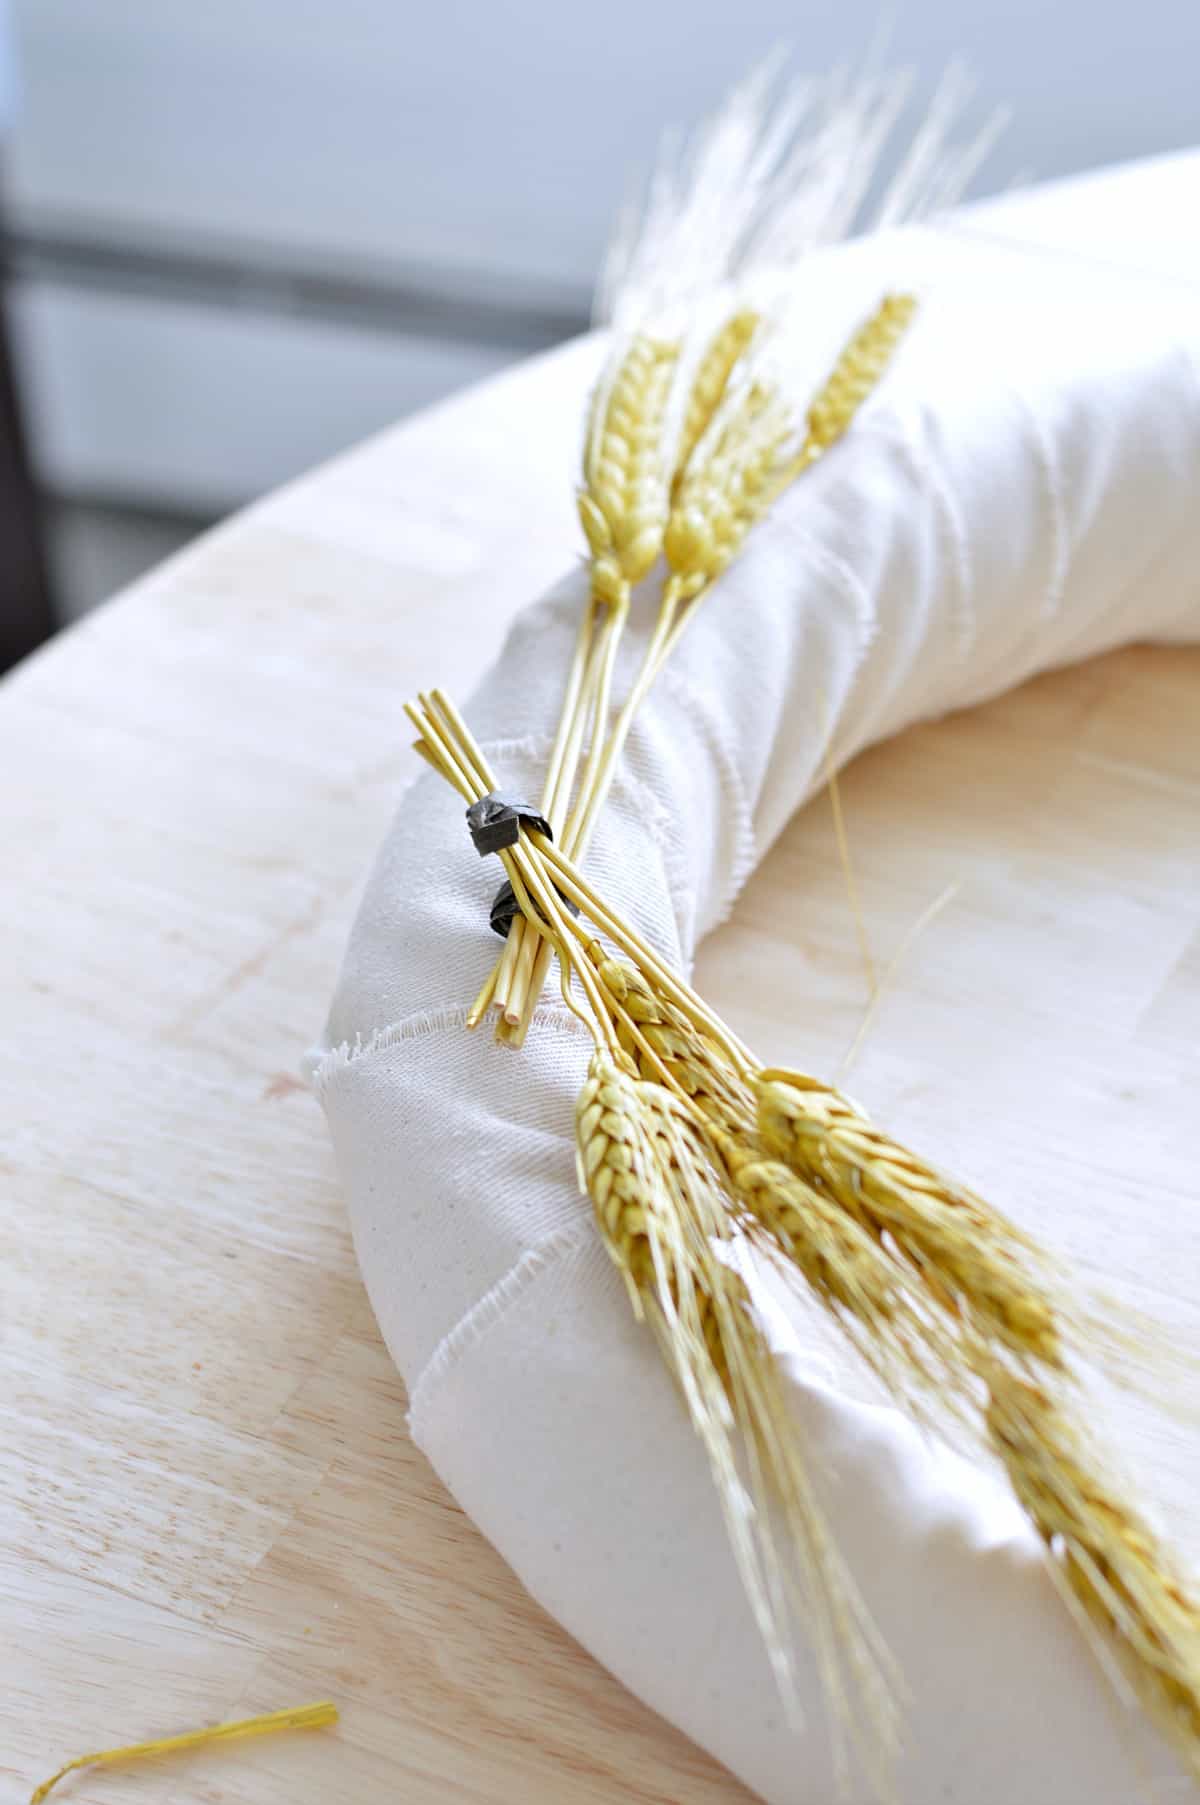
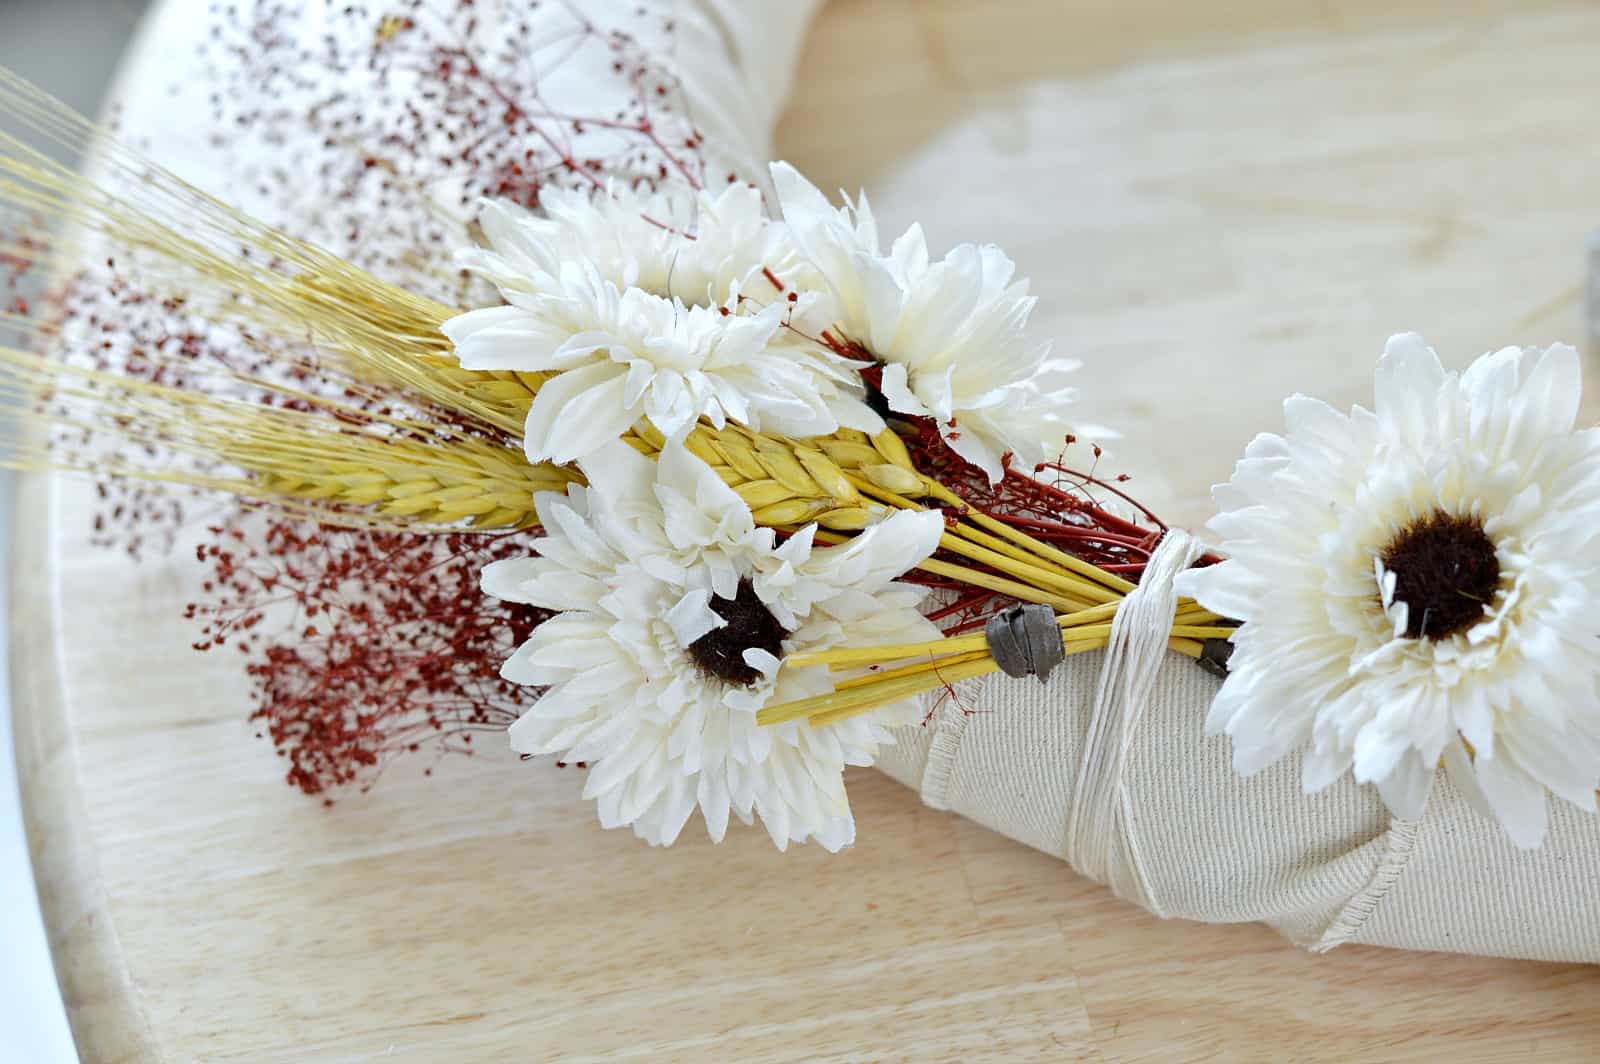
2. Attach The Wheat
Separate the wheat into 2 groups of 4 or 5 stalks. Using wire or string, tie it around the bottoms. You will most likely need to cut several inches off the bottom of the wheat so that they are short enough to attach to the wreath without sticking way out.
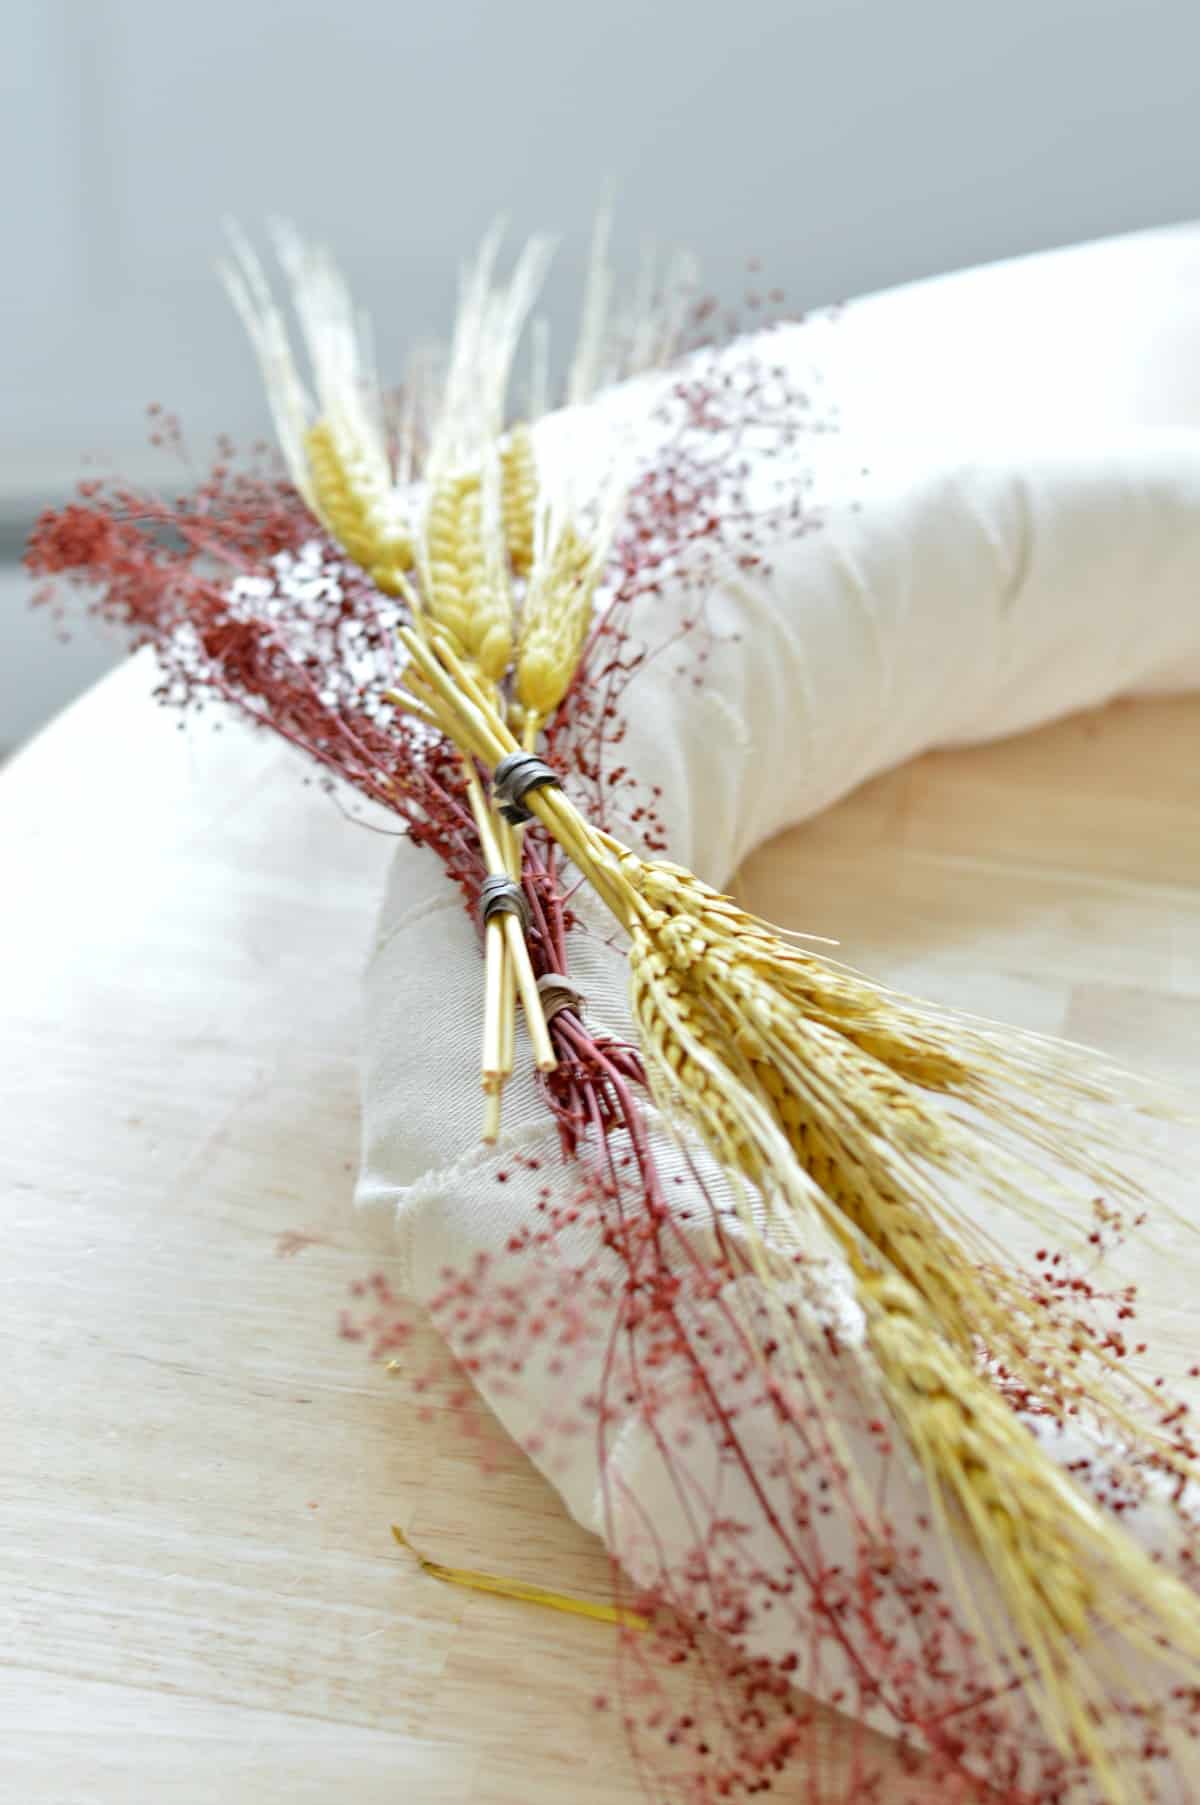
3. Add More Color
It’s time to add a pop of color! Do the same as above with the red twiggy bits (I don’t know the technical term!). Play around with placement, cutting the ends of both pieces as needed to fit the wreath. You can also use floral picks for added color.
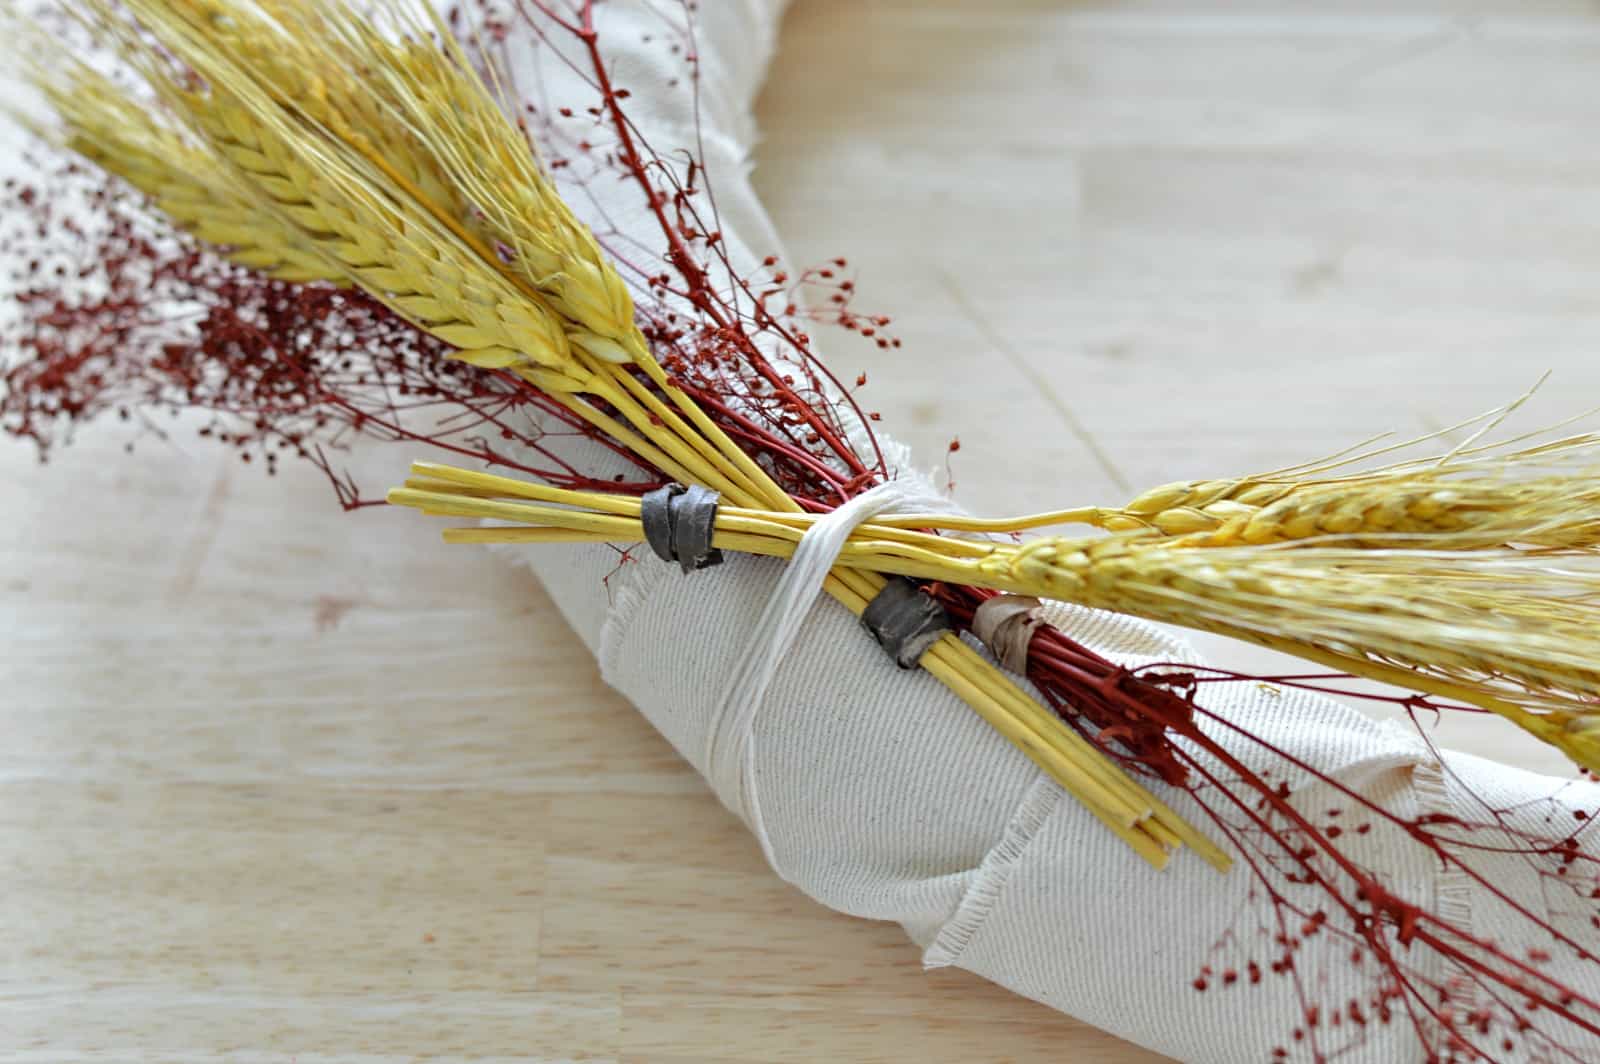
You could hot glue the wheat and twigs in place but they are kind of awkward to glue. I found that wrapping string around the wreath secures them perfectly while still allowing me to readjust them later if necessary.
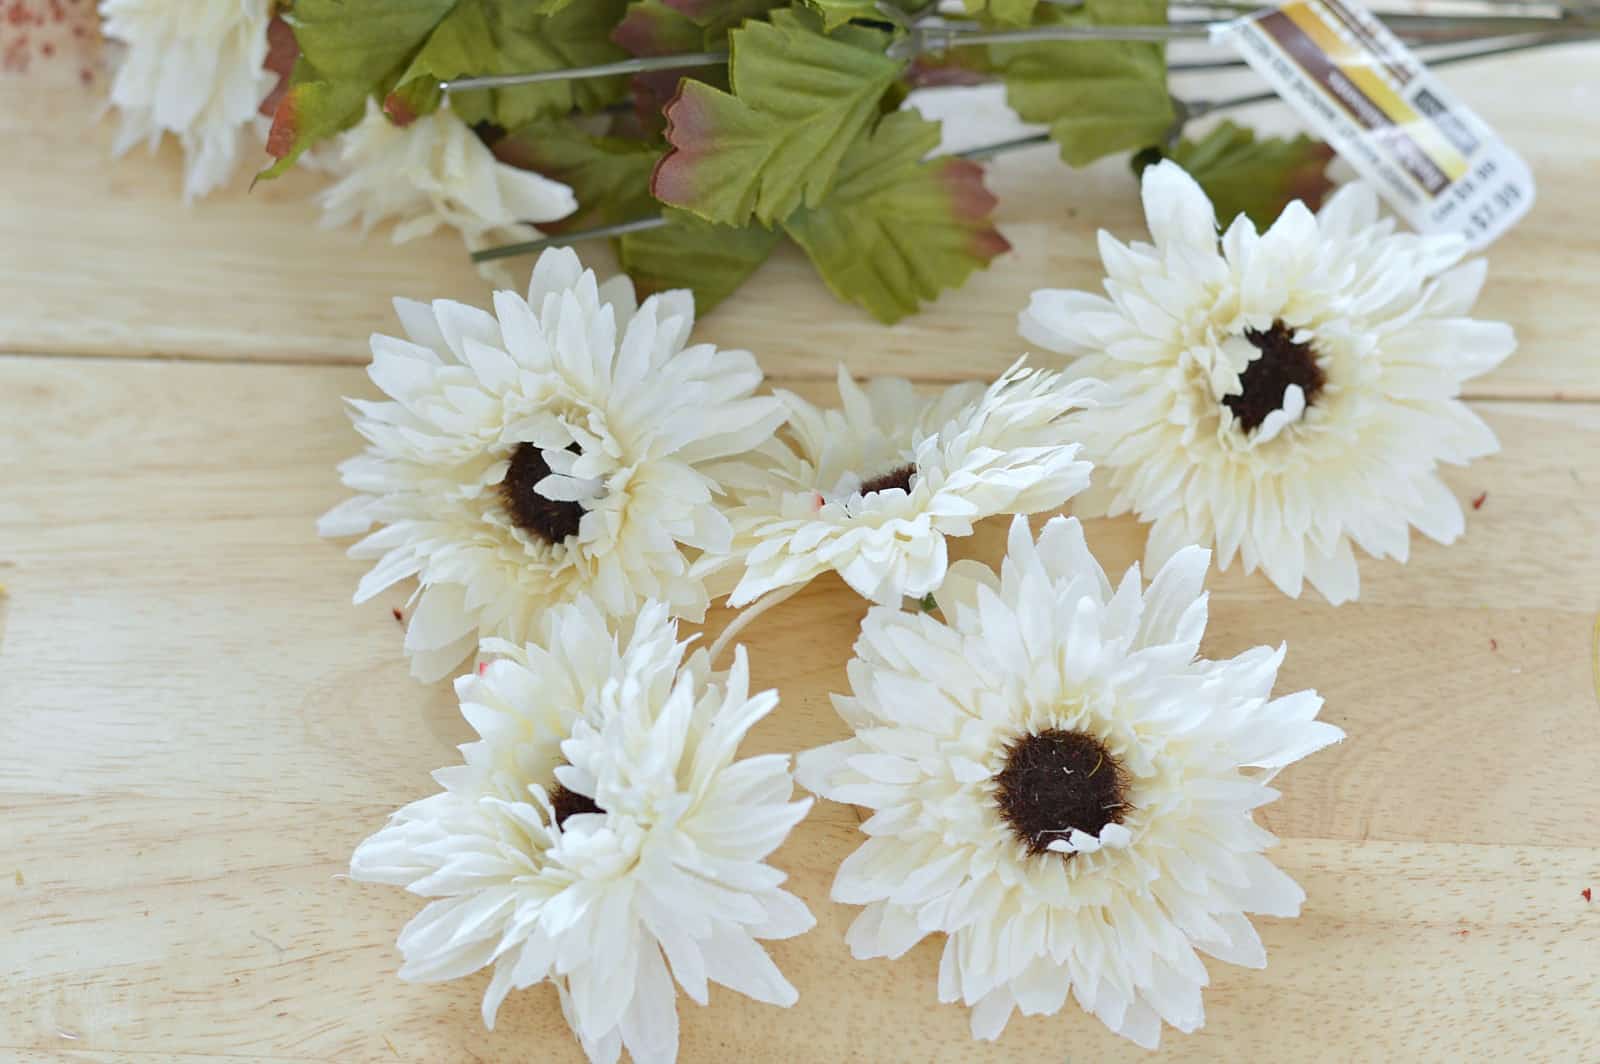
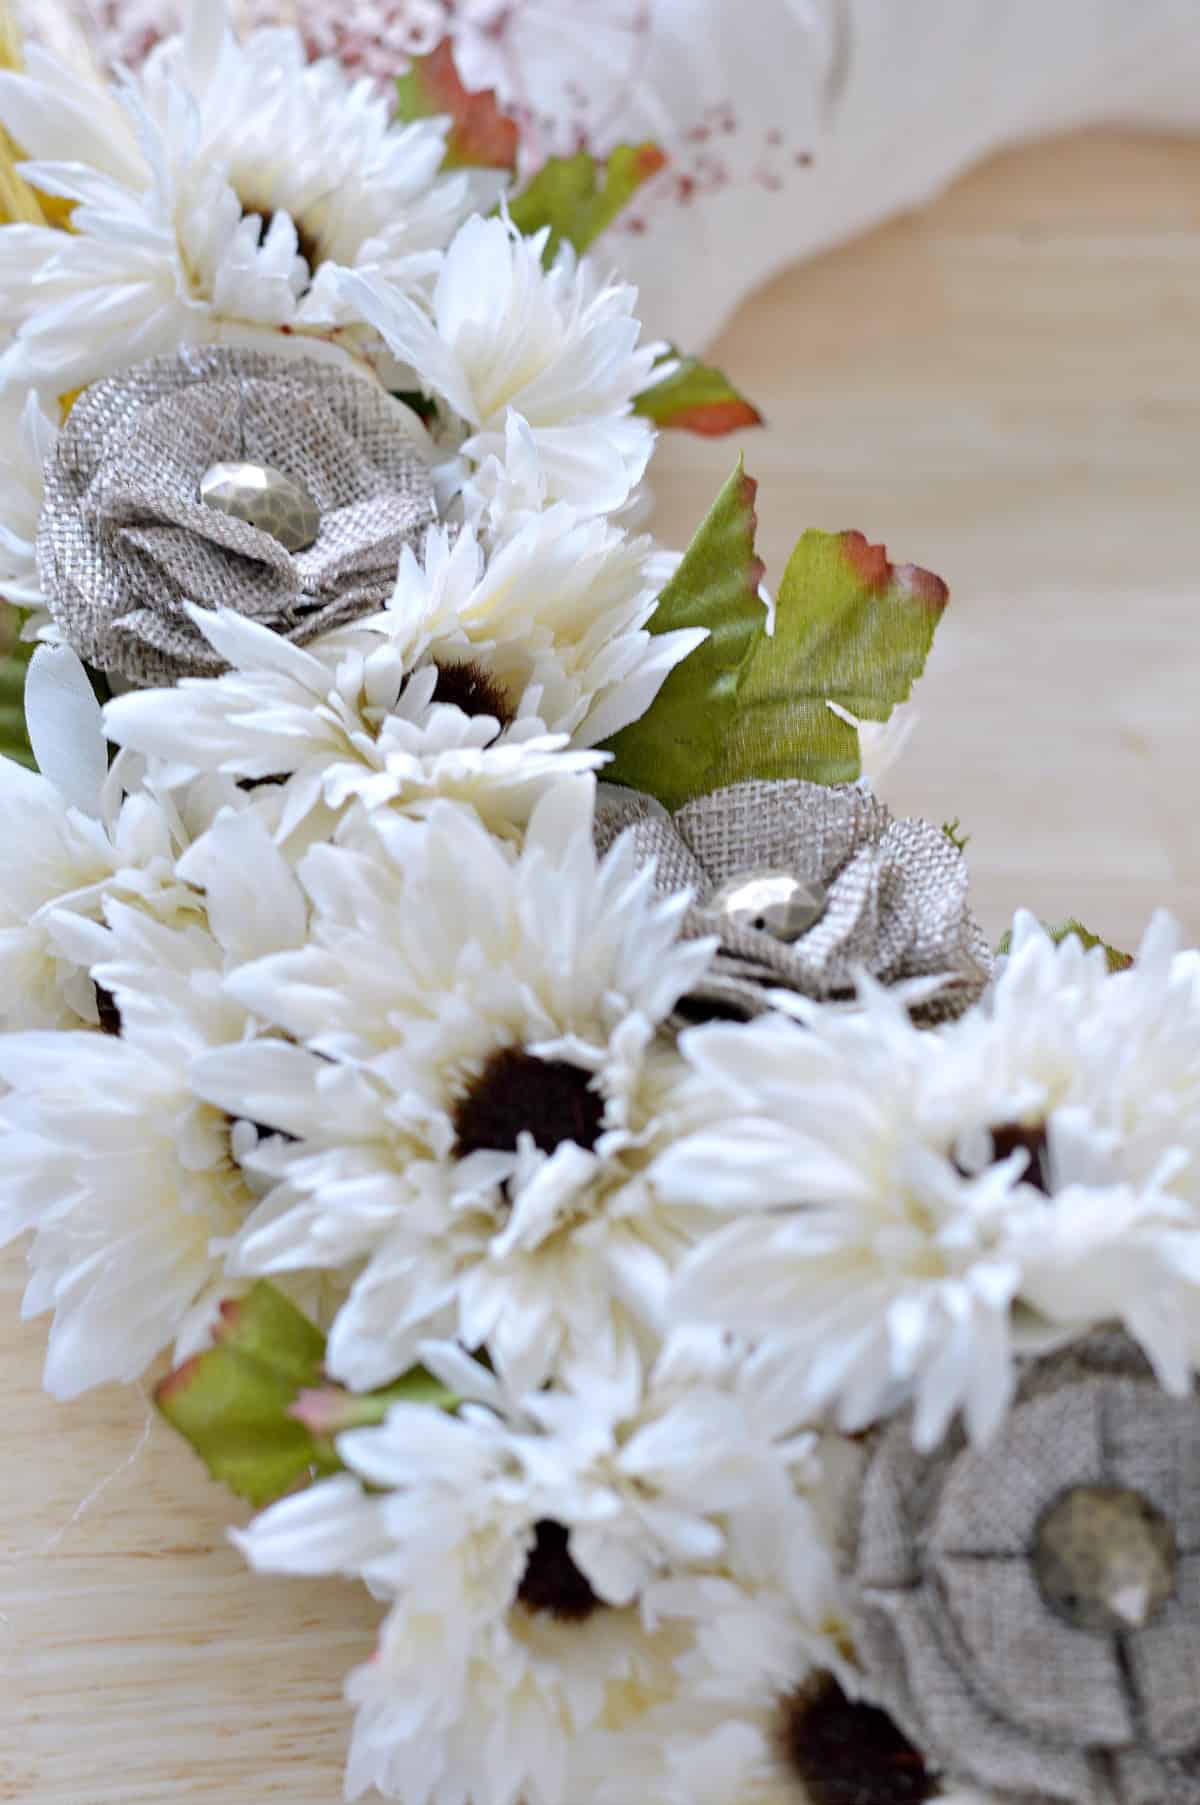
4. Add Faux Flowers
Pull the flowers off their stems, making sure the plastic bit at the bottom of each flower is removed, too. You can use different colors, but white fit perfectly with the color palette of my home and achieved the minimal look I was going for.
Start gluing your flowers on. (TIP: If you’re not great at visualizing where the flowers should go, grab some sewing pins and pin the flowers in place. That way you can move them if necessary. You can always go back and hot-glue if you want – or just leave the pins!)
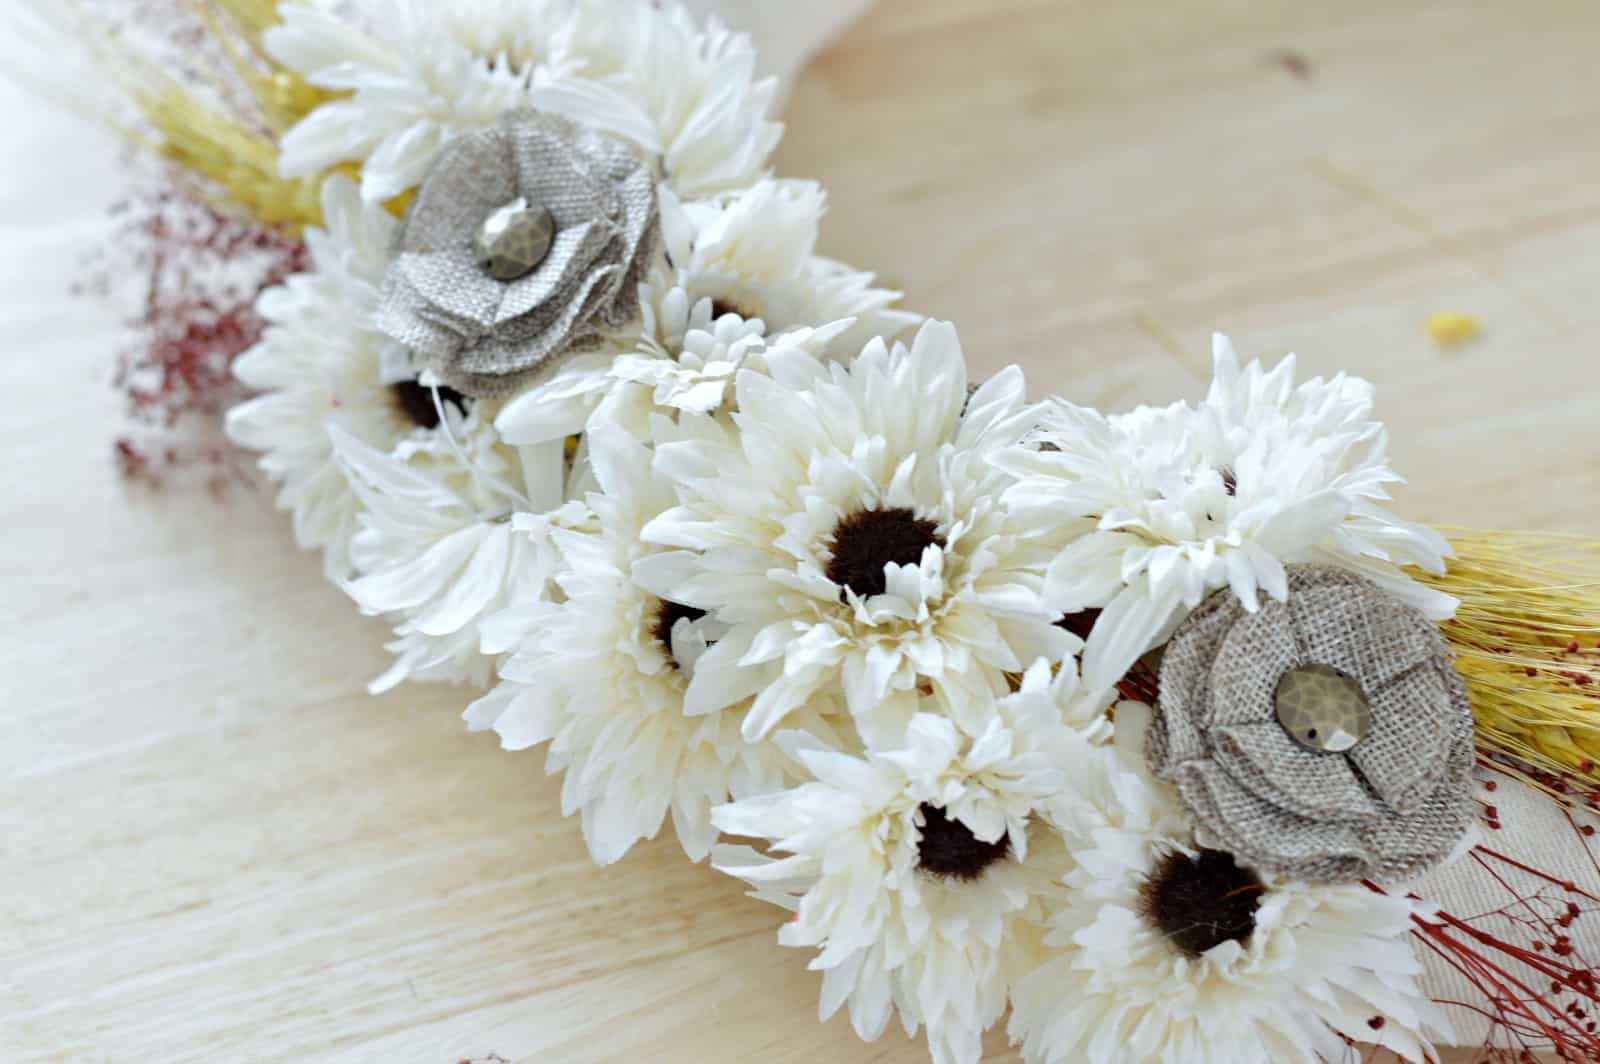
Keep gluing/pinning flowers until you’ve filled in all the gaps. Then add the burlap flowers.
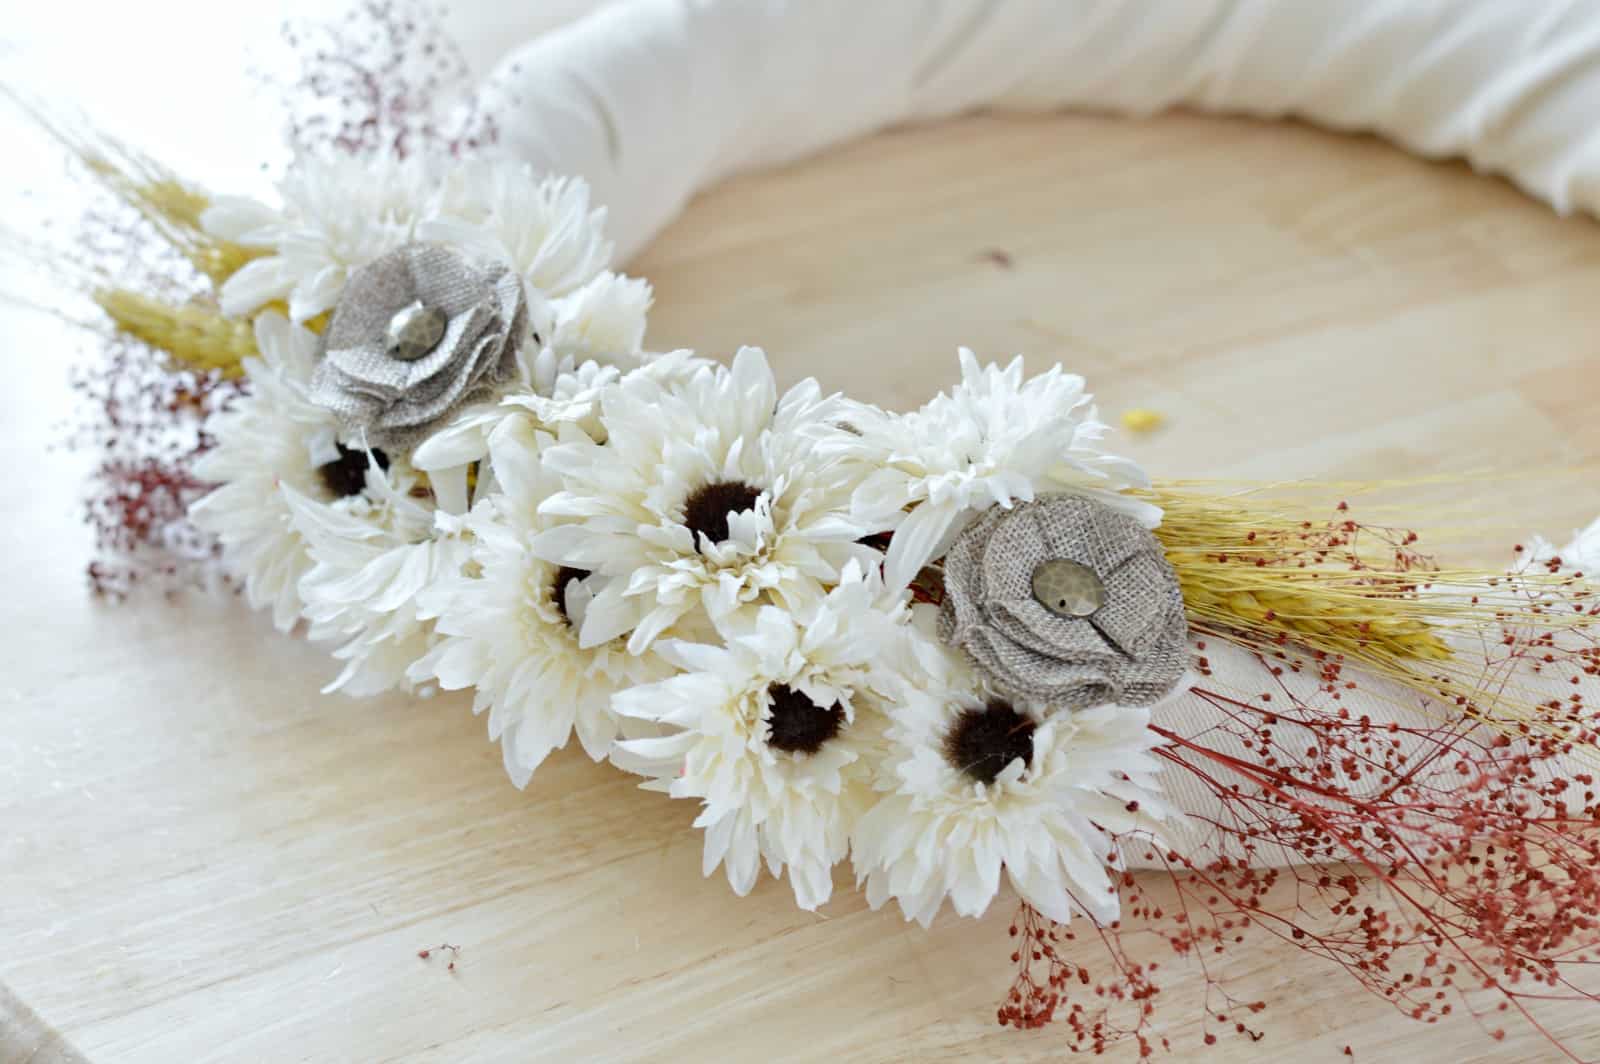
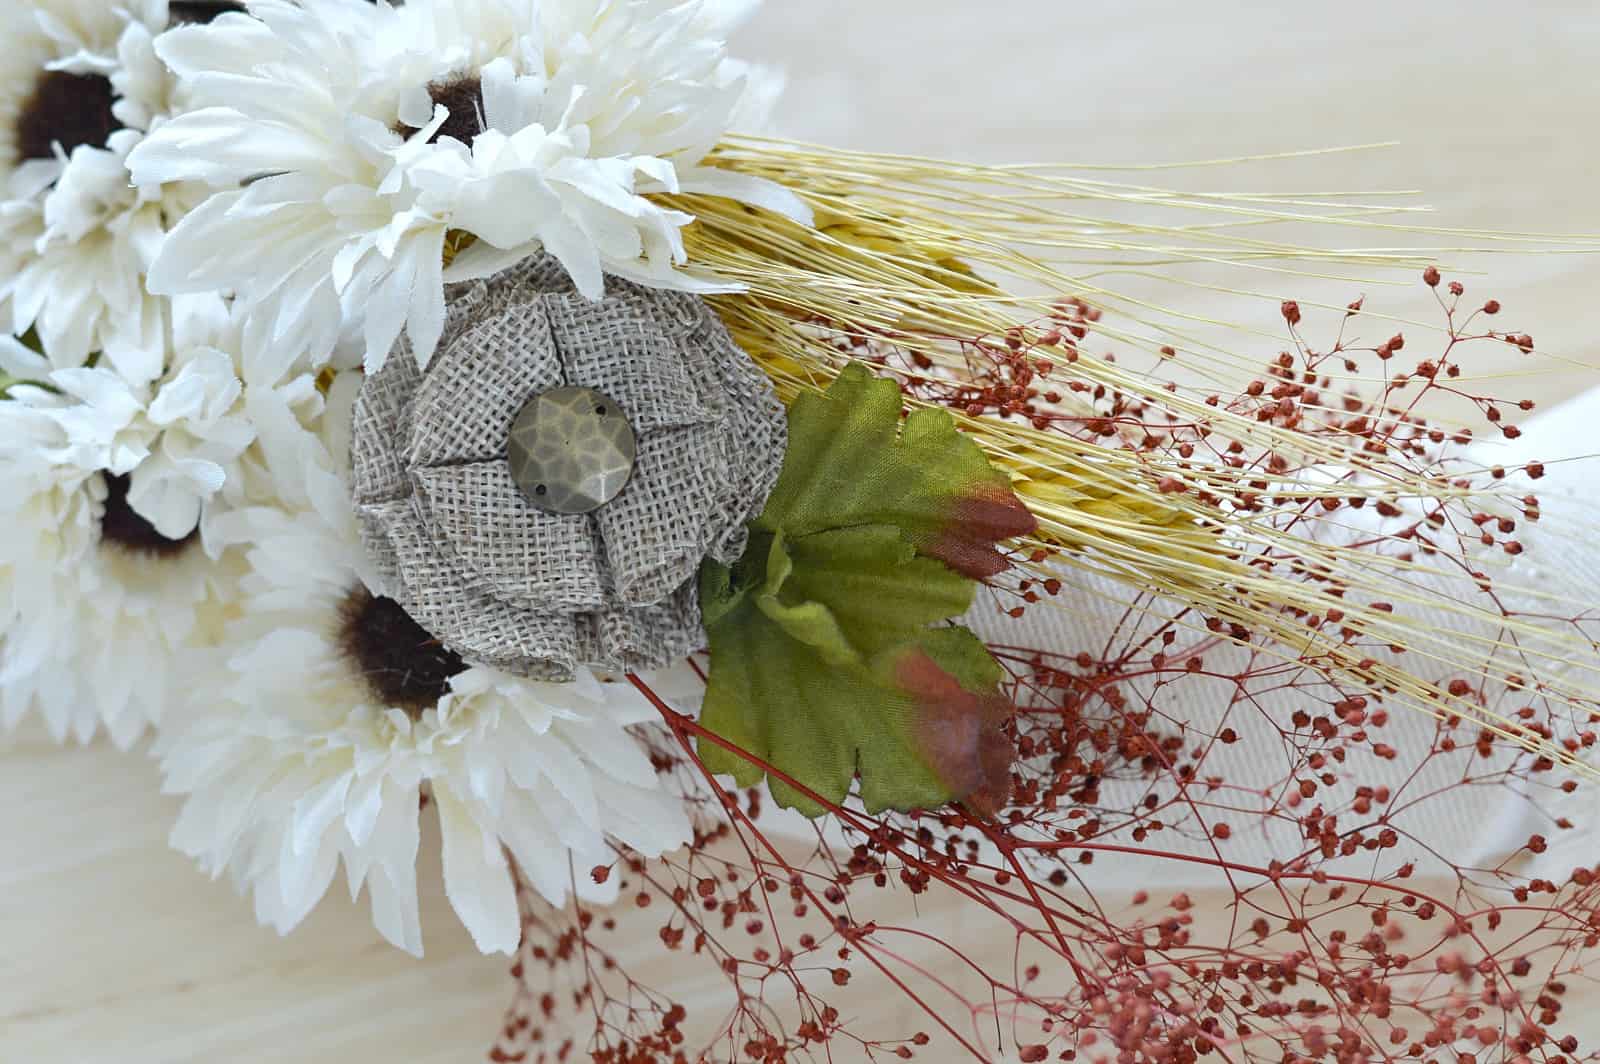
5. Add Greenery
Remove some of the leaves from the faux flower stems, again making sure all plastic pieces are gone. Fill in any remaining gaps, or just pick a few places to add a bit of color.
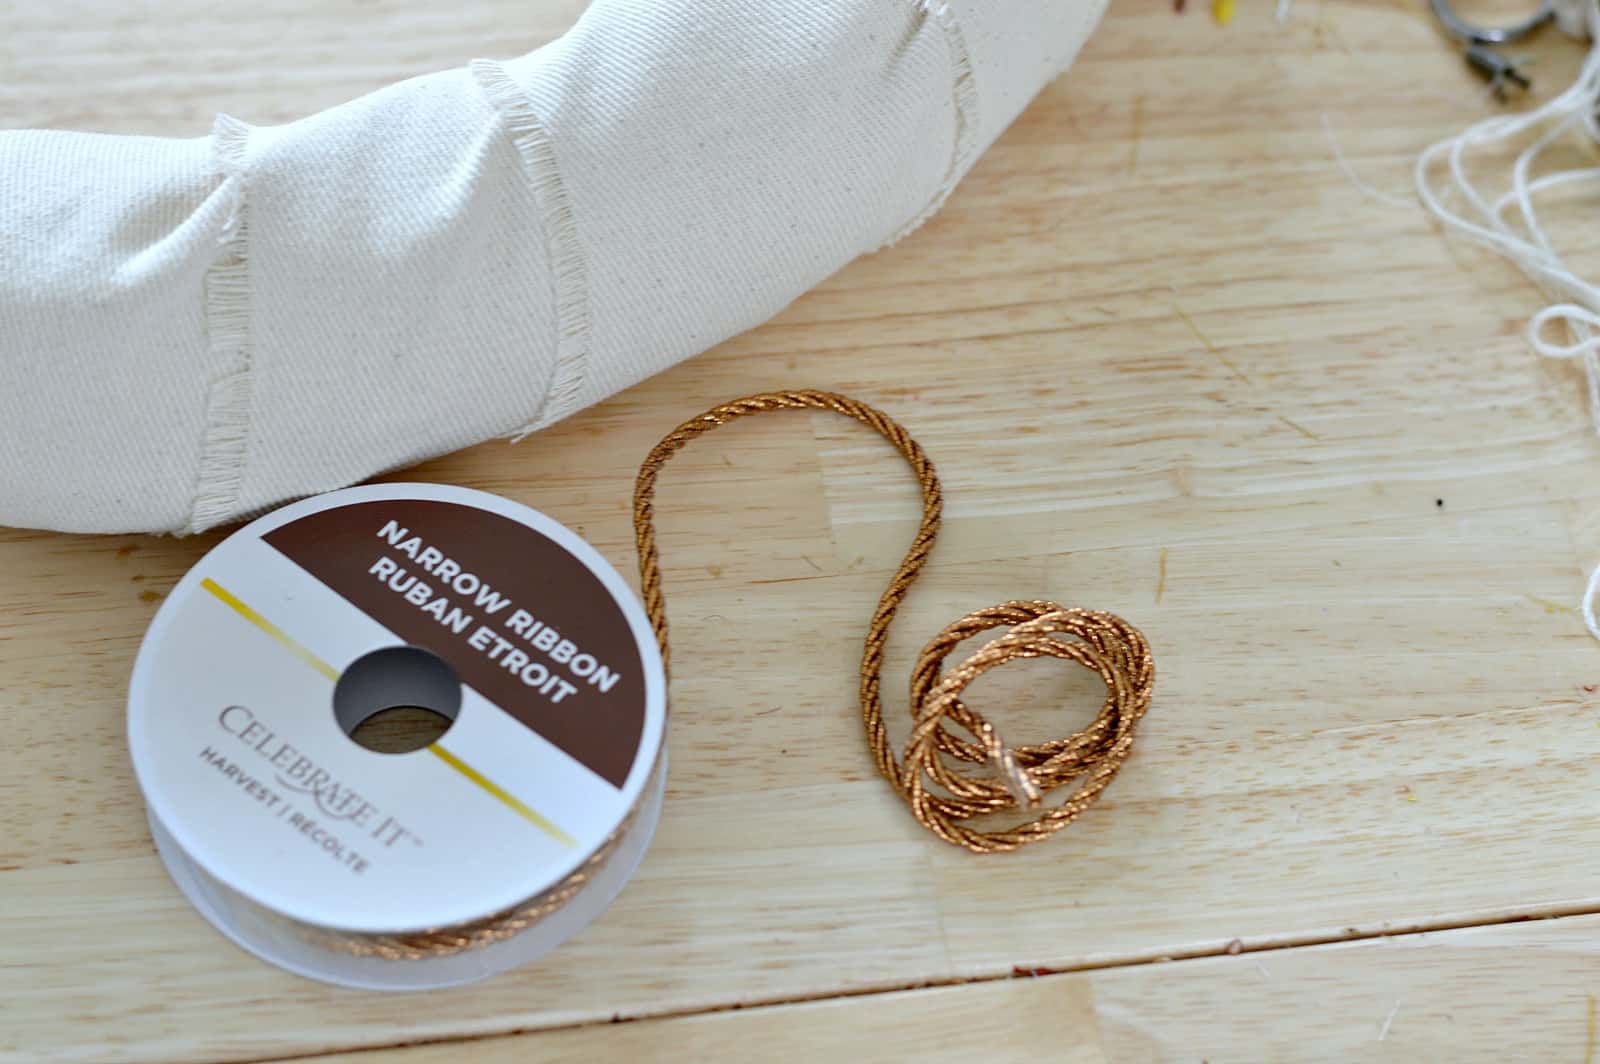
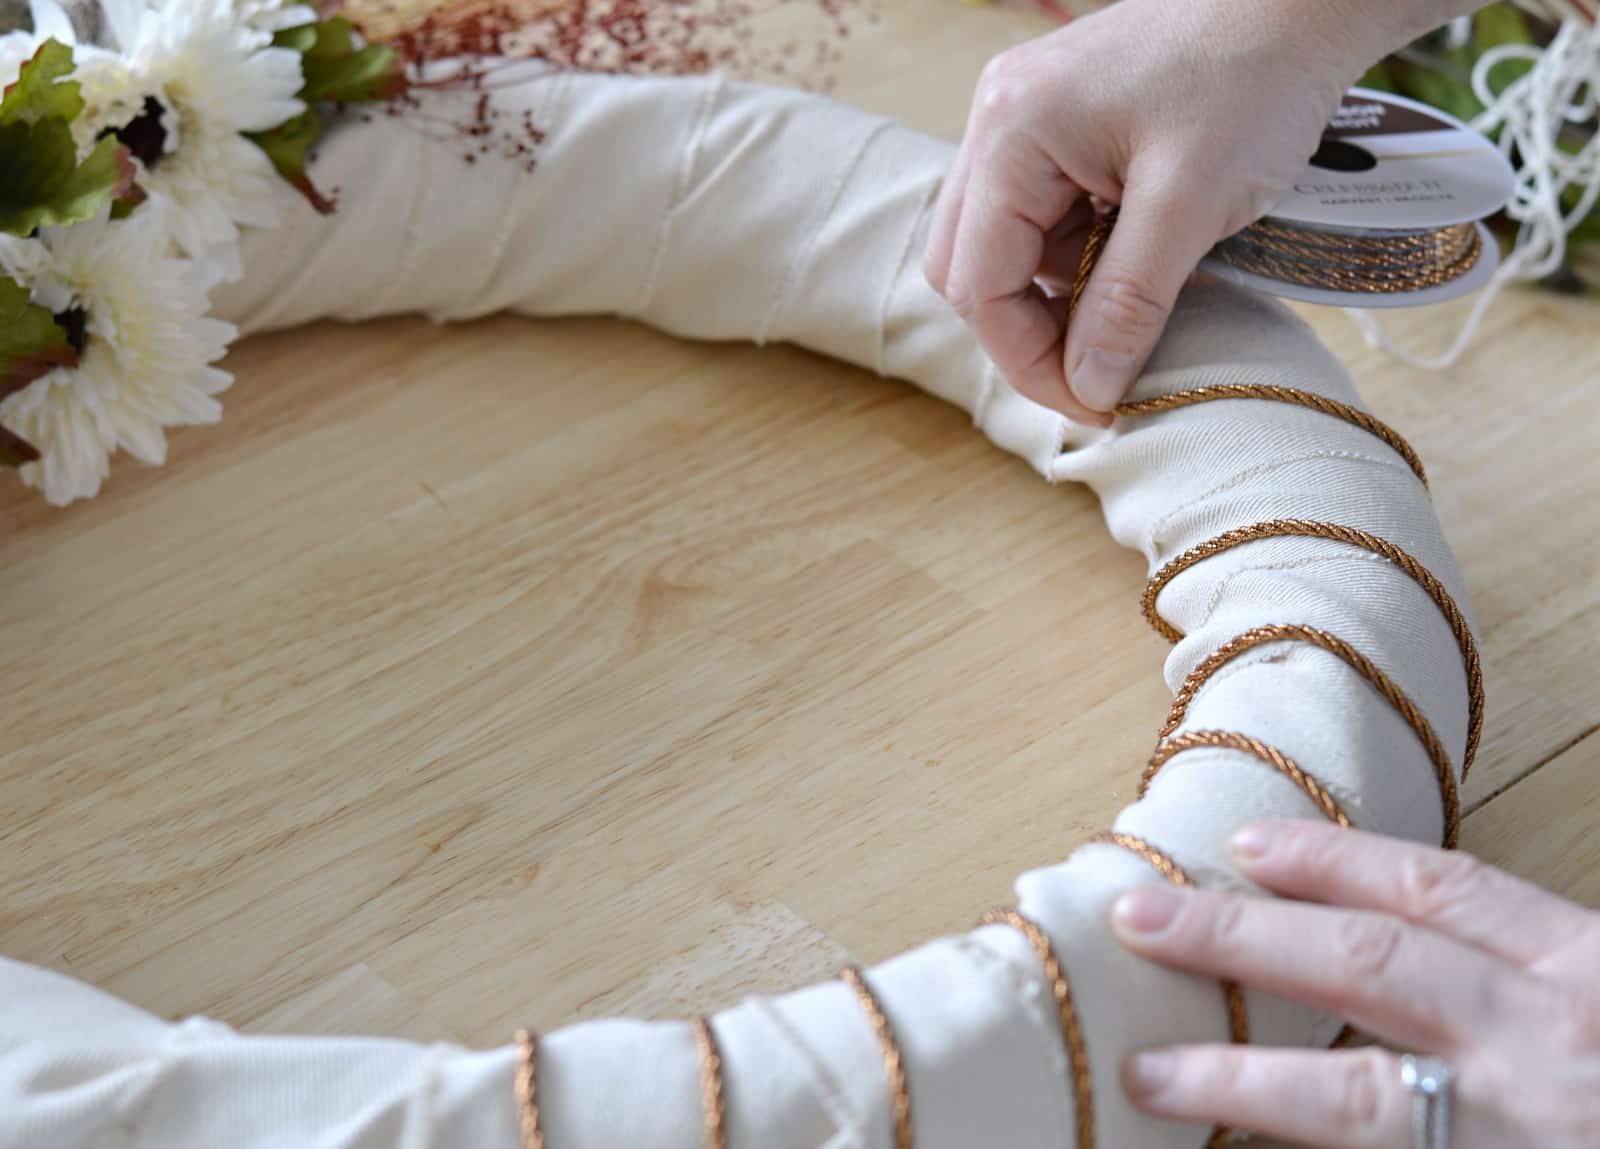
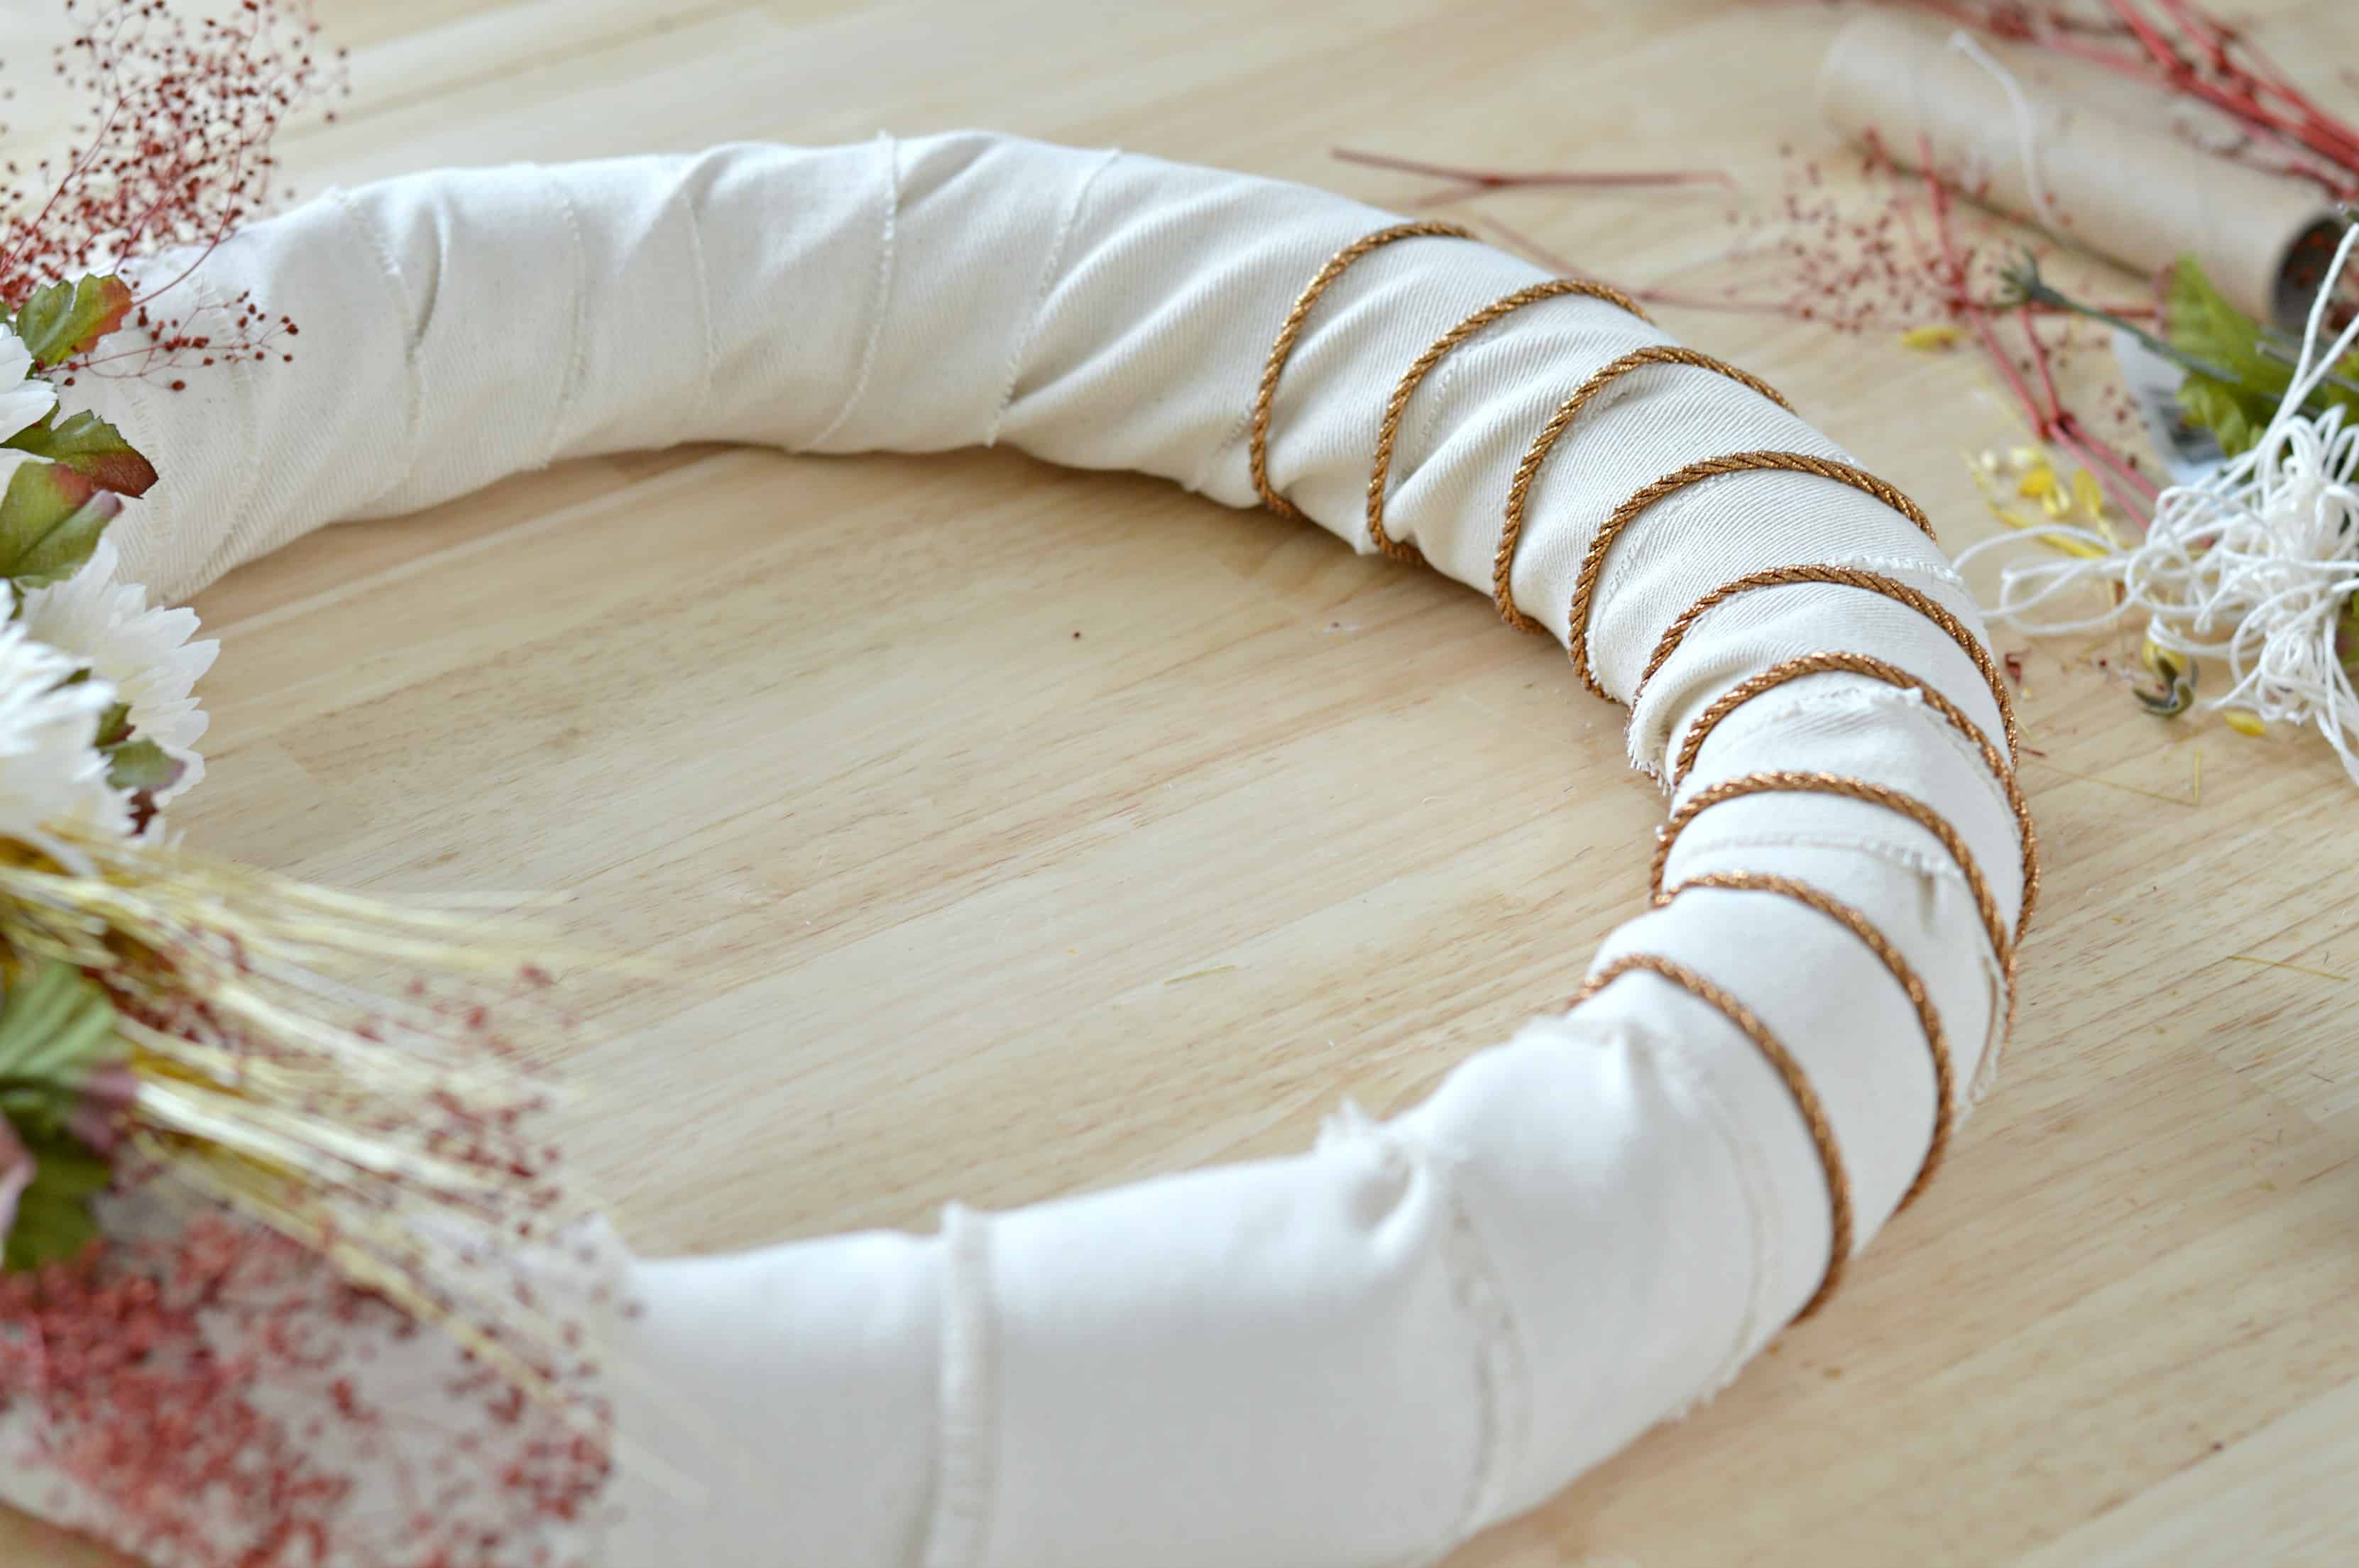
6. Embellish With String
Finally, add some copper or gold ribbon to the opposite side of the wreath, wrapping it around just like you did with the burlap. Secure each end with hot glue.
7. Hang it up!
That’s it! Now you know how to make a burlap wreath that’s perfect for fall decorating. Aren’t you just crazy about this autumn wreath?
Planning on making this burlap wreath? I hope you’ll give this easy craft project a try! It’s the perfect way to dress up your fall decorations with the colors of the season. Let me know in the comments if you end up trying this particular wreath, I’d love to see your own new wreath!
Other DIY Projects

How to Make a Fall Wreath
Easy DIY fall wreath with autumnal colors
Materials
- Foam Wreath
- Cream burlap or denim
- Faux flowers
- Burlap flowers
- Yellow Wheat
- Crimson Red Twigs
- String of choice
Tools
- Hot Glue Glue
Instructions
- Cover the wreath form: Wrap the foam wreath with your burlap or denim, overlapping each piece slightly. You will want to hot glue the first first piece and the last piece to the wreath.
- Attach the wheat: Separate the wheat into 2 groups of 4 or 5 stalks. Using wire or string, tie it around the bottoms. You will most likely need to cut several inches off the bottom of the wheat so that they are short enough to attach to the wreath without sticking way out.
- Add more color: Do the same as above with the red twiggy bits (I don't know the technical term!). Play around with placement, cutting the ends of both pieces as needed to fit the wreath. You could hot glue the wheat and twigs in place but they are kind of awkward to glue. I found that wrapping string around the wreath secures them perfectly while still allowing me to readjust them later if necessary.
- Add faux flowers: Pull the flowers off their stems, making sure the plastic bit at the bottom of each flower is removed, too. Start gluing your flowers on. (TIP: If you're not great at visualizing where the flowers should go, grab some sewing pins and pin the flowers in place. That way you can move them if necessary. You can always go back and hot-glue if you want - or just leave the pins!). Keep gluing/pinning flowers until you've filled in all the gaps. Then add the burlap flowers.
- Add greenery: Remove some of the leaves from the faux flower stems, again making sure all plastic pieces are gone. Fill in any remaining gaps, or just pick a few places to add a bit of color.
- Embellish with string: Finally, add some copper or gold ribbon to the opposite side of the wreath, wrapping it around just like you did with the burlap. Secure each end with hot glue.
- Hang it up!: That it's it! Now you know how to make a burlap wreath that's perfect for autumn decorating!

Thank you so much for sharing this on our new DIY Forum group! I love this, and that front door color is SO BEAUTIFUL! My readers will love it. Sharing today!
This is cute! I love the burlap flowers!