Content may contain affiliate links. When you shop the links, I receive a small commission at no cost to you. Thank you for supporting my small business.
Drywall damage happens to everyone – whether it’s a nail hole from hanging art, a doorknob ding, or a larger hole from moving furniture. The good news? You don’t need to be a contractor to fix it. With the right tools (and a little patience), you can repair holes in drywall so they completely disappear.
This guide walks you through the best way to patch a hole in drywall for every size hole – from tiny nail pops to larger doorknob holes – using simple, beginner-friendly methods.
How to Fix Very Small Holes (Nails, Screws, Dents)
Best for: Nail pops, screw holes, small dents less than ½-inch wide.
What to use: Lightweight spackle or wall repair compound.
Step-by-Step
- Clean: Use a putty knife or damp cloth to remove any loose drywall dust or paper around the hole.
- Apply Spackle: With your fingertip or a small putty knife, press spackle directly into the hole.
- Smooth: Wipe away excess, leaving the surface flush with the wall.
- Dry & Sand: Let dry completely, then sand lightly with fine-grit sandpaper or a sanding sponge.
- Paint: Touch up with matching wall paint.
Pro Tip: Less is more. If you overfill the hole, you’ll spend more time sanding it smooth.
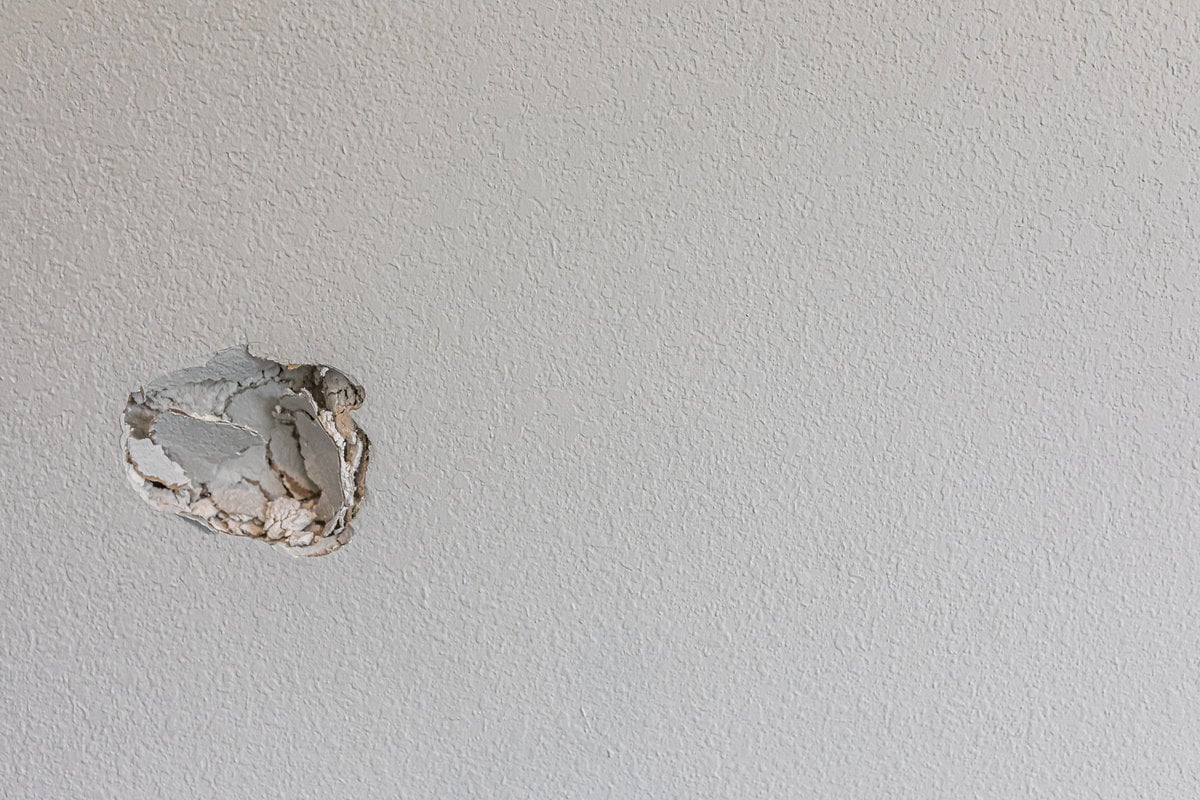
How to Fix Small to Medium Holes (1–3 Inches)
Holes this size are too big for spackle alone, but still small enough that you don’t need to cut and replace drywall. This is where most homeowners get frustrated — unless you use the right product.
Best solution: DAP Eclipse® Rapid Wall Repair Patch (no spackle, no sanding, no mess).
Step-by-Step
- Pick the Right Patch: Choose the Eclipse patch size that fully covers your hole.
2. Apply the Patch: Stick it directly over the hole. Smooth the edges with your hand (don’t press into the hole itself).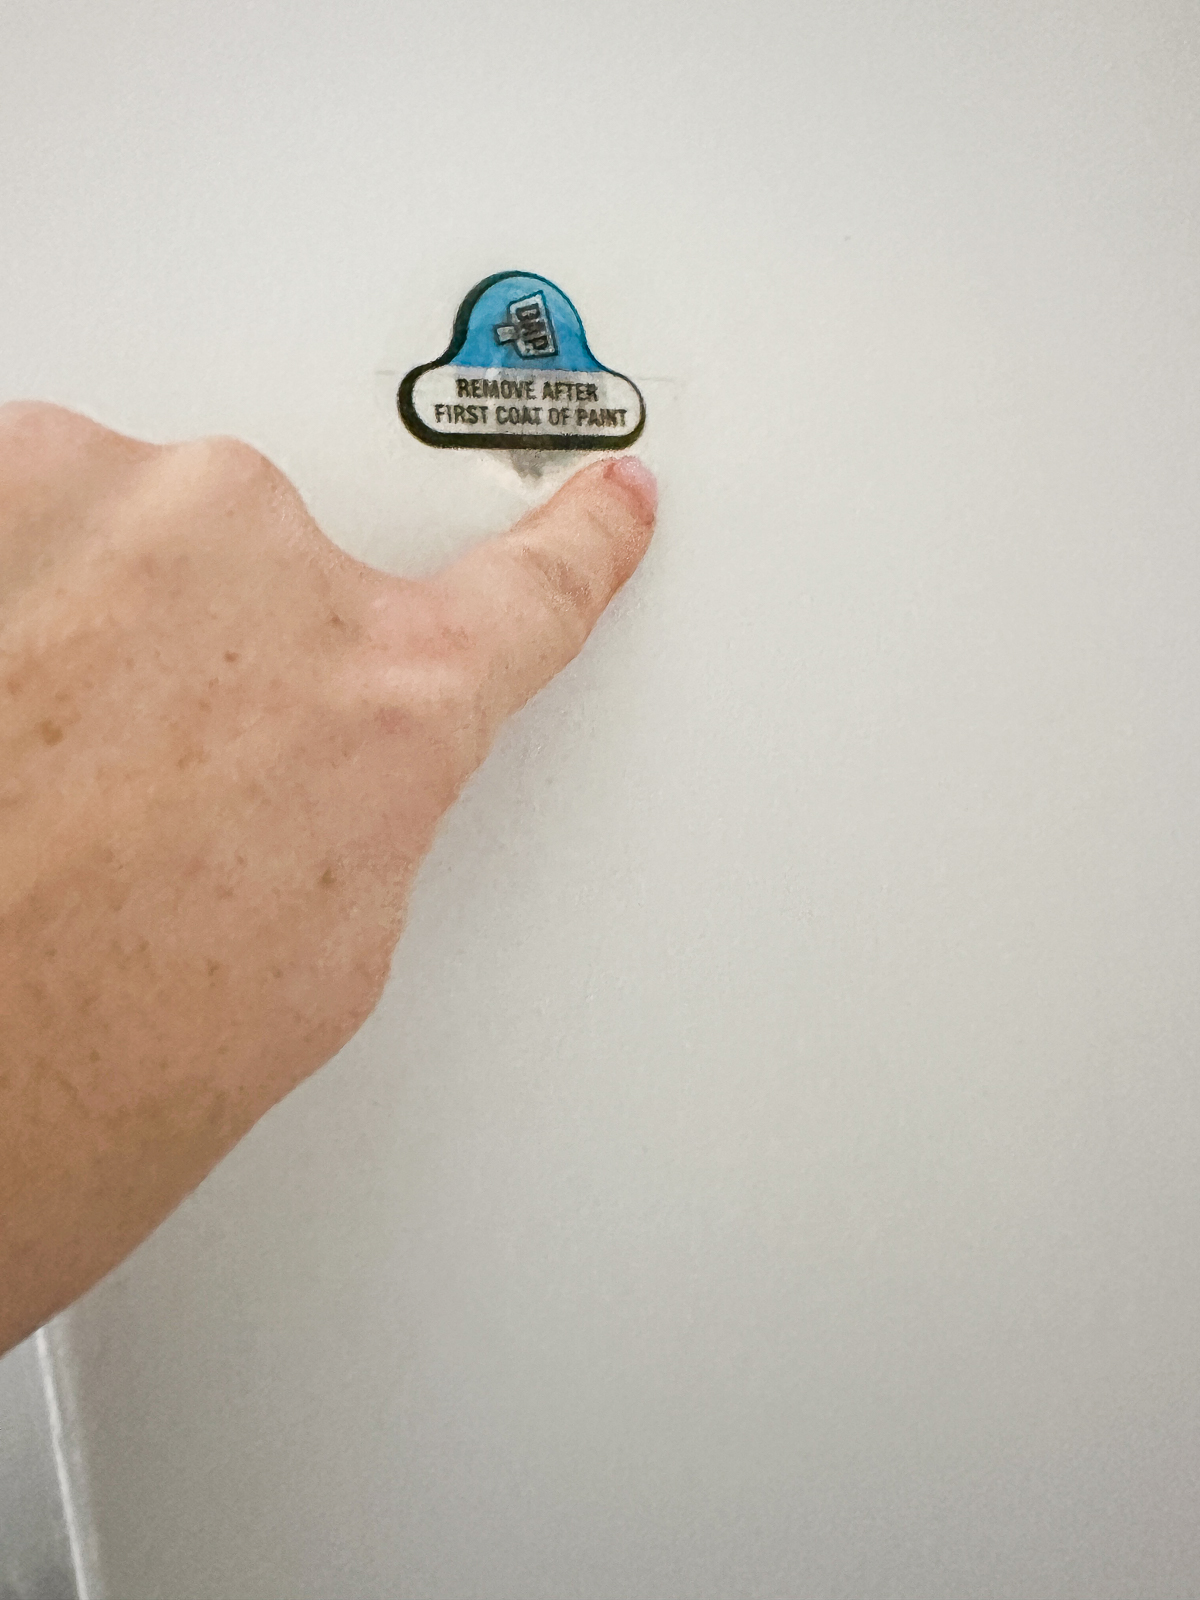
3. Paint First Coat: Apply a thin coat of paint over the gray circle in the center.
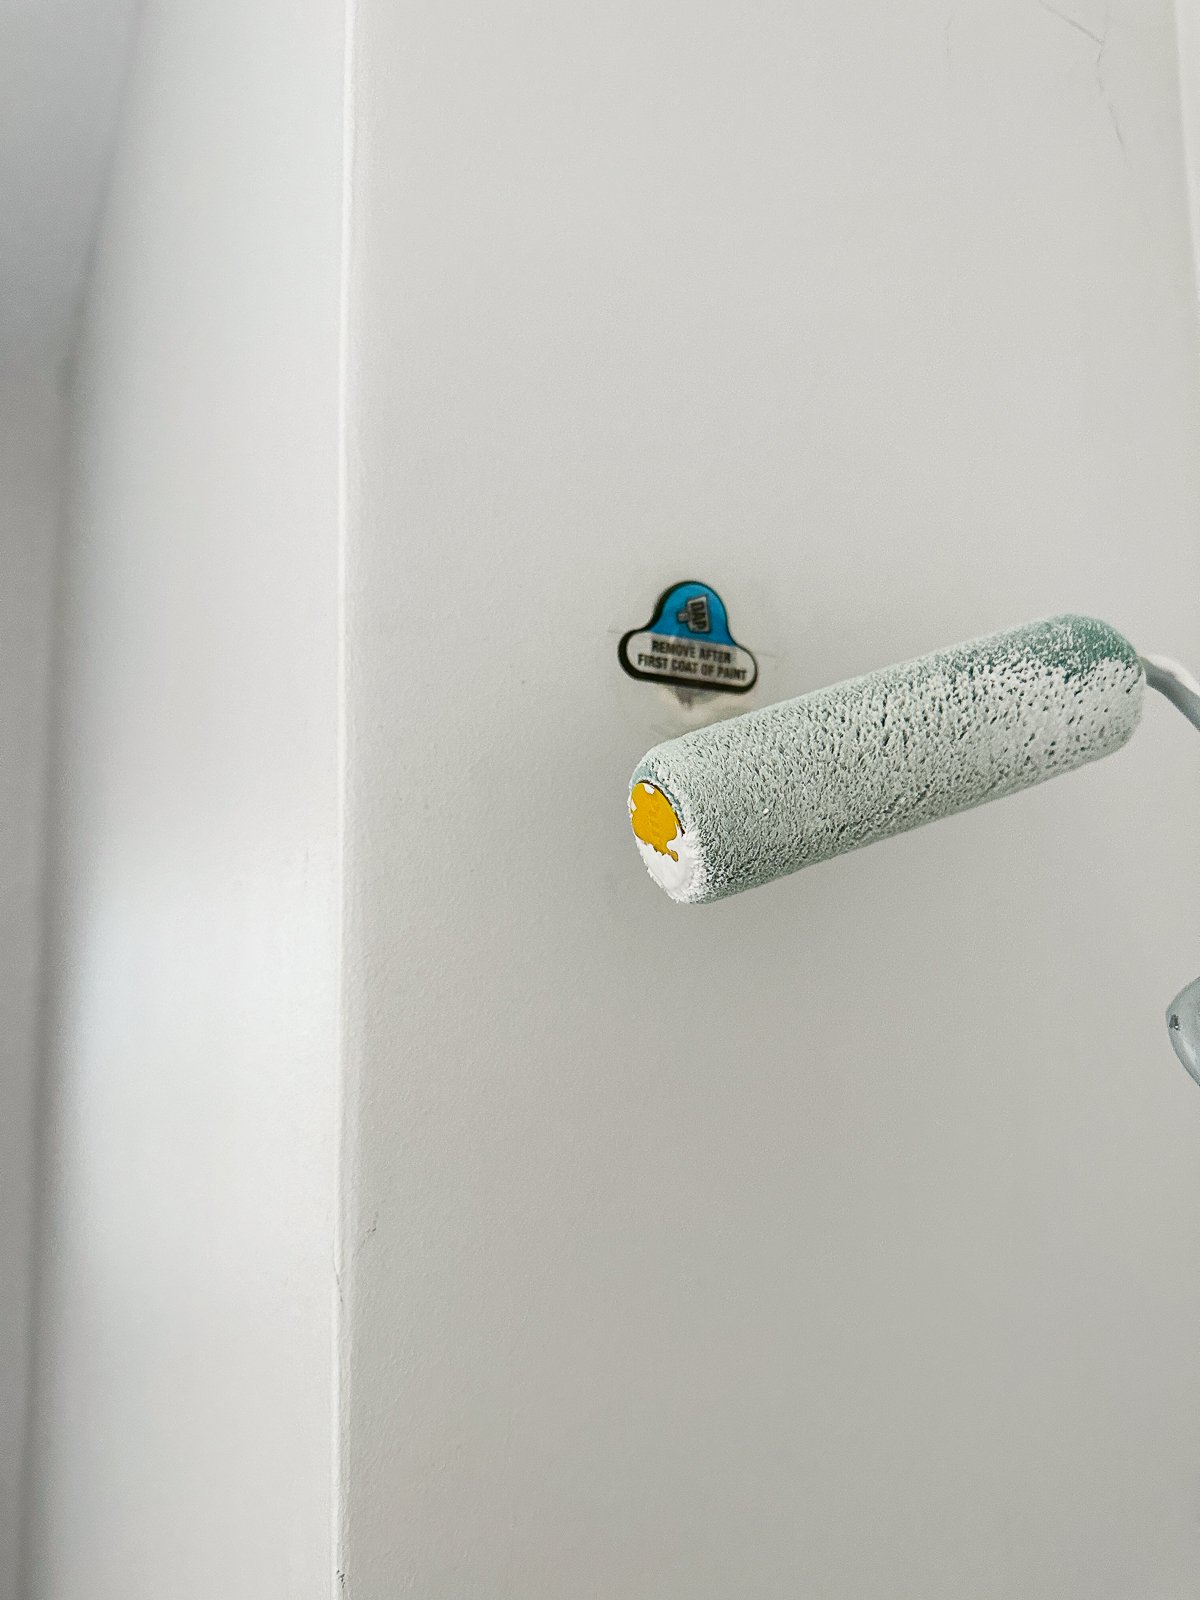
4. Remove Tab: Once dry, pull up the clear tab.
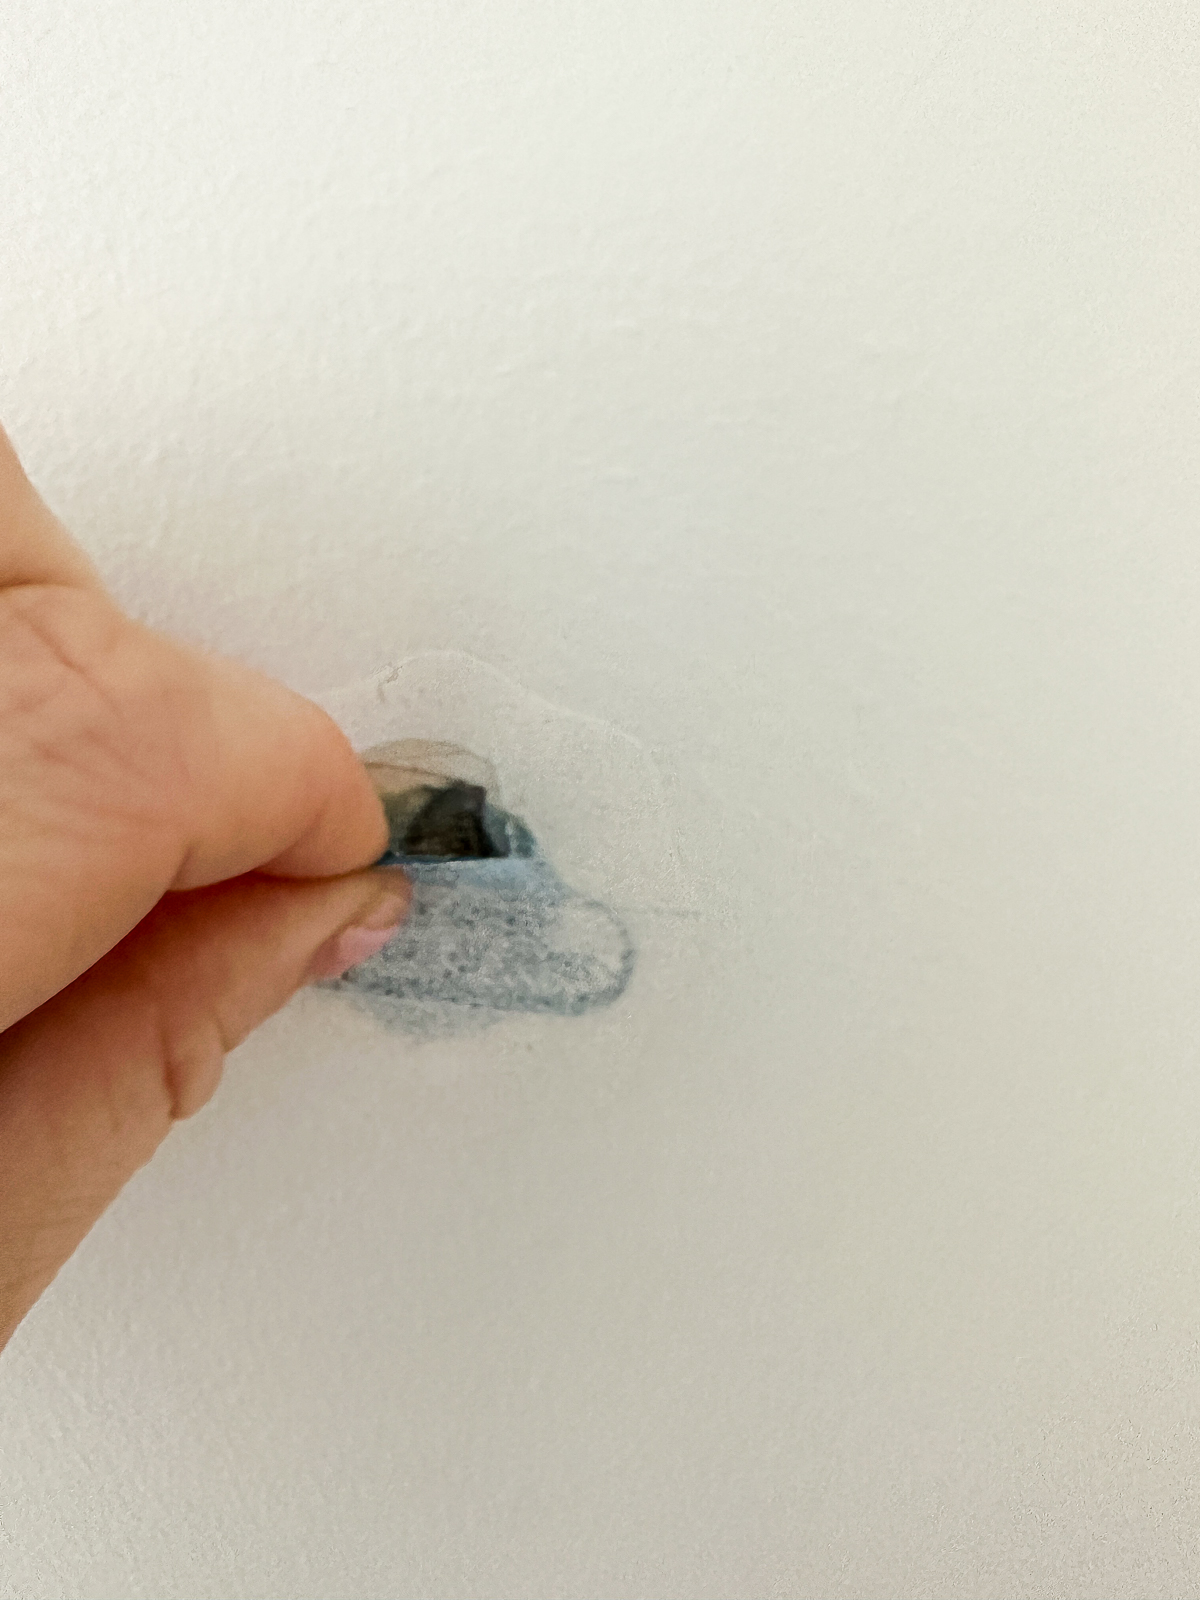
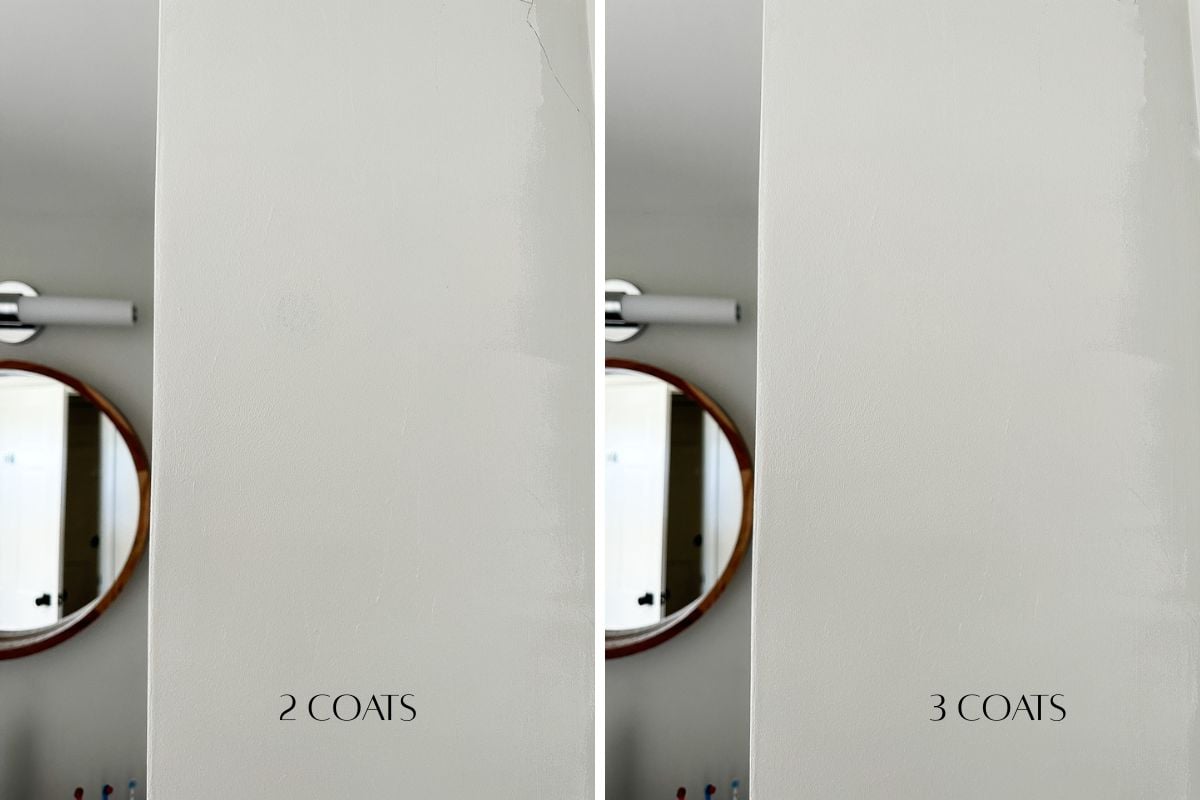
5. Paint Again: Add 2–3 more coats of paint until the patch completely blends with the wall.

Pro Tips:
- Always use at least two coats of paint — it’s the difference between a visible repair and an invisible one.
- These patches are four times stronger than drywall, so they also help prevent future damage in high-traffic areas.
How to Fix Large Holes (Over 3 Inches)
For bigger holes (like where a doorknob went straight through), you’ll need to replace a section of drywall. Don’t worry — with a little care, it’s totally doable for beginners.
What You’ll Need:
- Drywall saw or utility knife
- Scrap piece of drywall
- Drywall screws + drill
- Joint tape
- Joint compound (mud)
- Putty knife (6–12 inch)
- Sandpaper or sanding sponge
- Small piece of scrap wood (for support)
- Paint + primer
Step-by-Step
- Square the Hole: Use a drywall saw to cut the damaged area into a neat square or rectangle.
- Add Backing Support: Insert a scrap piece of wood inside the hole, secure it with drywall screws through the existing wall.
- Cut & Fit Patch: Cut a piece of drywall the same size as your hole. Place it over the opening and screw it into the wood backing.
- Tape the Seams: Cover the edges with self-adhesive mesh tape.
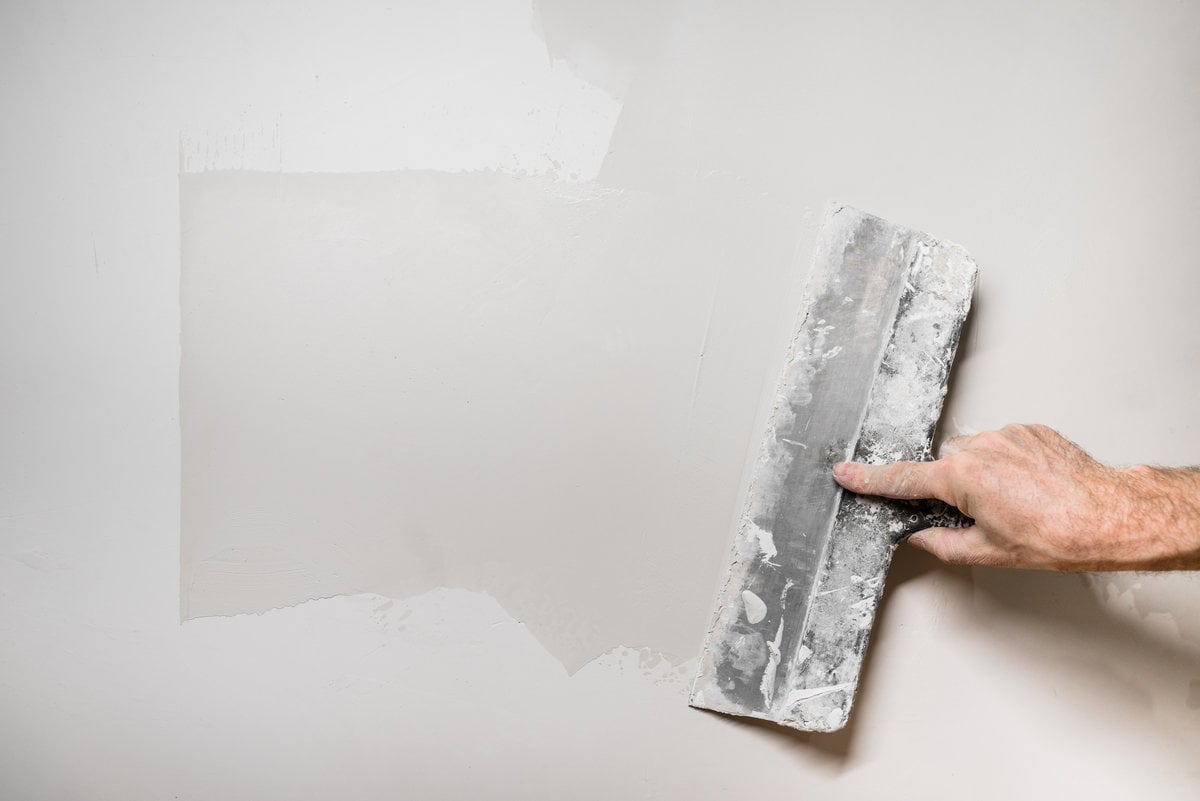
- Apply Joint Compound: Spread a thin coat of compound over the seams, feathering it outward. Let dry.
- Repeat: Add 1–2 more thin coats, sanding between layers for a smooth finish.
- Prime & Paint: Once fully dry and sanded, prime the patched area and paint to match the wall.
Pro Tip: Instead of sanding between coats, use a slightly damp sponge to smooth the edges of the compound. It saves time and keeps dust to a minimum.
Finishing Touches for a Professional Look
- Feather the Edges: When applying joint compound or paint, extend a little beyond the patch so the repair blends seamlessly into the wall.
- Lighting Check: Shine a flashlight across the wall at an angle to spot imperfections before you paint.
- Repaint Entire Wall (Optional): For the smoothest, most invisible repair, repaint the full wall instead of just spot-painting.
When to Call a Pro
If your hole is larger than a dinner plate, near electrical/plumbing, or you’re patching multiple big holes at once, calling a professional may save time and ensure safety.
Water-Damaged Drywall:
If your drywall has been exposed to water (from leaks, plumbing issues, or flooding), you’ll need to cut out and replace all of the damaged material, not just patch over it. Moisture weakens drywall and can lead to mold growth if left untreated. In these cases, it’s best to call a professional, especially if the water damage is widespread or near plumbing and electrical.
Tools & Materials Checklist
- Spackle or joint compound
- Putty knife
- Sanding sponge / sandpaper
- DAP Eclipse patch (for 1–3 inch holes)
- Drywall saw / utility knife
- Scrap drywall + wood backing
- Drywall screws + drill
- Joint tape
- Paint & primer
Frequently Asked Questions About Patching Drywall
While toothpaste is sometimes suggested as a quick hack for nail holes, it’s not durable and will eventually crack or crumble. Use lightweight spackle for a long-lasting repair.
For tiny nail holes filled with spackle, primer isn’t always necessary if you’re using a high-quality paint. For larger patches or areas covered with joint compound, primer helps prevent “flashing” (where the patch looks shiny compared to the rest of the wall).
Spackle is best for small holes and dries quickly. Joint compound (often called “mud”) is better for larger repairs and needs to be applied in thin layers with sanding between coats.
Small nail holes can be repaired in under an hour (including dry time). Medium patches with products like the DAP Eclipse can be painted the same day. Large drywall repairs may take 1–2 days, since you’ll need to let multiple layers of joint compound dry before sanding and painting.
Final Thoughts
Knowing how to patch a hole in drywall is one of the easiest DIY wins for any homeowner. With the right method for your hole size – spackle for tiny holes, a repair patch for medium holes, or a drywall replacement for large holes – you can restore your wall quickly and confidently.
Fix it right once, and it’ll look like the damage was never there.