Content may contain affiliate links. When you shop the links, I receive a small commission at no cost to you. Thank you for supporting my small business.
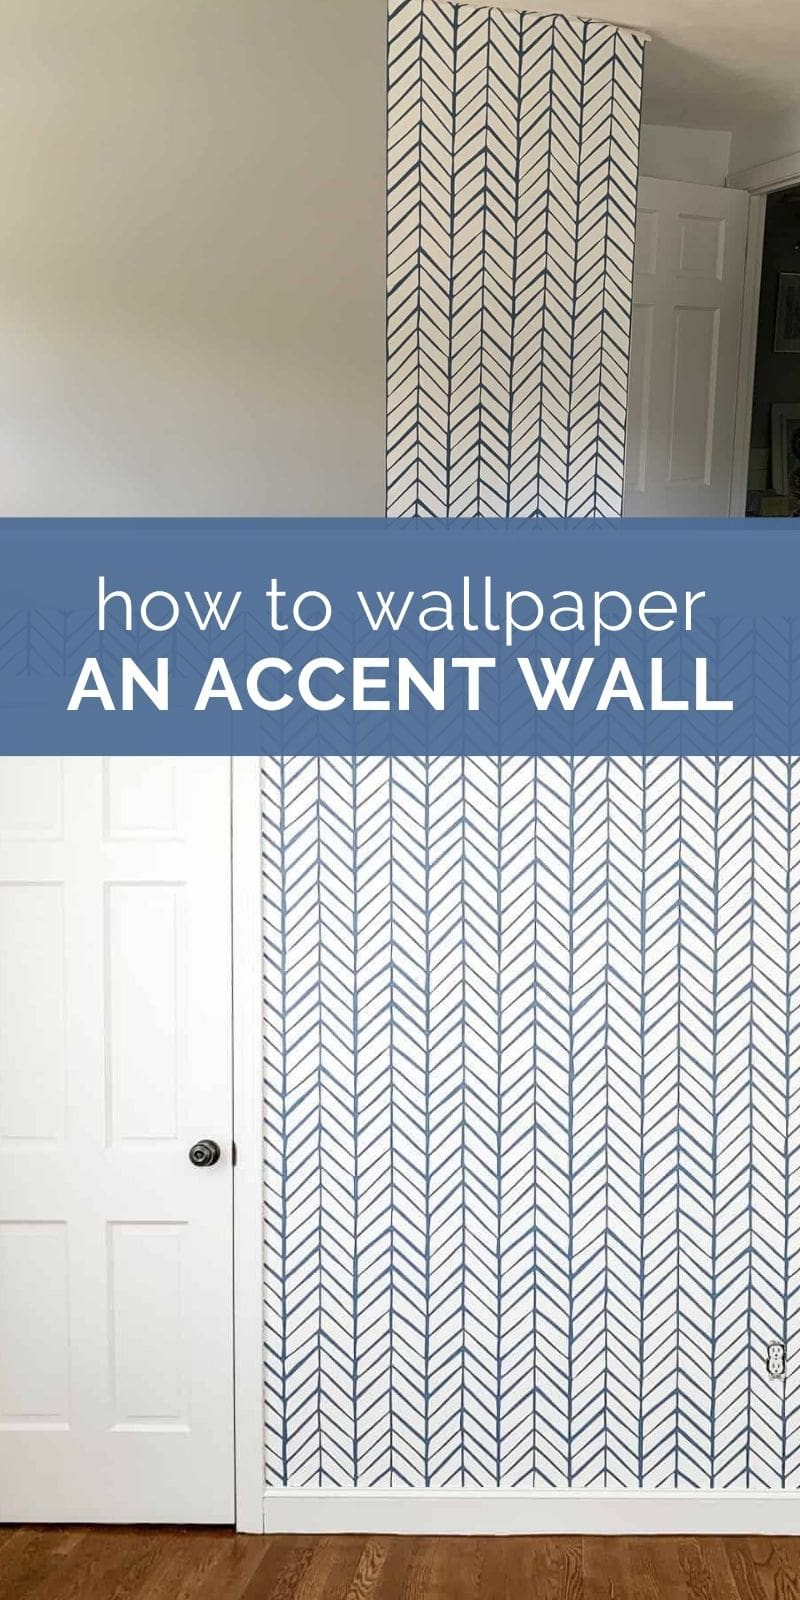
Don’t you love the look of a wallpaper nursery accent wall? Having a playful print on one wall can create an enviable feature in your child’s bedroom! Follow this step by step tutorial for creating a wallpaper nursery accent wall and that dreamy nursery will be yours in no time!

DIY Nursery Wallpaper Accent Wall
Now that the walls have been painted in the baby’s nursery, it’s time to get to work on the wallpaper accent wall that I’ve been so excited about.
I narrowed down my choices to 2 wallpapers – one from Wayfair and another from Serena & Lily – but was having a hard time deciding between them. So I asked my Instagram followers to vote!

Ultimately, the Serena & Lily wallpaper was the winner so I ordered a roll and got to work!
Installation Tips and Tricks for Your Nursery Wallpaper Accent Wall
- Use a cheap chip paintbrush in the largest size
- This is the wallpaper paste I used and it worked great!
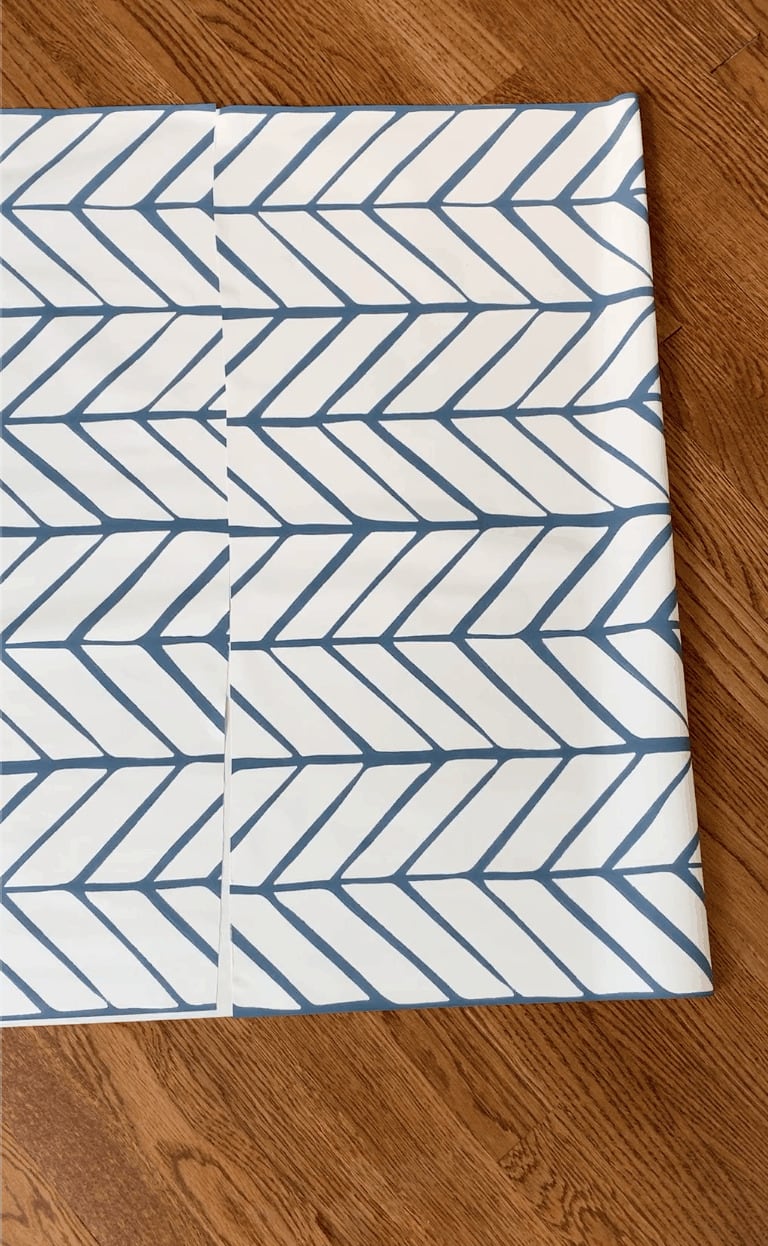
The paste I used required a thin, even layer to be applied and then the pasted sides of the wallpaper to be bookended. Instead of folding in the middle and having them meet at the ends, I had the top end meet 1/3 of the way down and the bottom meet at the 2/3 point.
That way, once the paste had set up (you have to let it rest for 3 minutes to get tacky), I just unfolded the top section to adhere to the wall. That was SO much easier than trying to wrangle one giant strip of gummy wallpaper (which I tried on the first strip!!)
3. Cut the strip of wallpaper 3-4 inches longer than the height of your wall. You’ll need the extra to account for matching the pattern correctly. Also, the way these patterns generally repeat, you will need to flip every second strip to match the pattern in the correct direction.
Getting Your First Strip of Wallpaper on The Wall Straight
Figure out the most logical starting point. For me, I knew my accent wall was going to end on a section of wall where it needed to be perfect – i.e. there wasn’t a door frame to score a clean edge on. So I chose to create my plumb line here and line up my first seam. This meant that I ended up working from right to left.

Most houses don’t have perfectly straights walls or ceilings. Drawing a plumb line on your wall will ensure that your first strip of wallpaper goes up straight and that subsequent pieces will too, provided you match the pattern correctly.
How to Easily Get a Plumb Line
The easiest way I’ve found to get a plumb line is to utilize gravity. Attach a piece of string to a thumb tack, stick it to the top of your wall and add a weight to the bottom of your string (a coin or anything works – I used a small USB drive!!).

Once the string stops moving, draw a few reference points in pencil along the line. Don’t use pen! It could bleed through your wallpaper!
How to Ensure a Bubble-Free Application for your Wallpaper Accent Wall
Use a large wallpaper smoother to smooth the bubbles out as you go. I found it much easier to smooth across (from right to left) instead of down. You want to get the bubbles out so smoothing down only pushes them down the strip instead of out from under the strip.
Run your hands along the wall to feel for any bubbles you might not see. If you come across a particularly stubborn bubble, you may need to slightly pull the wallpaper back off the wall.
When your wallpaper is on and you’re satisfied that you’ve removed all the air bubbles, use a straight edge and an Xacto knife (with a fresh blade) to score and remove the excess along the top and/or bottom. If you do not use a very sharp blade, you’re at risk of ripping the damp wallpaper – so be careful!
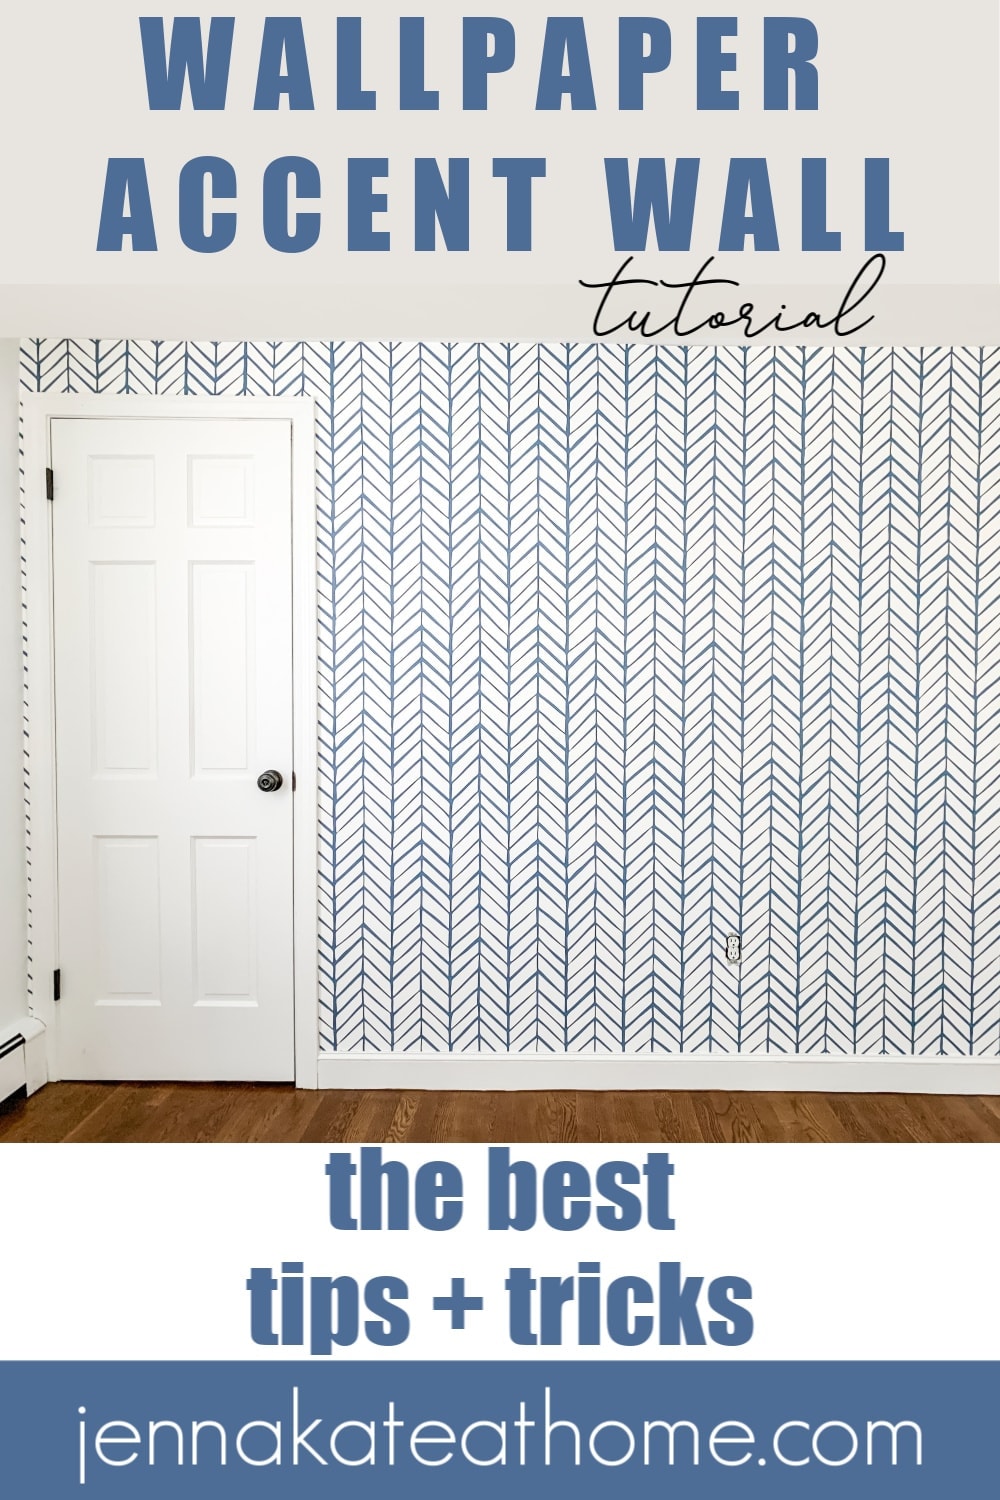
And that’s pretty much it! It’s certainly not difficult to install a feature wall like this in any room in your home. Wallpaper merely takes some practice and a little patience. Take your time, follow my tips, and you’ll have a beautiful wallpaper accent wall that you’ll be so proud of!
Looking For More DIY Tutorials & Room Makeovers?
- Painting the Nursery White
- The Best Nursery Paint Colors
- Reclaimed Wood Accent Wall
- Conor’s Nursery Reveal
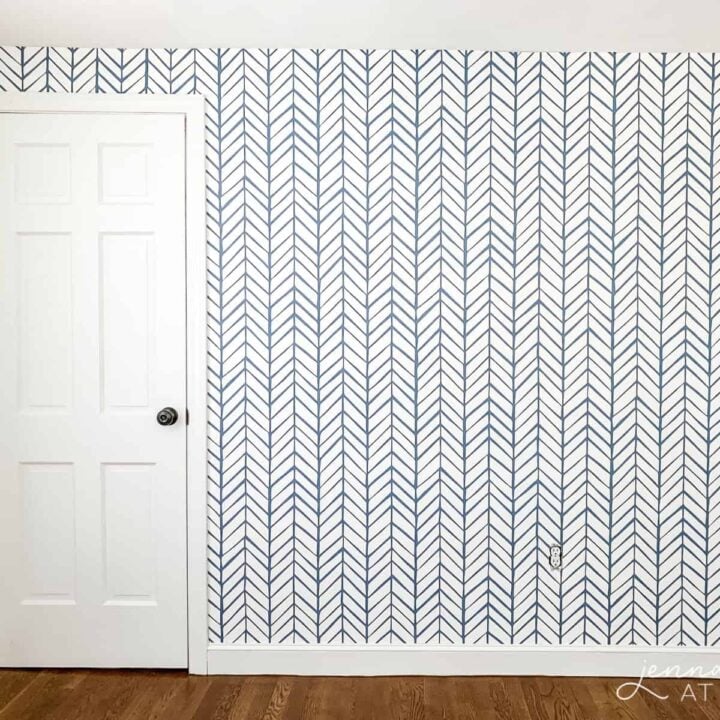
How To Create A Nursery Wallpaper Accent Wall
Dress up your nursery with a fabulous wallpaper accent wall! Follow this step by step tutorial to create a unique and stylish look in your child's bedroom.
Materials
- Wallpaper roll of choice
- Wallpaper paste
Tools
- Chip paintbrush
- Large wallpaper smoother
- Scissors
- X-acto knife
- Straight edge
Instructions
- Prep your wallpaper. Cut the strip of wallpaper 3-4 inches longer than the height of your wall. You'll need the extra to account for matching the pattern correctly. Also, the way these patterns generally repeat, you will need to flip every second strip to match the pattern in the correct direction.
- Create a plumb line and line up your first seam of wallpaper (*see notes for tips on how to create a straight plum line.
- Apply the wallpaper paste to the wallpaper. Before applying it to the wall, wait 3 minutes for paste to be tacky. Pro-tip: Instead of folding in the middle and having them meet at the ends, I had the top end meet ⅓ of the way down and the bottom meet at the ⅔ point. This makes it easier to apply the wallpaper to the wall smoothly.
- Use a large wallpaper smoother to smooth the bubbles out (right to left) as you go. Use your hands to check for other bubbles.
- Use a straight edge and an Xacto knife (with a fresh blade) to remove the excess wallpaper.
Notes
*When creating a plumb line, use gravity as your best friend! Attach a piece of string to a thumb tack, stick it to the top of your wall and add a weight to the bottom of your string. When the string stops moving, mark a few reference points with a pencil.
I love this patterned wallpaper! Thanks so much for sharing your helpful tips Jenna!