Content may contain affiliate links. When you shop the links, I receive a small commission at no cost to you. Thank you for supporting my small business.
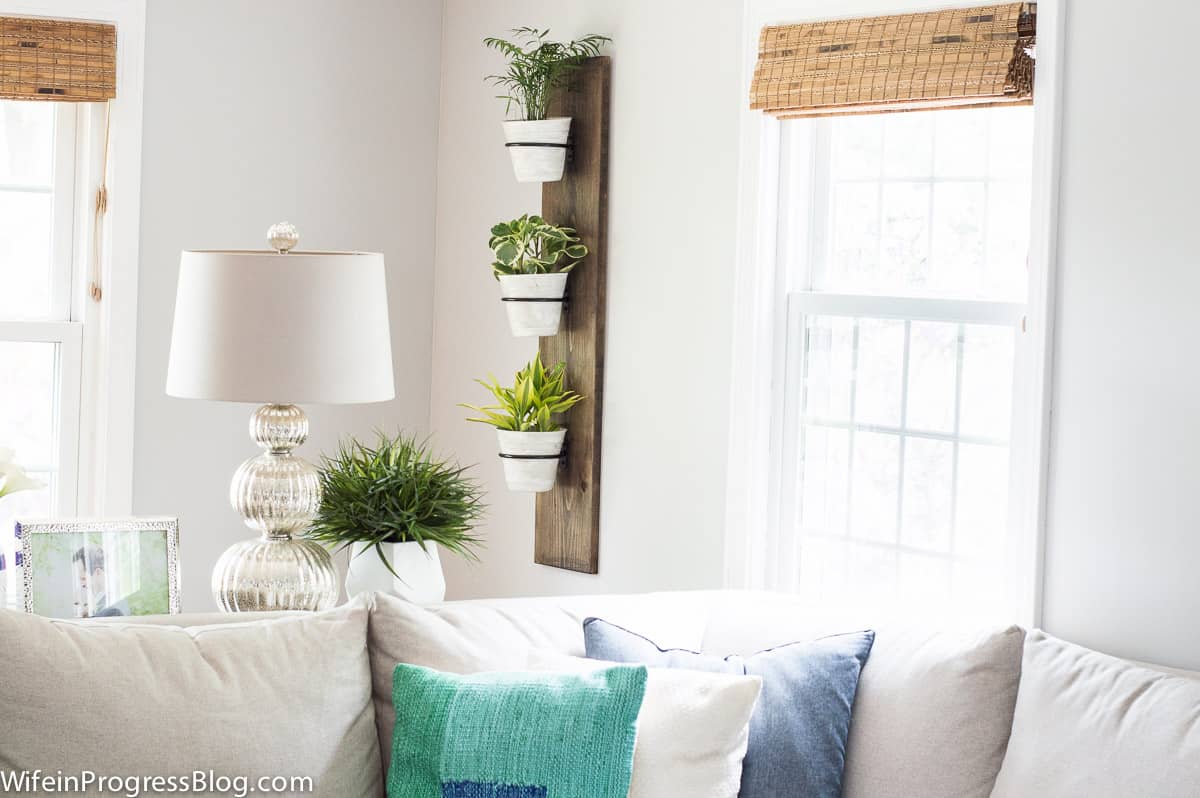
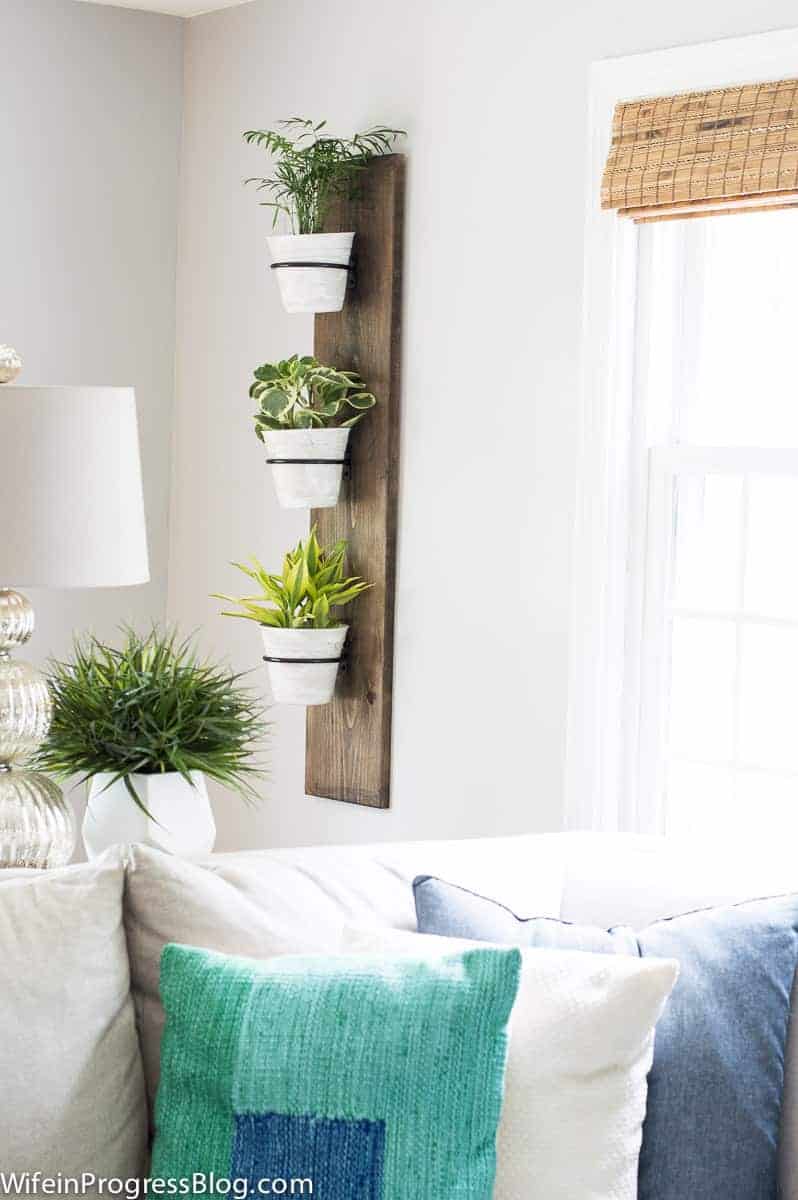
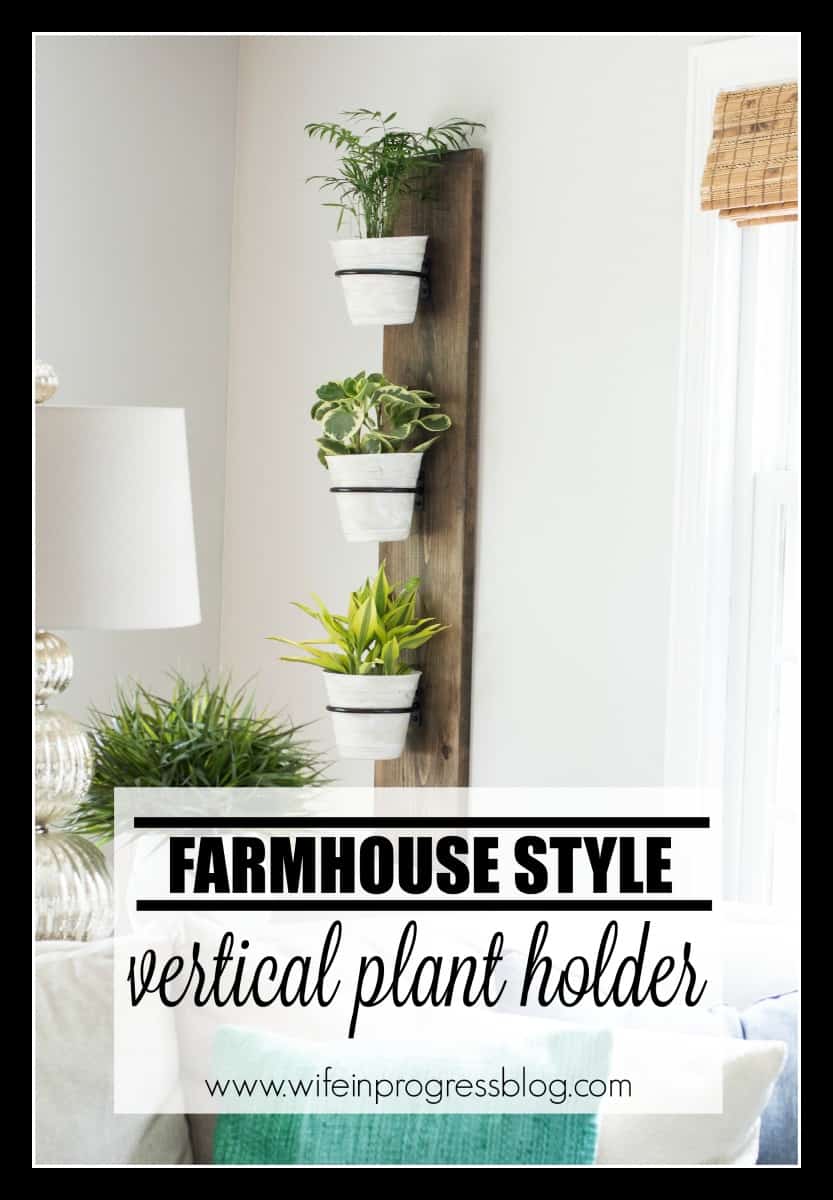
This super easy DIY farmhouse style planter can be made in about an hour. It adds a great touch of rustic charm to any room in your home. I made mine so that it hangs vertically, but feel free to switch it horizontally so that it spans across a couch or sideboard!
I’m excited to share another video tutorial with you, too. I’ve been trying really hard to improve the quality of my videos so I hope you’ve been enjoying them. I frequently post them to Facebook but you can also subscribe to my YouTube channel to receive notifications when I upload new ones.
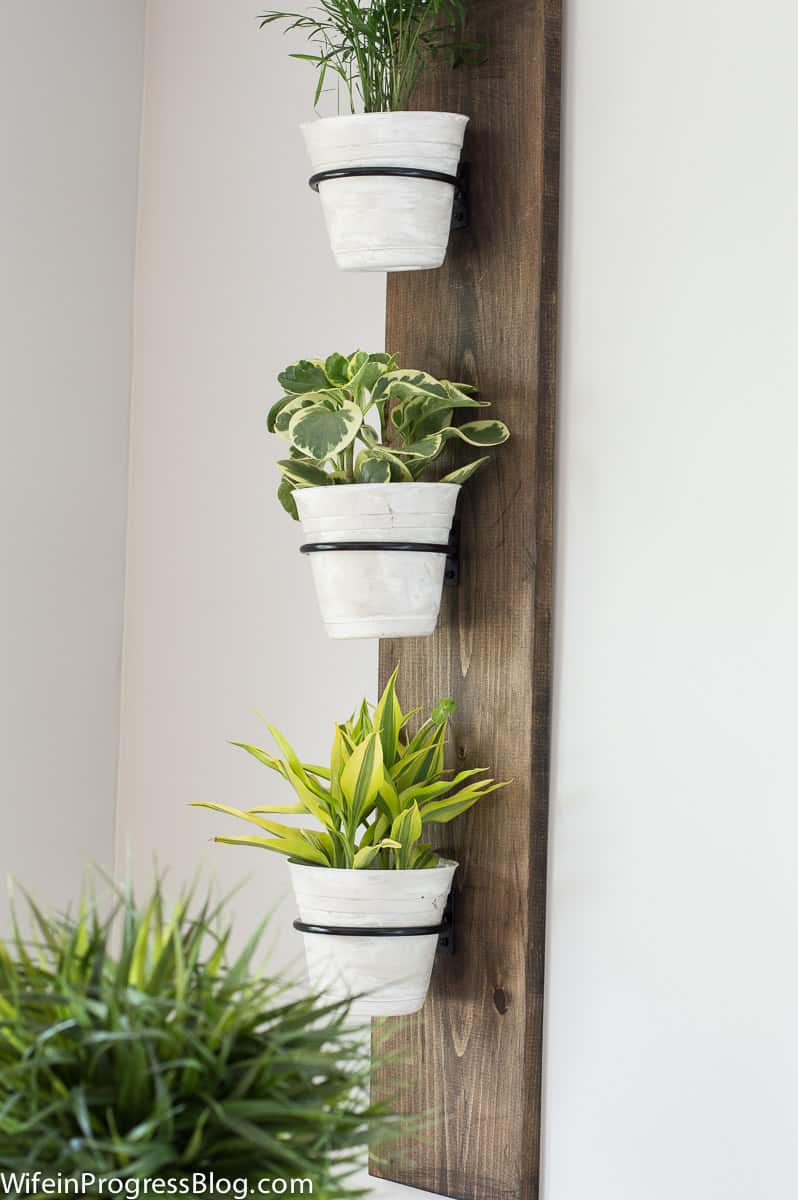
All you need to make this stylish plant holder is a piece of wood (I used a 1 x 12 board cut to about 4 feet long), stain of your choice, wrought iron flower pot rings and plastic flower pots from the dollar store.
You can watch the video of me making this plant holder below or skip over it to see the written tutorial.
Farmhouse Style Plant Holder Video Tutorial
[adthrive-in-post-video-player video-id=”mlz6ANve” upload-date=”Wed Dec 06 2017 00:00:00 GMT+0000 (Coordinated Universal Time)” name=”DIY Rustic Picture Frame Tutorial” description=”DIY Rustic Picture Frame Tutorial”]
[color-box]
*Affiliate links included for your convenience*
What You’ll Need:
- 1 x 10 pine board
- Sandpaper
- Wrought iron flower pot rings
- Black 1/4 inch screws + electric screwdriver
- Wood stain
- Rag or foam brush to apply stain
- 6 inch plastic flower pots
- White chalk paint + paintbrush
- Antiquing wax + rag
- Sawtooth hanger
- Picture frame hanger
[/color-box]

Sand down all the edges so that they are rounded off. The wipe off the dust with a tacky cloth.

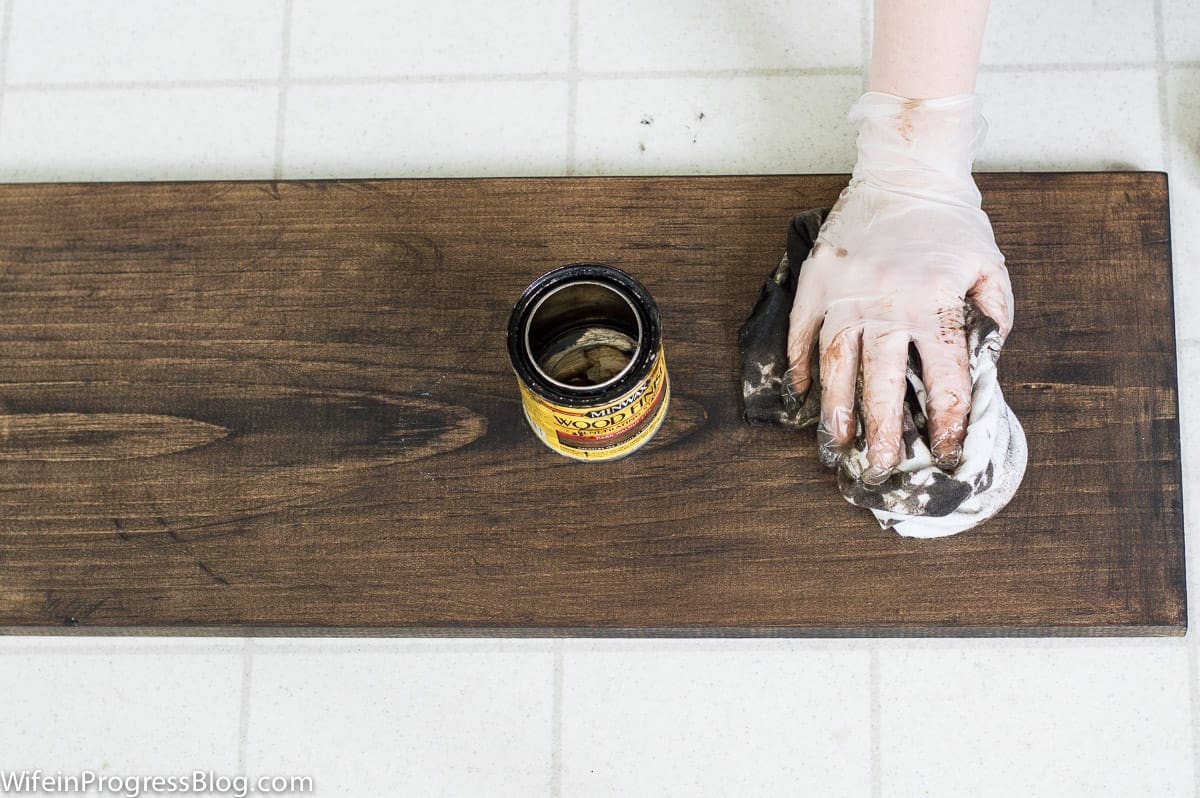
Stain the board. I used this stain in Dark Walnut. If you apply with a foam brush, wipe off the excess with a rag. If you apply with a rag there won’t be much excess to wipe off. Move on to the next step while the stain is drying.

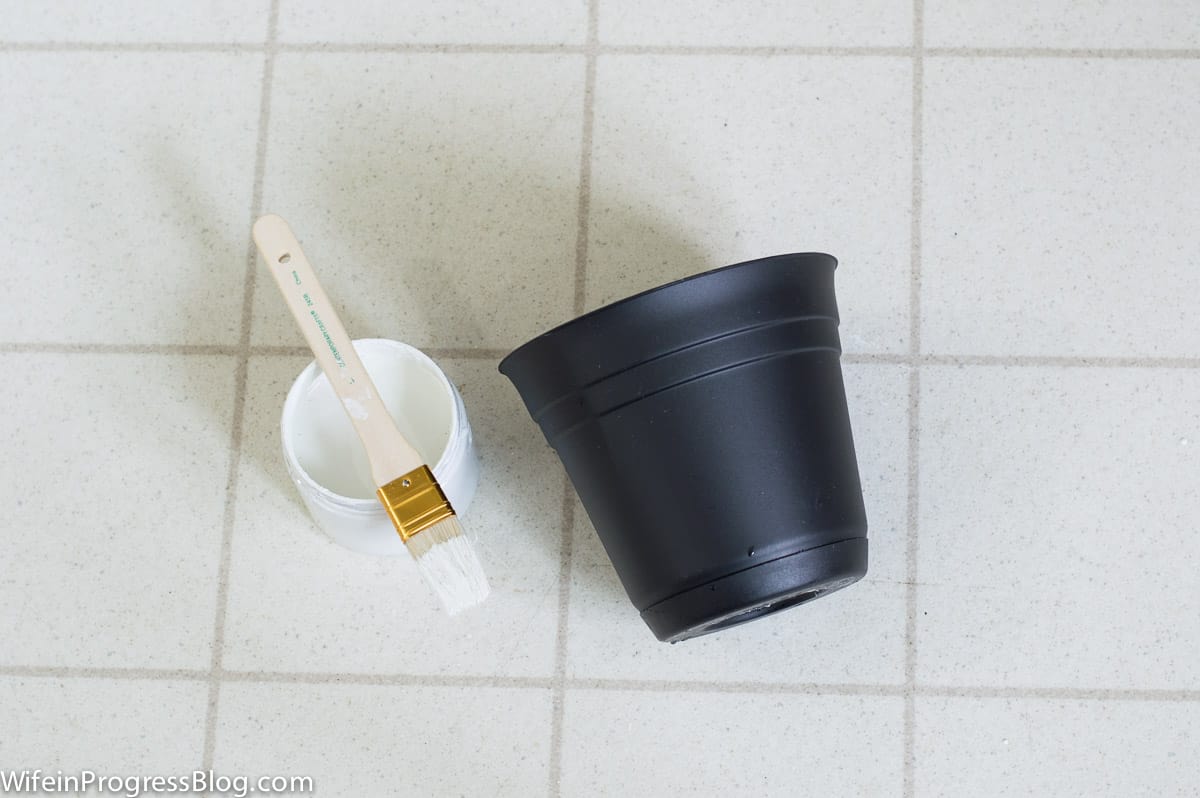
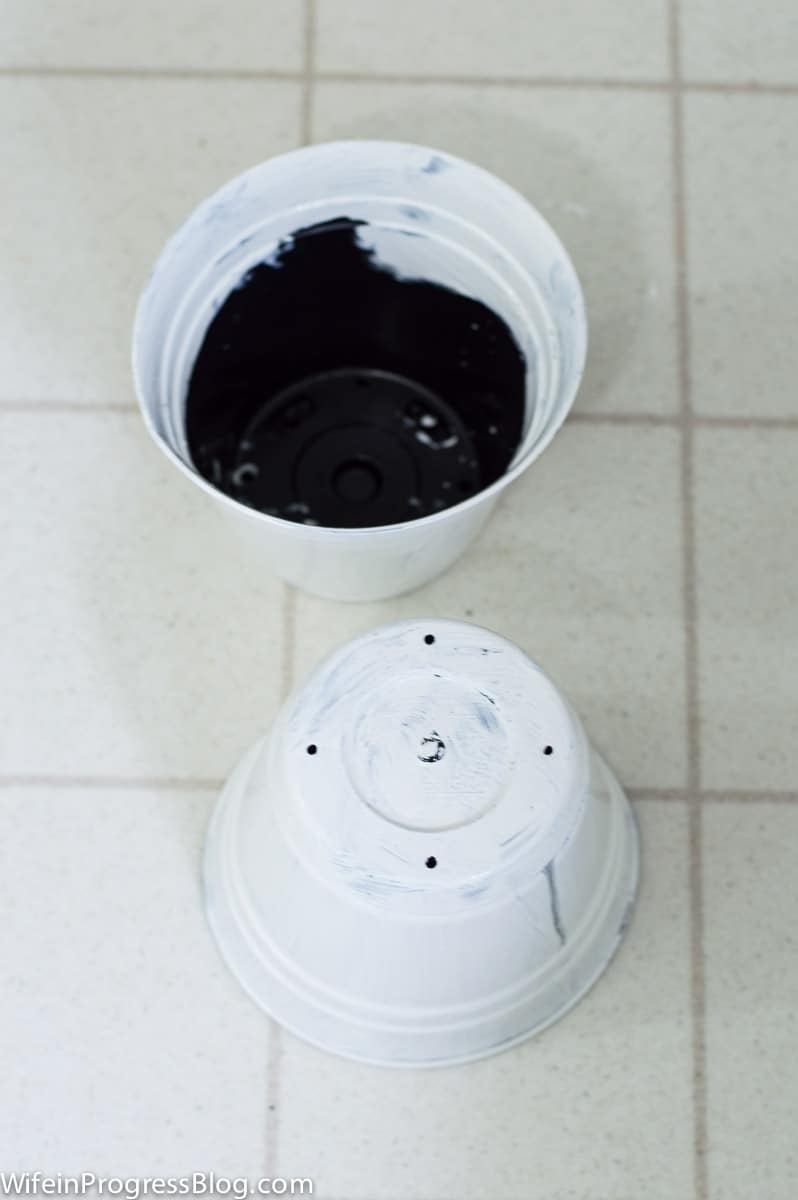
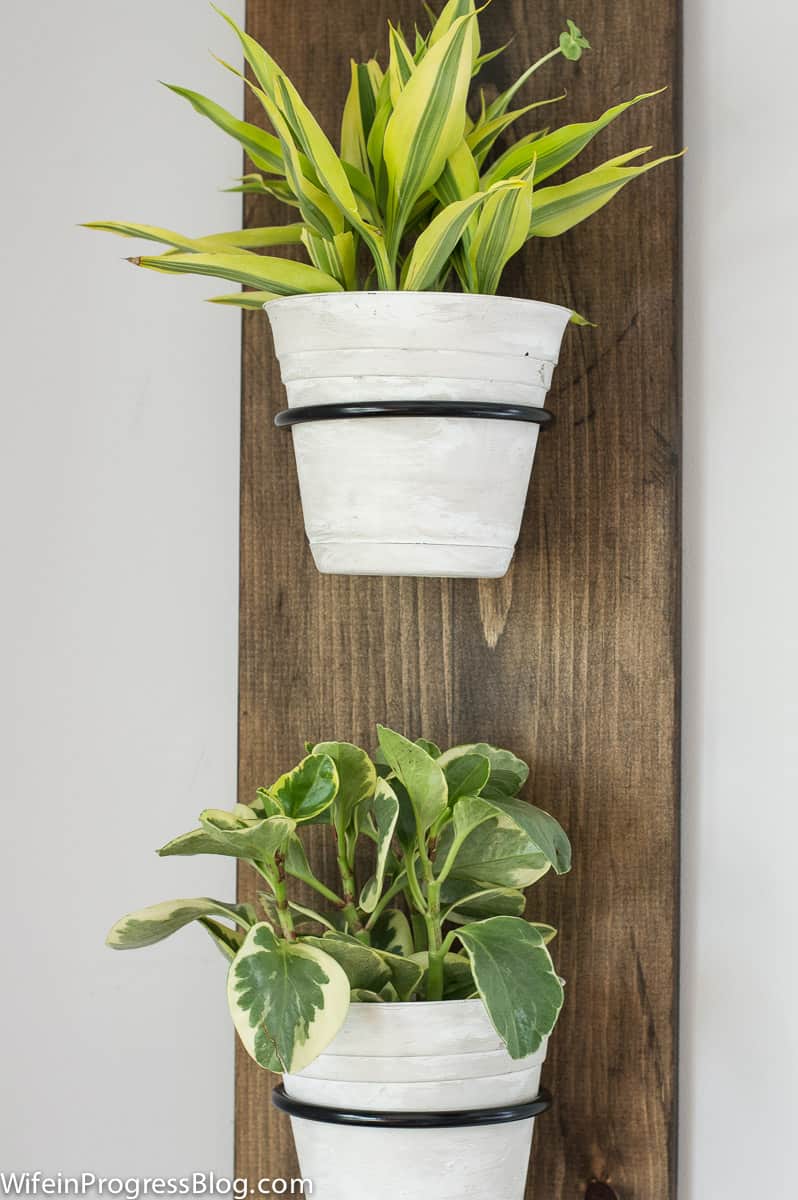
Using white chalk paint [learn how I make my own here], pain the plastic flower pots. You’ll want to paint about a third of the ways down on the inside and don’t forget the bottom, too! Apply additional coats as needed. Allow to dry.

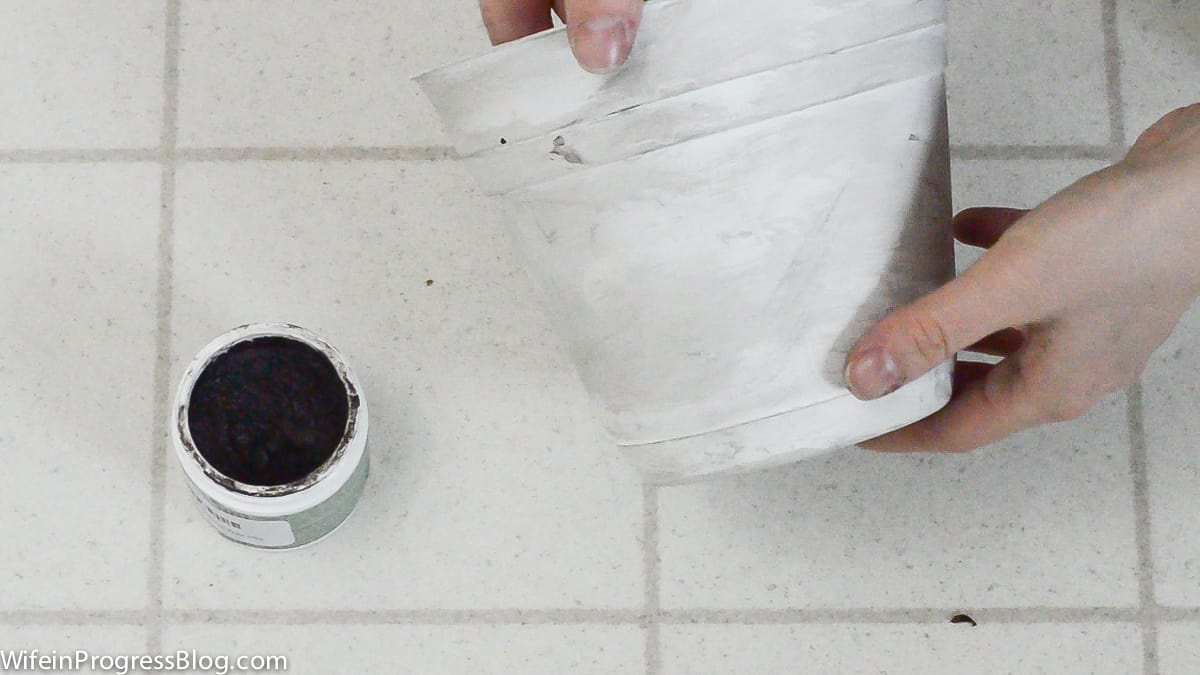
Once the paint on the flower pots is dry, rub on some antiquing wax to give the pots that “farmhouse touch”. Apply sparingly – a little goes a long way.

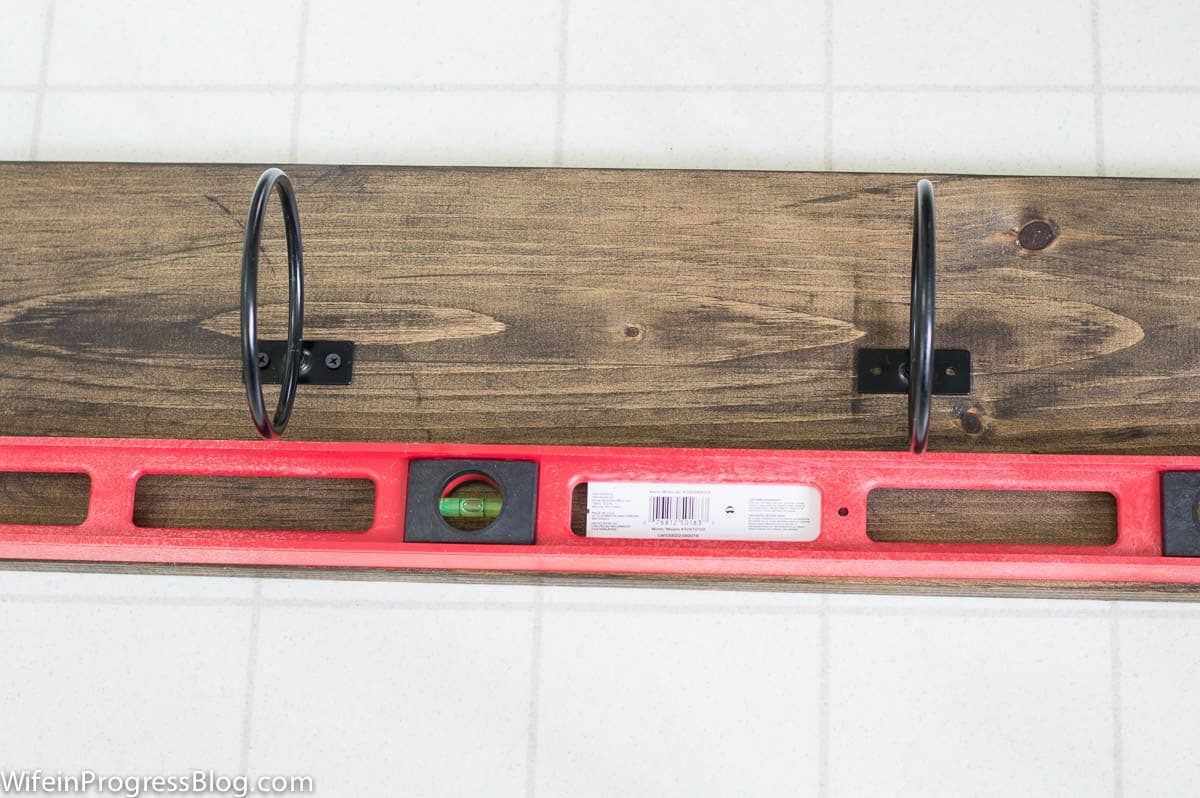
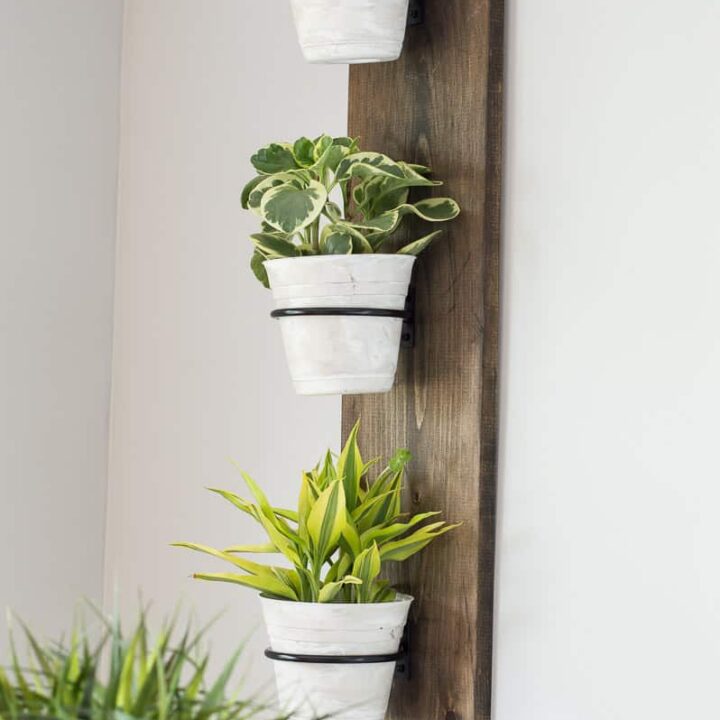
Use a ruler to find the center point of your wood, then figure out equi-distant spacing for your flower pot rings. Attach the wrought iron flower pot rings to the wood with quarter inch black screws.
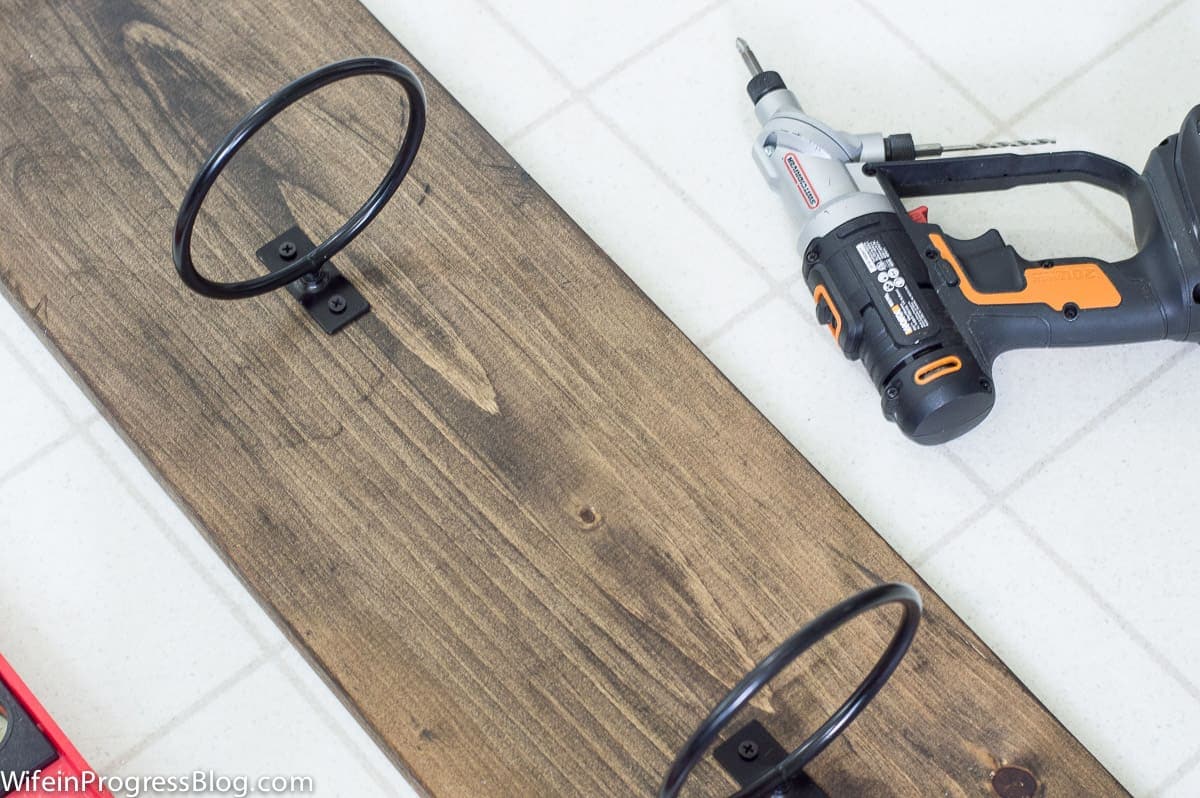

Attach a sawtooth hanger to the back of the wood. Using a picture frame hanger rated for a minimum of 20lbs, hang the planter on the wall.

Pop your indoor plants or succulents into the flower pots, sit back and enjoy their beauty!
If you’re looking for a quick DIY to spruce up a space in your home, this might just be the project for you! If so, don’t forget to pin it!
Farmhouse Style Vertical Plant Holder
A trio of happy, green blooms in simple pots are framed beautifully by a stained wood plank in this fun tutorial.
Materials
- 1 x 10 pine board
- Wrought iron flower pot rings
- Wood stain
- 6 inch plastic flower pots
- White chalk paint + paintbrush
- Antiquing wax
- Sawtooth hanger
- Picture frame hanger
Tools
- Black 1/4 inch screws + electric screwdriver
- Sandpaper
- Rag or foam brush to apply stain
Instructions
- Sand down all the edges of the pine board so that they are rounded off. Wipe off dust with a tacky cloth.
- Stain the board. If you apply with a foam brush, wipe off the excess with a rag. If you apply with a rag, there won't be much excess to wipe off. Move on to the next step while the stain is drying.
- Using white chalk paint, paint the plastic flower pots. Paint about a third of the ways down on the inside and the bottom as well. Apply additional coats as needed. Allow to dry.
- Once the paint on the flower pots is dry, rub on some antiquing wax to give the pots that "farmhouse touch". Apply sparingly - a little goes a long way.
- Use a ruler to find the center point of your wood, then figure out equi-distant spacing for your flower pot rings. Attach the wrought iron flower pot rings to the wood with quarter inch black screws.
- Attach a sawtooth hanger to the back of the wood. Using a picture frame hanger rated for a minimum of 20lbs, hang the planter on the wall.


I really love it when I see a DIY project like this that is not only gorgeous and entirely doable, but that doesn’t cost a lot! Thanks for sharing this. I look forward to checking out the rest of your blog and your videos!
Thanks so much, Deb!
This is such a fun idea.I just discovered these pot holders at Home Depot and used them in my master bedroom makeover. I love the idea of putting them on old wood for an extra bit of flare.
Thanks Gabby!!