Content may contain affiliate links. When you shop the links, I receive a small commission at no cost to you. Thank you for supporting my small business.
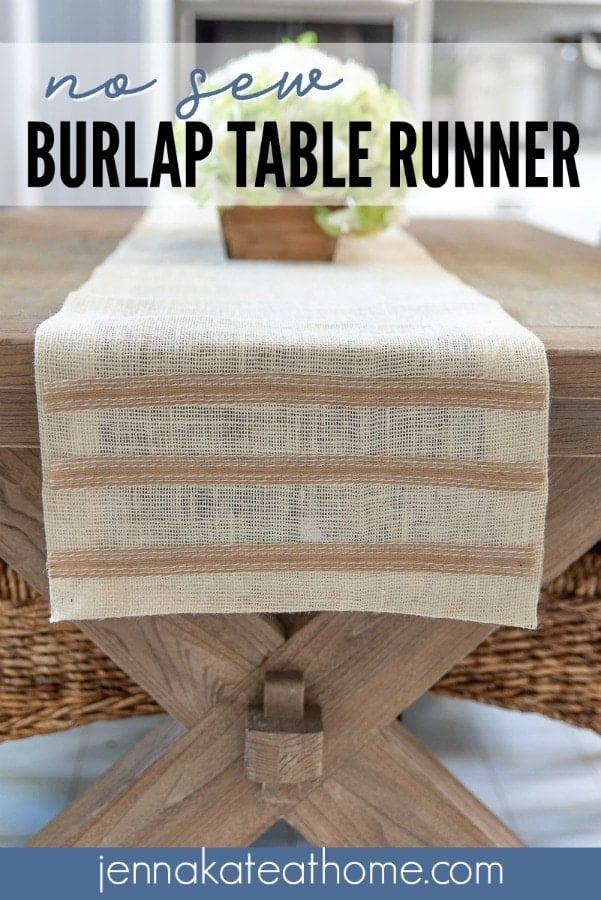
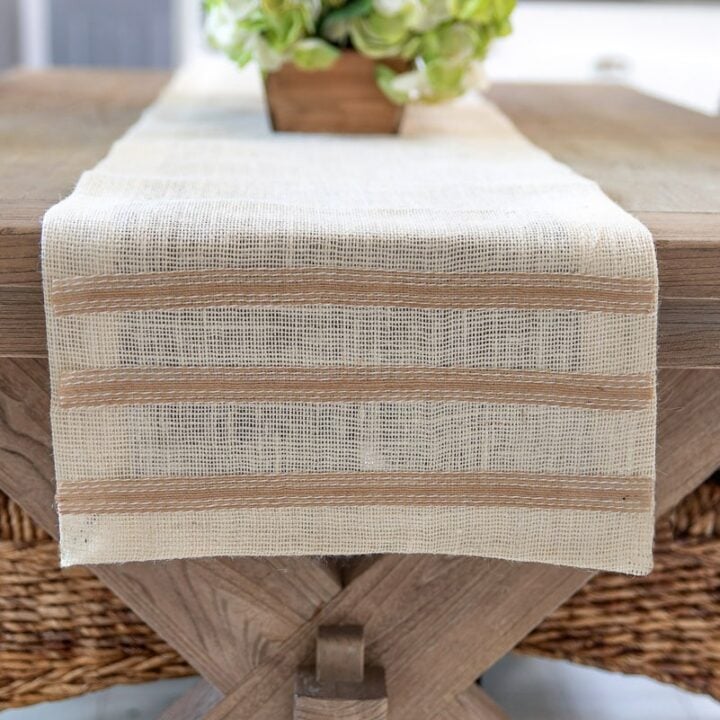
This easy no sew DIY Burlap Table Runner is the perfect project to kick start your DIY decorating skills. Plus, this method in this tutorial works for any fabric so the possibilities are endless!

Burlap fabric is like a favorite T-shirt in your closet you love to wear all the time. It’s classic and simple enough to complement any home decor but also looks elegant on its own.
I had bought some burlap once, intending to make a table runner out of it (because it’s one of the easiest projects you’ll ever do!). It remained in my office closet for months until I found a roll of the most darling burlap ribbon to add to it.
This timeless fabric runner for your dining table is perfect base for your fall or Thanksgiving table but also pairs up nicely with coastal table decor! It can easily transition for any holiday or as an everyday look. Guest will think you had a custom burlap table runner ordered, but we’ll keep it a secret on just how easy it is to make.
This DIY project comes together in such little time once you gather up all your materials.
Don’t worry if you have no sewing skills – this one is super simple. If you can cut a (relatively) straight line, you’ll have a fabulous burlap runner ready for decorating in about 20 minutes!I hope you enjoy making it as much as I did!

What You’ll Need
As with any crafting project, if you have to run to your local craft store or Hobby Lobby for additional supplies, always make sure you check online or their in-store ads for any dollar or percent off coupon. Every little bit helps when you’ve decided to make your own instead of buying brand new!
- Burlap – measure the length of your table and add about 10 inches so that there’s enough of the runner to hang over the side. If you don’t want your runner to hang, the length of the table plus around 3 inches for the seams will be fine.
- Fusing tape
- Scissors or Rotary Cutter
- Measuring tape or ruler
- Burlap ribbon or any other decorative touches you want to add
- Iron
How to Make Your Burlap Table Runner

1. Calculate the Measurements
Determine what length and width you want the runner to be. I wanted my runner to sit centered on my kitchen table with enough space so that plates wouldn’t touch it. I decided a 15 inch wide would be perfect and added on 2 inches on each side for the seams. So in total, I cut my fabric to a width of 19 inches.
My table is only 5 feet (60 inches) long and I wanted the fabric to hang over the edges so I added 8 inches to each end for the overhang plus an addition 2 for the seam allowance. So in total my runner was 60 + 8 + 8 + 2 +2 = 80 inches long. There’s no wrong way to measure this, just do whatever works for you and your table!
2. Cut & Hem the Burlap Fabric
Cut the length and width of the fabric. I like to use a straight edge and a rotary cutter (I use this exact set) to get a really clean edge but a good sharp scissors works just as well.
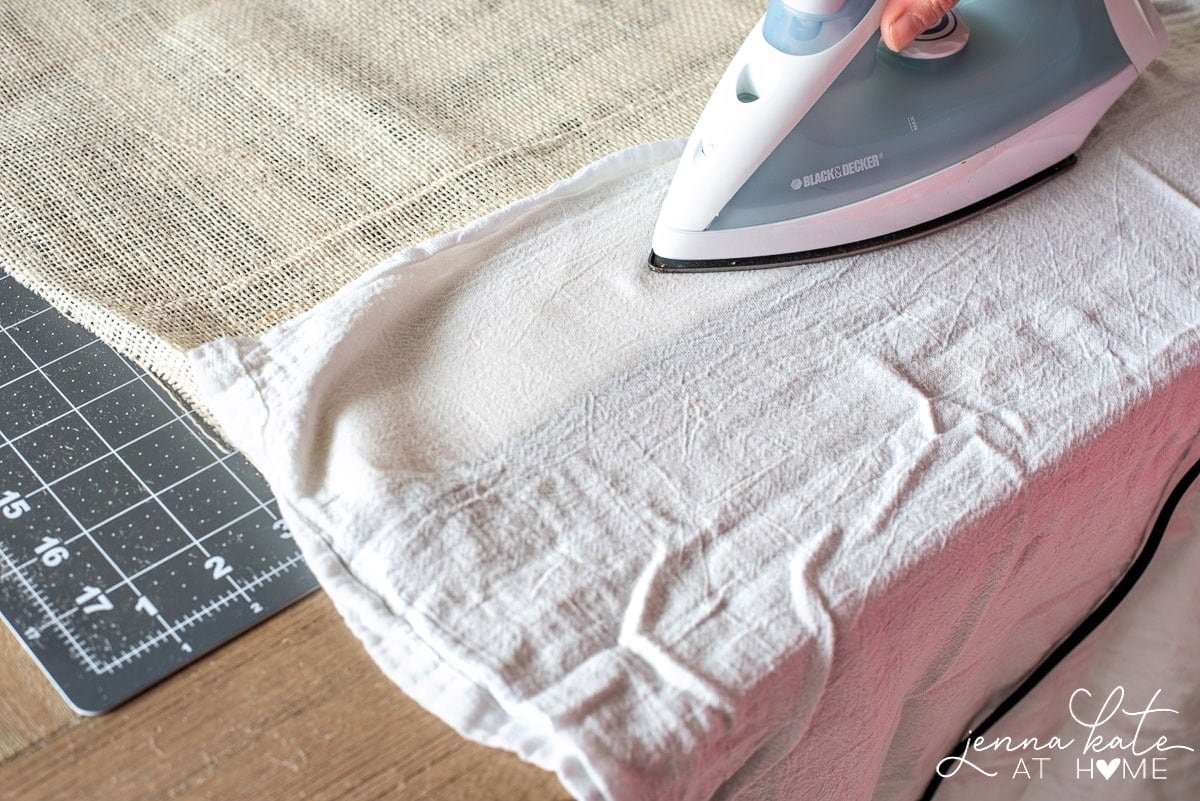
Create a hemmed edge on the long sides of the fabric first. Simply fold over the fabric to create a hem approximately 1.5 to 2 inches wide.
3. Fuse & Iron the Edges
With a tea towel on top, iron down the crease. Cut your fusible tape to the length of the side. Tuck the fusible tape inside the hem.

With the tea towel over the fabric, press the hot iron down for about 8 – 10 seconds on each spot to adhere the hem.
Repeat for the opposite side of the runner.

The process for the short sides is the same, except before you iron it down, cut the extra bit of corner fabric at a diagonal so that it’s not all thick and bulky. This also gives you a nice clean edge that looks professional.
I have heard of different bonding methods to use, but I found the fusible tape to be the easiest and most reliable for a secure hold. If you can’t find it, or prefer not to use it, mod podge and a good quality fabric glue should work fine.
I would stay away from using a glue gun, as it gets messy and a bit dangerous due to the hot glue seeping through the burlap holes.
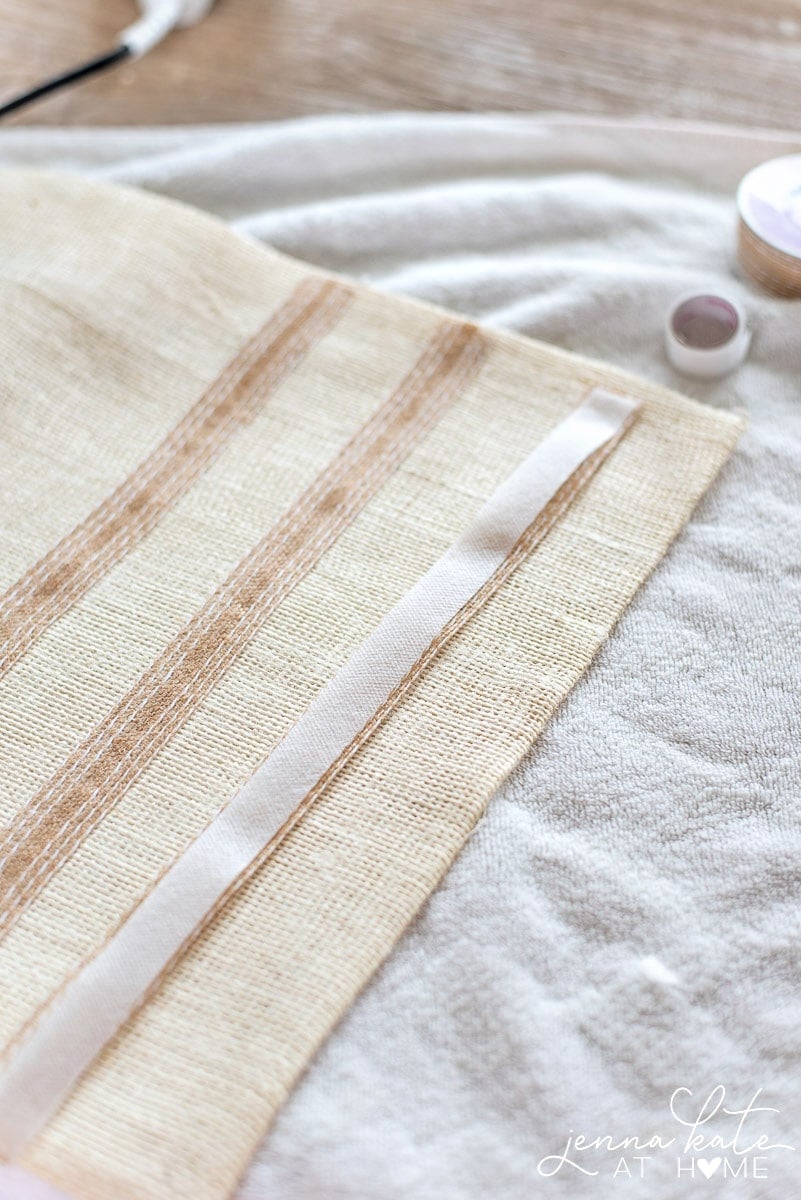
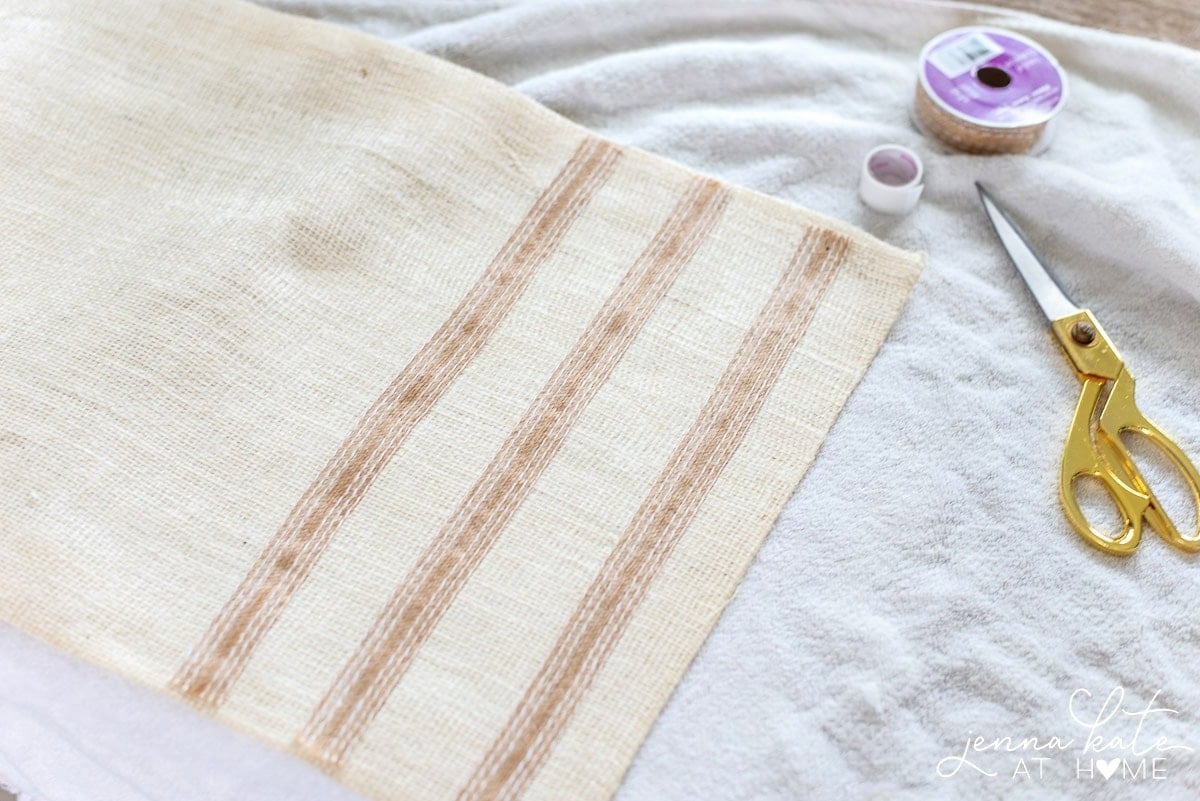
4. Add Embellishments to Your Table Runner
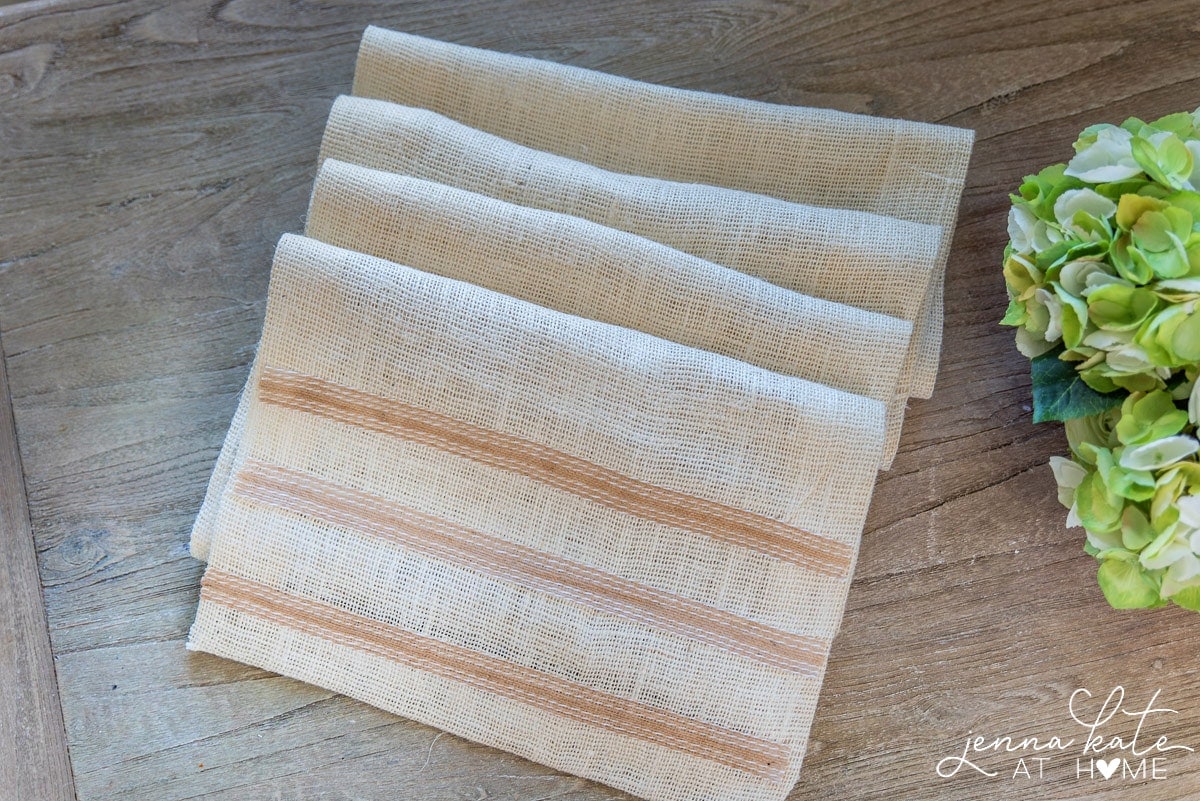
Finally, add the decorative touches to the end of the runner. I chose a burlap ribbon with white stitching. I cut each piece the same width as the runner, ran the fusing tape along the back and ironed it down.
And that’s it – a super easy DIY burlap table runner that required no sewing!

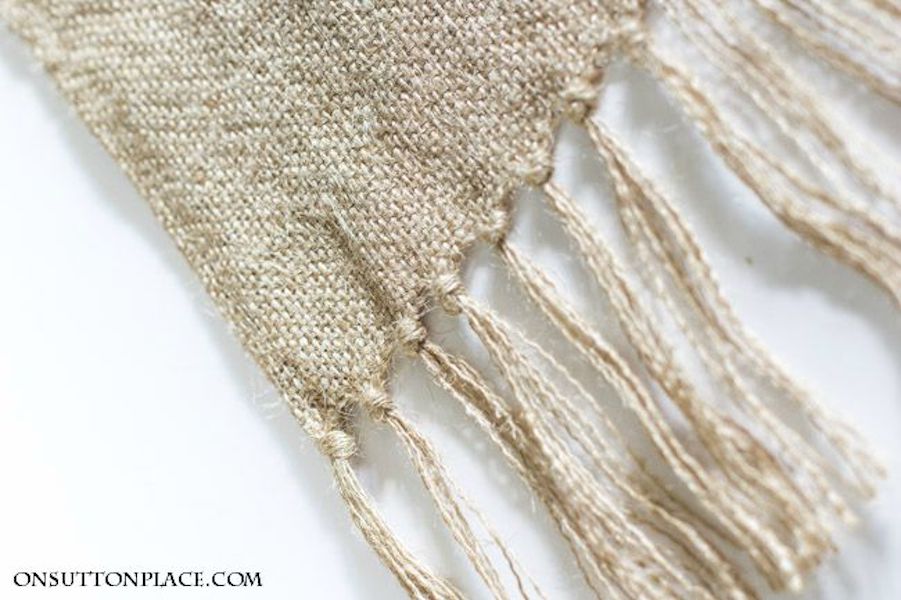
Optional Fringe
Another fun way to dress up your new sew burlap table runner is to add a little fringe to the ends. If you’re going to do this, take into account how long and where you want the fridge to start in addition to any ribbon you may be adding as well.
Instead of fusing the shorter sides together, simply pull the threads out until they fringe is about 6 inches long. Next, tie off 7-8 strings together into knots to hold them in place.
How to Clean a Burlap Table Runner
While some people throw their fabric in the washing machine before they begin a project like this, as long as it doesn’t have an extremely strong odor (as some burlap does), there is no need to prewash your fabric.
Once you have created your DIY table runner, if you happen to get a food stain on it, I recommend soaking it in a tub of cold water with a small amount of dish detergent. Let it air dry and then place a tea towel over it before you iron out the wrinkles.
Final Thoughts
I like the simplicity of the runner on my farmhouse style kitchen table and chose to only place my favorite faux hydrangeas up there. Of course, you can feel free to adorn it with all your favorite fall decor – or just let the pretty runner speak for itself!
If you have a sewing machine, by all means bring it out, but this super easy project is perfect for anyone who wants to add their own touch to their dining room table with ease.
And if you have extra fabric left over, why not make a simple DIY burlap wreath as well?!

No Sew DIY Burlap Table Runner
Don't feel like pulling out your sewing kit? Grab a scissors and fusing tape and make some magic with an iron to create your DIY burlap table runner!
Materials
- Burlap fabric
- Fusing tape
- Burlap ribbon or any other decorative touches you want to add
Tools
- Scissors or Rotary Cutter
- Measuring tape or ruler
- Iron
Instructions
- Determine what length and width you want the runner to be. I wanted my runner to sit centered on my kitchen table with enough space so that plates wouldn't touch it. I also wanted the fabric to hang over the edges so I added 8 inches to each end for the overhang plus an addition 2 for the seam allowance.
- Cut the length and width of the fabric. Create a hemmed edge on the long sides of the fabric first. Simply fold over the fabric to create a hem approximately 1.5 to 2 inches wide.
- With a tea towel on top, iron down the crease.
- Then, cut your fusible tape to the length of the side. Tuck the fusible tape inside the hem.
- With the tea towel over the fabric, press the iron down for about 8 - 10 seconds on each spot to adhere the hem to the tape.
- Repeat for the opposite side of the runner.
- Follow the same steps for the short sides, except before you iron it down, cut the extra bit of corner fabric at a diagonal so that it's not all thick and bulky.
- Finally, add the decorative touches to the end of the runner with fusing tape and your iron.
This is beautiful and perfect for any season! Bonus that no sewing is needed! XO
Aw love this! I am a FAN of no-sew. I’ve tried so many times and am a total lost cause on a sewing machine. Haha! Cute!
haha I’m with ya! I can just about sew a straight line but not much else!!
this is so pretty and that fabric with the burlap ribbon is perfect!
Thanks so much, Kristin!
I love neutrals so this is right up my ally!! Gorgeous texture and the stripes are so pretty! Happy Fall!
Thanks Heather! The stripes are my fave part :-)