Content may contain affiliate links. When you shop the links, I receive a small commission at no cost to you. Thank you for supporting my small business.

Is there anything prettier than a festive window box at Christmas? Maybe one thing – a festive window box at Christmas covered in snow!
This time of year, swap out those mums for a Christmas inspired window planter box. This easy tutorial will yield gourmet boxes that echo a classic Christmas vibe.
Assembling winter window boxes is really easy to do. Once everything has been gathered, it’s simply a matter of layering them into the box for the holiday season!
Today I’ll walk you through how we transformed the outside of our home with these DIY Christmas window decorations! These planter boxes were just the ticket for bringing the holiday spirit to the front of our house.
Why Decorate your Window Box for Christmas?
Especially if you live in colder climates, it’s going to be impossible to keep your real plants alive during Christmas time. Chances are, your flowers are starting to wilt or your box just looks a bit bland by now. In this display, we use a combination of faux plants and seasonal greens for an easier to maintain box!
In addition, if your house already has attached window boxes , utilizing them can be all the Christmas decor you need for the outside of your home. Talk about money and time saving!
Spending a few minutes giving a festive feel to your window boxes will totally improve the appearance of your home this winter season.
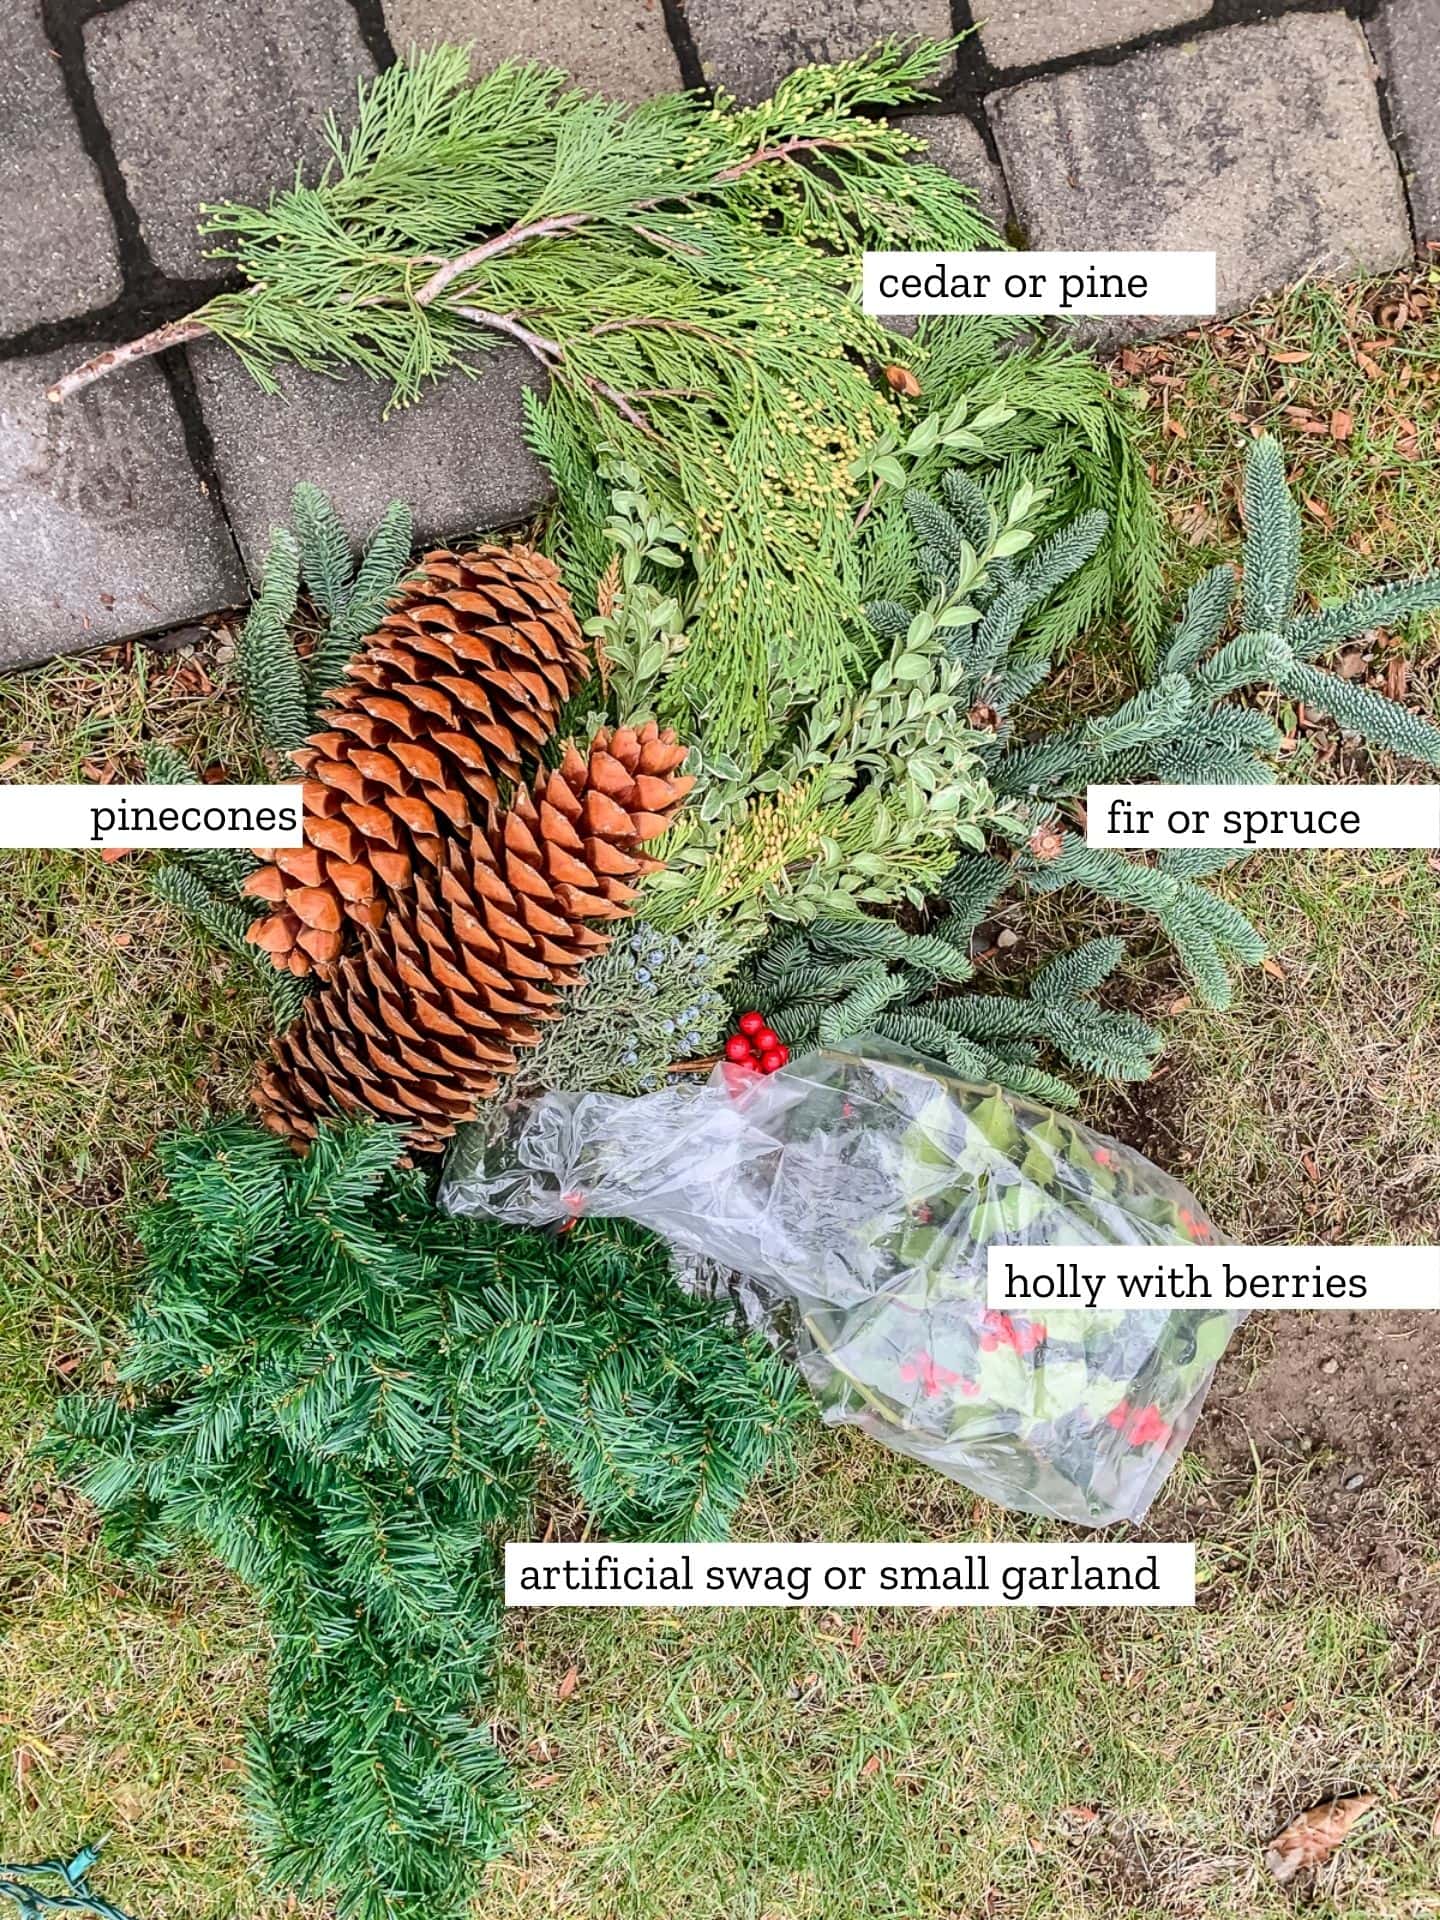
What You’ll Need
These are not hard and fast rules, so pick and choose your greenery based on what’s available at your local garden center or what you can clip from your own yard. For mine, I used a $7 swag bundle from my local Farm Stand as well as some large pine cones, holly with berries and some other clippings from my yard to fill it out.
As a base, you’ll want to use some cheap artificial greenery, like the type used for swags or garland. This bulks up the bottom of the window box so that you don’t need nearly as much greenery.
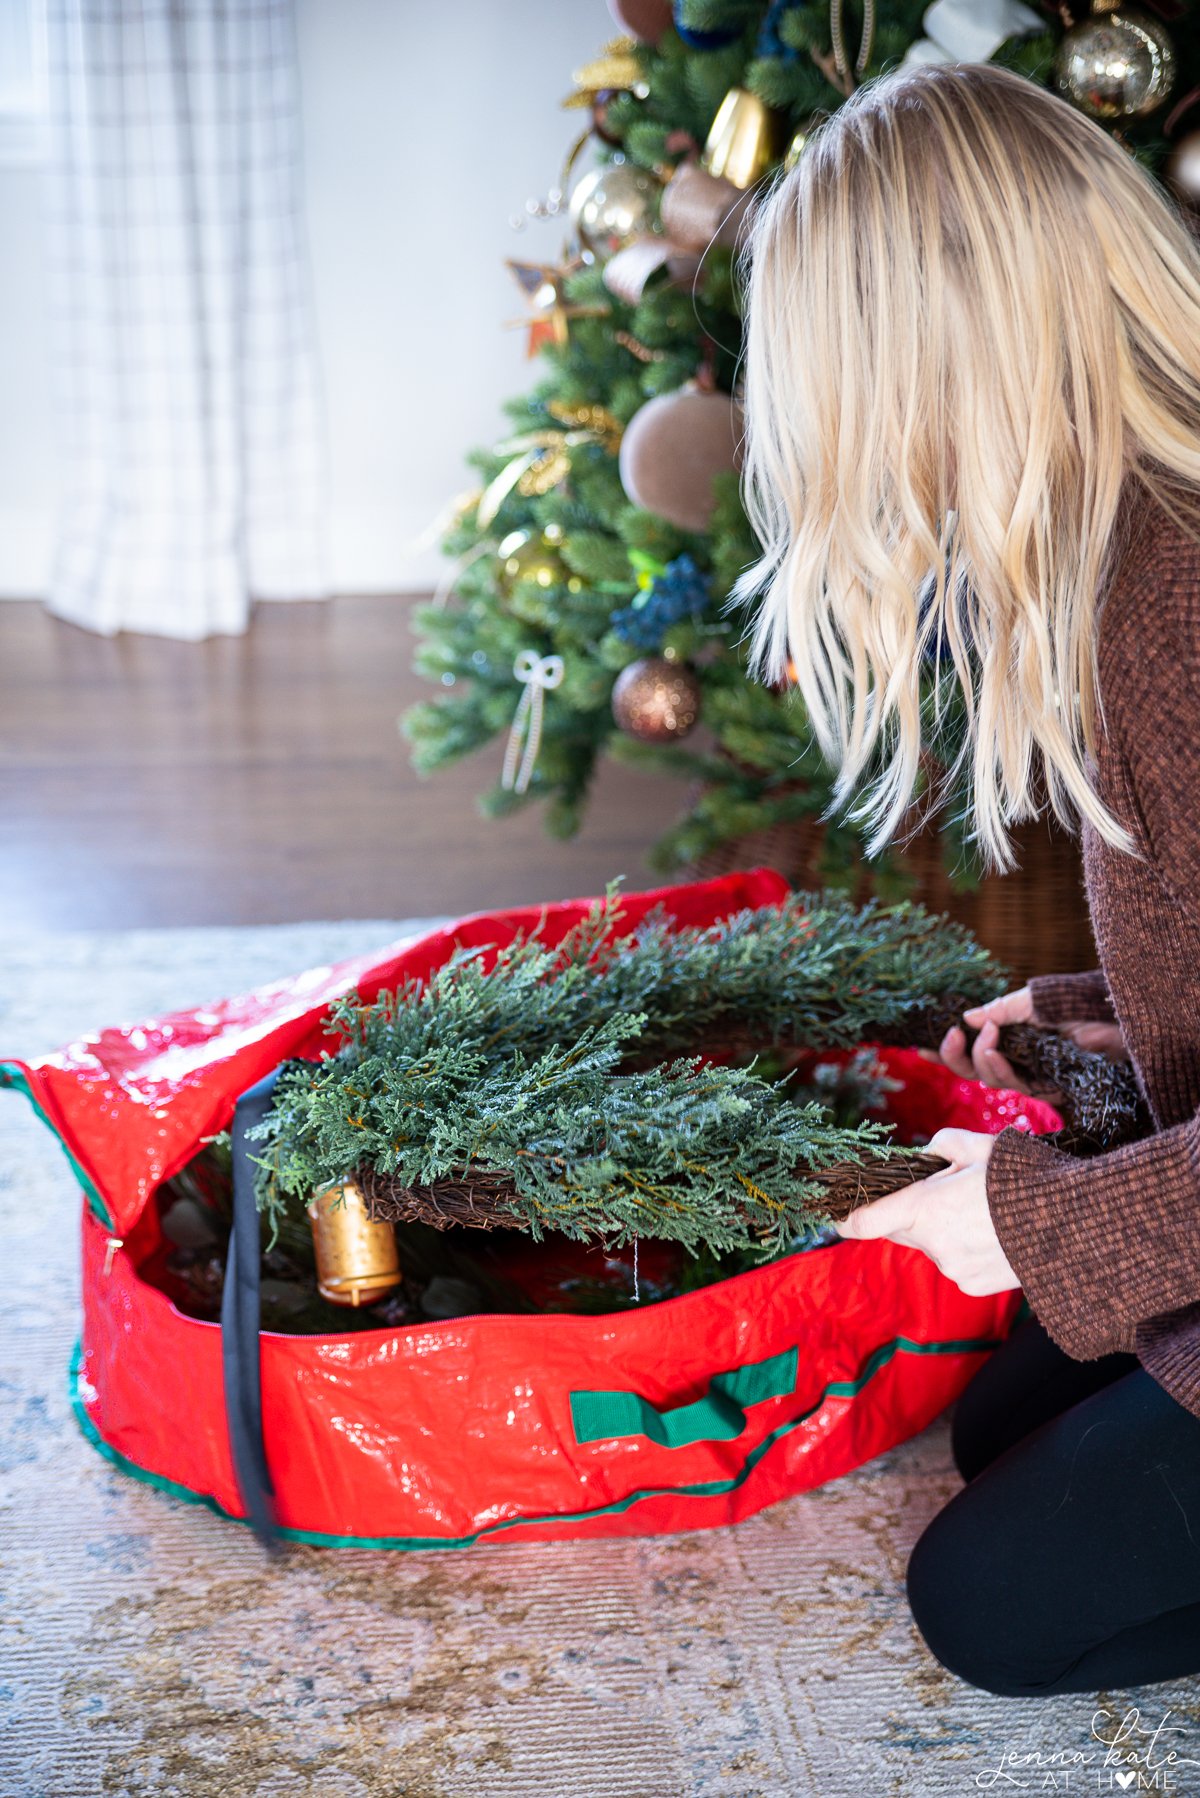
Side note: The window boxes I’m using are attached to my house with brackets, so they are removable. They are heavy with the dirt in, so we actually leave them up year round and just swap out the plantings as needed. They are self-watering, vinyl and very sturdy. We’ve had them for 4 years and have been very happy with them.
Assembling the Christmas Window Box
Once you’ve selected the greenery you will use and gathered a few small accents like pinecones and berries, you’re ready to get started. Follow these easy steps to start spreading the holiday cheer!
1. Remove Flowers and Plantings
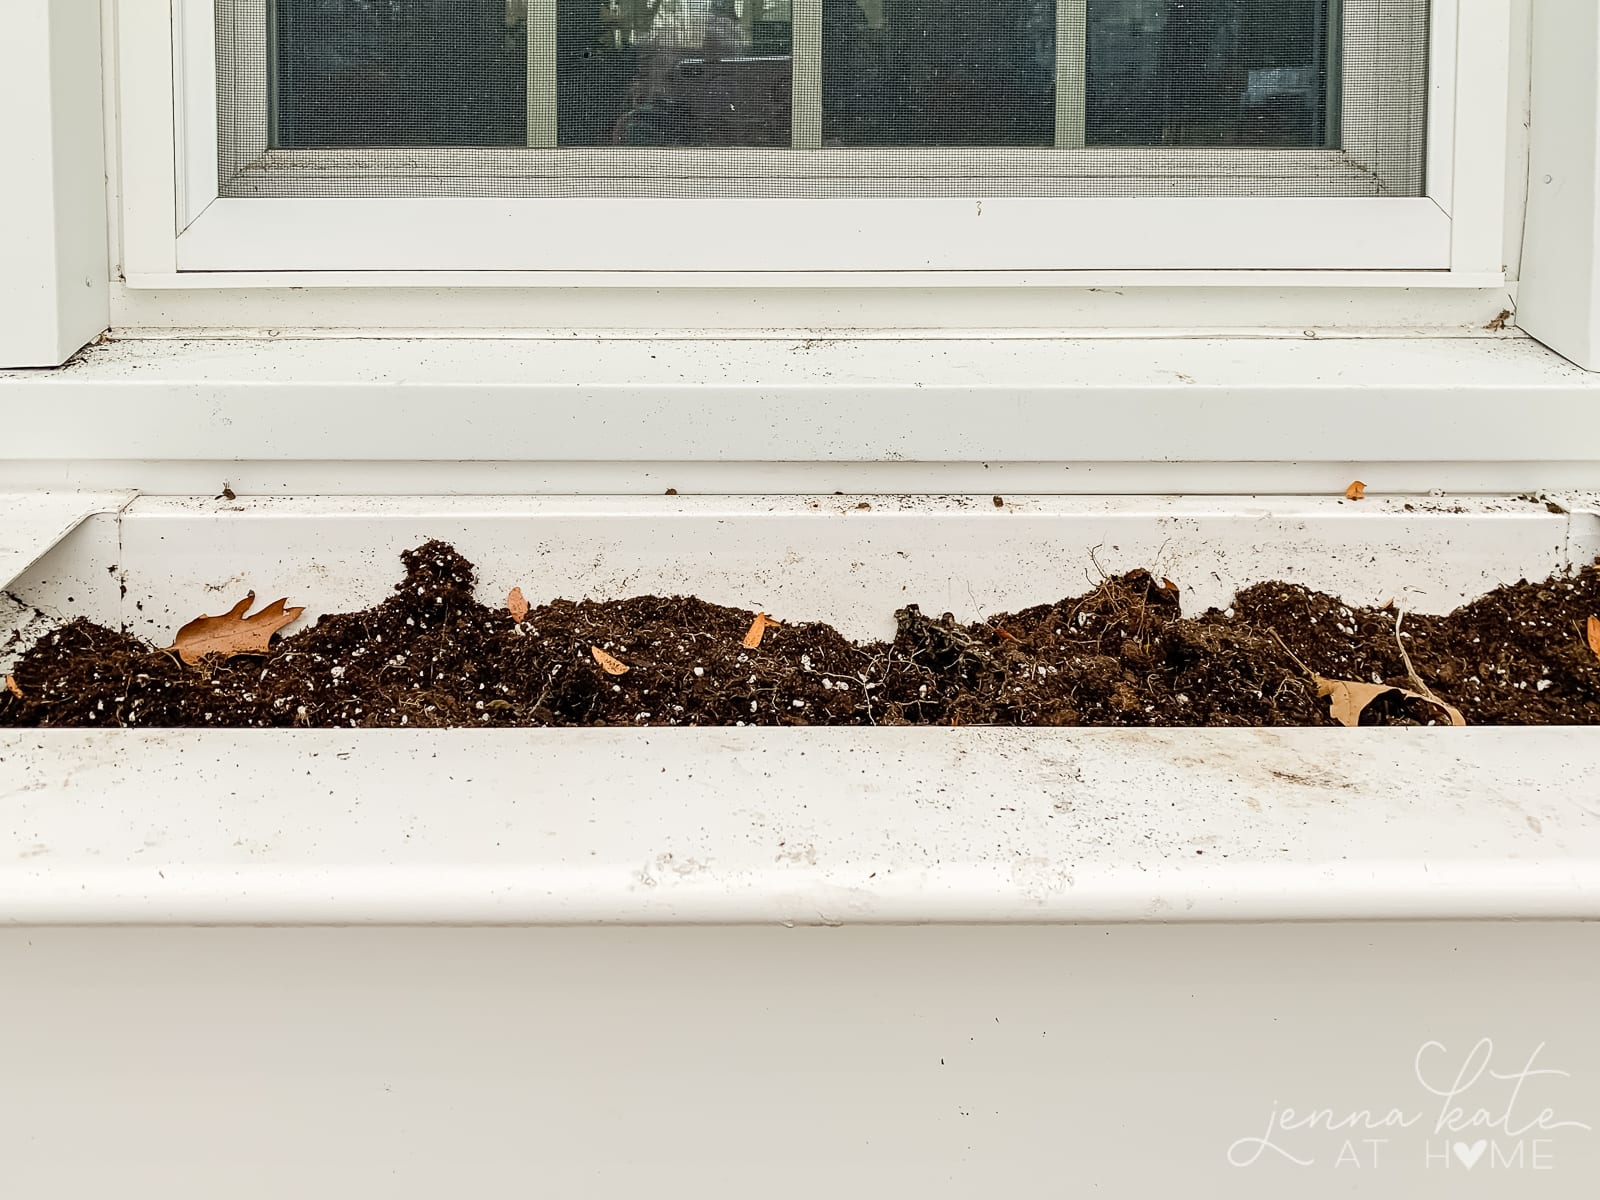
First things first, you’ll need to clear out any old plants or dead flowers hanging out. Once you are down to the soil, you can move on.
2. Base Layer of Greenery

Starting towards the back of the box, put the base layer of faux greenery along the bottom, shaping it so that it’s not completely flat. Use the faux branches to cover the dirt completely and add a bit of height to the winter window planters.
This step is really just to add some “fluff” so don’t overthink it or be too precise.
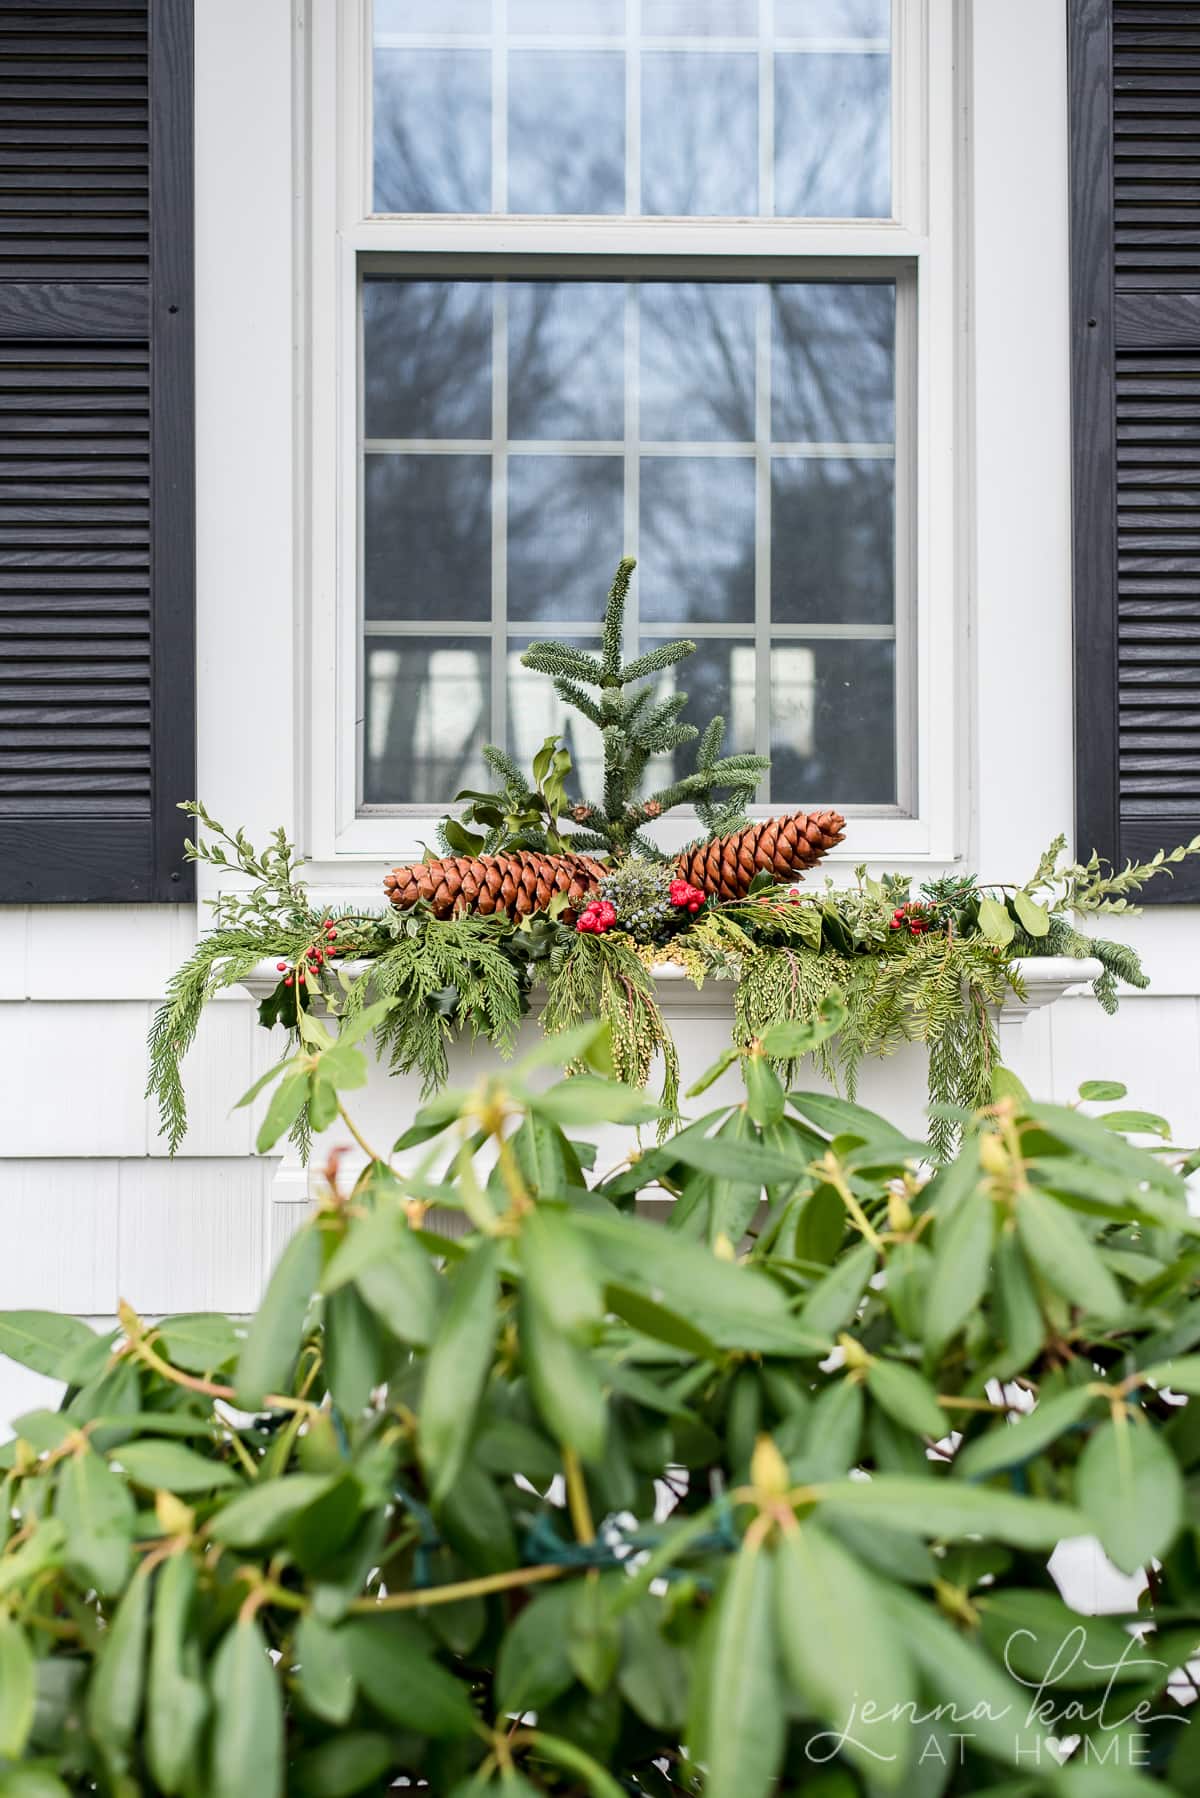
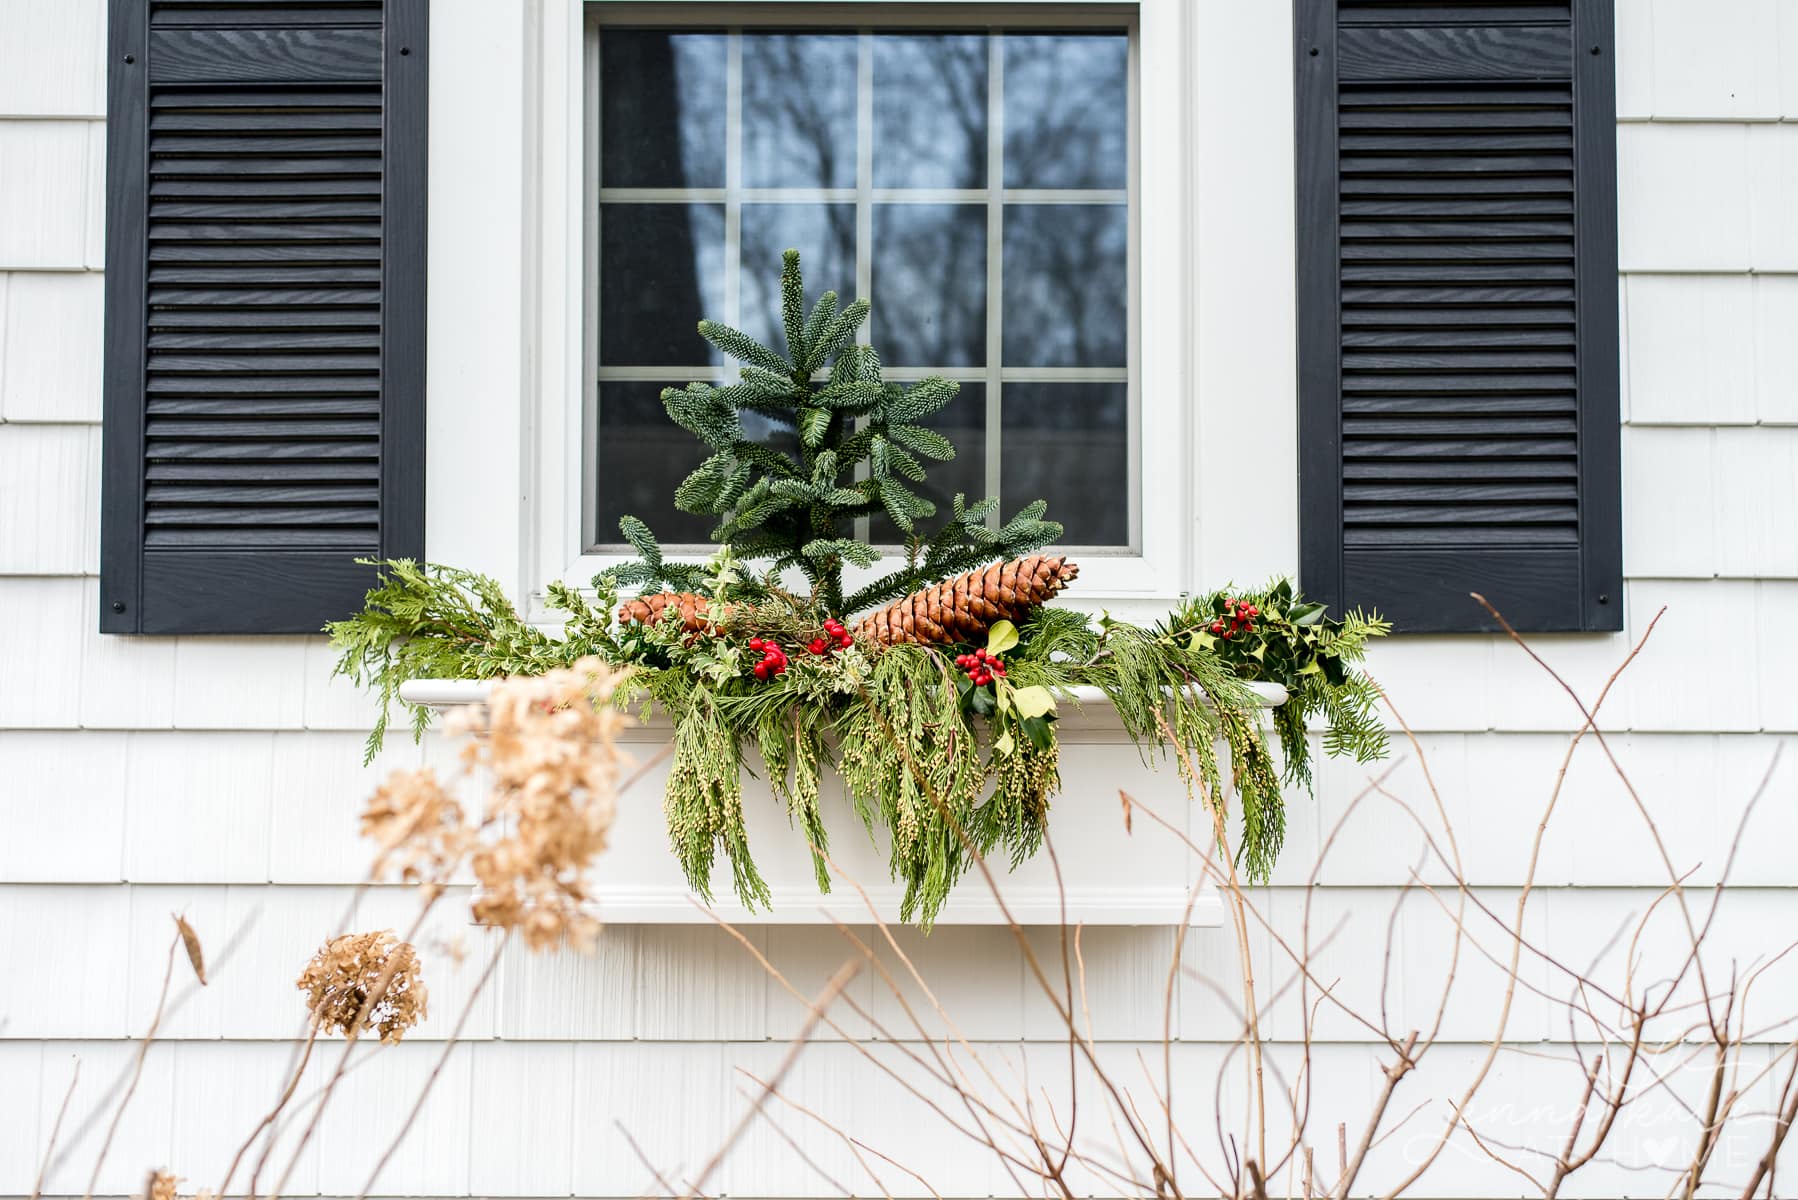
3. Add Draped Greenery
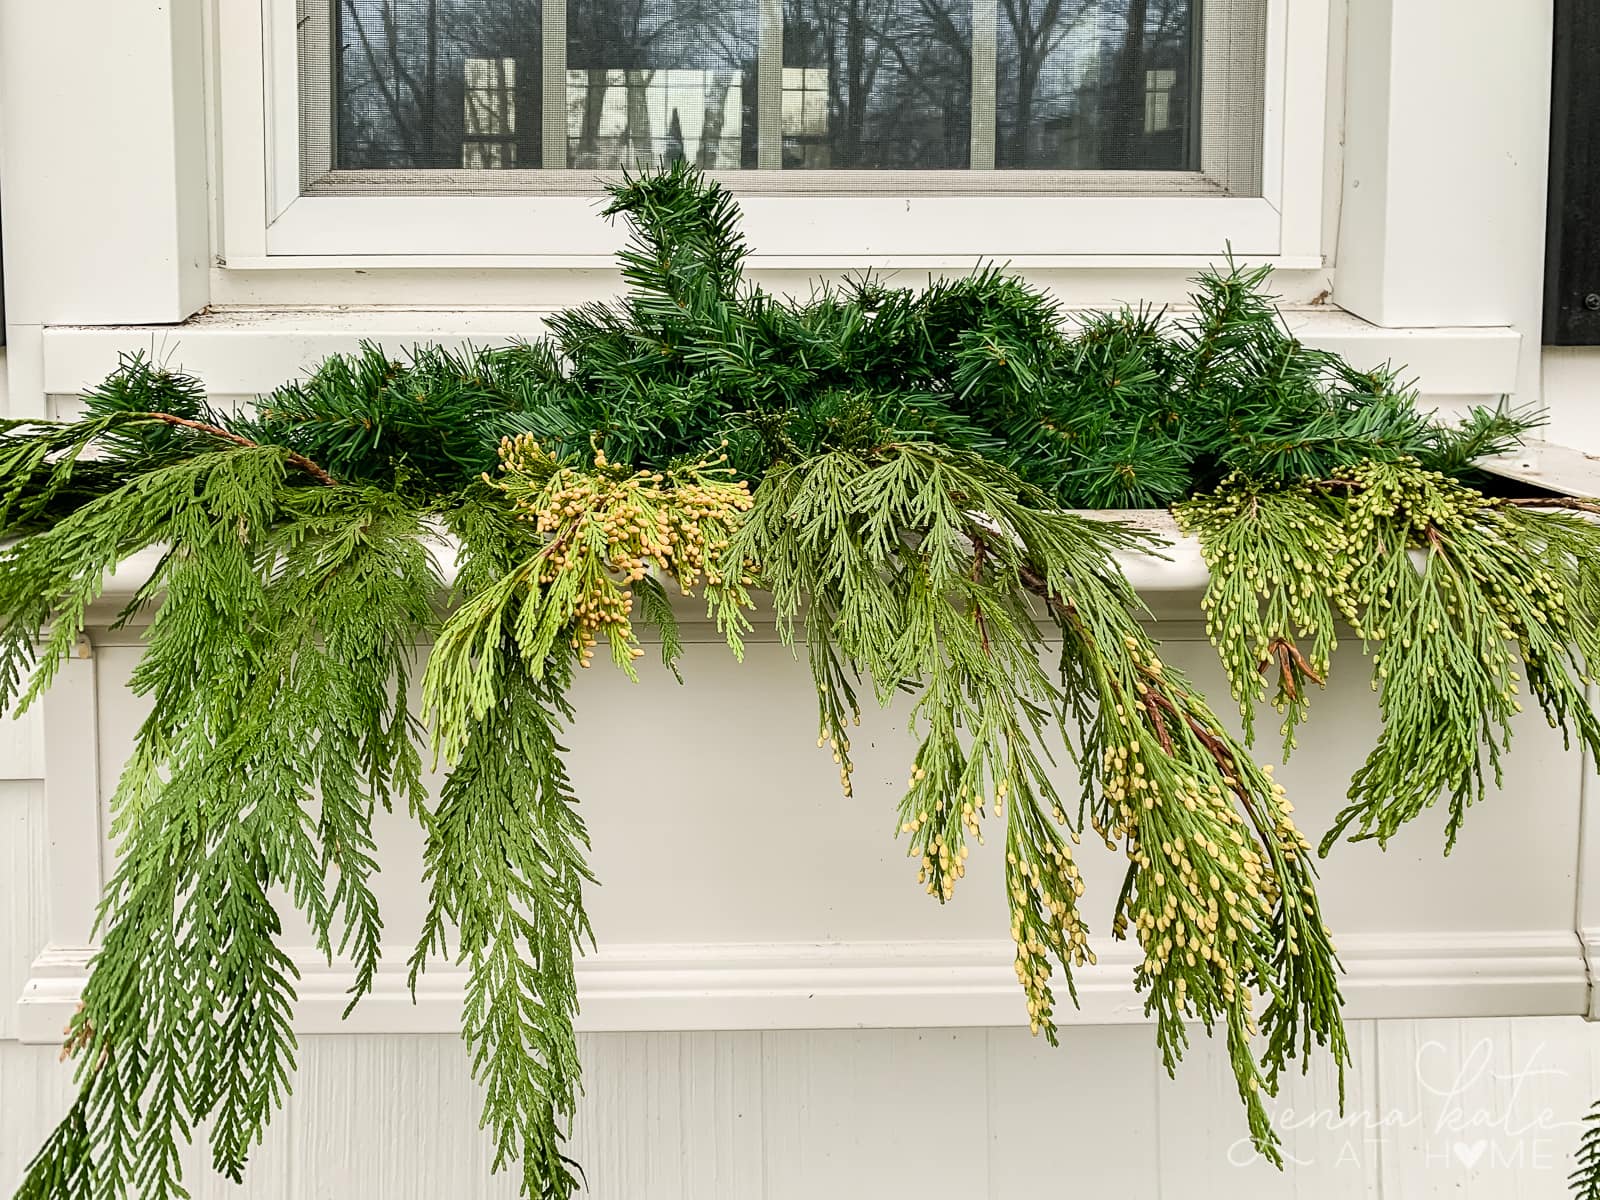
Next, you’ll add in the draped greenery right at the front of the box. Cedar or pine branches work well to get this pretty draping effect over the front of the window box.
Stick the branches right into the dirt so that they are secure. The last thing you want is them falling out!
4. Add Height
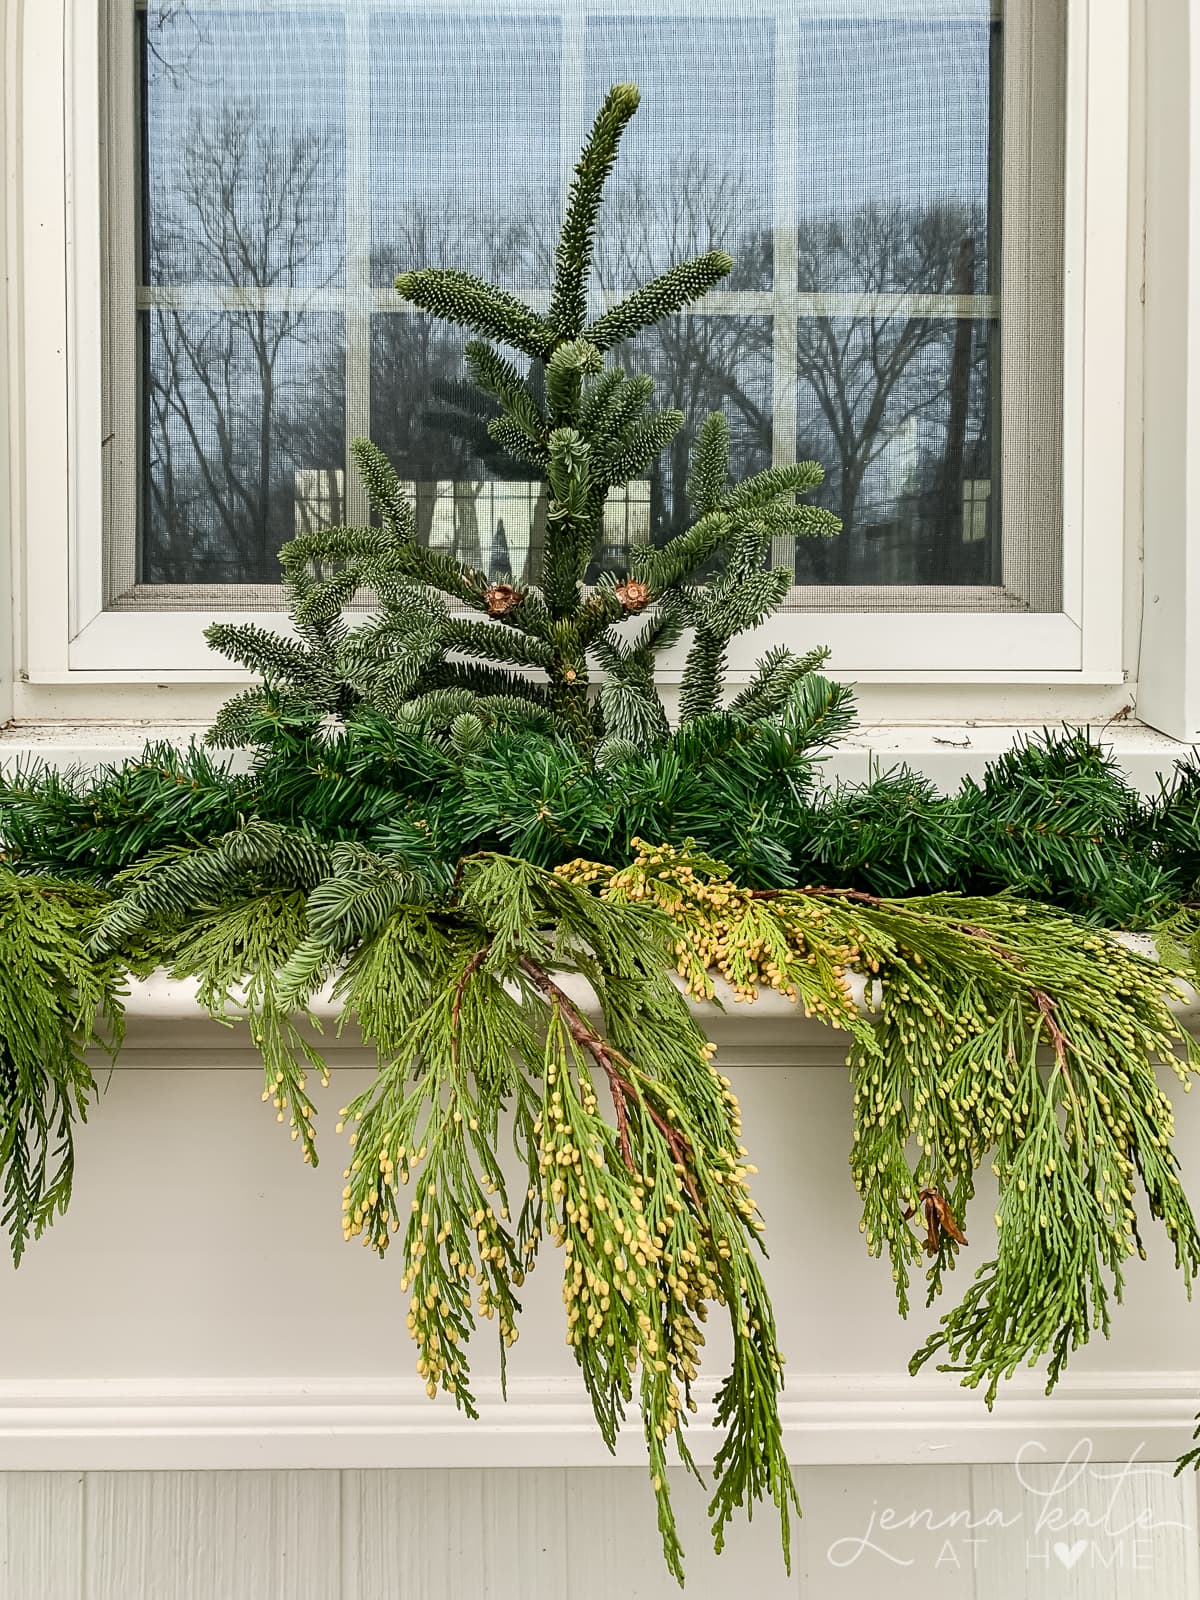
Add height with a stiff branch like a piece of fir or spruce. Basically, a piece that looks like the top of a Christmas tree. You could also add in 2 – 3 skinny birch logs in front of this, but I couldn’t find any that were small enough.
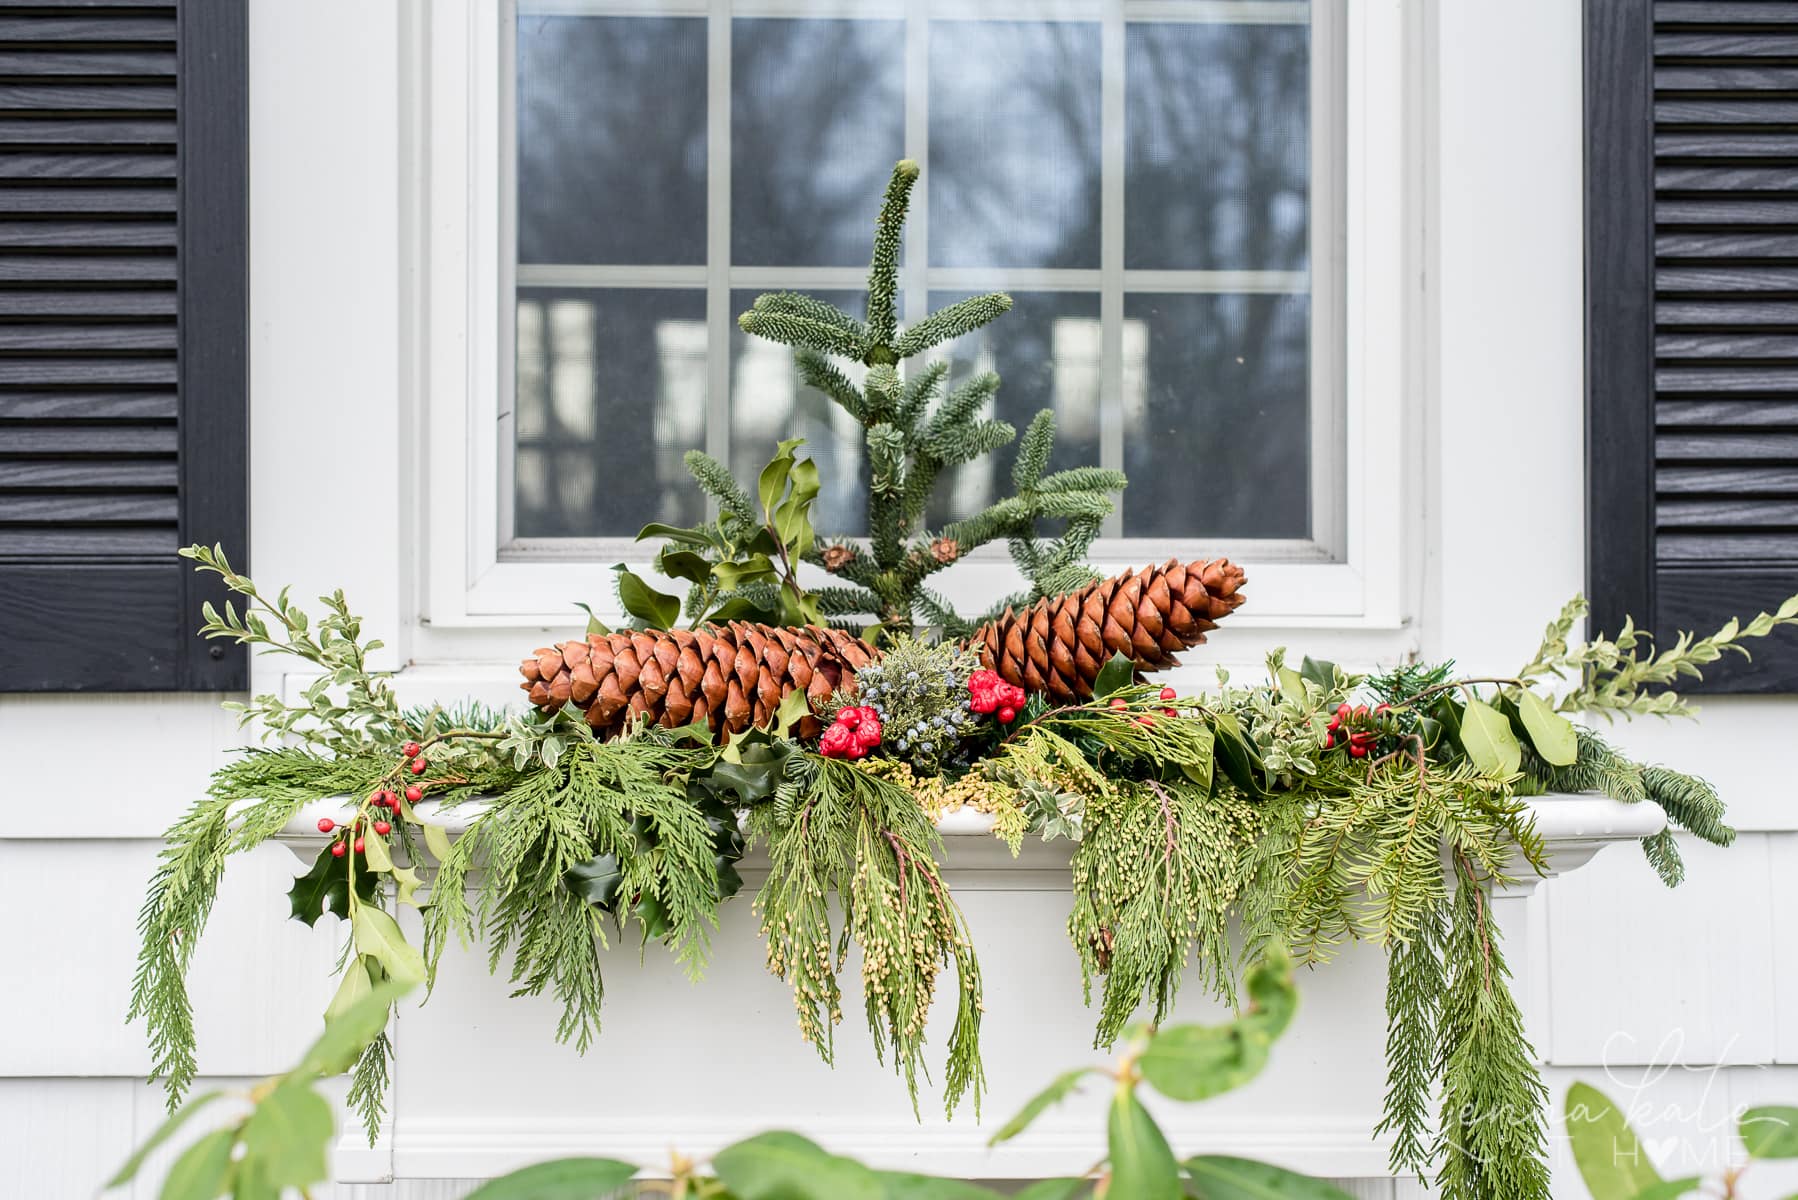
5. Layer in Berries and Pinecones

Layer in the large pinecones and berries to add a pop of color. My swag bundle came with faux red berries as well as juniper berries. If you don’t have any, holly berries work for this step, too. The red accents from the berries are truly one of my favorite parts, so don’t skip out on adding some color!
6. Fill in Gaps

Fill in any gaps with the holly and any other evergreen clippings you might have, until the window box looks full (magnolia leaves work great for this!). Once you are satisfied with the overall look, step back and admire your work.
I haven’t added holiday lights to my window boxes, but a string of battery operated outdoor twinkly lights (on a timer) would also be a really stunning holiday look!
And there you have it! These Christmas window boxes add such a lovely dose of color to the outside of your home, especially in the dead of winter. As beautiful as all the green is, I can’t wait for it to be dusted with snow this Christmas season!

Has this inspired you to add some Christmas cheer and decorate your window boxes for Christmas? Don’t leave the sad looking, frost-bitten mums in any longer! Swap them out for a festive look like this and your curb appeal will thank you!


DIY Christmas Window Box Arrangement
Materials
- Fresh seasonal evergreen swag, with cedar, fir and berries
- 2 large pinecones
- Bunch of holly with berries
- Additional evergreen clippings (cedar, pine etc.) as filler
- Artificial garland for the base
Instructions
- Start with the window box with all existing planters removed, but dirt still there.
- Create a base layer with the artificial garland. Fluff and shape it so that it fills out the bottom of the window box.
- Draper cedar or pine over the front of the box, so that they drape down the front. Stick the ends into the dirt so that they are secure.
- In the back of the window box, place a tall piece of fir or spruce (anything that looks like a Christmas tree). Push it into the dirt to secure it.
- Add the two pinecones in front, then start to layer in berries for color.
- Finish the arrangement off by adding in the holly and any extra clippings to fill in the gaps.