Content may contain affiliate links. When you shop the links, I receive a small commission at no cost to you. Thank you for supporting my small business.
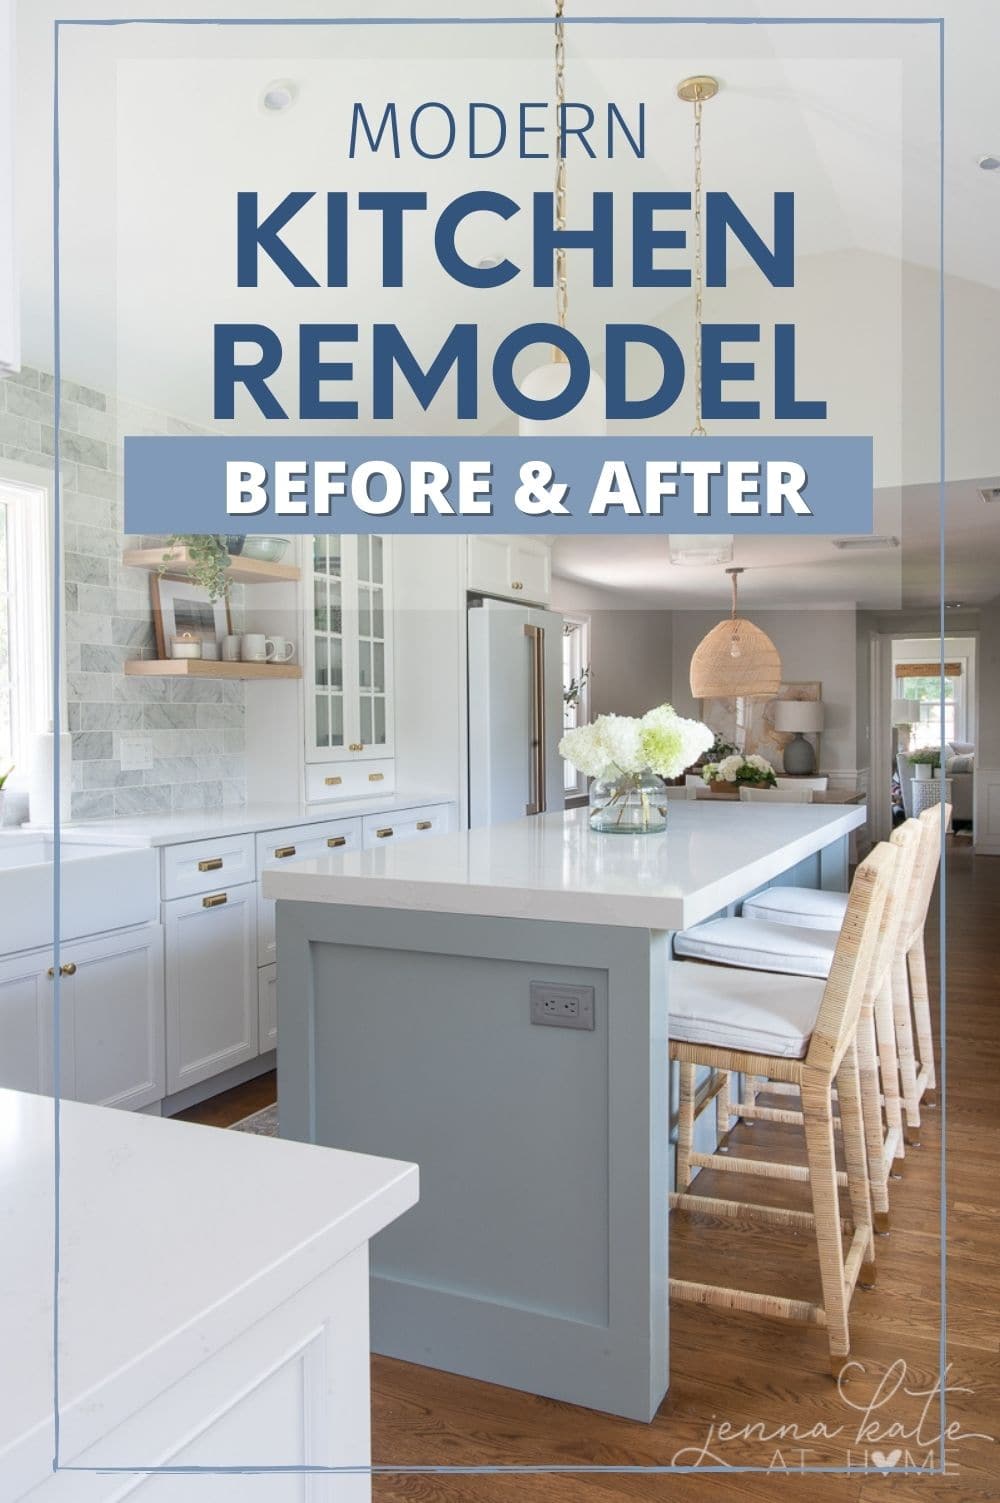
The day is finally here! After 10 weeks of eating, “relaxing” and everything in between in our living room, our kitchen remodel is finally done and we can enjoy our beautiful space.
Tears were shed during the process on more than one occasion. 10 weeks is relatively short for a major kitchen remodel, but having been told it would only take 4 -6, 10 seemed like an eternity. Not everything went to plan (including our floors having to be refinished twice and several cabinet issues), and we went a few thousand over budget as a result, but I’m so happy with how everything turned out.
Our mudroom and office were also included as part of this remodel, but I’ll share those as part of another post.
Before I start getting into all the details, I want to preface this by saying that we paid for 99% of this remodel ourselves. I was gifted a few items by some wonderful brands that I work with but we saved long and hard for the rest of it.
Before and After
When we bought this house 6 years ago, the kitchen looked like this:
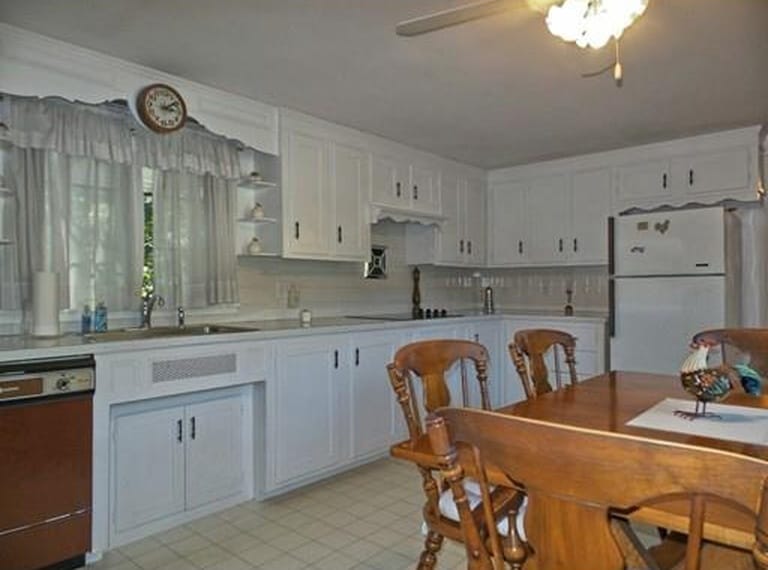
We did a few basic updates like installing new appliances, laminate countertops, updating the backsplash and flooring and even DIYing a range hood cover.

These little updates made a huge difference, but they were surface-level band-aid fixes and the kitchen’s age and poor condition were becoming all too apparent (especially after spending so much time at home over the last year!).
Fast forward to our new kitchen!!
Structural Changes
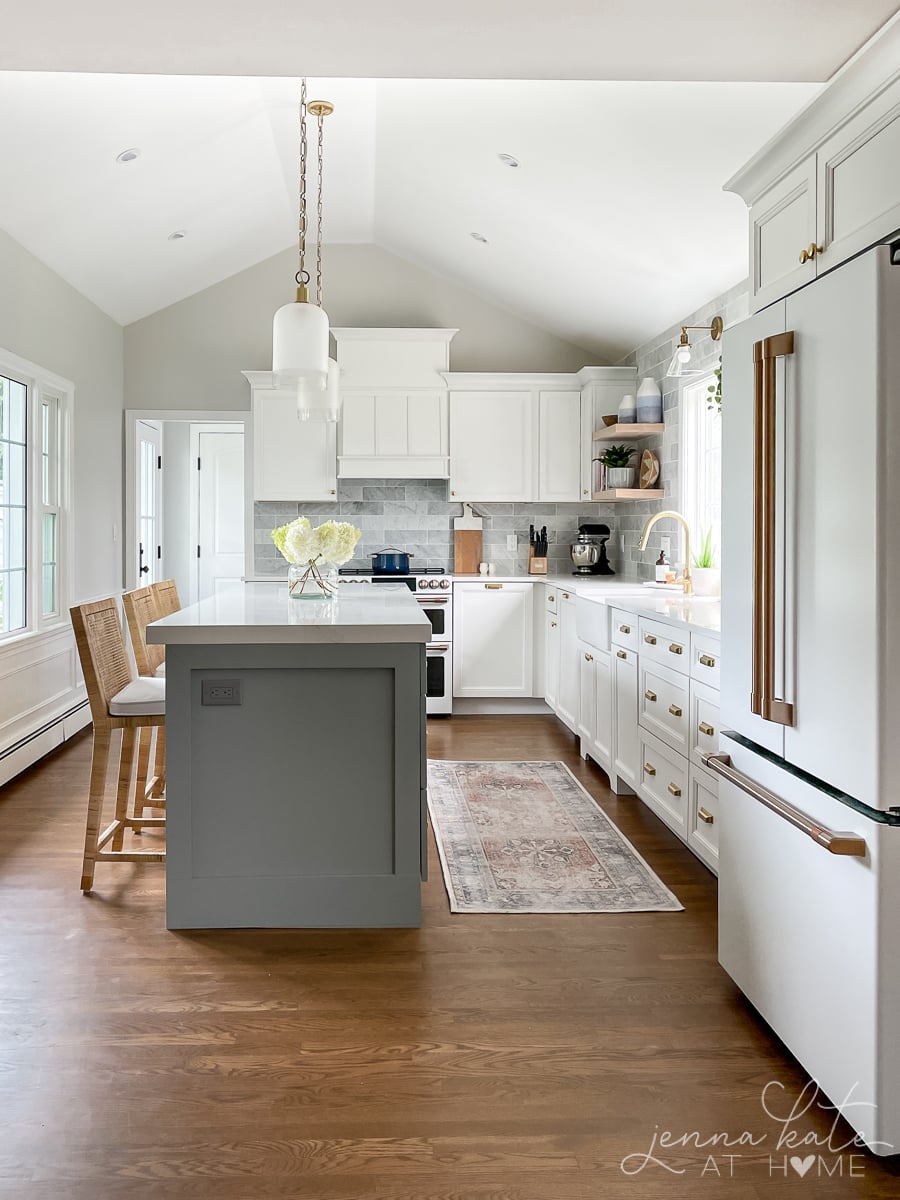
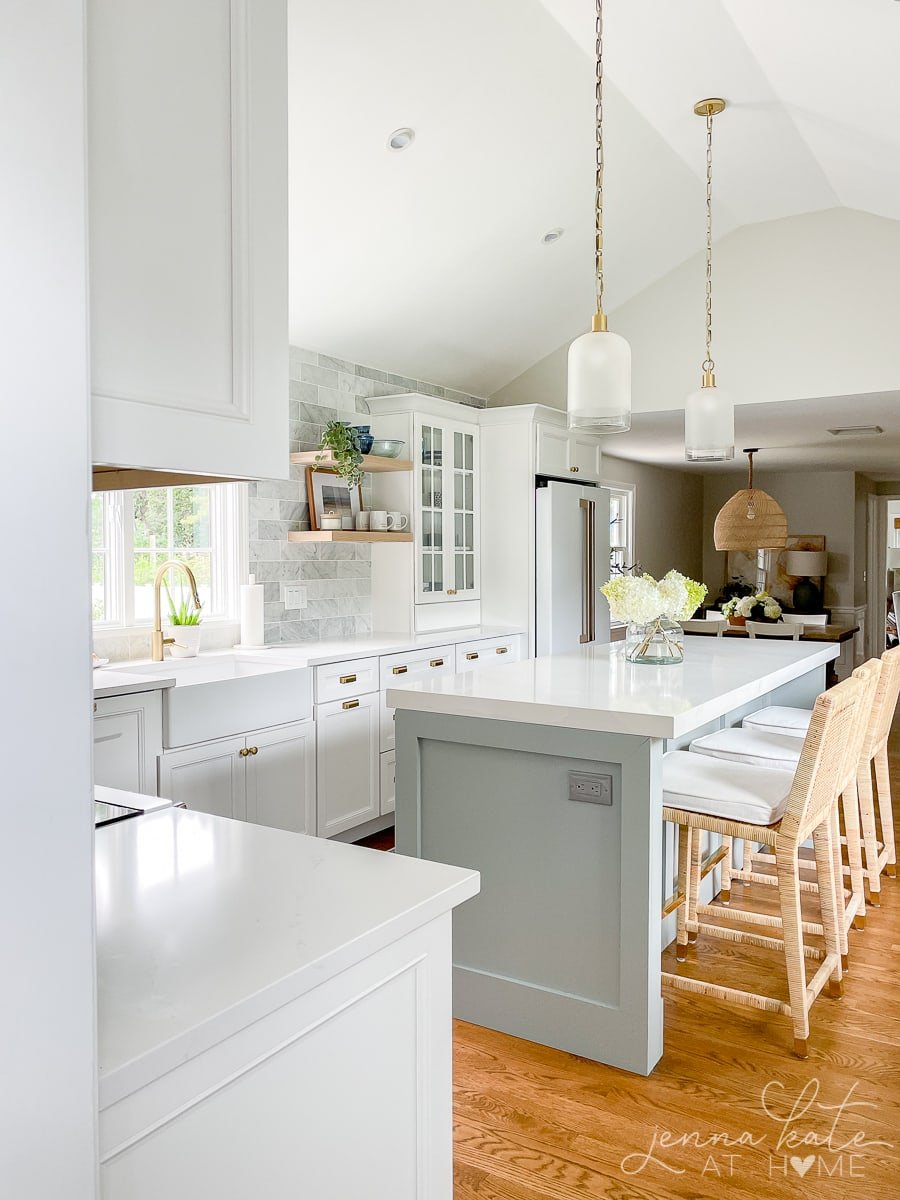
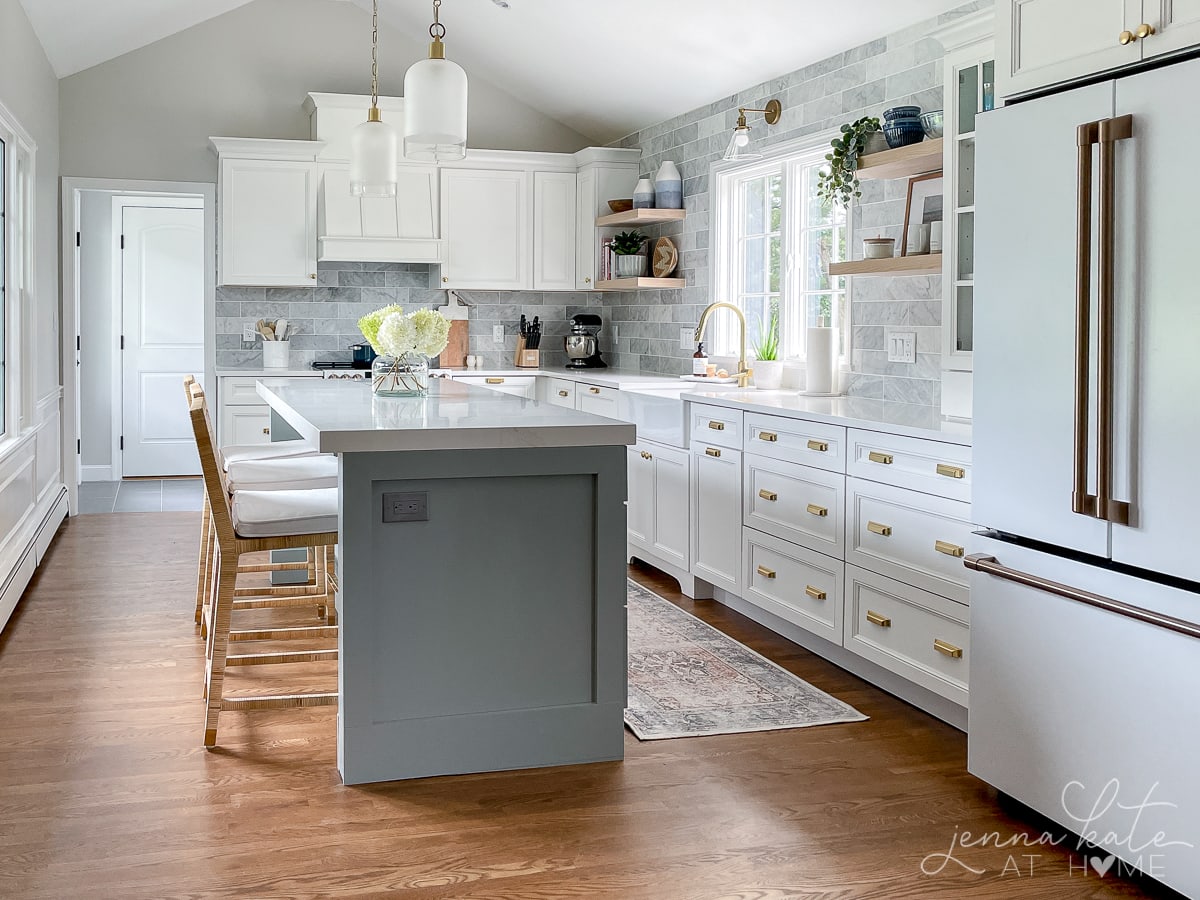
One of the biggest differences you will immediately notice is the ceiling height. We had intended on working with our 7 1/2 foot ceilings, but the electrical work was going to be so extensive that the ceiling had to be torn down anyway…so it seemed like the perfect opportunity to vault the space!
And wow, I’m so glad we did!
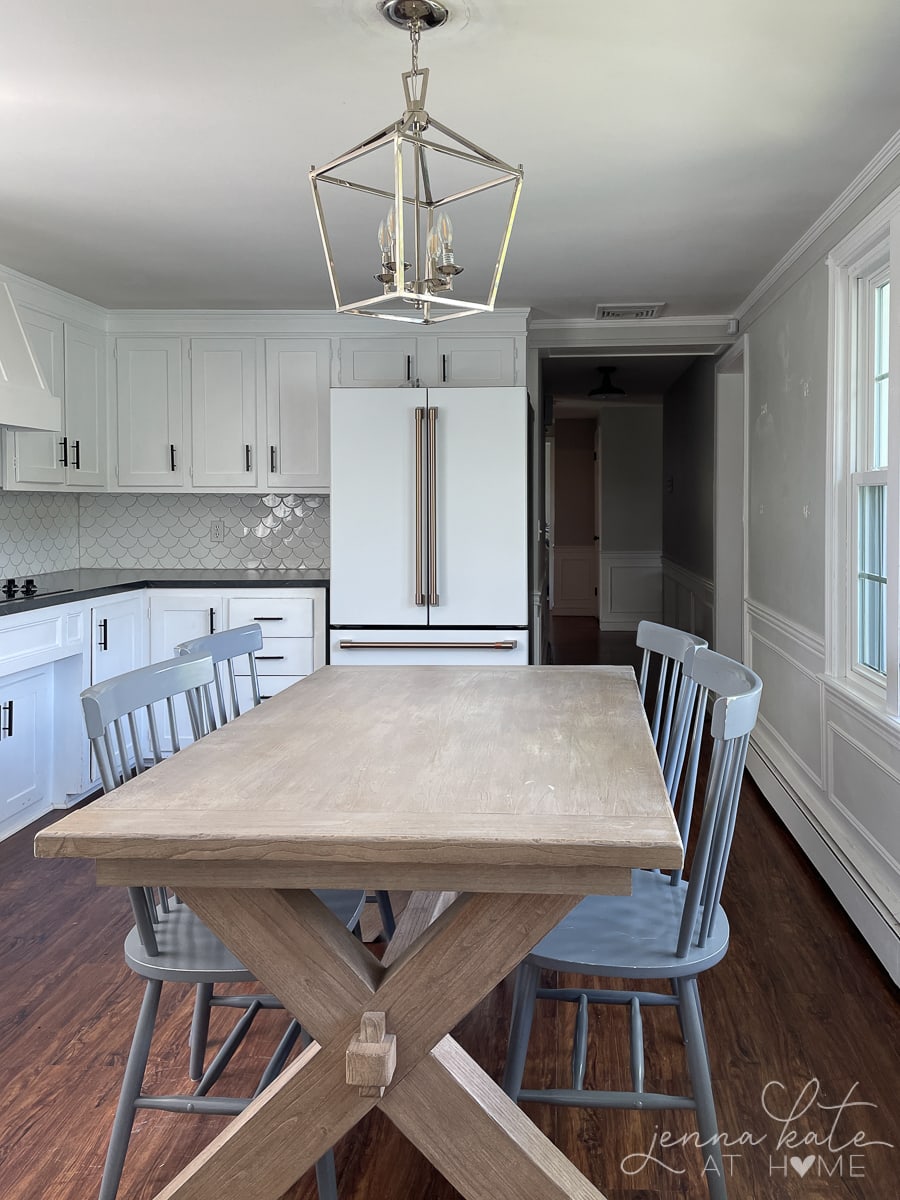
We also knocked down the wall into the old office, which completely transformed how large the kitchen feels, even though it’s still contained within the same footprint as the existing one.
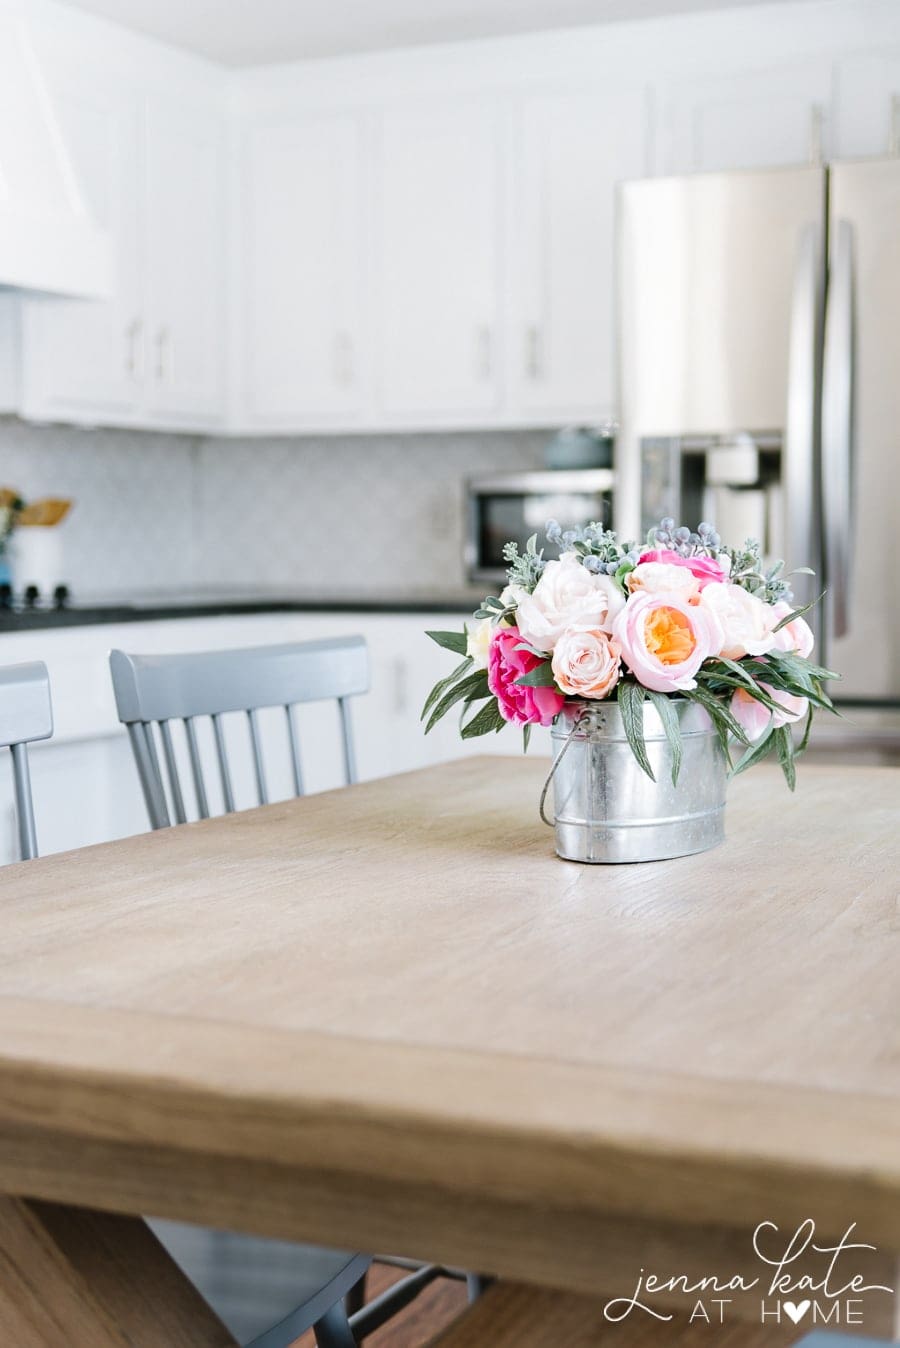
We kept our old kitchen table, and moved it into our new dining space, adjacent to the kitchen. This is where we usually eat dinner in the evening, while the island is for a quick breakfast or lunch.
I had originally mulled over some other dining nook ideas, including bumping out this space into the yard – which may happen in the future, but this works great for us for now.

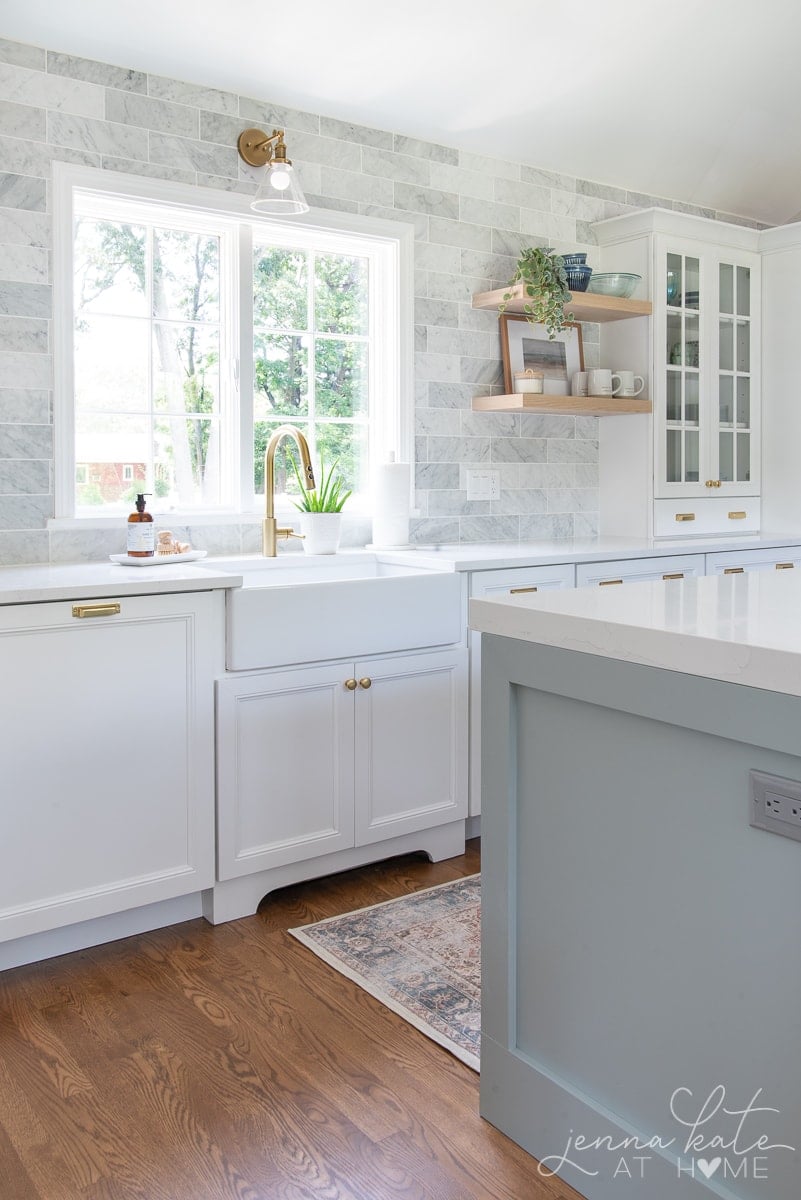
Cabinets and Sink
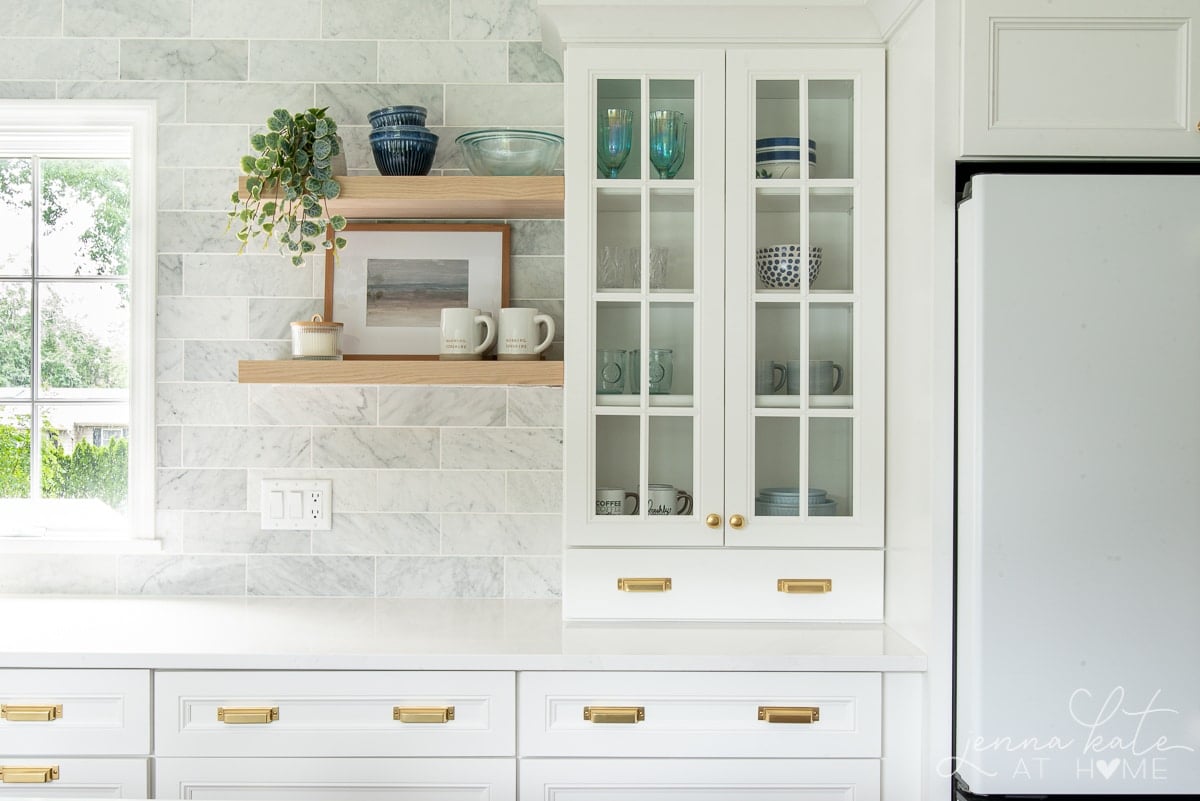
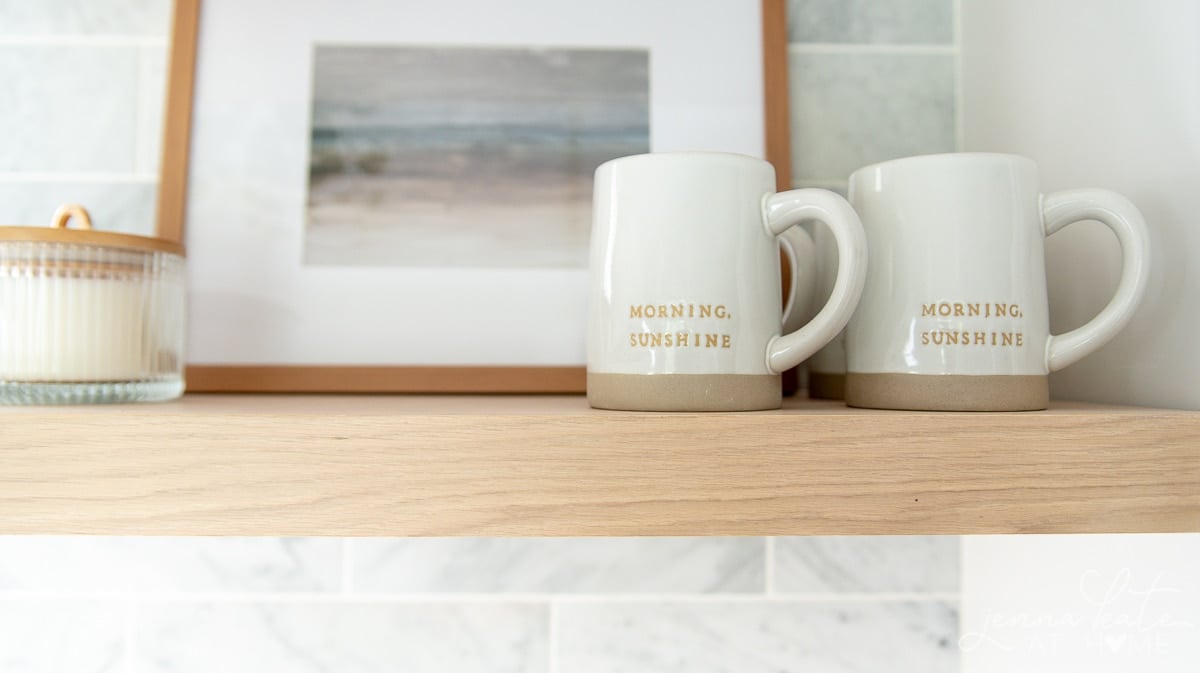
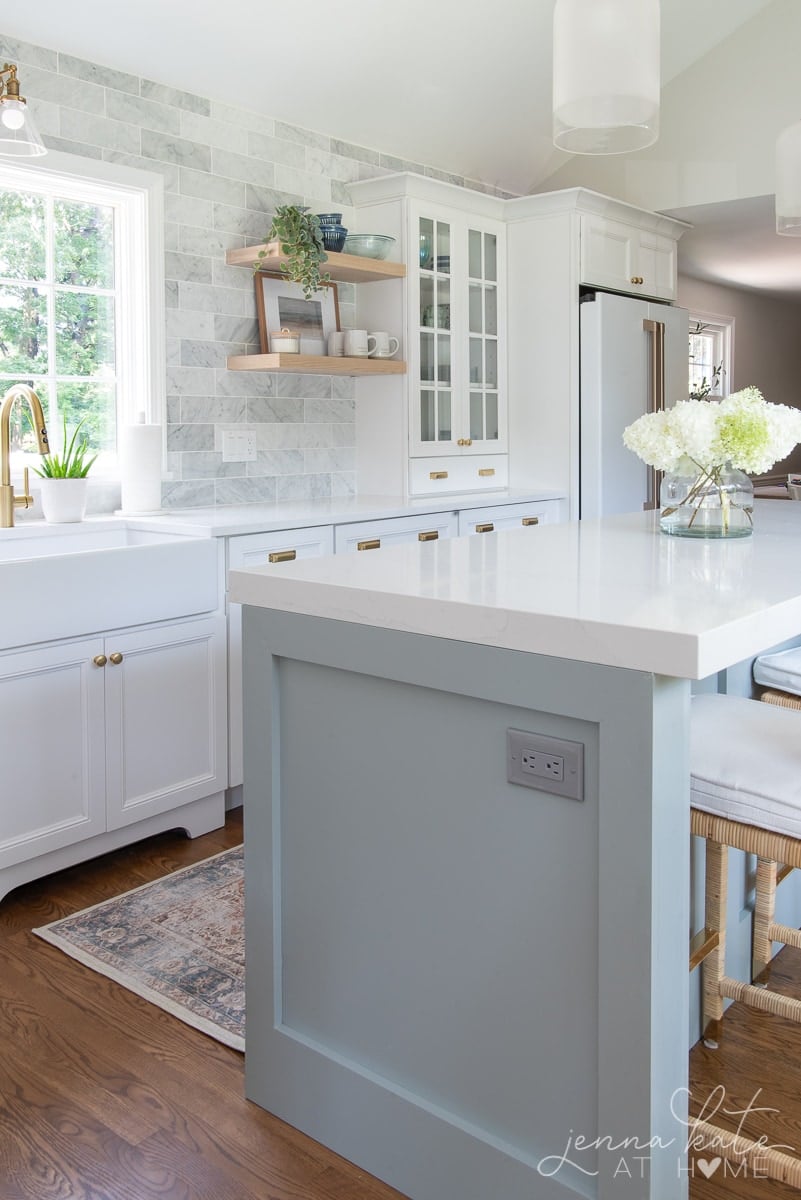
Instead of a wall of cabinets around the sink window, I opted for floating shelves from Ultra Shelf, leaving enough of a gap between them and the window to highlight our beautiful honed marble backsplash that runs the whole way to the ceiling.
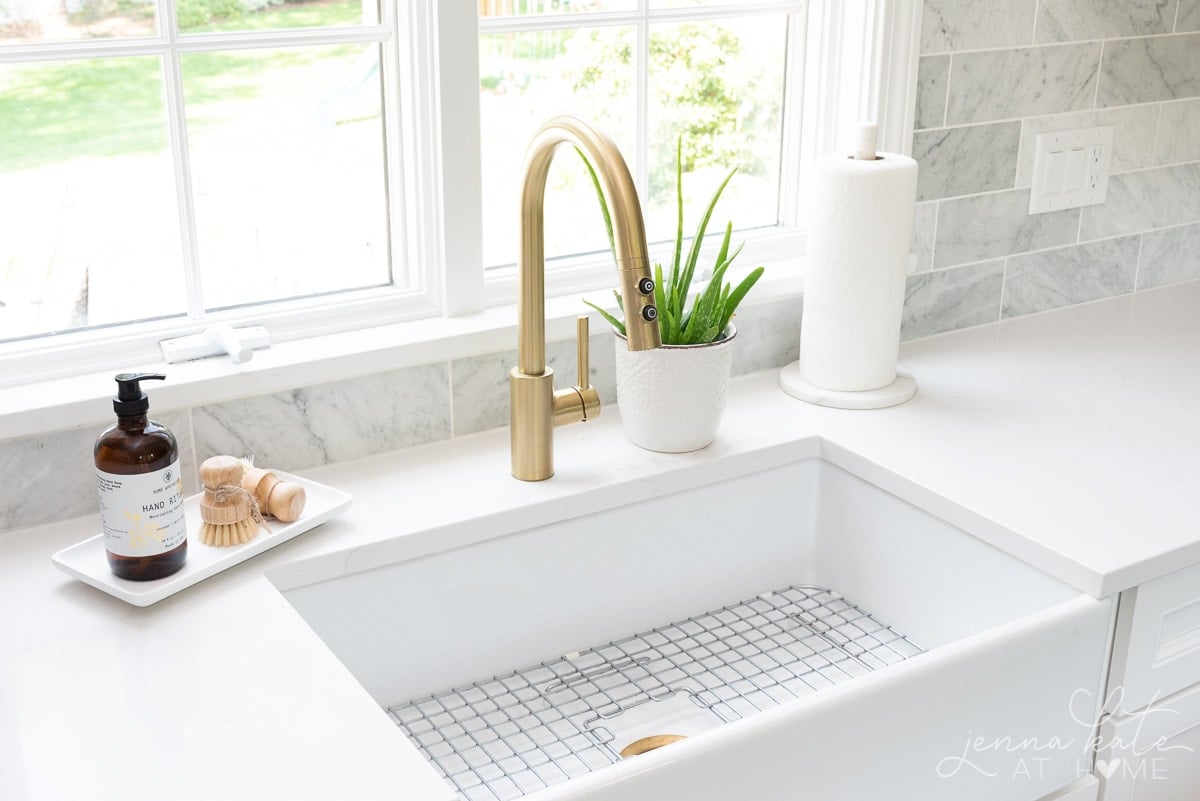
The pretty window really accentuates our new gold faucet and fireclay sink set from Sinkology.
I’ve wanted a farmhouse sink forever, and I’m so happy with how it looks. I opted for a shallower basin, and had the base cabinet doors made larger so there wouldn’t be a gap below the sink.
RELATED: Painting White Grout to Hide Stains
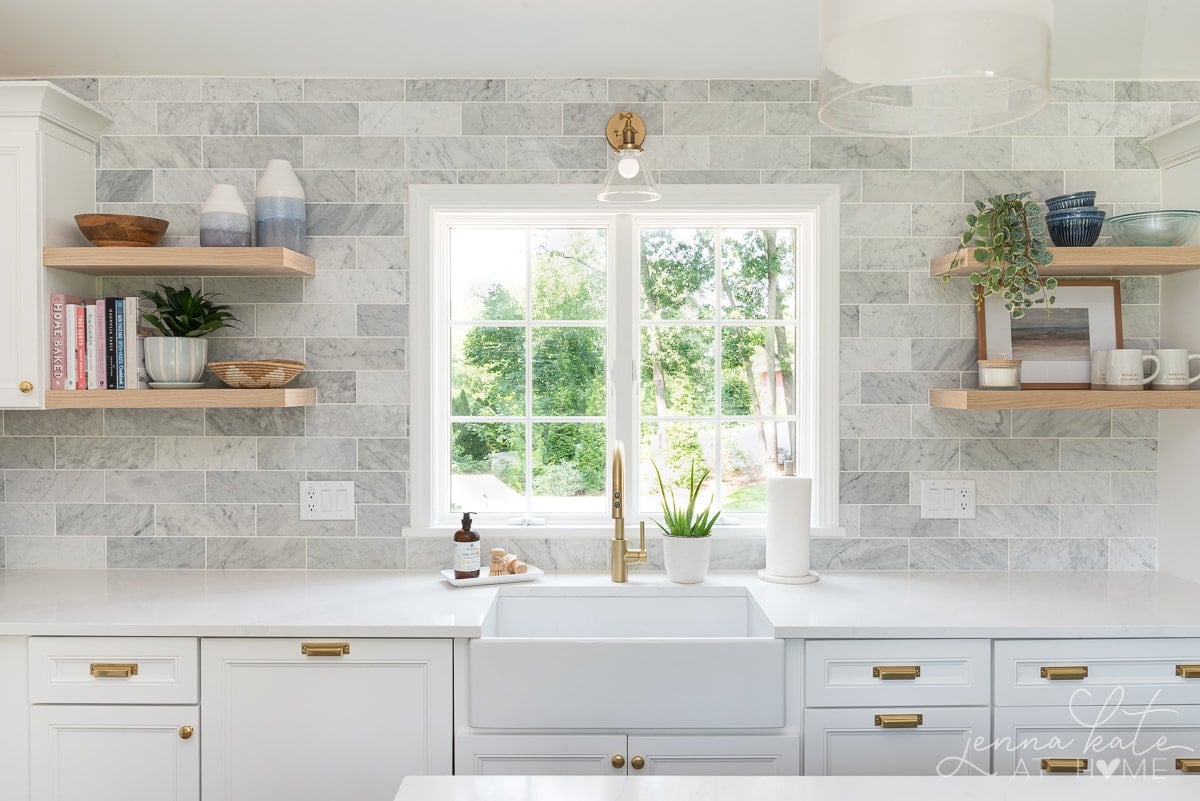
The sink itself is amazing. It has been a dream to keep clean, thanks to the powerful faucet.
The cabinets themselves are semi-custom, full overlay cabinets from the Wolf Designer line. Semi custom cabinets come in more sizes than basic stock options and have other additional options to make them feel more custom.
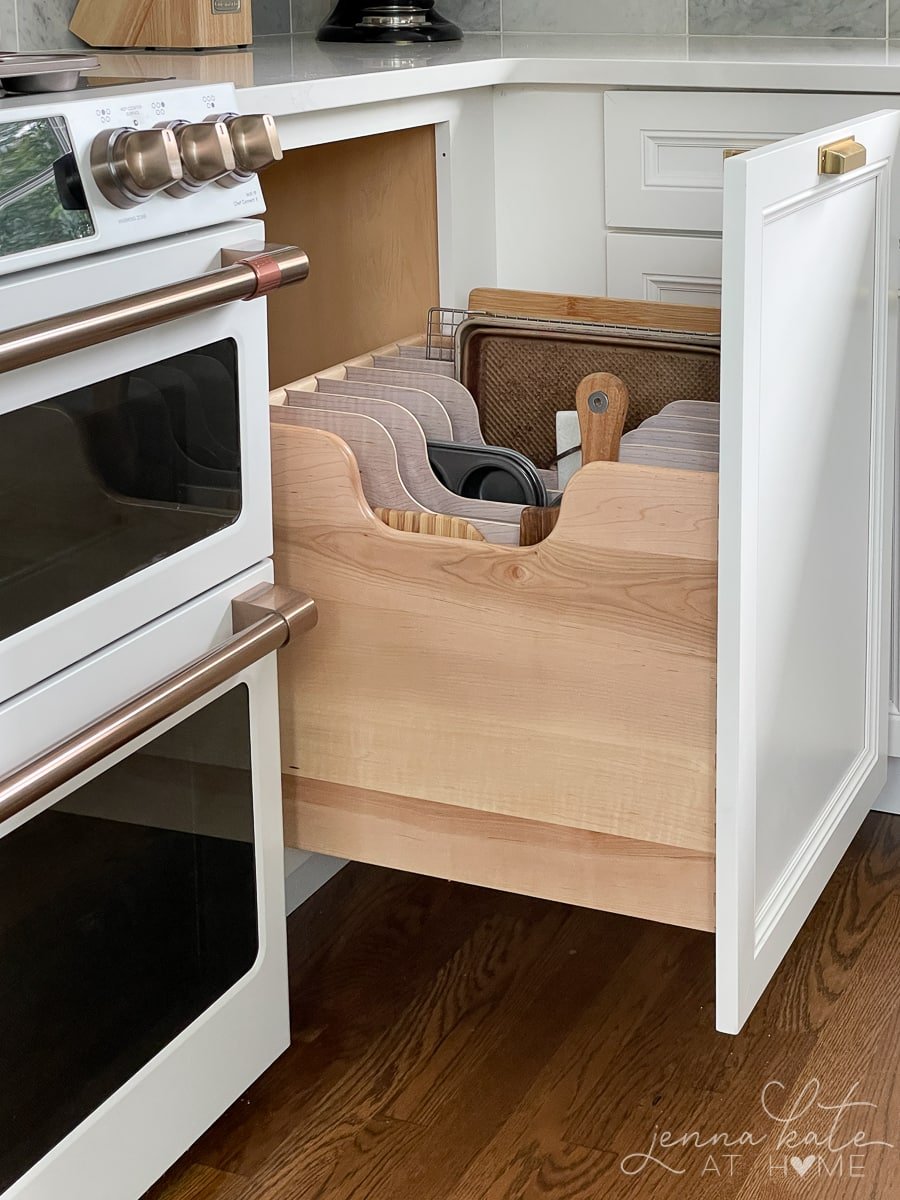
I chose a majority of drawers for our base cabinets, with a one regular cabinet on the island, a blind corner on the perimeter and a custom cookie-sheet pullout next to the stove. If you’ve been looking for baking storage ideas and have the budget, I highly recommend one of these cabinets! The custom pullout had to be made separately by a local custom cabinet maker, since the stock options were not what I had in mind.

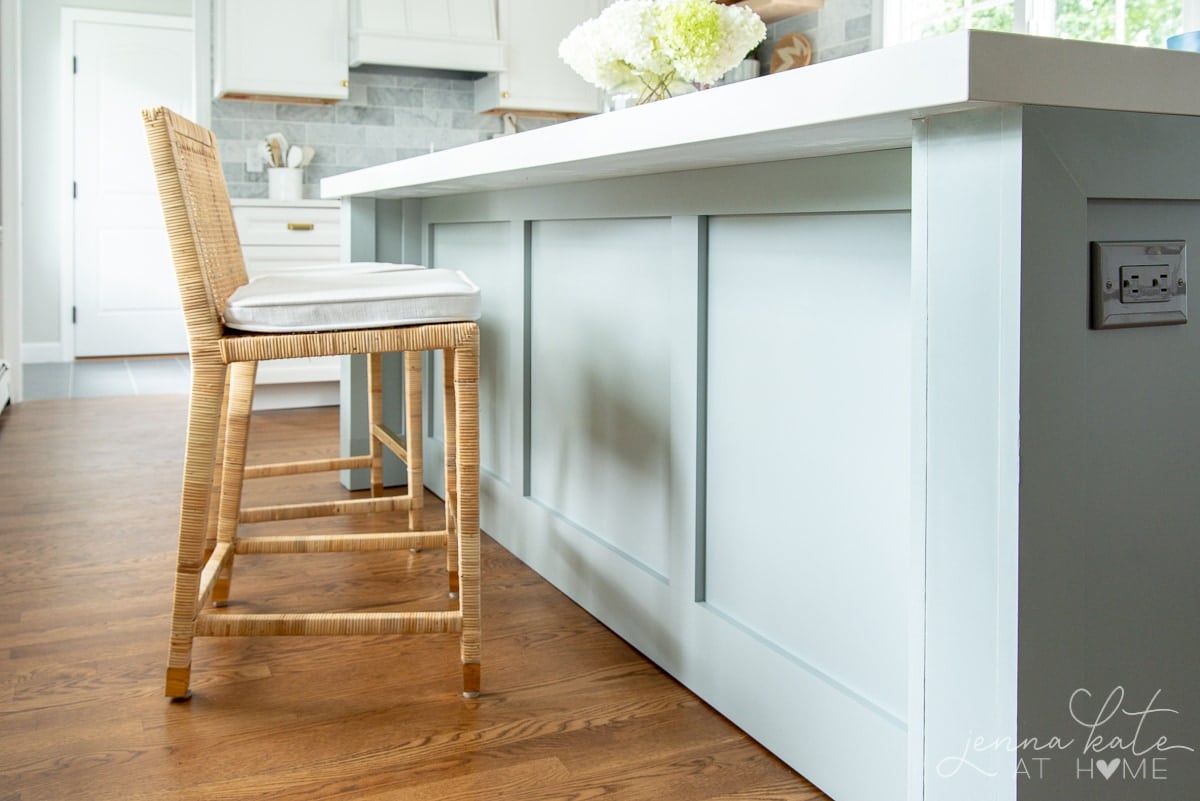
The perimeter cabinets are a soft white (not a bright, cooler white) similar to Benjamin Moore Simply White. The island was custom painted with Benjamin Moore Boothbay Gray, and I am beyond obsessed with the color.
Sometimes it looks gray, it mostly looks blue, and in the evening, when all the lights are on, it’s slightly green. It’s a truly stunning color.
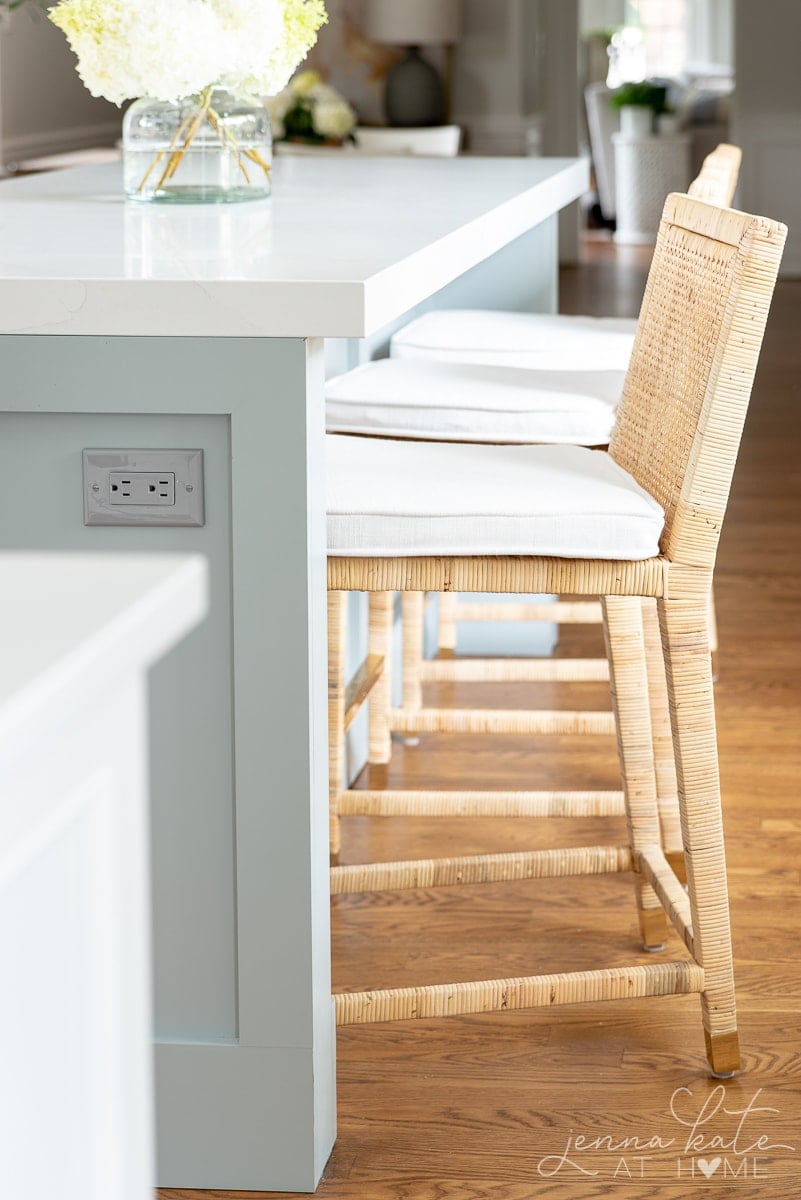
I love to warm up a space with natural wood tones, and these rattan counter stools from Serena & Lily pair perfectly with the oak floating shelves. They have gold detail on the feet and crossbar, with also ties in with our other brass touches!
Even the inside of the island has pretty finishing touches!
Appliances
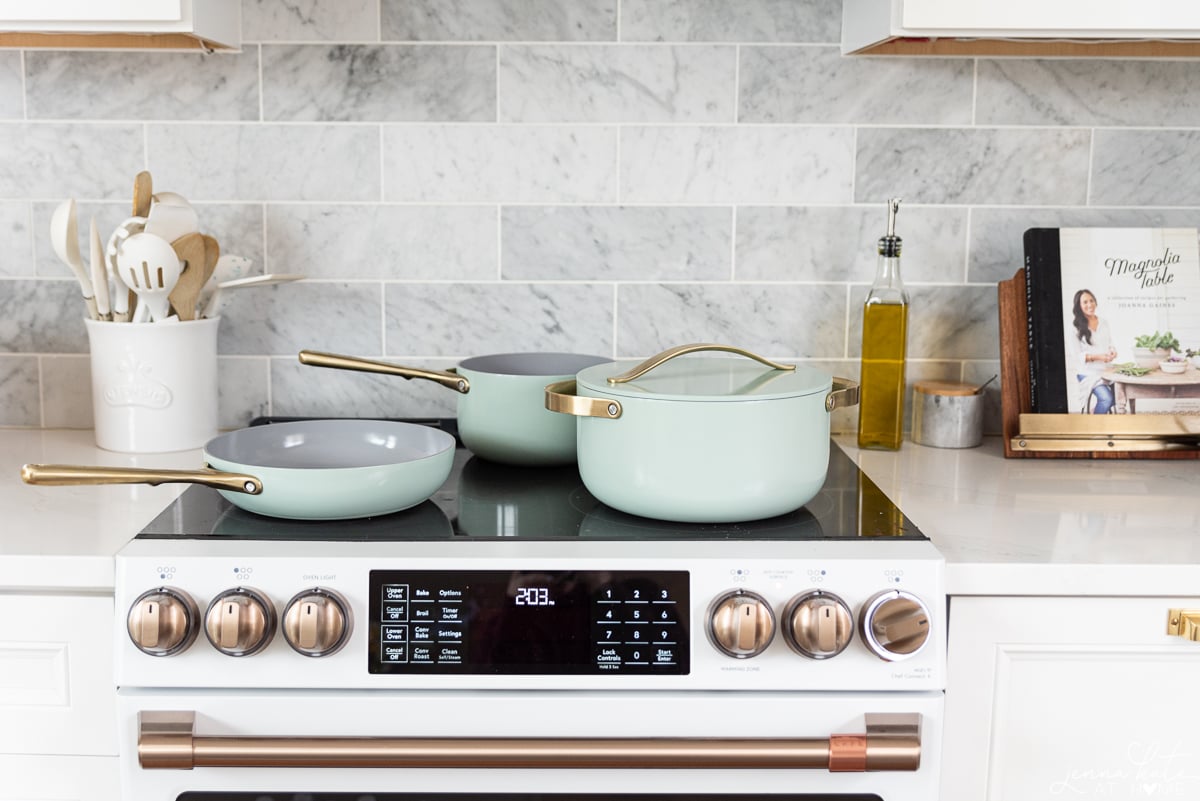
Another amazing feature of the kitchen is my new GE Cafe appliances. I chose the matte white double electric oven and matching fridge. I fell in love with the look of these appliances when they were released a few years ago and I’m happy to say that they perform as well as they look!
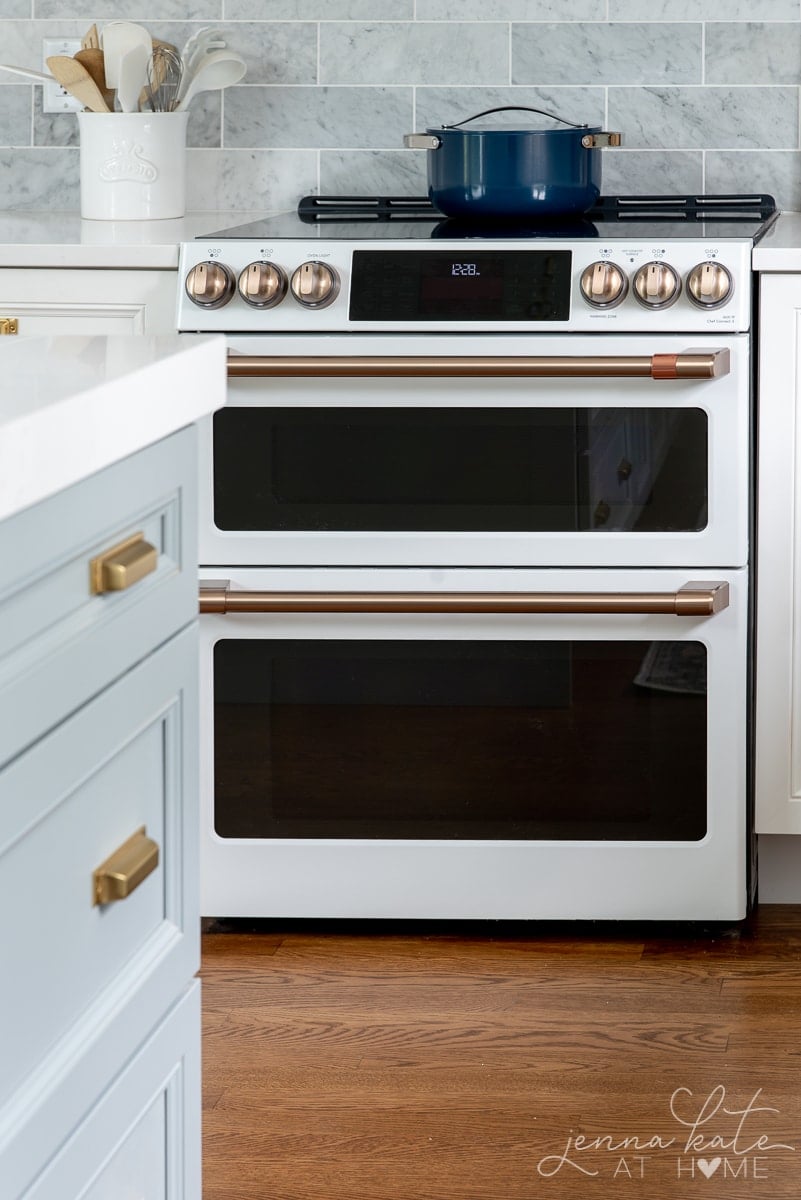
For the dishwasher, we stuck with our tried and true favorite brand – Bosch. Their dishwashers can’t be beat.

Instead of the stainless steel version we previously had, we went for a panel-ready version that integrated with our cabinets for a more seamless look.
Countertop and Lights
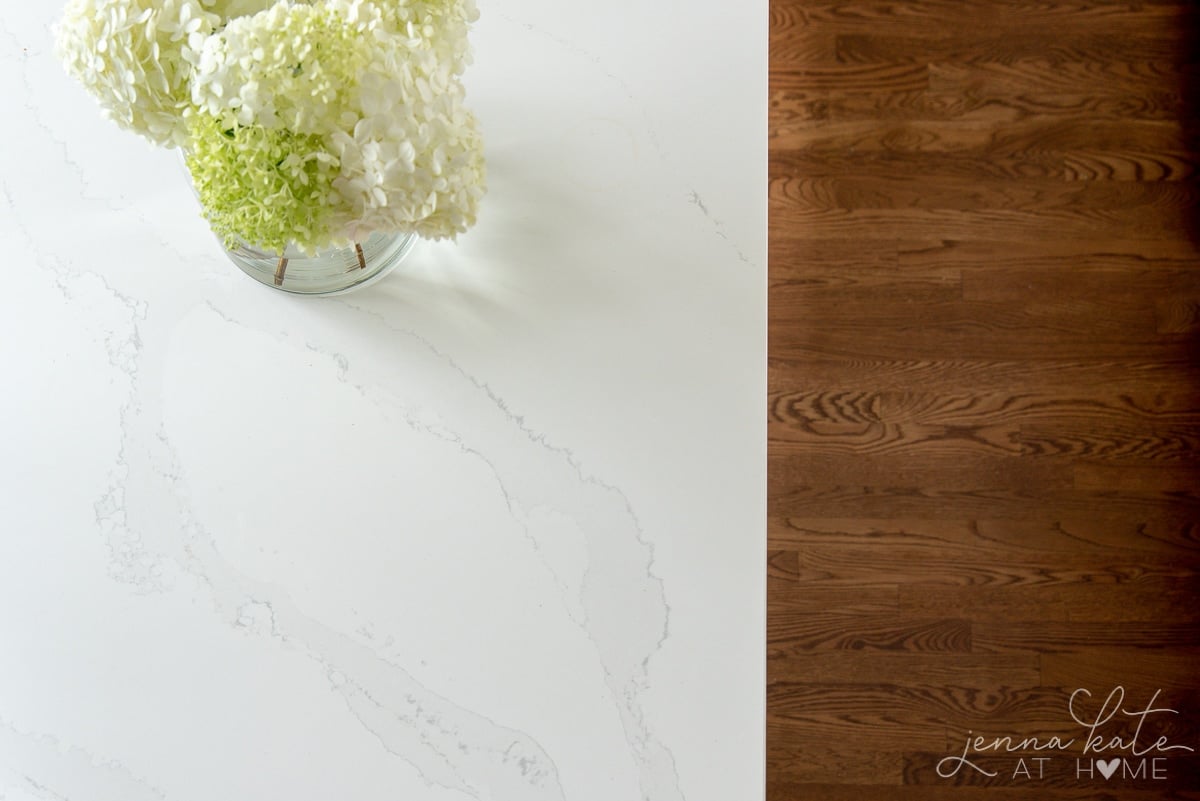
For the white quartz countertops, I chose Silestone Eternal Calacatta Gold quartz. It’s a very simple white quartz with a light gray vein and a tiny touch of beige (“gold”) here and there. It’s light and bright and incredibly easy to maintain.
I love the look of real marble, but with three little boys making messes every 5 minutes, it’s not a smart choice in my house. And let’s be honest, I have marble in my bathroom and it was etched and stained after 5 minutes, so it’s not just my kids that would have an issue keep it stain-free!
There’s barely any variation in the slabs, so once I picked the style that I liked, that was it. I put my deposit down, they came to template once the counters were installed, and the quartz was ready in 10 days!
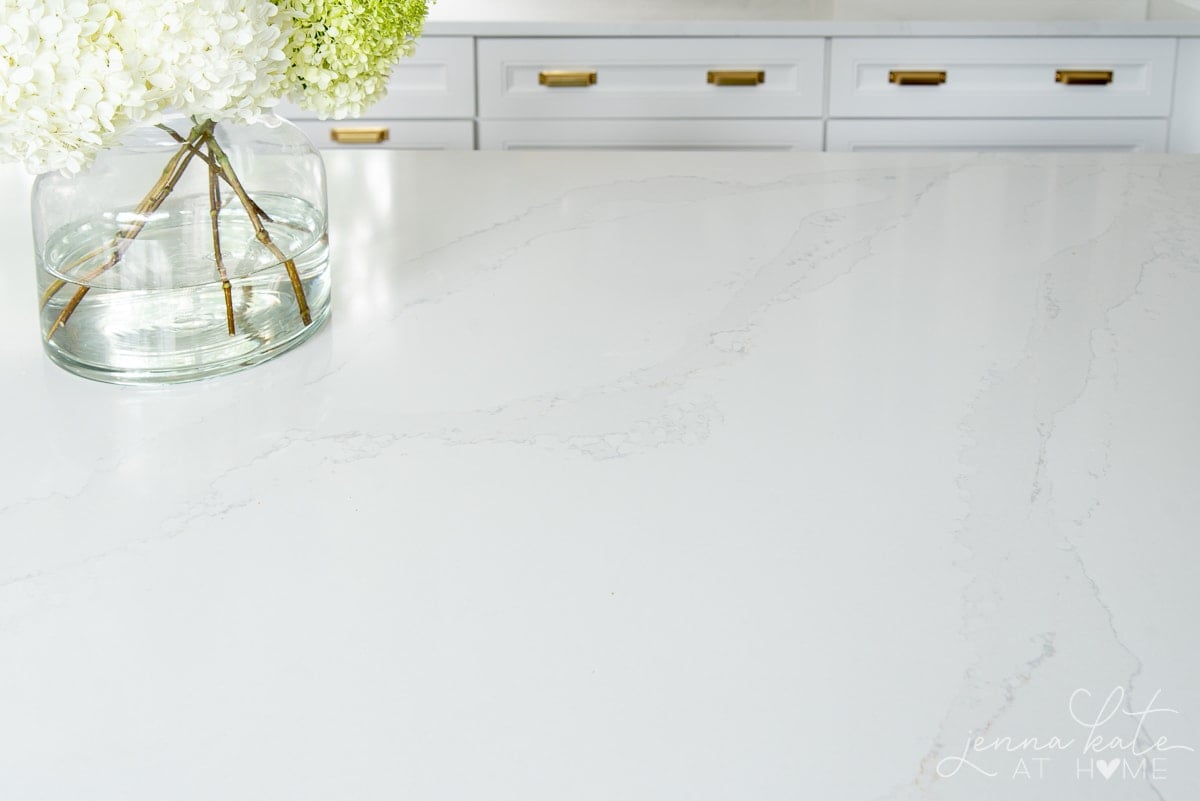
I did shell out the extra $$ to get the mitered edge on the island. Notice how it looks double thick? It’s actually just a band that goes all the way around, making it appear thicker. It was a must-have for me as far as the design went, and I think the island would look a little wimpy without it!

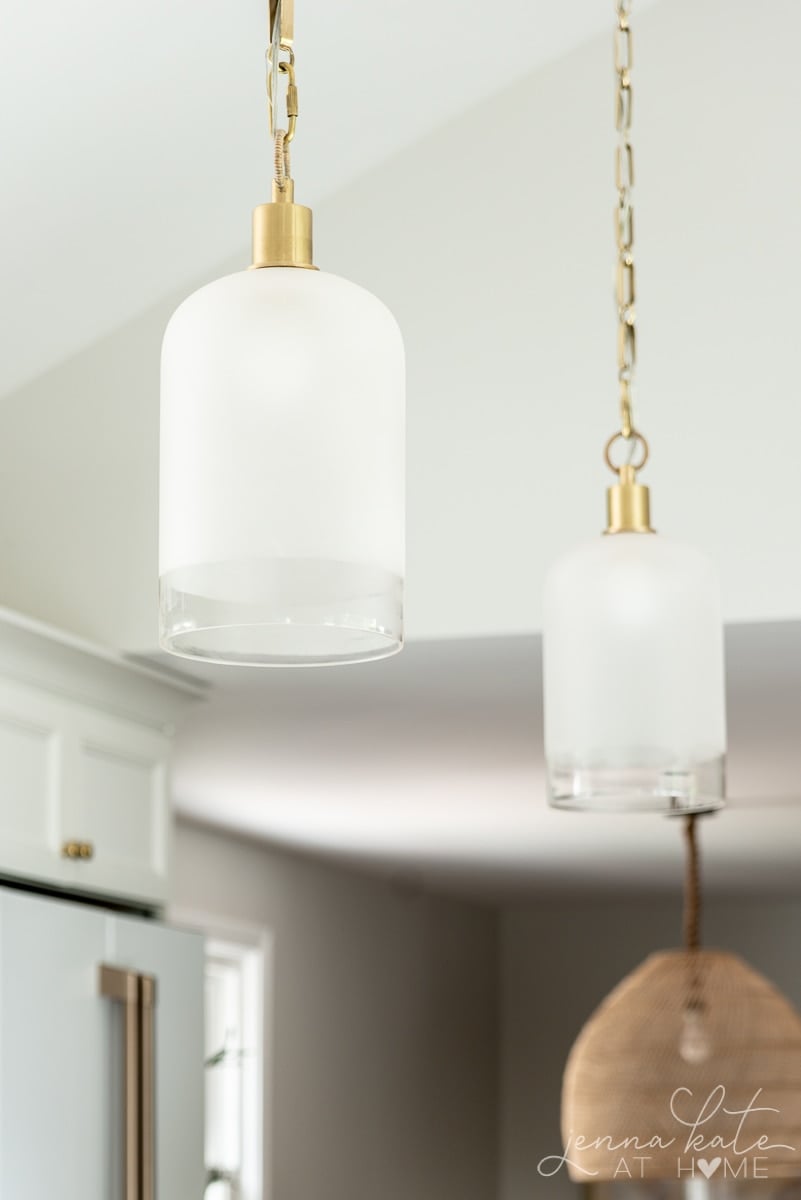
I chose these particular Serena and Lily pendant lights for over the island because I wanted something understated, yet elegant – but also lights that didn’t look visually heavy, and that wouldn’t block the view through the kitchen to the range hood.
Glass can be iffy in a kitchen because you don’t want to be always cleaning them, but the frosted glass on these makes them a safer bet to show a whole lot less dust and streaks.
Cabinet Hardware
My goal was to warm up all the white and cool tones with lots of gold and wood touches.
The cabinet hardware goes a long way to accomplishing that goal! I chose the Rejuvenation Mission Pull for the drawers and the Massy Knob for the cabinets.
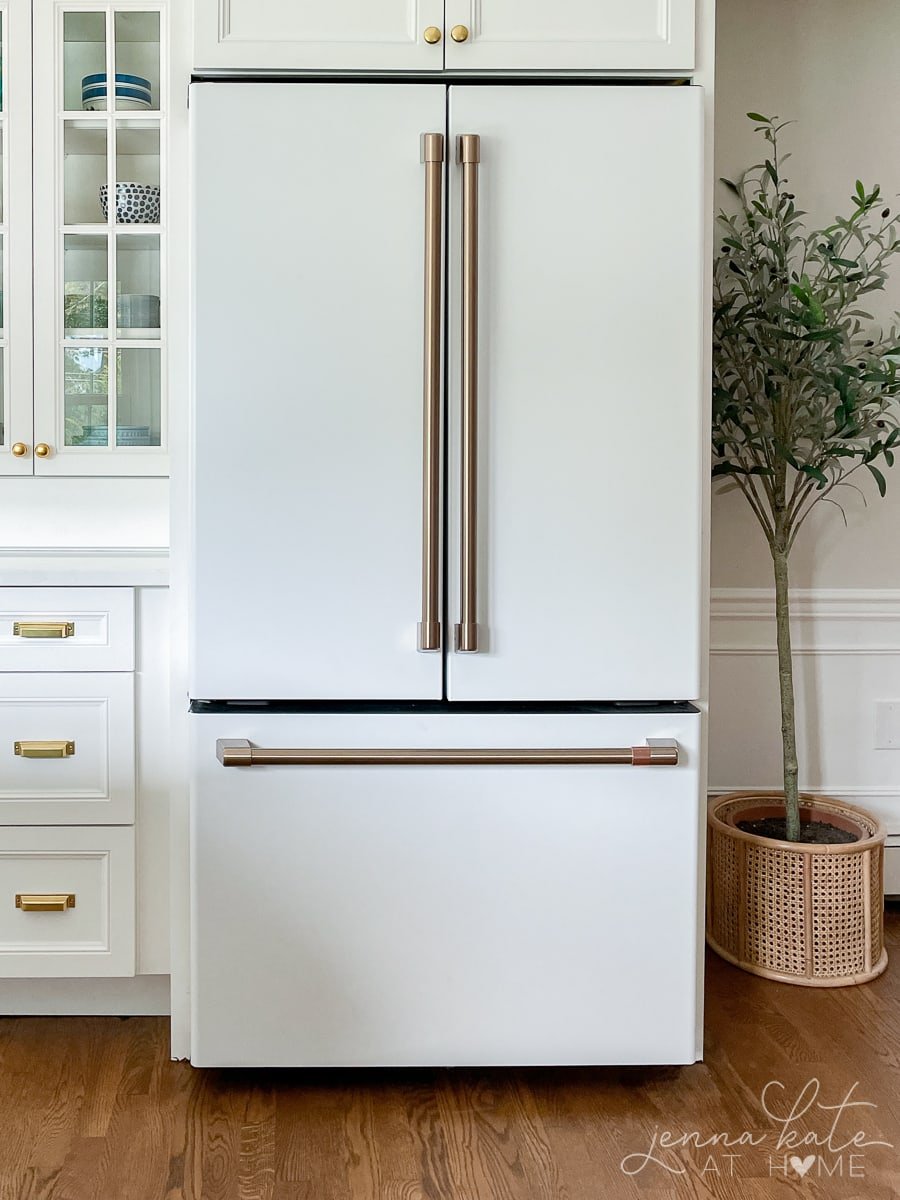
The hardware on the fridge and stove are pretty awesome, too!
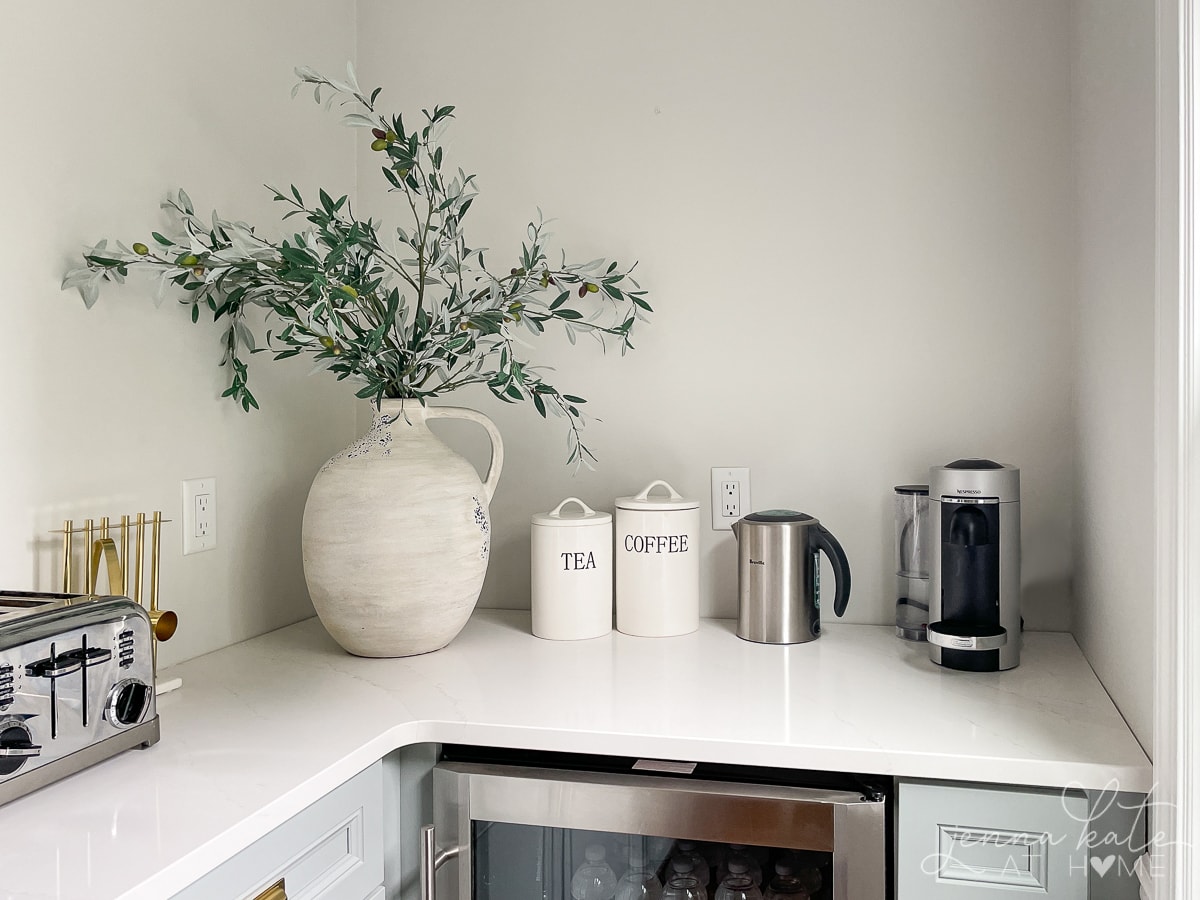
Pantry
Last but not least, we have our pantry which is directly off the kitchen, where our dining room used to be. We separated the room in two and created a pantry on the smaller side and office on the opposite side.
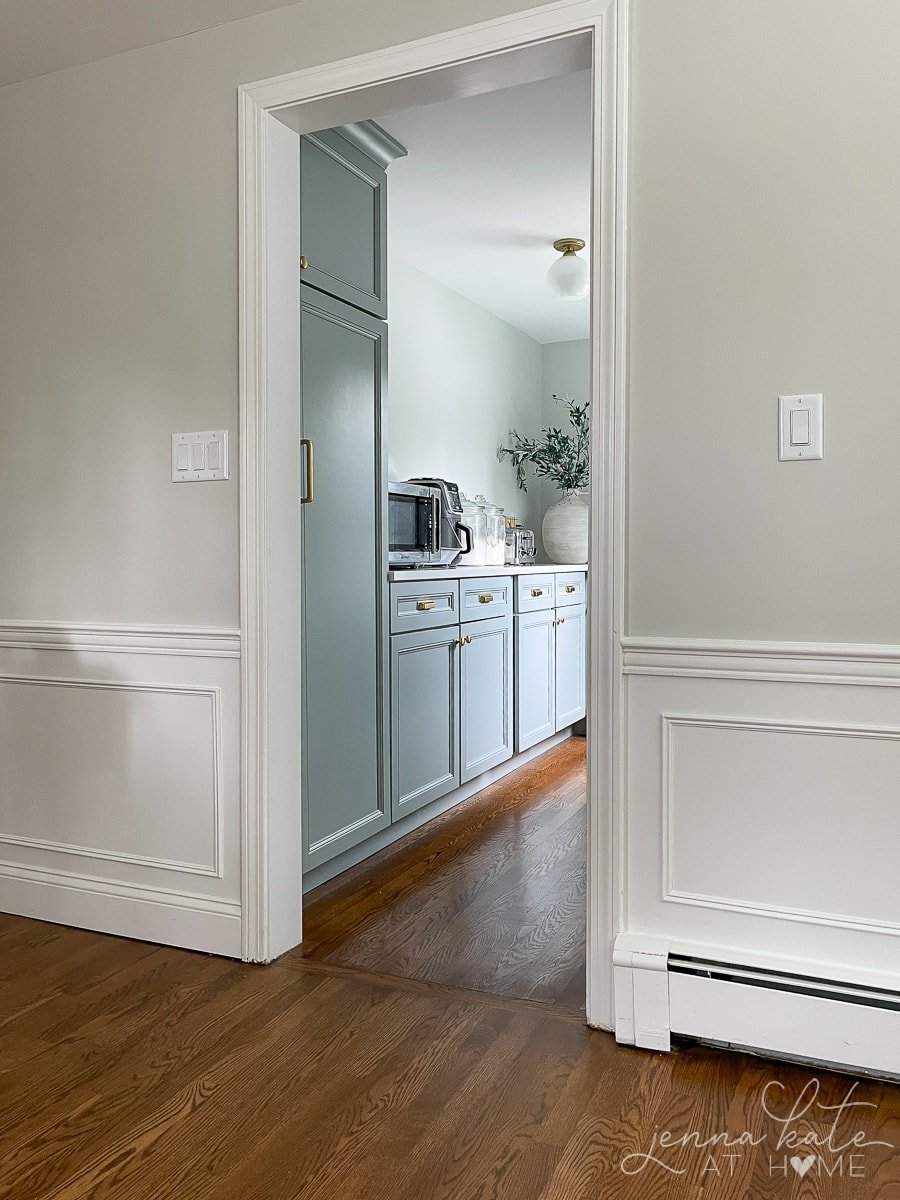
The pantry is not 100% completed yet (it still needs shelves) but I love walking by and seeing the pretty blue-gray cabinetry.
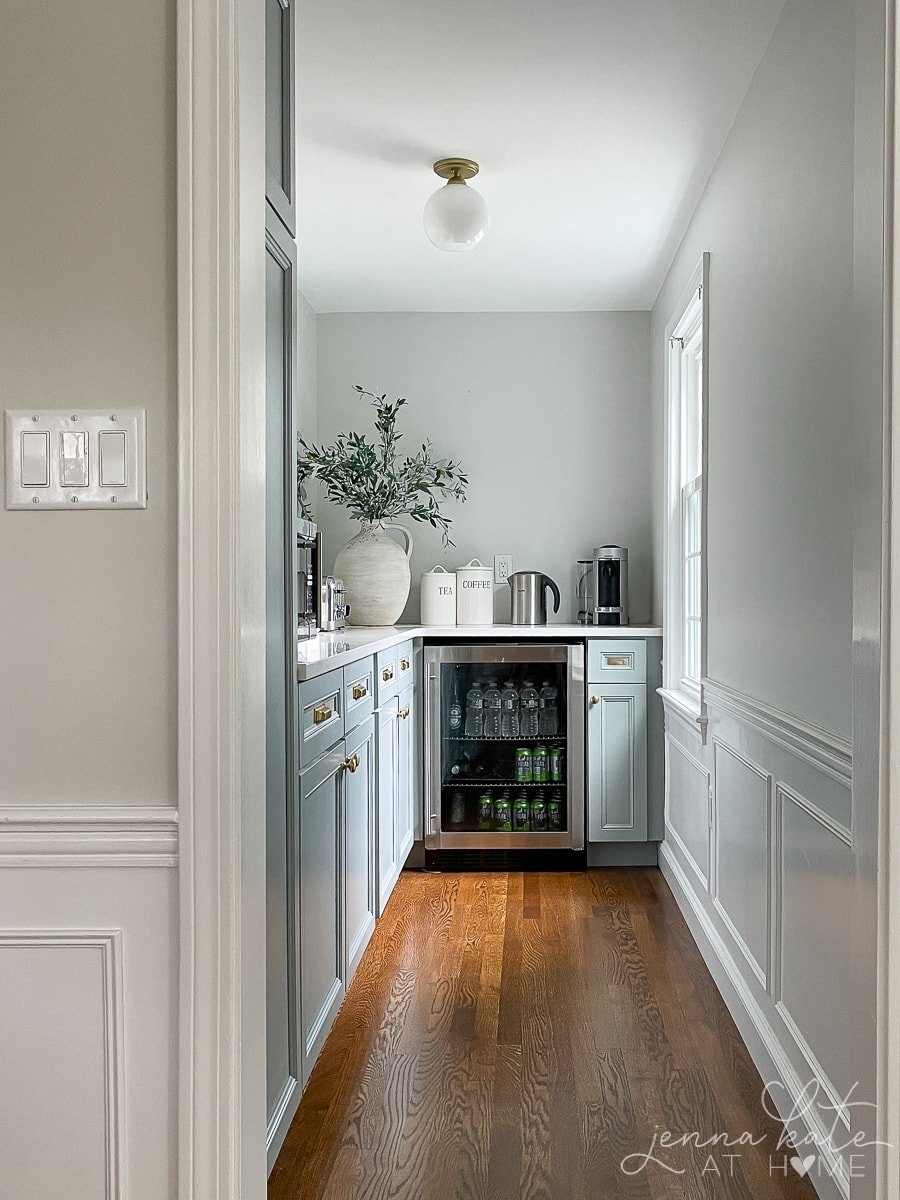
All our bulky appliances – toaster, air fryer, microwave, tea kettle and coffee machine live in the pantry and help to keep our kitchen counters clutter-free. We also added a mini-fridge in here so that our main fridge is not constantly filled with beer, bottled water and seltzers!
We have chosen not to put a door on it for now since it’s a small space. Plus, I think a door would just be awkward…but we’ll see if that changes in the future!
Lessons Learned
Remodels always take longer than your contractor says it will. And probably 10% more in cost, too.
I did not hire a designer to help me with this kitchen remodel. The contractor we worked with flips houses, so she has a good design eye and I was able to bounce ideas off her. For the layout, the cabinet guy helped me figure out what cabinets could go where, etc. etc.
I’m not going to lie – being my own designer was amazing, but it also created a lot of pressure for me to get it right. I tried to think of everything, but missed a few things here and there. It was mentally exhausting and I had many sleepness nights wondering whether I’d made a mistake or forgotten something.
I knew what I wanted my kitchen to look like, and I sourced every single item myself.From working with the cabinet store, to picking and ordering appliances, quartz, tile, lights, hardware, and other accessories. On top of that, I figured out cabinet hardware placement, where I wanted the lights and the grout color for the tile.
It may have been less stressful if I’d had a designer to help me, but knowing my personality, I probably still would have done the same amount of work. If you’re organized, know exactly what you want and have the time to spend overseeing the details, you don’t need a designer. After all, they don’t come cheap!
Love this kitchen remodel? Don’t forget to pin it for later! Just hover over any of the images and hit the “pin” icon
More Kitchen Posts
Full Source List
- Perimeter cabinets: Wolf Designer Series in white
- Island cabinets: Wolf Designer Series in custom color, BM Boothbay Gray
- Countertop: Silestone “Eternal Calacatta Gold” quartz
- Floating shelves: Ultra Shelf (white oak with nature stain)
- Walls: SW Repose Gray, lightened by 50%
- Floors: White oak stained the color “Provincial”.
- Marble backsplash tile: Floor & Decor
- Custom Cookie Sheet Organizer: CJ’s Finish Carpentry & Millwork
Appliances and Hardware
- Stove: GE Double Electric Oven Slide-in Range
- Fridge: GE Cafe, counter depth
- Dishwasher: Bosch
- Sink: Sinkology, INSPIRE Collection, Turner fireclay sink, All-In-One Kit with Pfister faucet
- Cabinet drawer pulls: Rejuvenation
- Cabinet knobs: Rejuvenation
Lights
- Island pendant lights:Serena and Lily
- Over sink light: Amazon
- Under cabinet lights: LED tape lights
- Rattan light over dining table: Pottery Barn
- Dining table: Pottery Barn
- Dining chairs: Pottery Barn
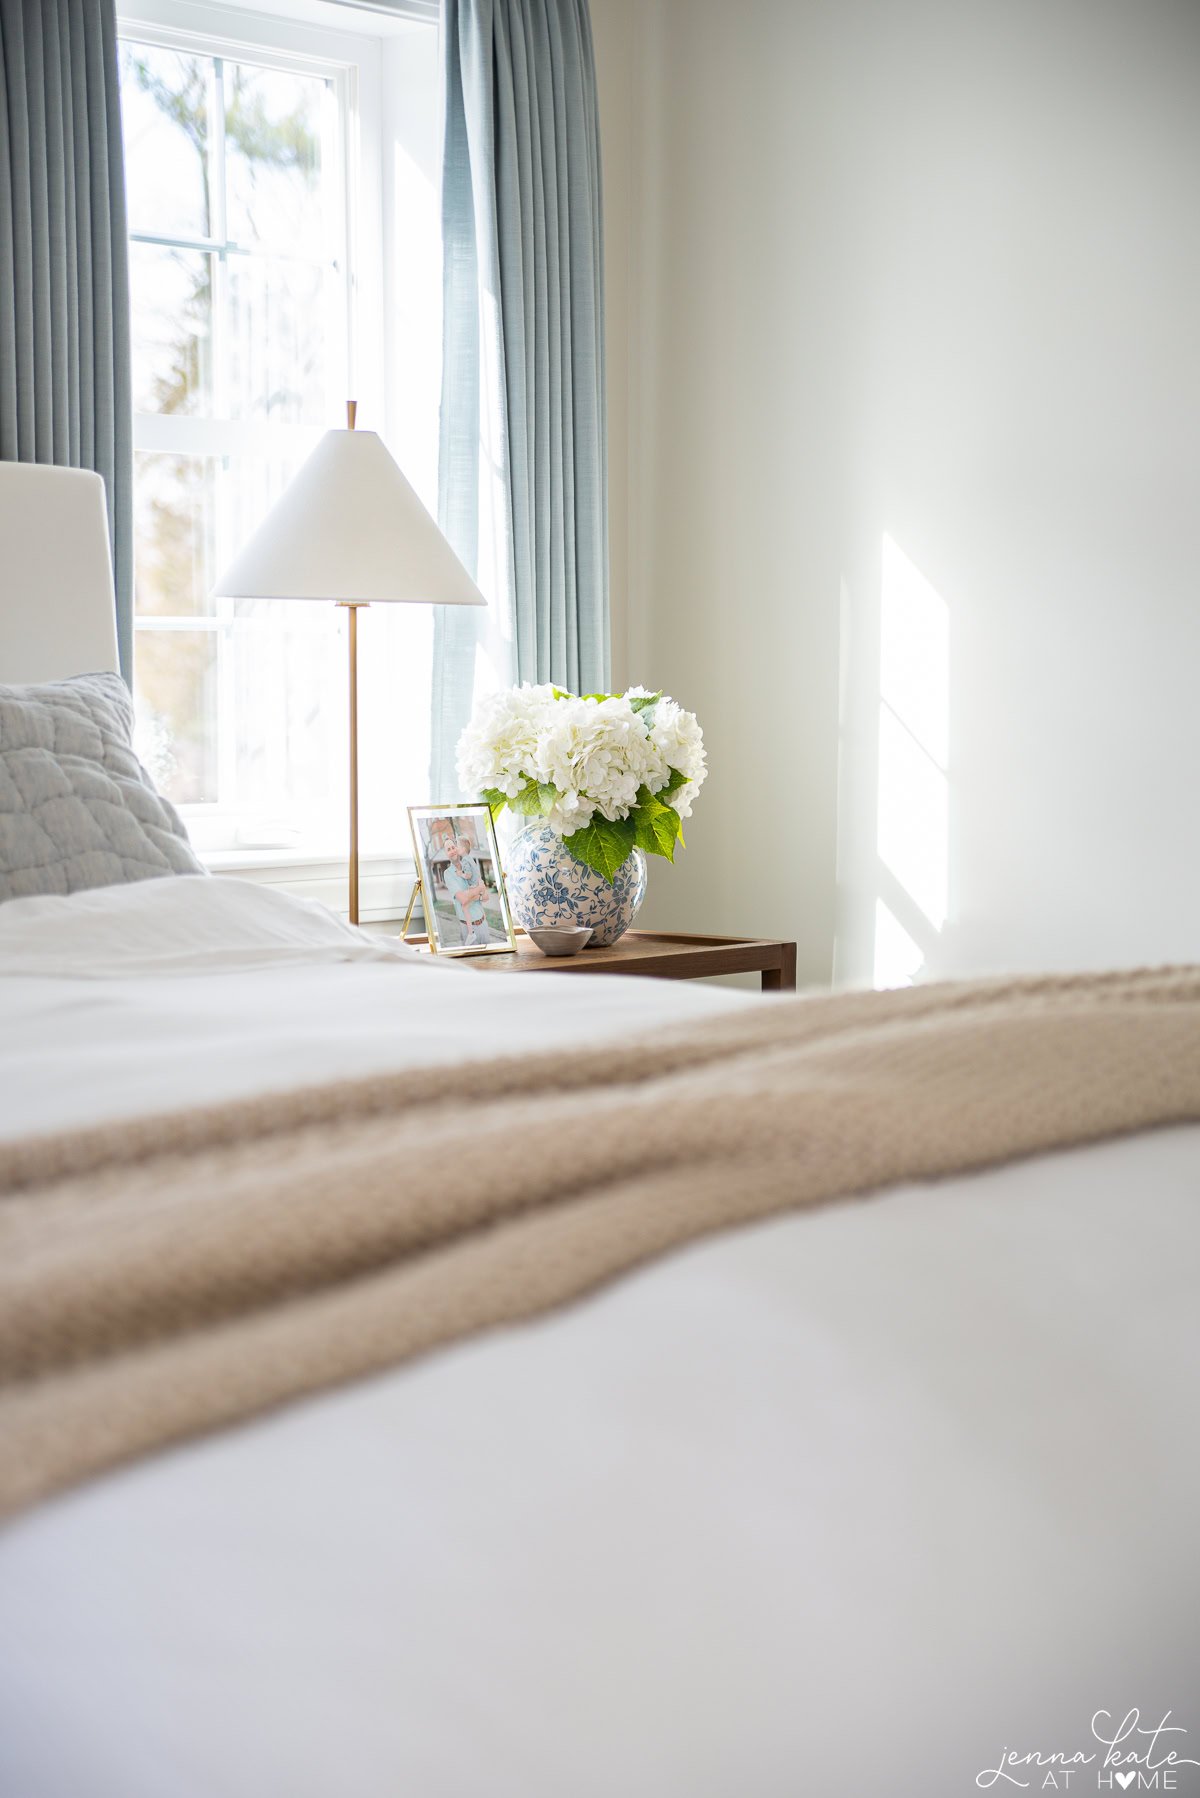
- Gray table lamp: Target
- Pantry light: Amazon
Accessories
- Counter Stools
- Bamboo dish scrub brush
- Utensil holder: HomeGoods
- White Utensils: Amazon
- Vase: Target
- “Morning Sunshine” mugs: Target
- Runner: Ruggable
- Blue cookware: Caraway
- Wall art: Target (Studio McGee – no longer available)
- Pantry vase: Pottery Barn
Are your marble backsplash tiles 4×12? The link says those tiles are 4×12 but yours don’t look that wide and long in your kitchen photo!
Yes! They’re 4 x 12!
Hi. I would be grateful if you could tell me the size of your window and shelf width and thickness. I love this whole look! You did such an amazing job on this kitchen. Thank you.
Hello – Beautiful kitchen! Wondering how you get your cushions to stay on the stool? I’m not seeing ties on your cushions to secure them to the back of the chair so I’m curious.
The cushions that come with the stools have a rubbery material underneath that makes them non slip!
Good luck with your GE appliances, especially the fridge. I loved the white matte too but we have had a quite damaging leak and ruined hardwood floors, damaged drywall and issues with repairs that went on for months. A Nightmare. Poor Customer Service from GE. Very Disappointing!
We have had ours since 2021 with not a single issue. You must just have been unlucky.
First always buy from an appliance store. Do not trust a box store ie Lowes Home Depot. You get an actual repair man who knows what they’re doing.
I agree with you GE appliances are worthless.