Content may contain affiliate links. When you shop the links, I receive a small commission at no cost to you. Thank you for supporting my small business.

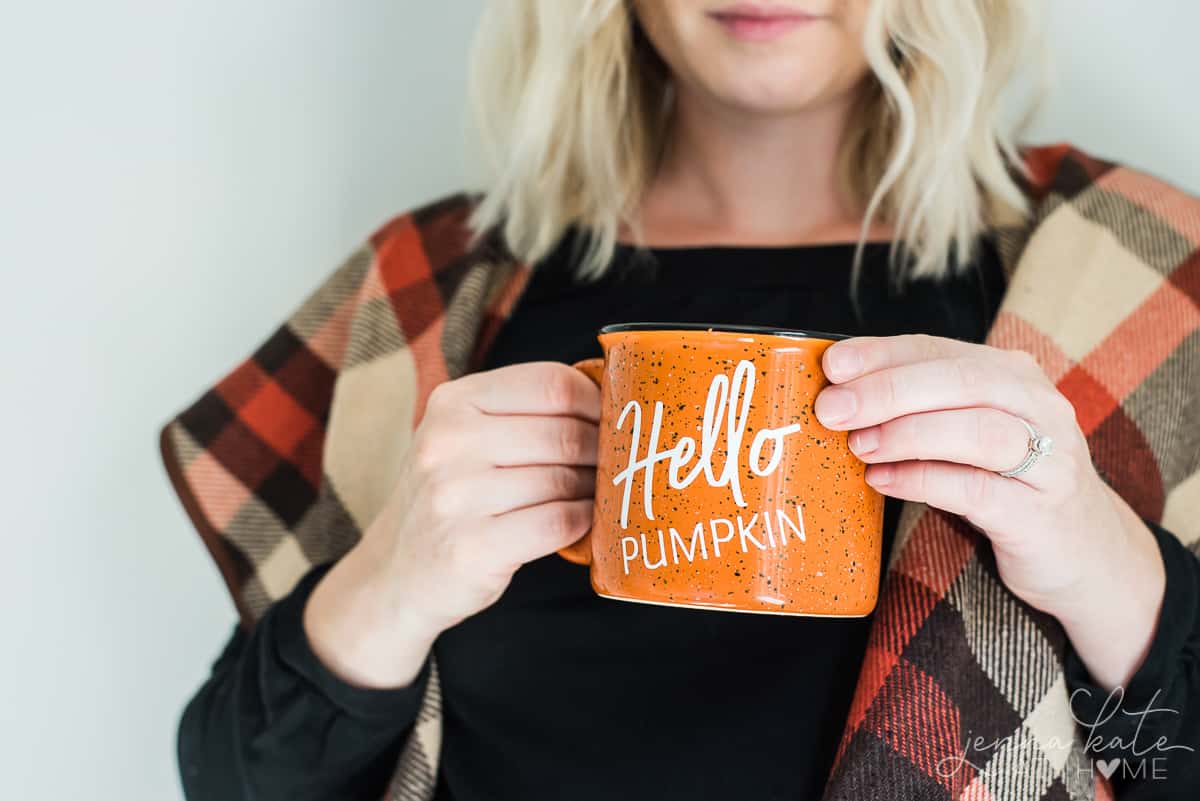
Learn how to make these DIY personalized mugs for Fall using vinyl – it’s easy to do with professional results! You can make these adorable mugs easily with my free cut file and be sipping your favorite pumpkin spiced infused drink in no time!
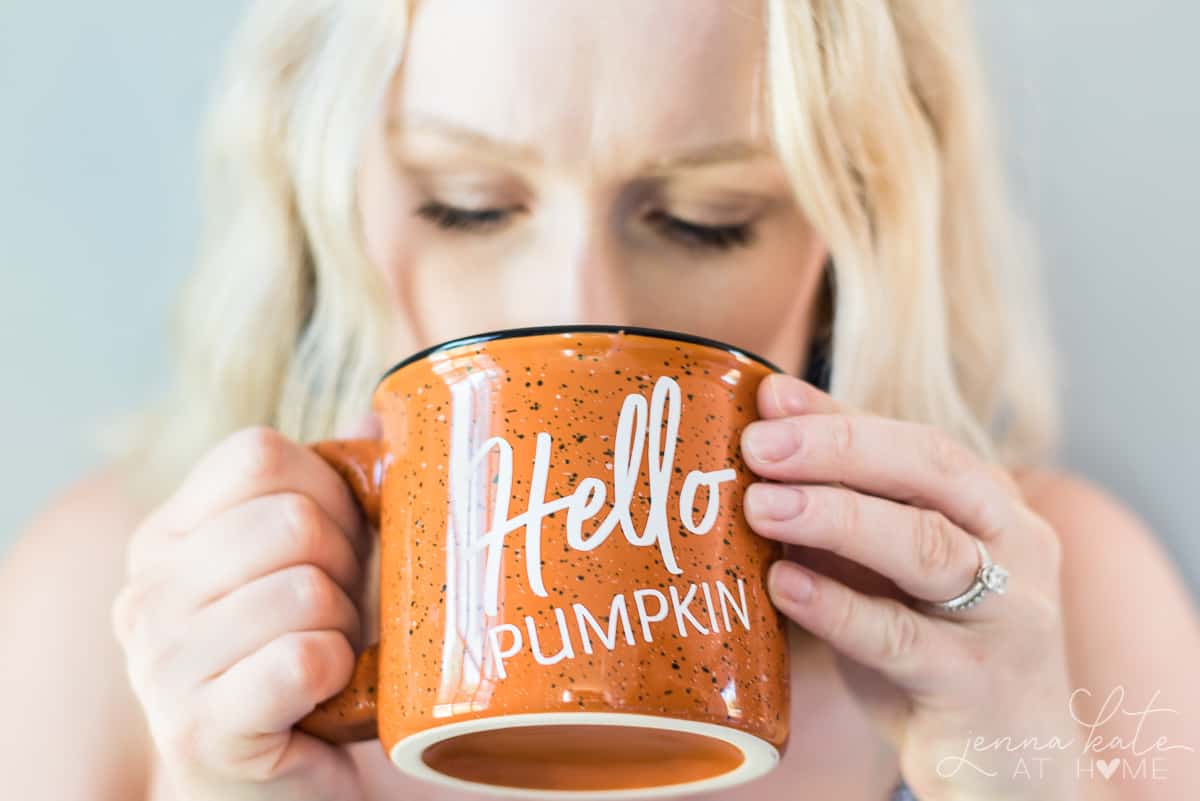
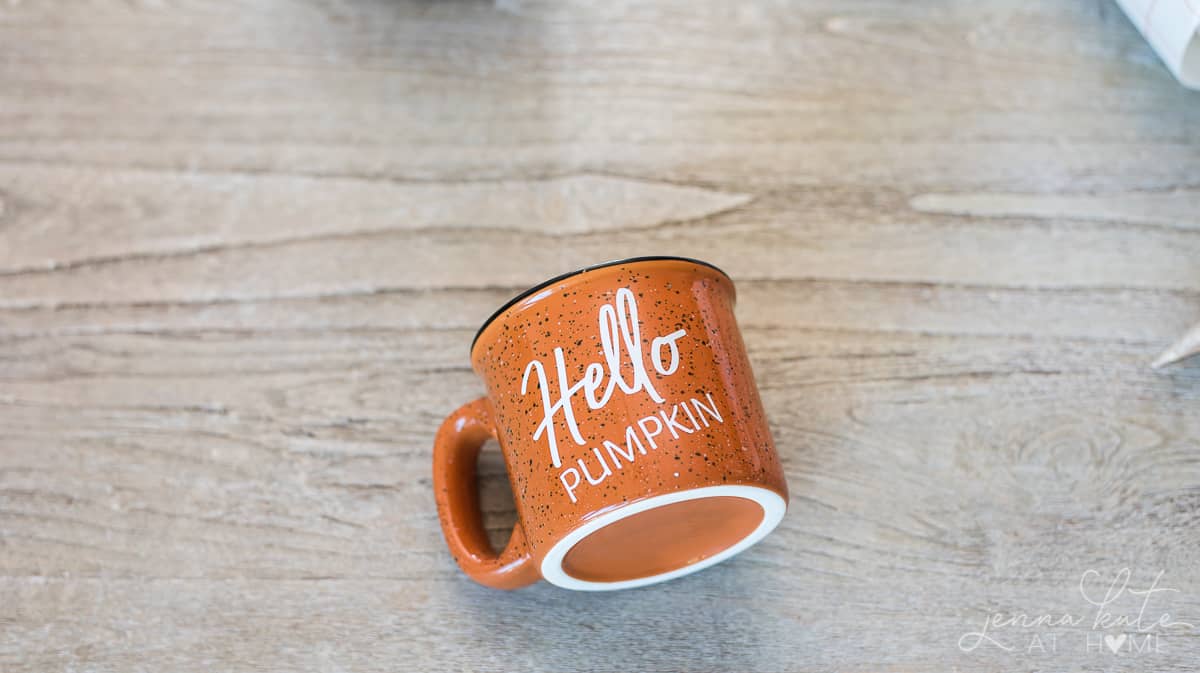
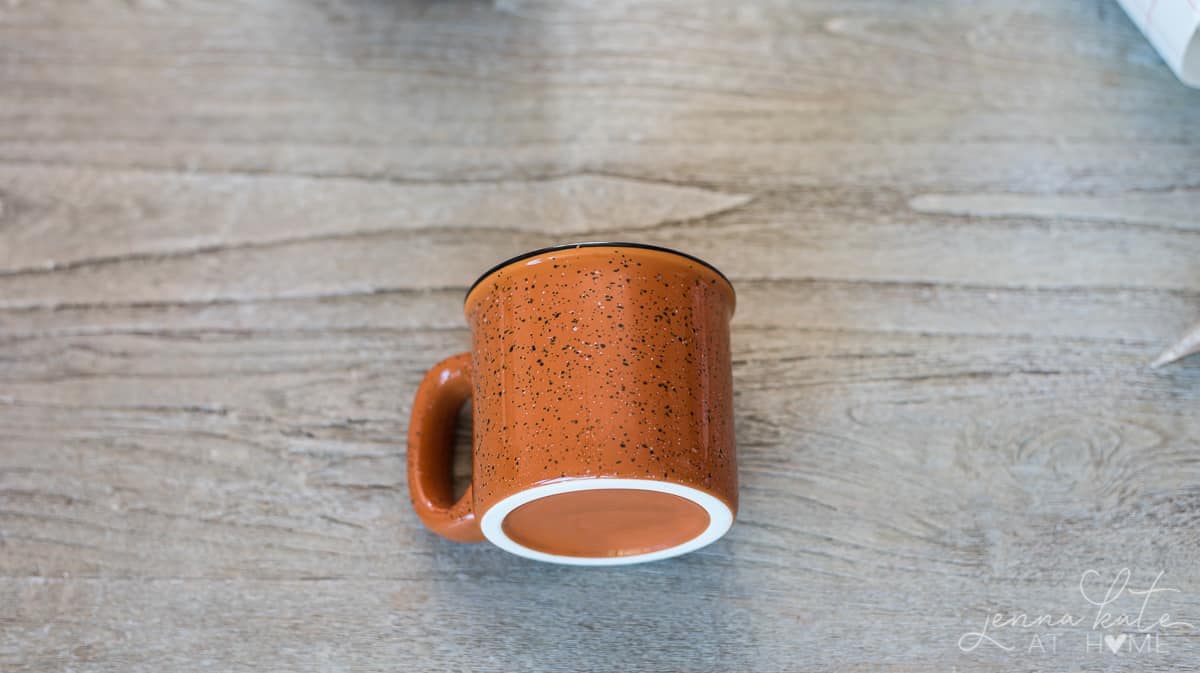
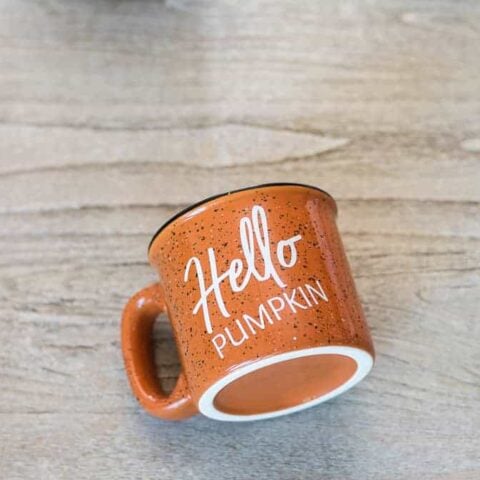
How cute is this mug? You would think I scored this orange sensation after hours in the home store but no – it’s an easy DIY project! It makes the perfect gift and is so festive this time of the year.
With fall on its way, we’re all looking forward to pulling out our favorite mug and drinking on pumpkin spice lattes, pumpkin spice hot chocolate and other pumpkin spice hot drinks.
Who wouldn’t love a custom mug that’s an easy project to make? So pull out your scissors and vinyl – it’s time to make a fun mug that you can enjoy all season long!
DIY Seasonal Mugs
These DIY mugs make for a one-of-a-kind (and cheap!) gift too. If you’re looking for a teacher gift, birthday present or just as an “I’m thinking of you” surprise, this is a fun way to go for any special occasion.
And if you buy a few mugs (the dollar tree normally has some!), you can mix the prints and have a complete set for a special someone. This simple project will display beautifully in their kitchen cabinets!
If you’re feeling inspired by this DIY personalized mug, check out my Halloween candle labels for another cool gift idea for this time of year.
What You Will Need
- Permanent Vinyl (I used white but choose whatever color you want)
- Ceramic Campfire Mug in your favorite color
- Silhouette or Cricut Cutting Machine
- “Hello Pumpkin” design
(download SVG file here – or Silhouette file here)
I used permanent vinyl and my Silhouette cutting machine to make the transfers for the mugs but if you don’t have a cutting machine, you could also cut out your own design on vinyl. Personally, even though I don’t use my Silhouette ALL the time, I think it was a great investment and I’m really happy that I bought it.
Watch the video below to see how I transfer the design to the mug!
[adthrive-in-post-video-player video-id=”H1RyGyps” upload-date=”Thu Aug 22 2019 00:00:00 GMT+0000 (Coordinated Universal Time)” name=”DIY Personalized Mug For Fall” description=”DIY tutorial for making a personalized fall coffee mug perfect for those pumpkin spice lattes!”]
How To Make Your Own Personalized Fall Mug
Follow this easy step-by-step tutorial to craft your own custom coffee mug. Trust me, it’s easy peasy!
1. Download the Personalized Design
Save the cut files above for an easy method or design your own. Using a Silhouette or the Cricut design space and cutting machine, cut the design out on permanent vinyl.
You could also draw your words on the vinyl and cut out with a pair of scissors if you’ve got a steady hand!
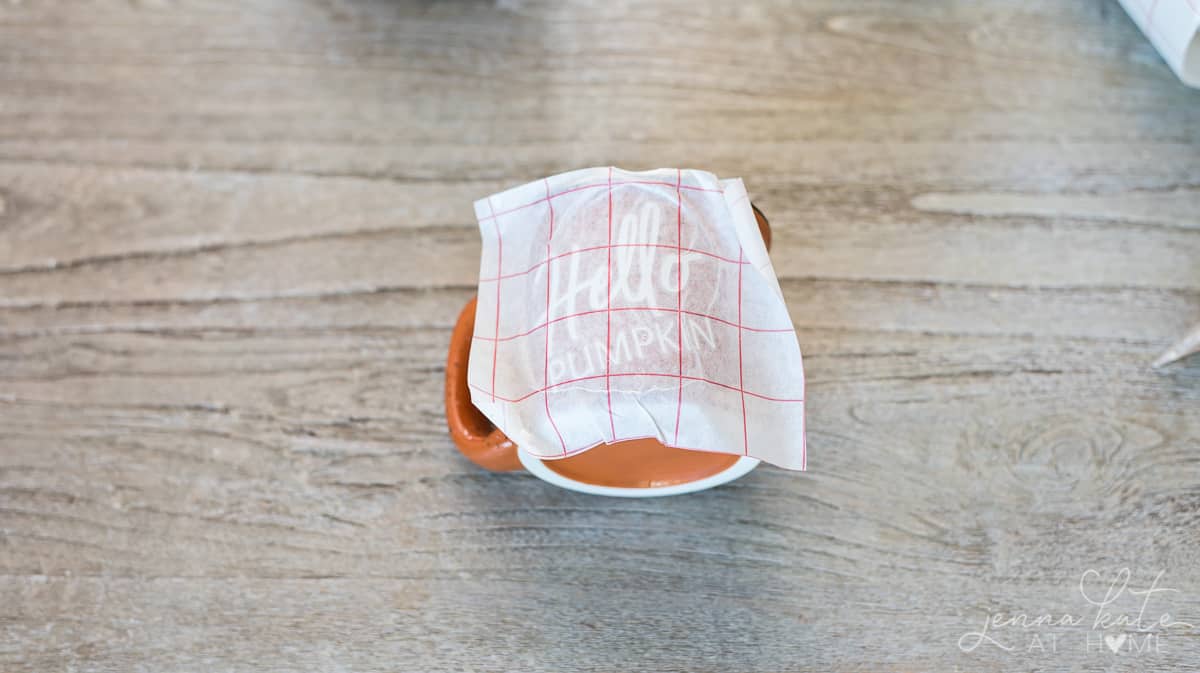
2. Attach the Transfer Paper
Cut a piece of transfer paper slightly larger than the vinyl design. Remove the backing from the transfer paper so that you’re left with the sticky grid side. Stick it to the face of the vinyl design.
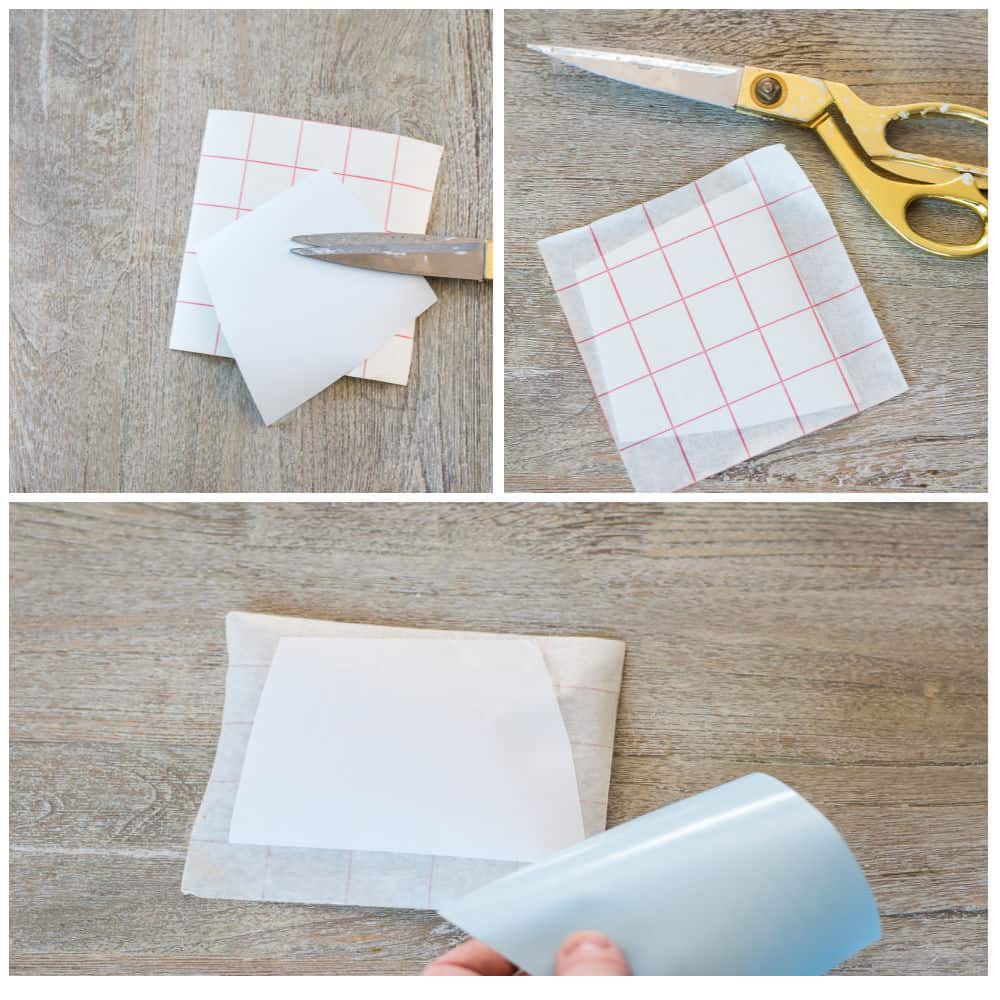
3. Trim the Vinyl Design
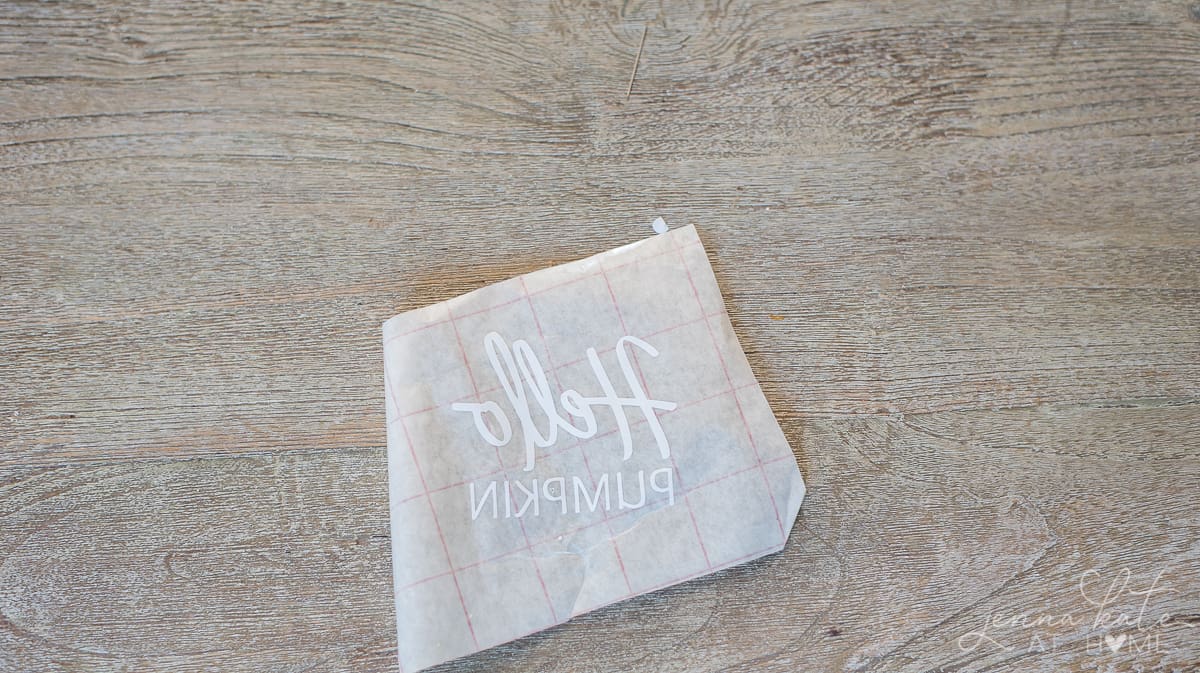
Peel the backing off the vinyl design. Then, slowly peel the surrounding vinyl away from the actual cut design.
Cut away vinyl as you go so that it doesn’t stick back down and cause problems. Use a weeding tool or a pin to remove any excess vinyl left in between the letters.
4. Prep the Surface of the Mug
Clean your mug with alcohol and allow to dry for a few minutes.
5. Transfer Design to the Mug
Center the design on the mug, press down firmly and rub it well so that the letters adhere.
Slowly begin to pull off the transfer paper so that the letters remain on the mug.
6. Bake to Set the DIY Design
Bake the mug at 175 degrees F for 60 minutes to set the vinyl. Allow to cure for 3 days before washing.
If you want to use a dishwasher, keep it on the top rack. It should wash fine but the dishwasher will limit the life of the vinyl. Also, the mug is fine to microwave once cured!
RELATED: How to build a coffee bar cabinet.
Final Thoughts
Easy, right? Now I’m dreaming all sorts of ways to make more of these. Something about my morning cup of coffee just taste better in these cute mugs.
I’m picturing these particular fall ones stuffed with some delicious fall treats and wrapped in cellophane as a great gift! Next up – winter themed ones full of hot chocolate necessities!! Yum!
Other DIY Projects You’ll Like


How to Create a Personalized Mug
Why waste time looking for the perfect fall mug with your favorite message - make it yourself with this easy tutorial!
Materials
- Permanent Vinyl (I used white but choose whatever color you want)
- Ceramic Campfire Mug
Tools
- Silhouette or Cricut Cutting Machine
- "Hello Pumpkin" design
Instructions
- Save the cut files above or design your own. Using a Silhoutte or Cricut cutting machine, cut the design out on permanent vinyl.
- Download the SVG file here. Or download the Silhoutte Studio3 File here
- Cut a piece of transfer paper slightly larger than the vinyl design. Remove the backing from the transfer paper so that you're left with the sticky grid side. Stick it to the face of the vinyl design.
- Peel the backing off the vinyl design. Then, slowly peel the surrounding vinyl away from the actual cut design. Cut away vinyl as you so that it doesn't stick back down and cause problems. Use a weeding tool or a pin to remove any excess vinyl left in between the letters.
- Clean your mug with alcohol and allow to dry for a few minutes.
- Center the design on the mug, press down firmly and rub it well so that the letters adhere.
- Slowly begin to pull off the transfer paper so that the letters remain on the mug.
- Bake the mug at 175 degrees F for 60 minutes to set the vinyl. Allow to cure for 3 days before washing. If you want to use a dishwasher, keep it on the top rack. It should wash fine but the dishwasher will limit the life of the vinyl. Also, the mug is fine to microwave once cured!
Notes
I used permanent vinyl and my Silhouette cutting machine to make the transfers for the mugs but if you don't have a cutting machine, you could also cut out your own design on vinyl if you have a steady hand.
LOVE that mug! The colours are perfect for this fall project. Thanks for sharing!
This is so adorable Jenna! Love it!
Thanks Deb!
I love that these can be personalized and would make great gifts stuffed with treats! Thank you for sharing on the blog hop.
This is so cute. It’s probs my favorite. Shhhh don’t tell anyone ;}
lol thanks Ashley ;-)
I love this!! Such a fantastic gift idea since you can personalize it however you like! XO
Thanks so much, Christy!
THis is adorable!!!
Thank you, Kristin!