Content may contain affiliate links. When you shop the links, I receive a small commission at no cost to you. Thank you for supporting my small business.
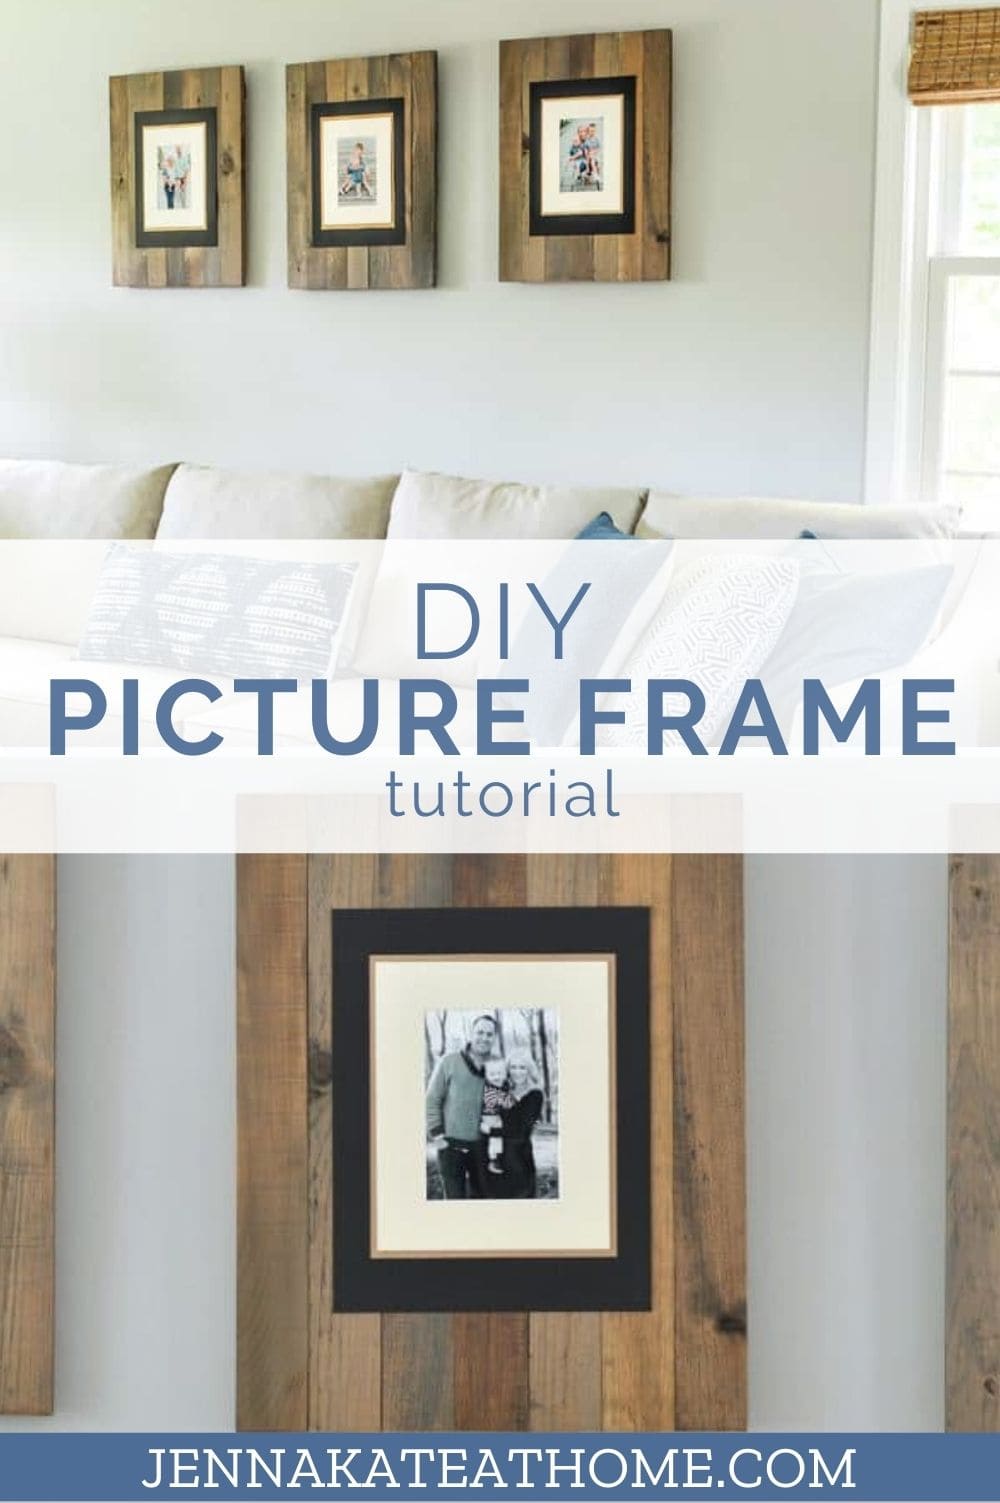
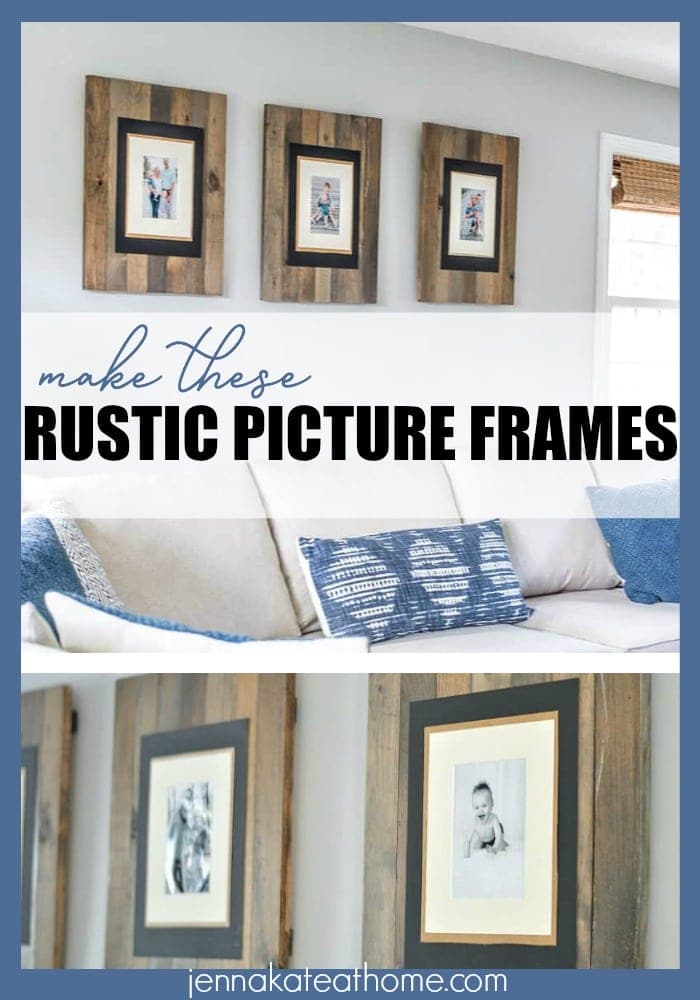
These DIY picture frames are not only a simple project but make for a beautiful homemade piece of decor. Plus, because you’re making them, you can customize them to any size you like!

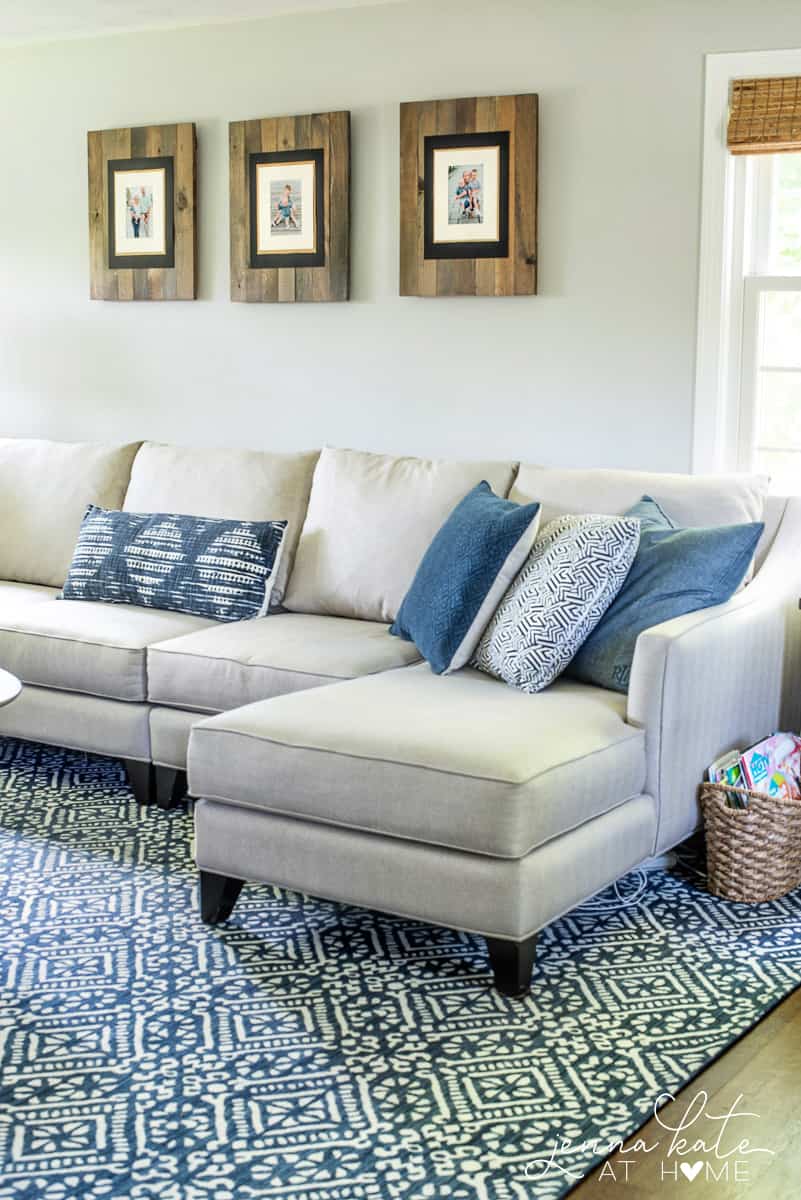
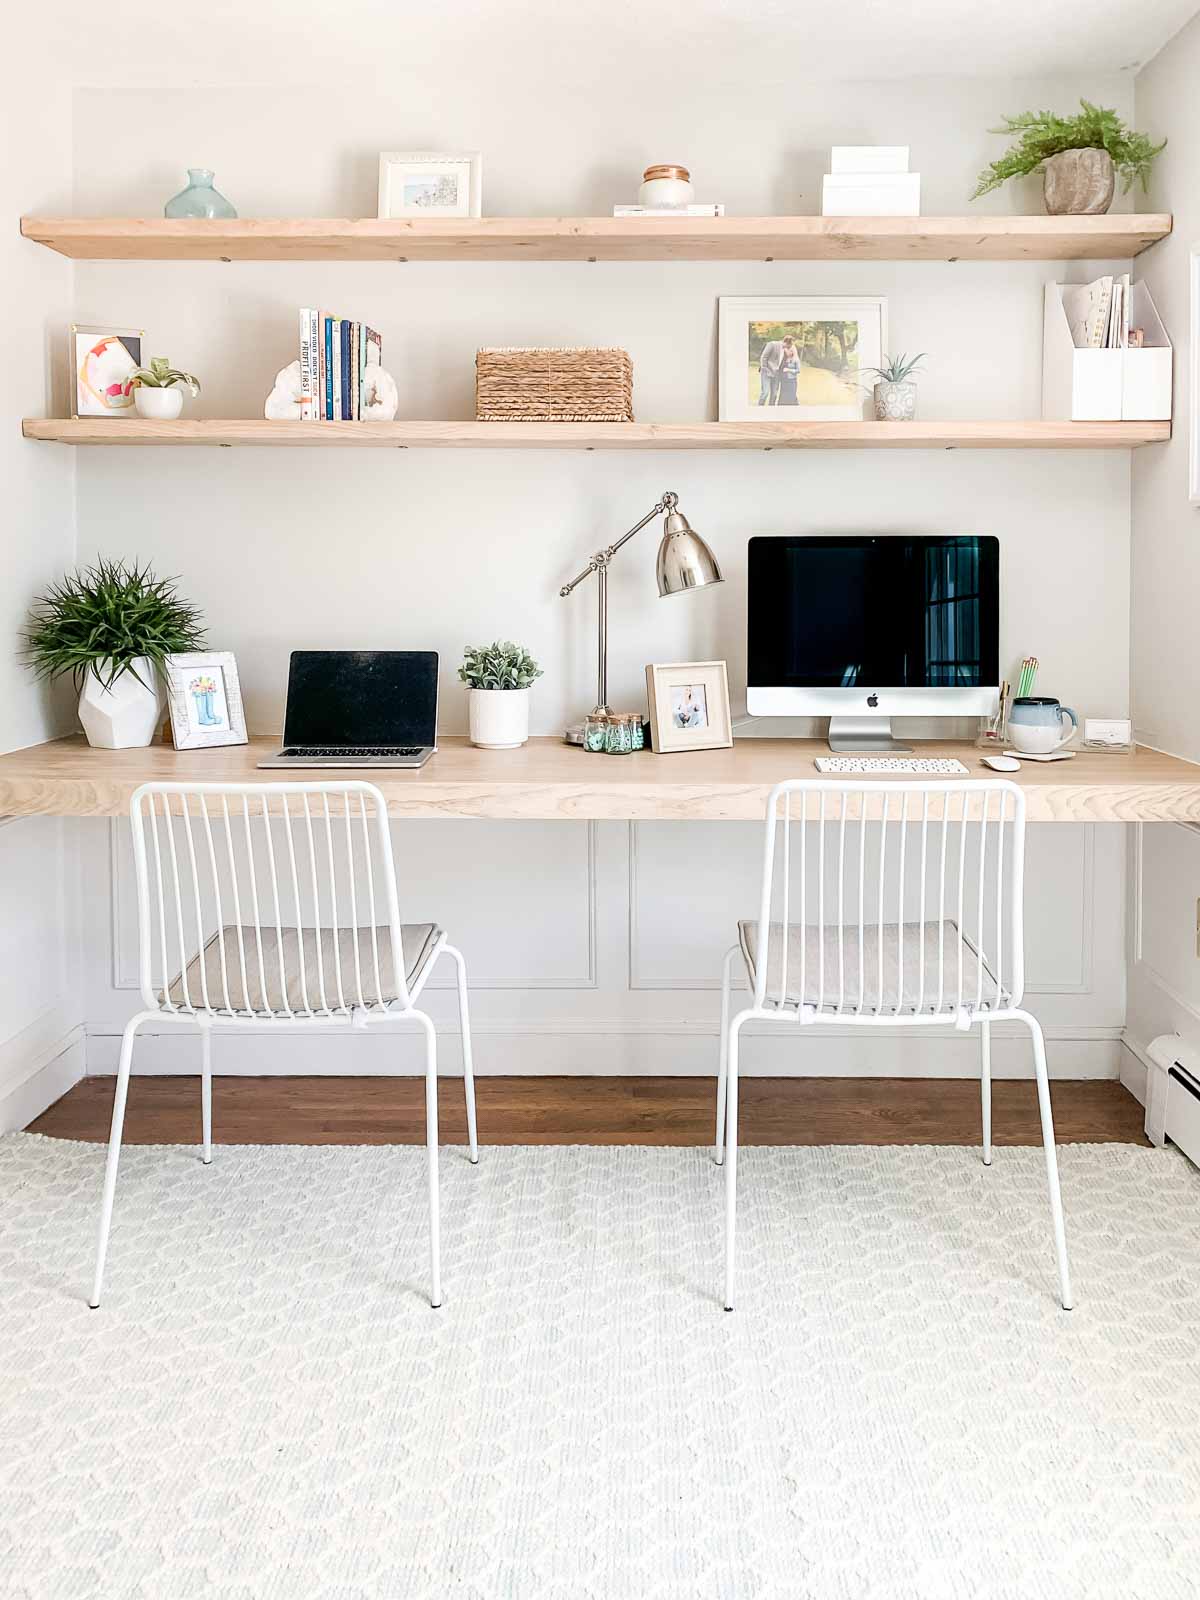
Sometimes finding the perfect way to display family photos can be tricky. These DIY picture frames are one of my favorite weekend projects ever, and solved the problem of the blank wall over my couch.
RELATED: Stylish Ways to Display Family Photos.
They are easy to make (even if you’re a DIY newbie!) and require only a few materials. They can be customized to whatever shape, size and color fits your decor – which makes them the perfect project!


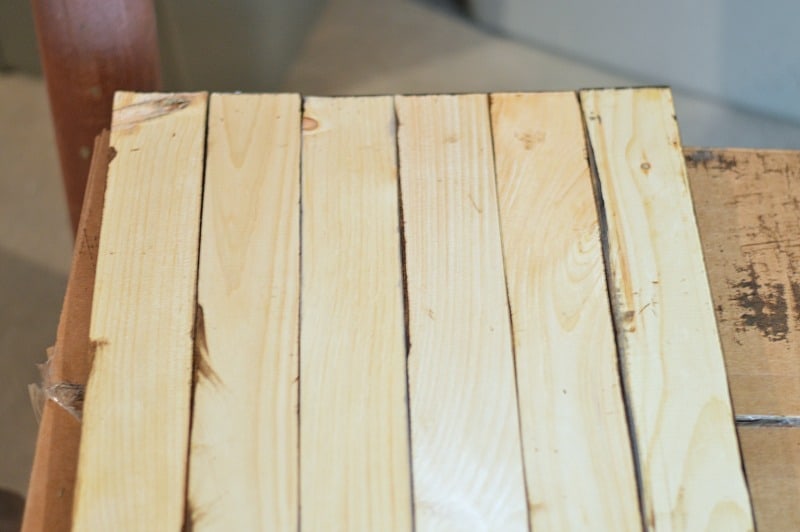
And they are so simple to make. They look like old weathered pallets but in fact they are basic white wood 1 x 3’s from the hardware store that have been stained to look all old and rustic.

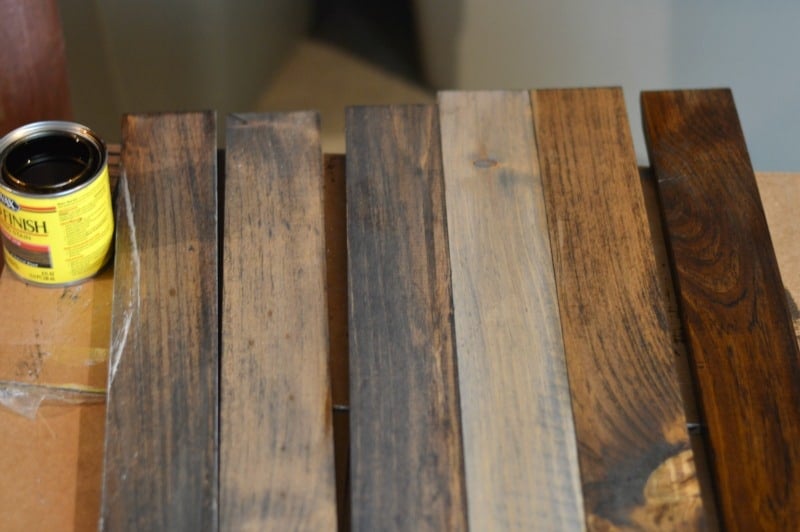
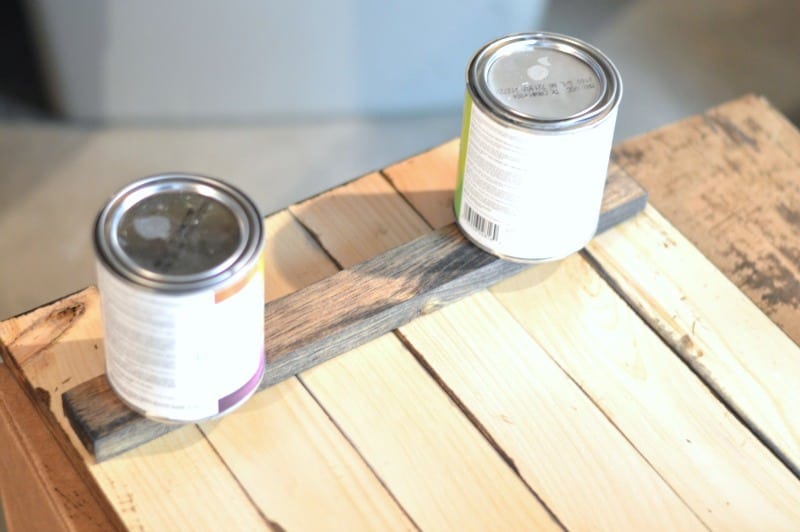
The staining technique is simple – it’s just layers of dark stain with a gray stain on top. By varying the intensity of the different stains (the longer it’s on, the darker the stain ends up), you get a variety of color on the wood.
My whitewashed wood technique is also another method that would work well here if you would prefer a lighter look. A solid coat of paint or spray paint would work too – solid white or a rich navy would be stunning!
They really add so much warmth to the living room. Plus, I love looking at pictures of my babies!

Step-by-Step Guide to Your Own DIY Picture Frames
Materials Needed
- Wood: 1 x 3’s cut to size. My frames are 22 inches long and 7 boards wide, easily sourced from your local hardware store or from scrap wood.
- Wood Stain: Minwax Dark Walnut & Classic Gray.
- Card Stock: Black (11 x 14) and burlap color (8 x 11) for a classic look.
- Photo: Your favorite 5 x 7 photo and a 5 x 7 cream mat.
- Other Supplies: Foam brushes, rags, wood glue, Elmer’s glue, removable glue dots, a smaller cream mat for the photo, sanding paper/block.
I’ve put together a video tutorial to help you… or you can just skip over it and read the directions below.
Watch this updated video to see how I improved my method using the removable glue dots so that the photos can be changed out as needed.Instructions
- Cut the wood: Cut the wood into strips the length you want the frame. My frames are 22 inches long and 7 boards wide (just over 17 inches). I purchased 1 x 3 x 8’s and had them cut down into 4 equal pieces. So I got 4 boards from each 8 foot piece at round $4.50 for the entire 8 ft board.
If you’re comfortable using power tools, a miter saw or table saw can make cutting your wood pieces more precise.
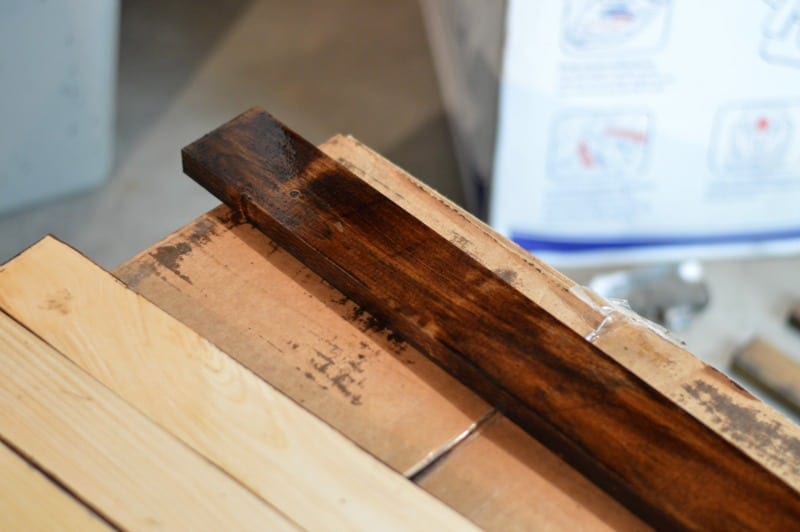
- Stain the wood: Start by putting a coat of Dark Walnut on all the boards except for a few. Immediately wipe it off 3/4 of them. Let it sit for 20 minutes on the remainder before wiping off. This will allow for a different depth of color on the boards.
- Second round of stain: Next, apply a coat of Classic Gray to all boards, including the ones that didn’t get Dark Walnut. Again, wipe it off a few, and leave it sit longer on others. Allow to dry for 6 – 8 hours.
4. Assembling the Frame: Lay out your stained wood, ensuring a varied color pattern. Use wood glue for the frame pieces, securing them with a corner clamp for precision.
- Brace the back: Using wood glue, place two braces on the backs.
Weigh them down with something heavy so that the glue bonds correctly, or use a clamp if you have one.
Tips
- Adding Stability: For larger frames, consider using pocket holes for additional support.
- Custom Sizing: Measure twice, cut once! Use a tape measure and straight edge for precise measurements.
- Enhancing the Back of the Frame: For a more polished look at the back of the frame, you can use a piece of foam core board or a piece of cardboard cut to size with a box cutter.
Adding the Front Design: Once the wood is dry and secure, you can work on the front design.
Attach the black card stock to the front, using Mod Podge or Elmer’s Glue. Again, place something down on it and let it dry.
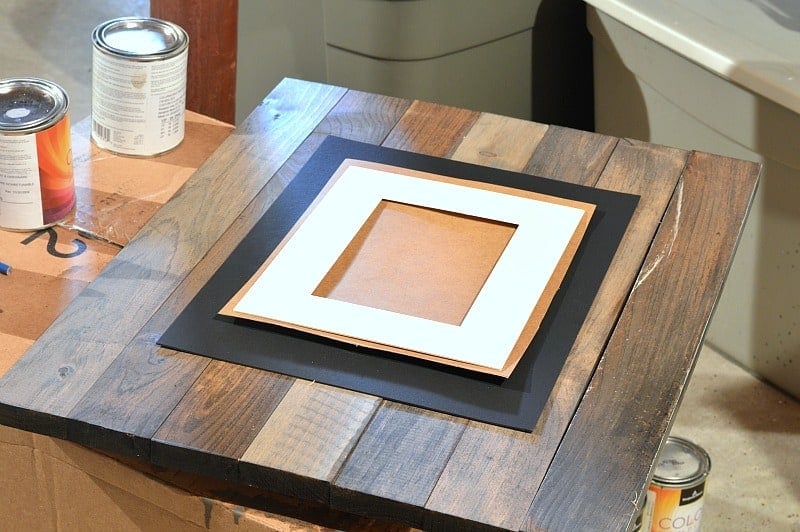
On top of the black, glue down the piece of tan colored card stock (you may need to cut it to fit correctly). Put some removable glue dots on the back of your photo and press it into the center of the tan colored card stock. Finally, attach a strip of glue dots around the the back of the cream mat, and press it down on top of the photo.
Note: It’s important to use the removable glue dots and not regular glue, or you won’t be able to remove the photo and the mat on top of it.
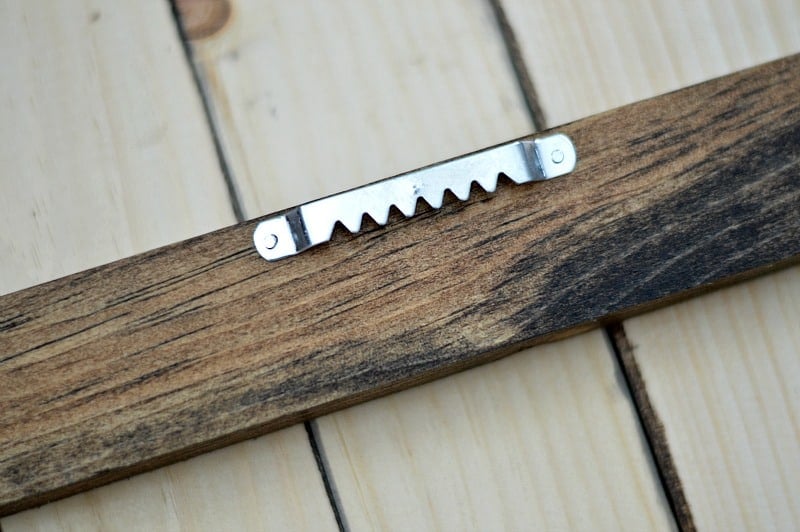
Finishing Touches: Lightly sand the edges for a distressed look. Attach a sawtooth picture hanger on the top back brace. Then hang it up!
That’s it. Really, they couldn’t be easier to make and look pretty impressive in my opinion. What do you think?
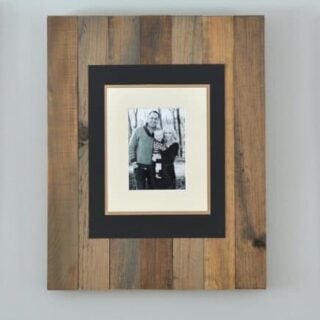
DIY Picture Frame
This DIY wooden picture frame is not only a simple project but makes for a beautiful homemade piece of decor or thoughtful gift idea.
Materials
- 1 x 3's cut to size (Lowes/Home Depot will do this for free). My frames are 22 inches long and 7 boards wide (just over 17 inches).
- Smaller boards to brace the backs (whatever you can find that's low profile. Get these cut to about 1.5 ft pieces)
- Wood Stain - I used Minwax Dark Walnut & Classic Gray
- Foam Brushes
- Rags or paper towel
- Wood glue
- Mod Podge or Elmer's School Glue
- 11 x 14 card stock or picture mat, black
- 8 x 11 card stock, burlap or tan color (length will need to be trimmed)
- Small mat for a 5 x 7 photo, cream
- 5 x 7 photo of your choice
- Removable glue dots
Instructions
- Stain your wood. Start by putting a coat of Dark Walnut on all the boards except
for a few. Immediately wipe it off 3/4 of them. Let it sit for 20 minutes on the
remainder before wiping off. Next, apply a coat of the Classic Gray stain to all
boards, including the ones that didn't get Dark Walnut. Again, wipe it off a few,
and leave it sit longer on others. - At this point, it's all a matter of preference whether you want to add more gray
stain or darken up some of the boards. It's all about getting different colors on the
wood. Play around with them! - If you want a really old look, you can also add some watered down white paint. I
did not do this but it does look good, too! - By the way, you'll notice the ends of my pieces of wood are not stained. I decided
to cut my pieces shorter so I stained them at the very end. - Arrange the boards so that the colors vary. Flip 7 of them all over, laying them
tightly together. - Using wood glue, place two braces on the backs. Weigh them down with
something heavy so that the glue bonds correctly. - Once dry, attach the black card stock using Mod Podge or Elmer's Glue. Again, place
something down on it and let it dry. - Glue down the piece of tan card stock (you may need to cut it to fit correctly). Use glue dots to place
the photo, centered, on top. Finally, place glue dots around the back of the cream colored mat and press it down over the photo. - Lightly sand all the edges to give a slightly distressed look.
- Attach a sawtooth picture hanger to the back and hang it up!
Hi! Quick question… I made some similar diy frames and the stain says to cover with a sealer… I have not made much with wood before… is that necessary for a picture frame or just for something that would be outdoors or get scratched easily. I didn’t see a sealer used in your tutorial… did you just stain?
Definitely doesn’t need a sealer!
Hello, Jenna Kate! This project is EXACTLY what I was looking for when deciding how to frame all my puzzles! I only have one question: did you glue the 1″ x 3″ boards together prior to flipping them over for the braces? It wasn’t in the instructions or your video. I just wonder if it would make the overall finished piece heavier with more glue. I’m concerned because I’ll be framing large puzzles which will require more and longer boards. My puzzles are 18″ x 24″ and 48″ x 13″. Thanks in advance! When I’m done, I’ll tag them on Instagram!
Hi! I didn’t glue in between the boards, but you definitely could! A bit of glue won’t add any weight
Holy Moly! I did NOT expect you to answer so quickly. THANK YOU! I’m heading to the store to see what I can find. I live in Costa Rica and there’s no Home Depot-like store close to us, but there are hardware stores. I’m taking pics of everything I need in case I don’t know the words in Spanish.🤔🤣
P.S. LOVE getting all your emails! Really enjoy reading all your ideas. Once our house is complete, I’ll be putting more than one project into play. This frame will be my first! Again, thank you!
I did this! My fam loves them. I wish I could share a pic on here. Thanks for posting this! Cheers!
If you’re on Instagram, I’d love for you to share and tag me @jennakateathome!
Hi Jenna! Love this project and did something similar…check it out! https://www.janesreallife.com/diy-rustic-wall-decor/ I linked to your post, hope that is ok.
So I want to do this but my wood distressed frame. However, my picture is 11×14. I don’t want all the framing. Was just going to put down burlap and/or white/cream cardstock and then the picture. I just wanted to know what ratio I would use for the frame. I see yours is 22×17. Any help?
Hi Shane,
Just use your picture as a template. Place it over the wood and determine how much space you want around it. That’s all I did to come up with my sizing :-)