Content may contain affiliate links. When you shop the links, I receive a small commission at no cost to you. Thank you for supporting my small business.
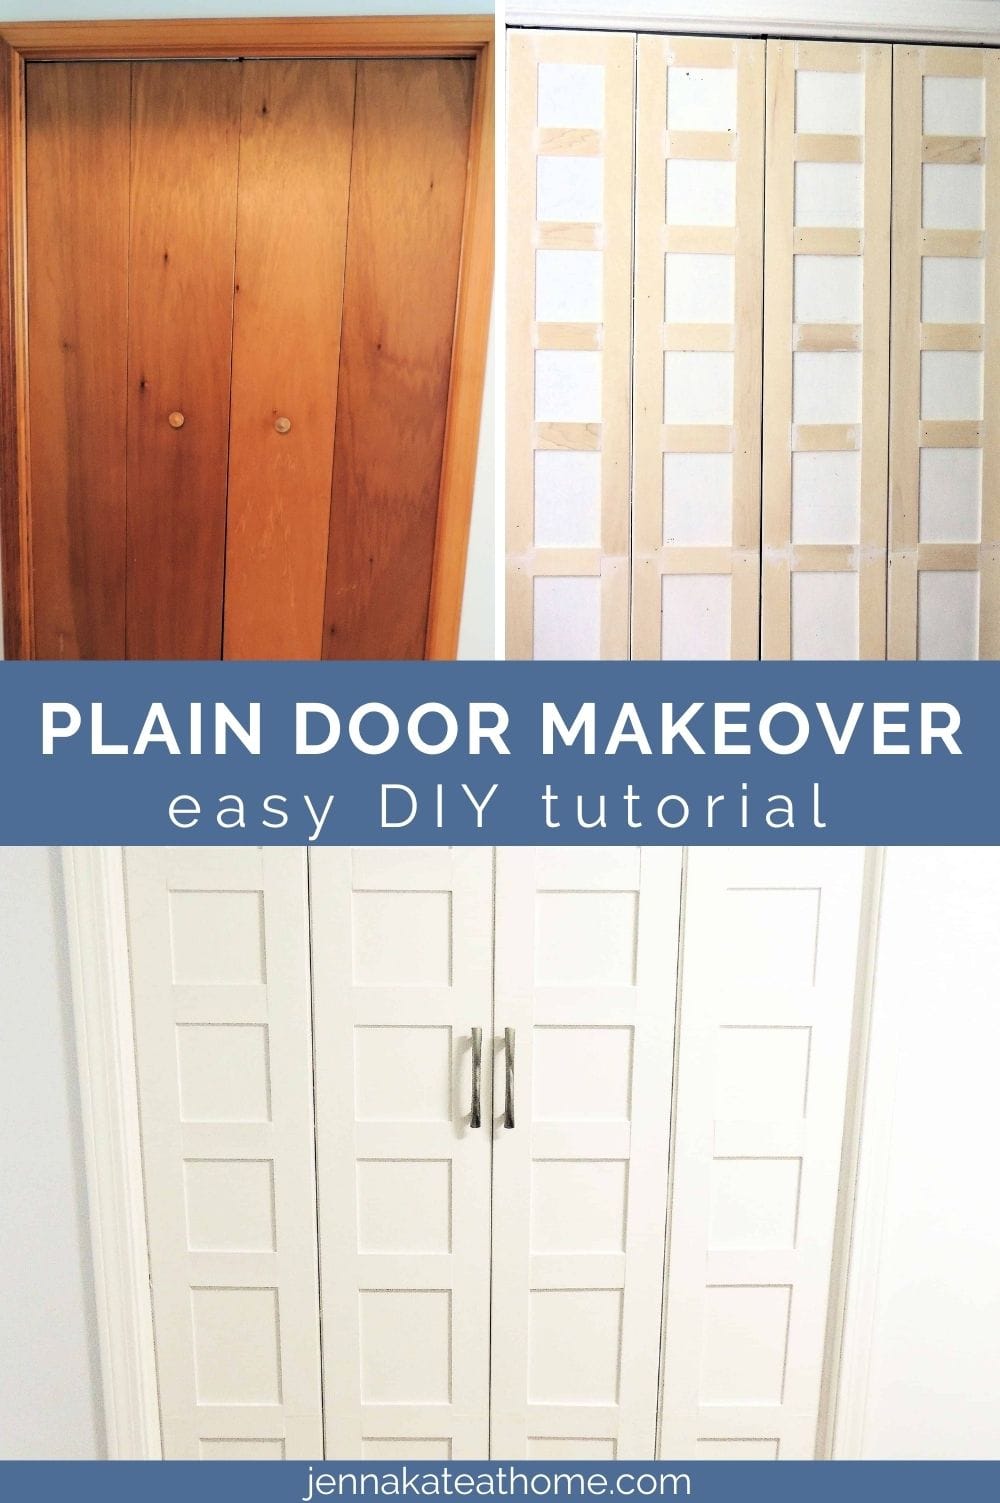
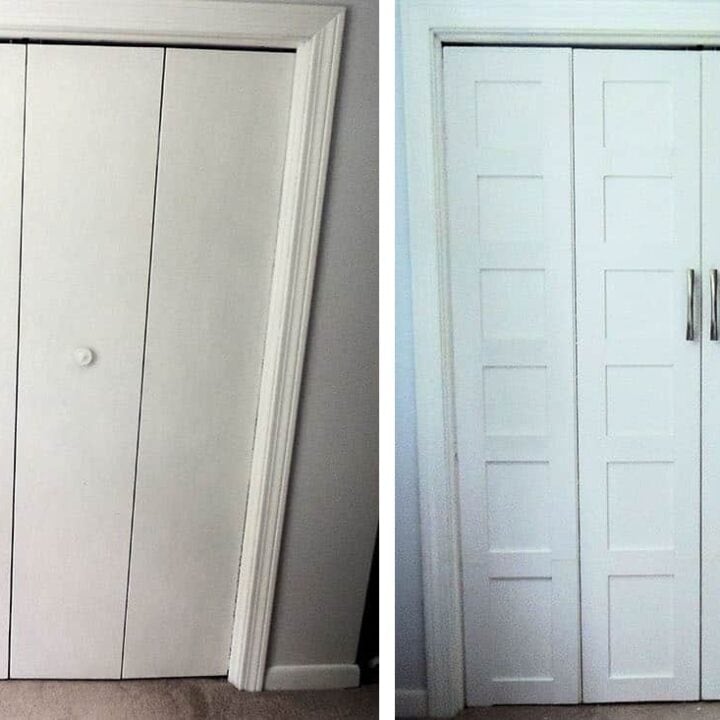
A quick and easy cosmetic facelift turned these old flat doors into beautiful panel doors. This is such an easy makeover that makes bi-fold doors look expensive!

Bedroom closets don’t just hide the occasional wardrobe clutter or Santa’s Christmas presents for your kids. They make a statement – elegant, dependable but always practical.
I was not happy with the boring appearance of my double doors! I knew I wanted to improve the look of these bifold doors, but wasn’t sure how to squeeze this project into the budget.
Originally, I had several quotes to replace them but since they were custom-made (5-ft non standard height), new doors were going to set me back close to $400! Not to mention it would take a couple weeks before they could even start.
Updated Bi-Fold Closet Doors
One day, I was strolling around Lowe’s (isn’t that where we all hang out on the weekends?!). I was looking at trim for a DIY mirror project when I came across some ¼” thick trim. It made me think of several ideas I’d come across on Pinterest for DIY closet door ideas.
Without even as much as measurements, I bought 15 pieces of the ¼” trim and took it home. The next five hours flew by as I measured, cut and painted….and finally, stared in amazement at my beautiful ‘new’ doors, for a fraction of retail price!
This DIY project is great for those on a budget or my fellow DIY enthusiasts that just can’t wait to get their hands on a new home project. This one really goes to show that you can transform just about anything without spending a fortune. Plus, it’s a great one to add to the list of first projects new homeowners could accomplish.
Now, let’s get into this DIY makeover! Luckily, you don’t need many materials.
Materials:
- ¼” wood trim boards
- Brad Nails
- Handles for door (your choice of style)
- Optional – longer screws for installing handles
- Measuring tape
- Compound miter saw
- Wood Glue
Tutorial:
Step 1: Measure the Door Panels
First thing, measure the height of your door panels to get the length of the vertical trim.
To calculate the width of the horizontal trim panels, measure the width of the door panel; then, subtract the total width of both of the vertical trims.
Step 2: Choose the Layout of the Panels
Decide how many square/rectangle “panels” you want on each door. If you’re really detailed, you would do some math here.
I was too lazy and just eyeballed where I wanted them to go.
Step 3: Cut the Trim Pieces
Cut lengths of the trim to match the measurements of your door with the power saw. It’s okay if these aren’t perfect. We’re going to fill in gaps later and sand everything out. Just get as close as you can to the measurements!
Step 4: Apply Trim Pieces to the Plain Doors
Using wood glue and some brad nails, secure the vertical strips in place. A brad nailer might come in handy here. Make sure you leave enough space between each panel for the doors to still properly swing open without any problems.

Then, attach the horizontal pieces with the layout you planned. You might want to use a level here or just eyeball it like I did. You could also use a tape measure to ensure they are the same height.

Repeat the above steps for all doors. Don’t worry about making it perfect, we’ll fix any holes or gaps next!

Step 5: Sand and Finish the Door Panels
Use wood filler or some caulk to fill in any spaces or nail holes that you may have. Even if it doesn’t look too pretty now, we’ll paint over all of this so don’t be shy in using the caulk. I’d rather it be smooth!

Sand down the caulked areas if necessary. You’ll want to ensure a smooth finish before we move on to painting. Next, apply a coat of primer (you probably will want a second coat, too!). I used Benjamin Moore Fresh Start primer, but any of your favorites should work. Let the primer dry for 24 hours.
The next day, paint. A fresh coat of paint works wonders in itself, but especially with your new design, you’ll start to see the entire look of the room change!
If you can find the same paint color the doors or walls are already, that’s a safe bet. Or, use this as an opportunity to bring in an accent or dark color!

Step 6: Install New Handles
Before we wrap up this bi-fold closet door makeover, we need to attach some fancy new hardware. You’ll most likely need to buy longer screws than what is supplied with the hardware, since they are meant for cabinets. I used these screws:
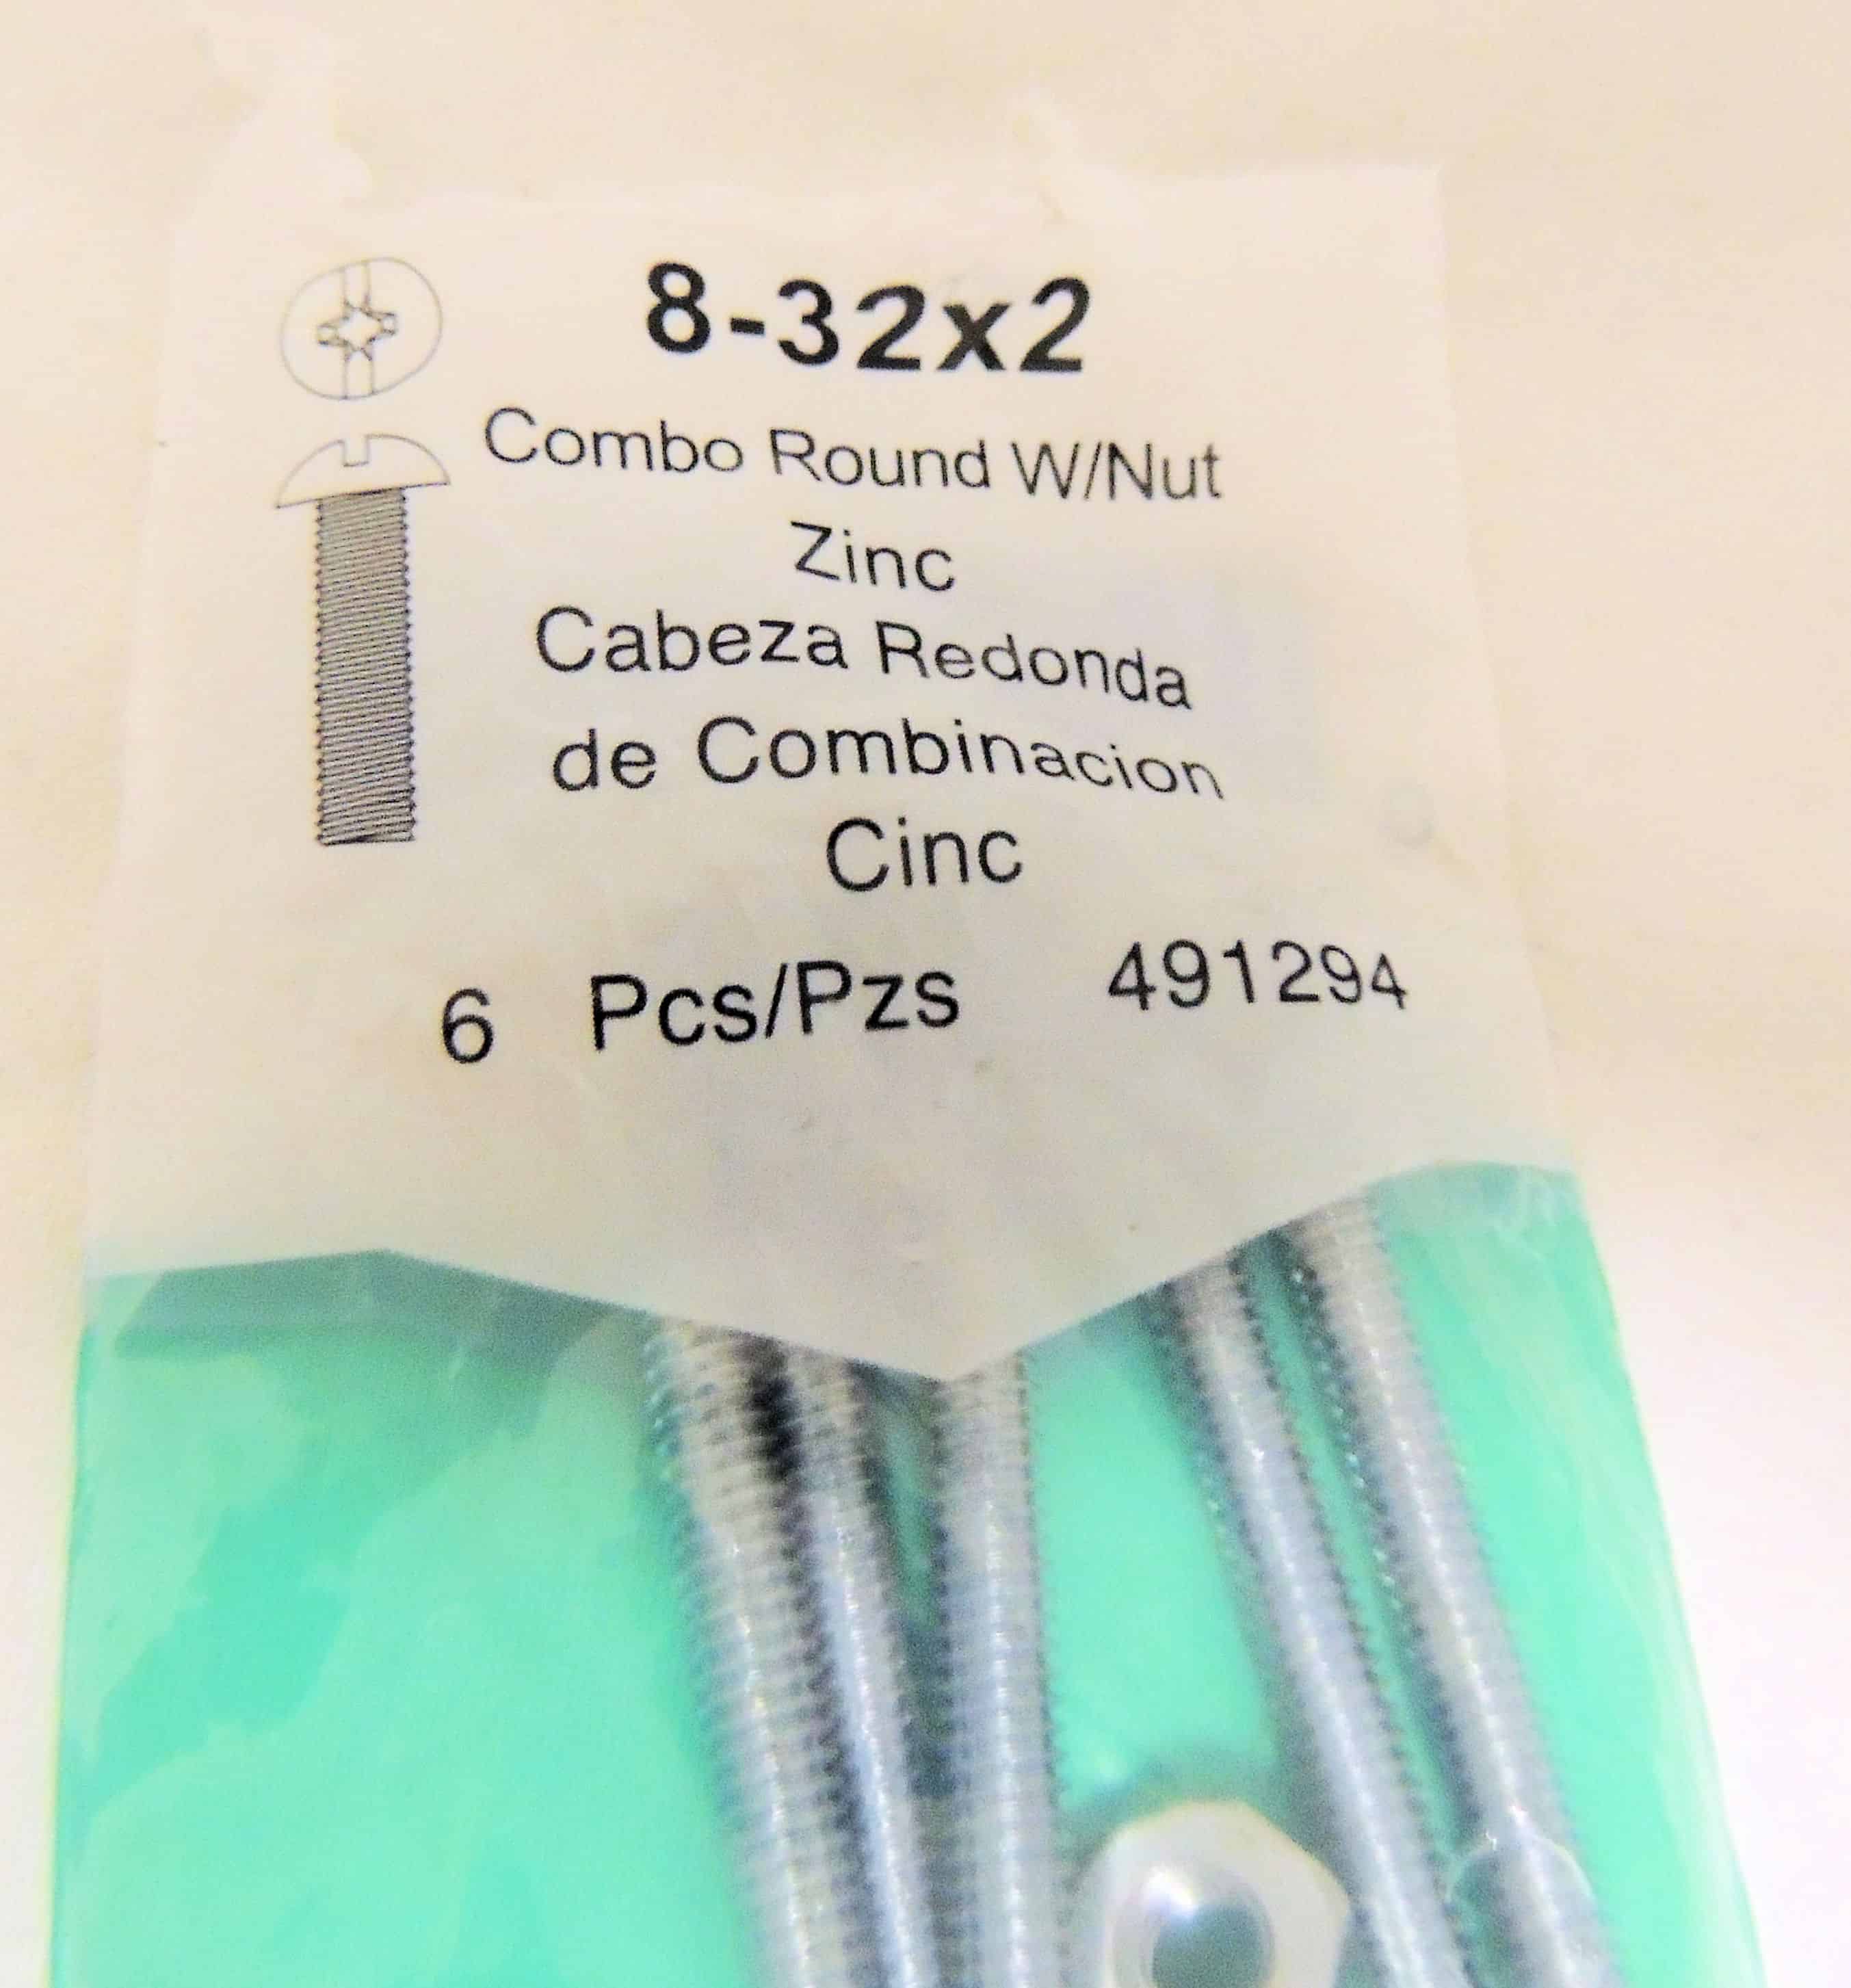
If you are not good at installing door hardware, make yourself a template using painter’s tape. Put the tape on the hardware and punch through the holes with a pencil – instant template!
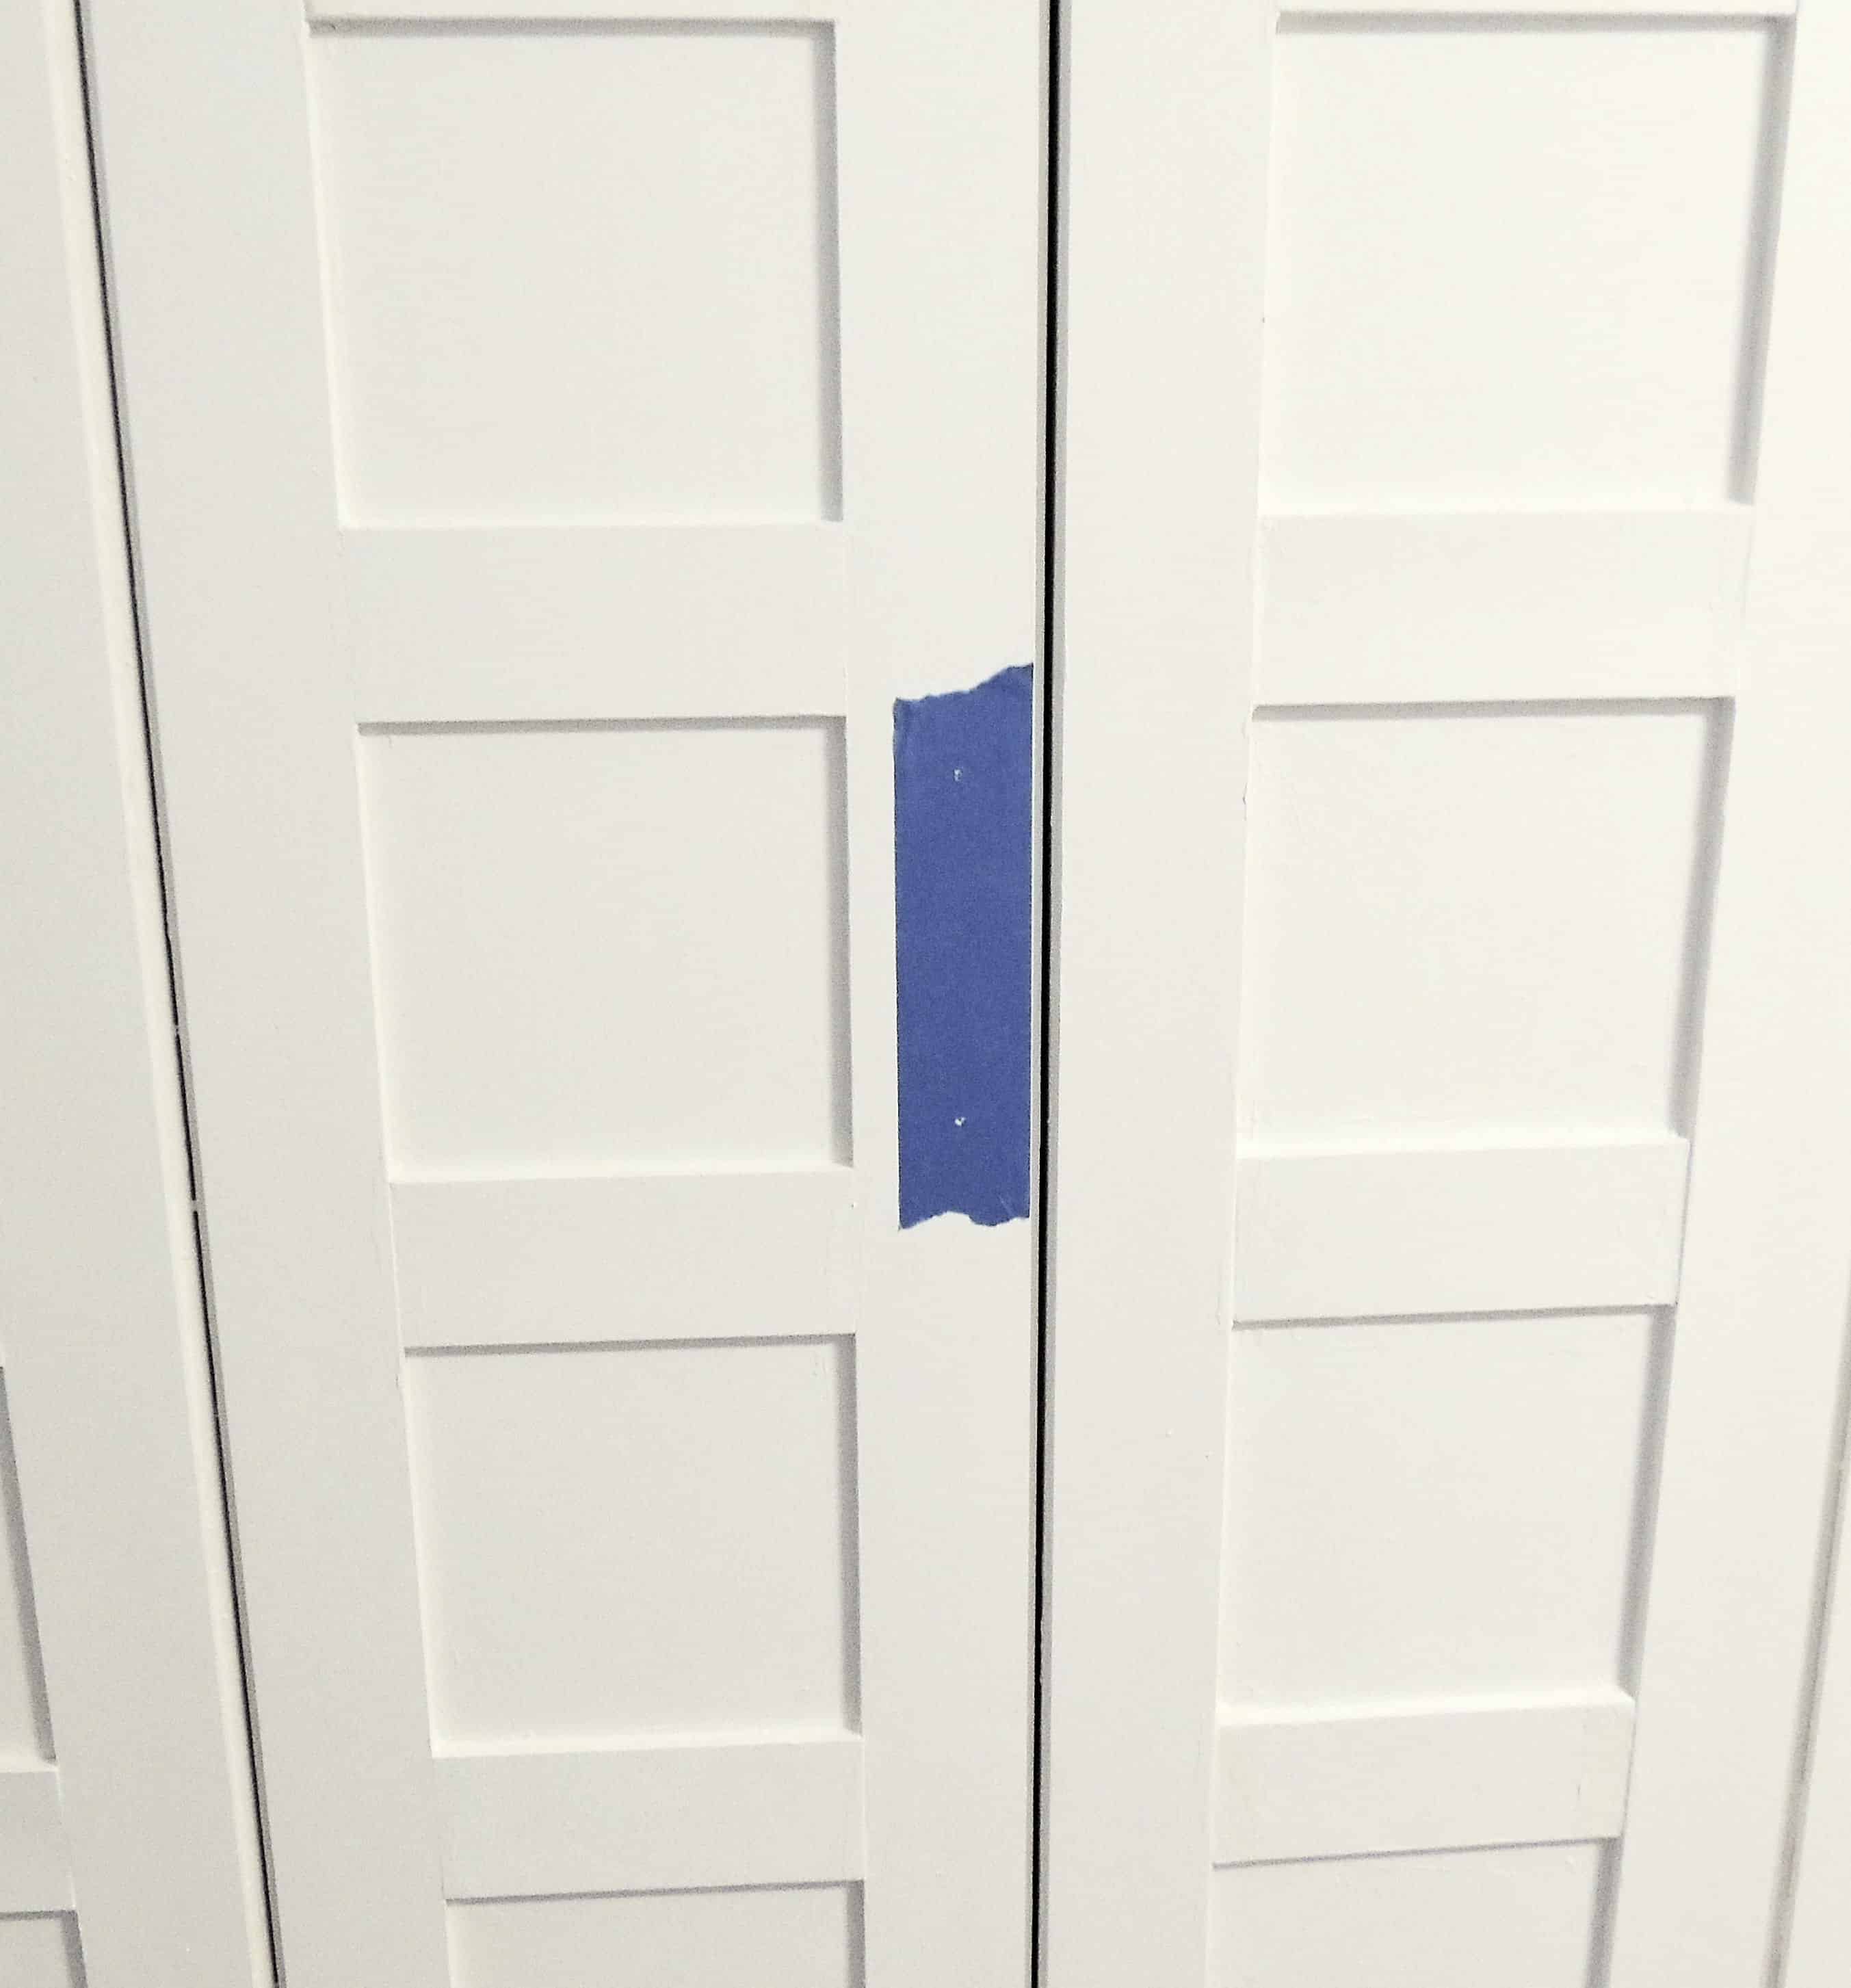
Drill from the outside of the door to prevent the wood from splintering. This is the perfect finishing touch, so don’t skip this step!
Final Thoughts
And that’s it! Sit back and enjoy your makeover with these updated closet doors!
I absolutely love how this project turned out. It was so rewarding to give a new look to these bi-fold closet doors and transform them into something stunning for our master bedroom.
I’m also glad I didn’t spend huge amounts of money to replace these doors – a few hours of glueing/nailing wood, a couple coats of paint, and a little elbow grease transformed them into doors that look a lot more expensive than your everyday standard bifold door.
*UPDATE* If you enjoyed this post, check out how I converted my bedroom closet bi-folds to french doors!

Closet Door Makeover - from Plain to Panel
Don't waste money replacing your closet doors - upgrade them with simple wood trim!
Materials
- ¼” wood trim boards
- Brad Nails
- Handles for door (your choice of style)
- Optional – longer screws for installing handles
Tools
- Measuring tape
- Compound miter saw
- Wood Glue
Instructions
- Measure the height of your door panels to get the length of the vertical trim.
- To calculate the width of the horizontal trim panels, measure the width of the door panel; then, subtract the total width of both of the vertical trims.
- Decide how many square/rectangle "panels" you want on each door. If you're really detailed, you would do some math here. I was too lazy and just eyeballed where I wanted them to go.
- Cut lengths of the trim to match the length of your door with the miter saw.
- Using wood glue and some brad nails, secure the vertical strips in place. Then, attach the horizontal pieces with the layout you planned.
- Repeat the above steps for all doors.
- Use wood filler or some caulk to fill in any spaces that you may have. Sand down the caulked areas if necessary.
- Paint with two coats of primer (I used Benjamin Moore Fresh Start primer). Let dry for 24 hours.
- Finish with a semi-gloss white paint.
- Attach some fancy new hardware. You'll most likely need to buy longer screws that what is supplied with the hardware.
- If you are not good at installing door hardware, make yourself a template using painter’s tape. Put the tape on the hardware and punch through the holes with a pencil - instant template!
- Drill from the outside of the door to prevent the wood from splintering.
- Sit back and enjoy your new closet doors!