Content may contain affiliate links. When you shop the links, I receive a small commission at no cost to you. Thank you for supporting my small business.
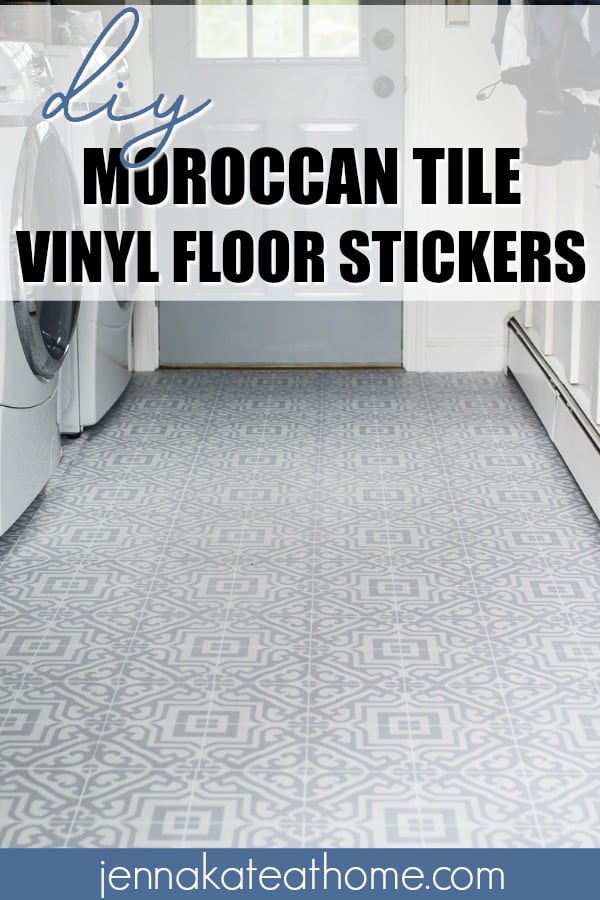
How to install DIY Vinyl Peel & Stick Moroccan Tile. These are a quick and easy way to cover up old ceramic tiles or ugly linoleum floors in one afternoon!
If you remember my plans for the laundry room, it included laying some sort of new flooring.
The issue with our old floor was not only was it really dirty looking (no amount of scrubbing made it look clean) but there was also the possibility of asbestos underneath. So we knew that whatever floor we chose, it had to float over the existing linoleum.
I recently came across some vinyl tile stickers while doing research for my Cheap Flooring Ideas post and instantly loved the simplicity of them. After looking into them further and reading Lauren from Bless’er House’s review, I knew I wanted to go a similar route.
This post may contain affiliate links for your shopping convenience.
These vinyl floor tile stickers and sheets are amazing for a quick flooring update. Whether you have ceramic tiles or old linoleum flooring like me, they are a fabulous way to update any space. They are water resistant and rated for kitchens and bathrooms. They also come in backsplashes and stair risers!
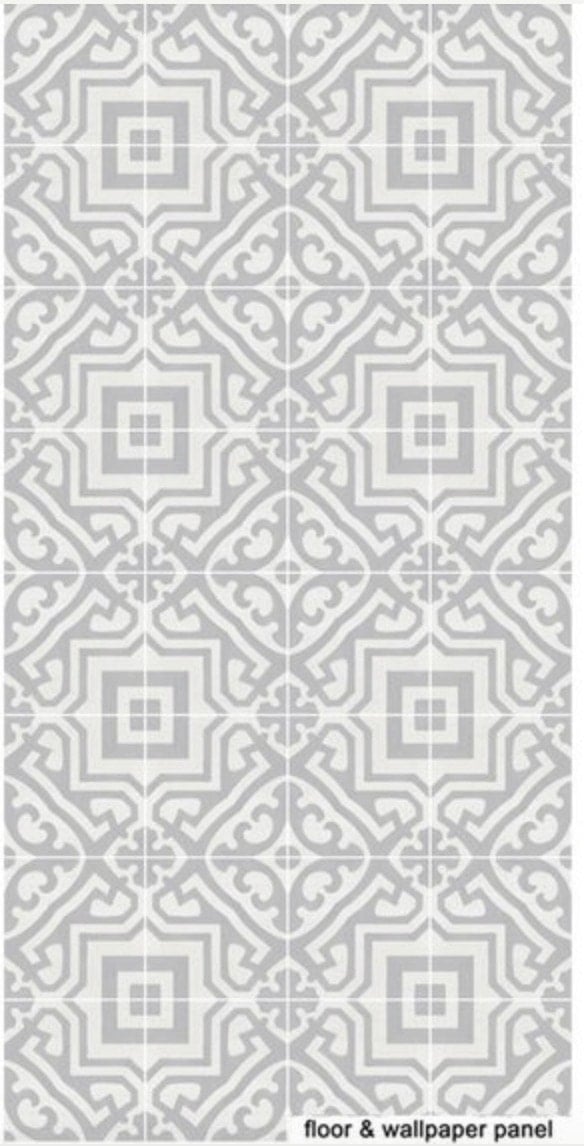
After a whole lot of indecision (so many pretty choices!!), I eventually decided on this gray moroccan tile style and ordered the tile stickers.
However, after contacting the store to make sure I was making the right choice, I was actually advised to ditch the tile stickers and go with a full sheet instead.
The reason being this: the tile stickers are designed to stick right over existing tile that already has grout lines. If you have linoleum like I do, you don’t need individual stickers as you are laying over an already flat, even surface. Since it comes in a full sheet and they don’t have to cut it into stickers, it’s also cheaper! Wahay!
The floor stickers/sheets that I ordered are shipped from Indonesia but arrived within 5 days of my ordering them. And being the eager beaver that I am, I got to work installing them immediately.
How to Install Vinyl Tile Floor Decals
Ensure that you floor is free of any dirt, lint or grease. I vacuumed my floor first, then scrubbed it down and allowed it to air dry for a few hours.
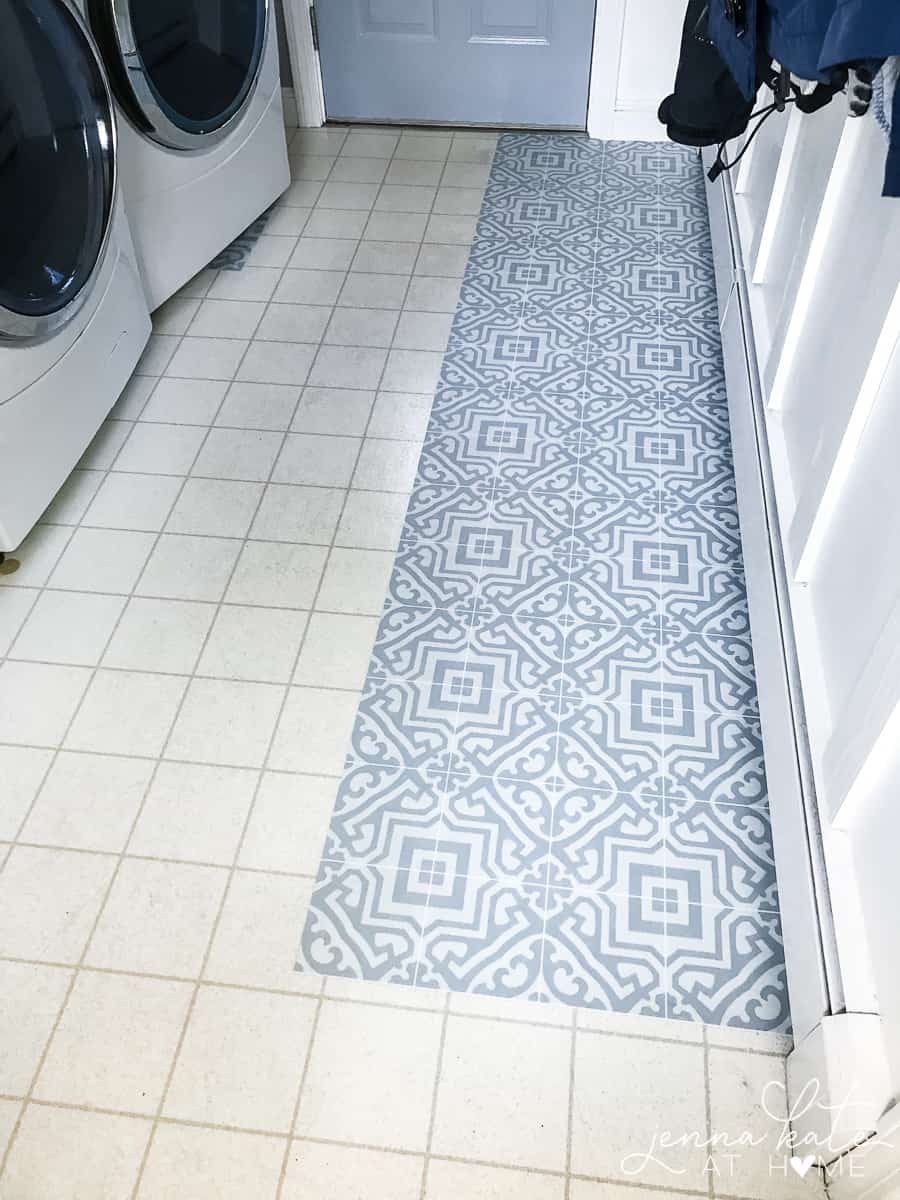
Before starting to lay down your vinyl sticker floor , take notice of how you want the pattern and grout lines placed.
I wanted the pattern centered on my door, so starting way off to the far edge was not an option. Instead, I started in the middle and then worked on either side.
When you are ready to start, you are going to need a straight line to work with. I used the existing “grout” lines on my linoleum as my guide but if you don’t have those, use a chalk line or laser to get a straight line to follow.
Also – excuse my phone photos. I so excited to get started that I forgot to charge my camera!
Pull some of the backing off the floor sticker and place it down, making sure it is straight along the top and sides. Using a credit card (or something similar), rub the decal onto the floor, removing any air bubbles as you go.
Continue pulling the backing paper off, a bit at a time, and using the credit card to smooth it out. If you have an air bubble that won’t budge, just pull the sticker up and smooth it out again. I had to reposition some of mine a few times and I had no issues doing this.
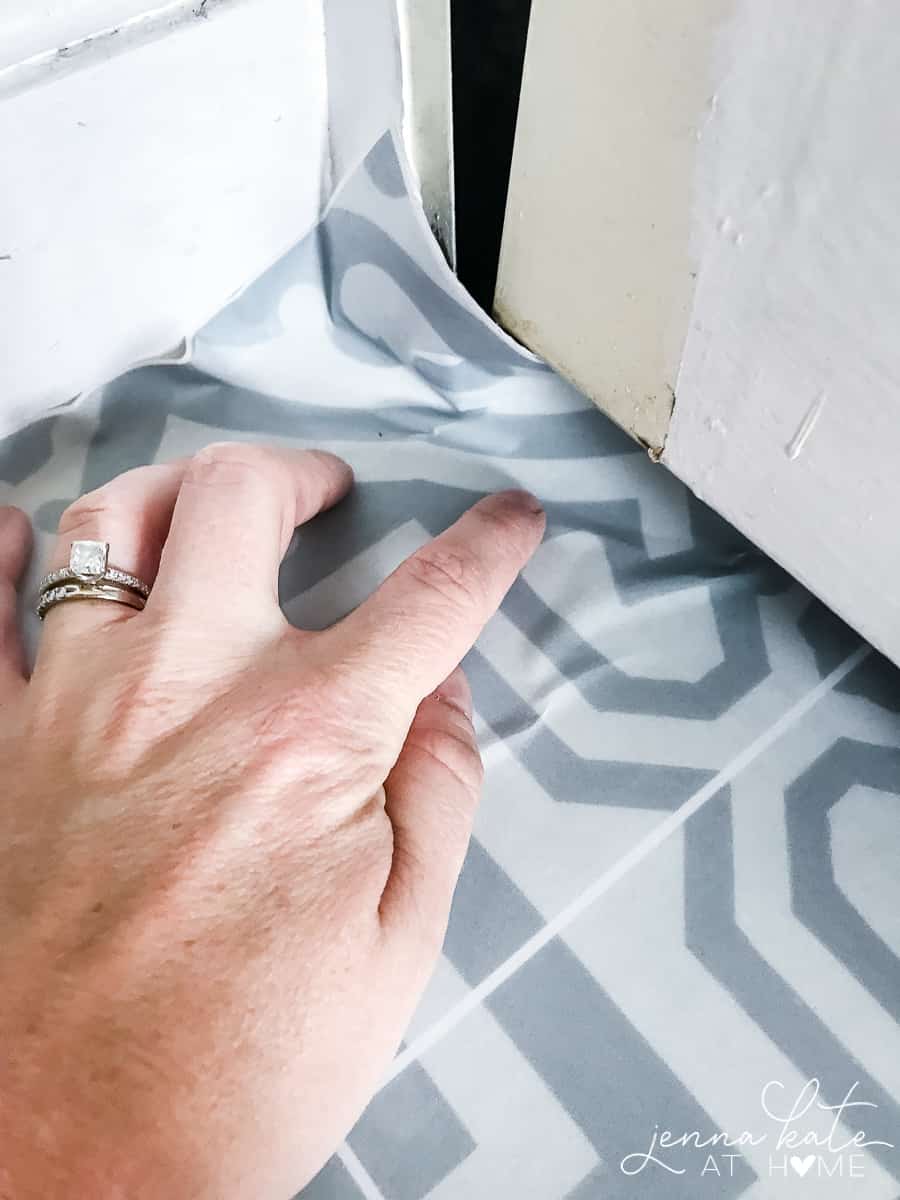
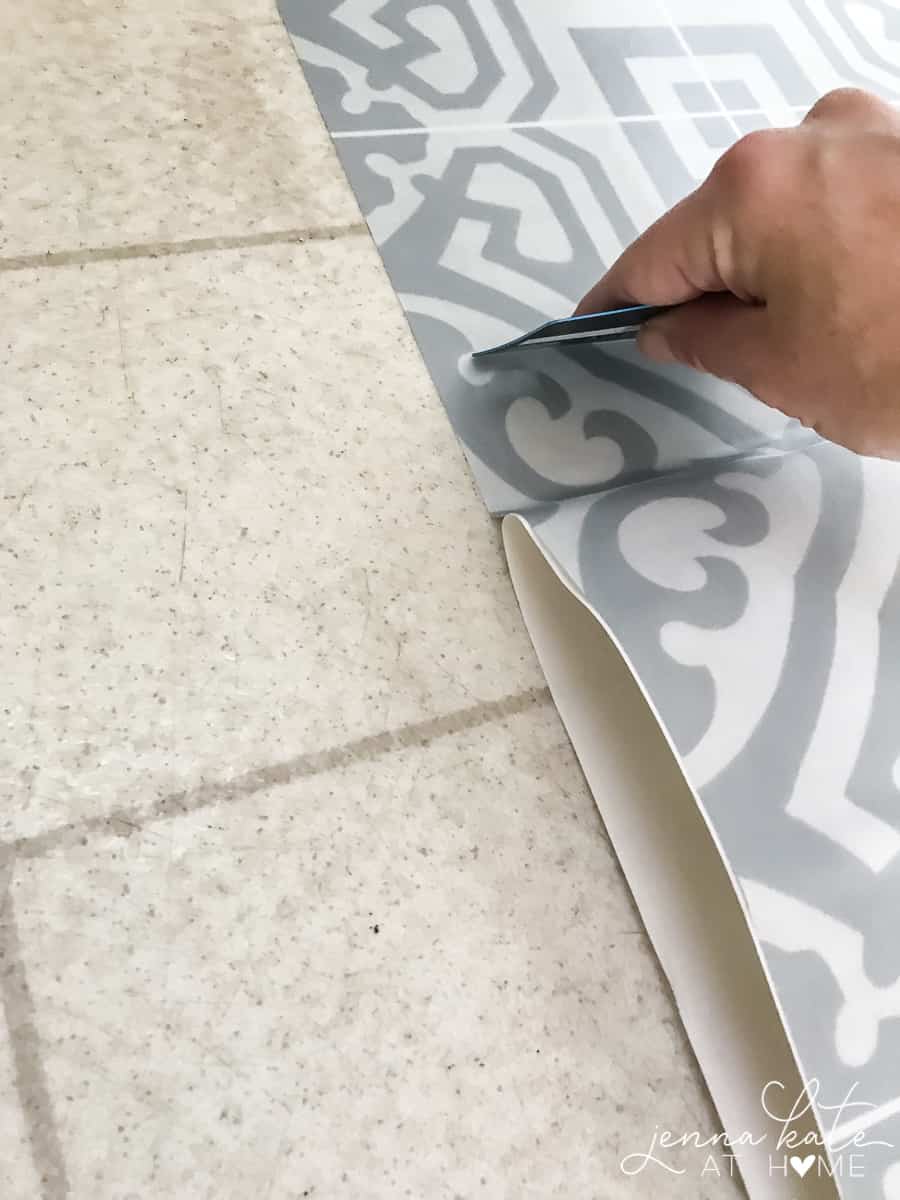
When you get to a spot that requires cutting, use the space as a template. Without removing the backing paper, align the decal where you want to place it. Push it into the corner and using a Xacto knife, cut out the shape. The sticker cuts very easily and cleanly.
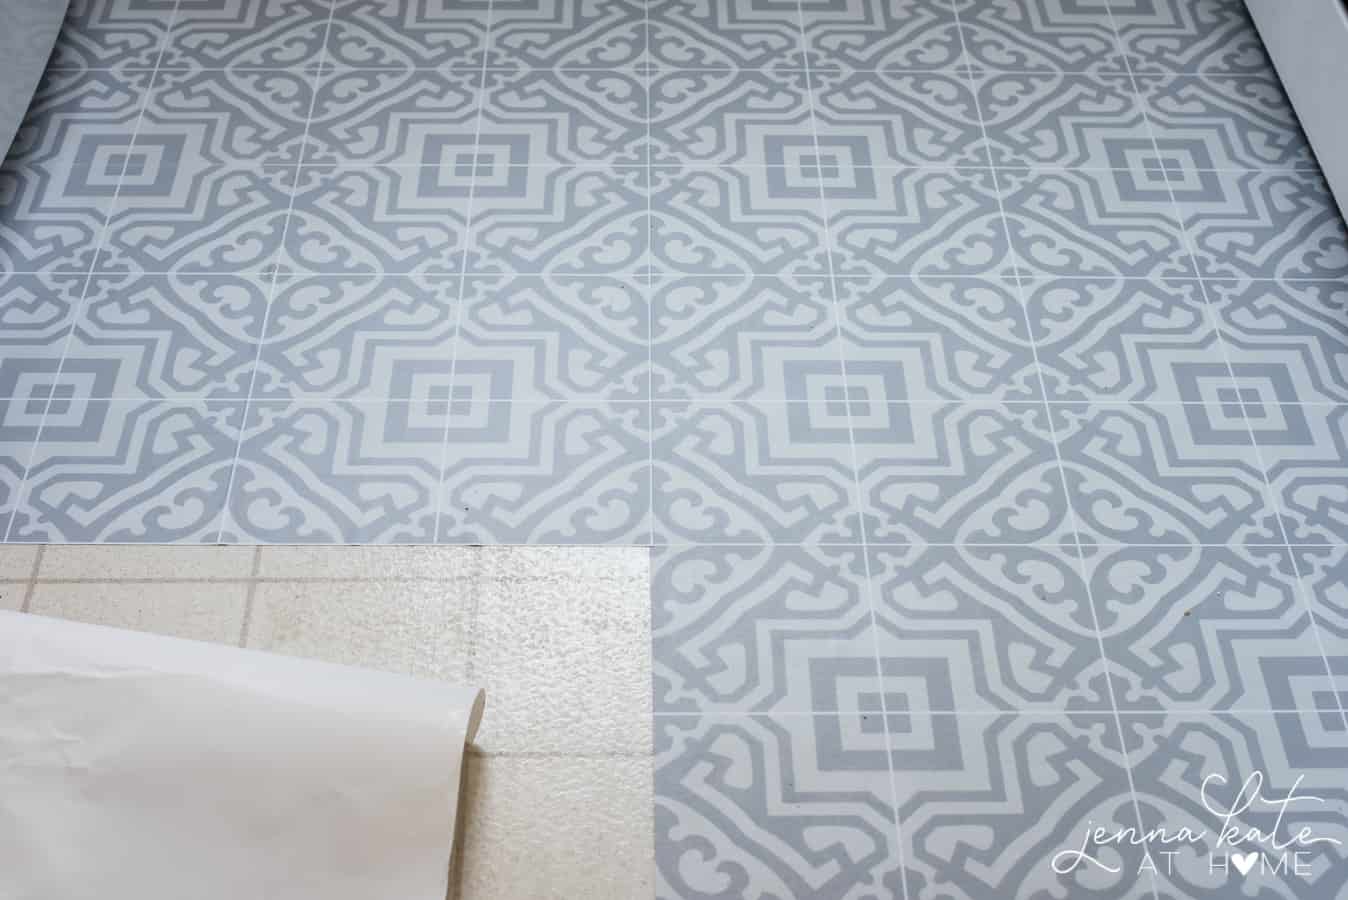
Follow this process for all the pieces, being careful to match up the “grout” lines on the floor decals. If you put one down and it’s even a little off, you’ll mess up all the remaining pieces. So keeping everything straight the whole way through is really important.
Also – put something under your knees when you’re doing this. I didn’t think to do that until I was 3/4 of the way done and I had sore and bruised knees for the next week!
When you’re finished, stand back and admire your handy work…
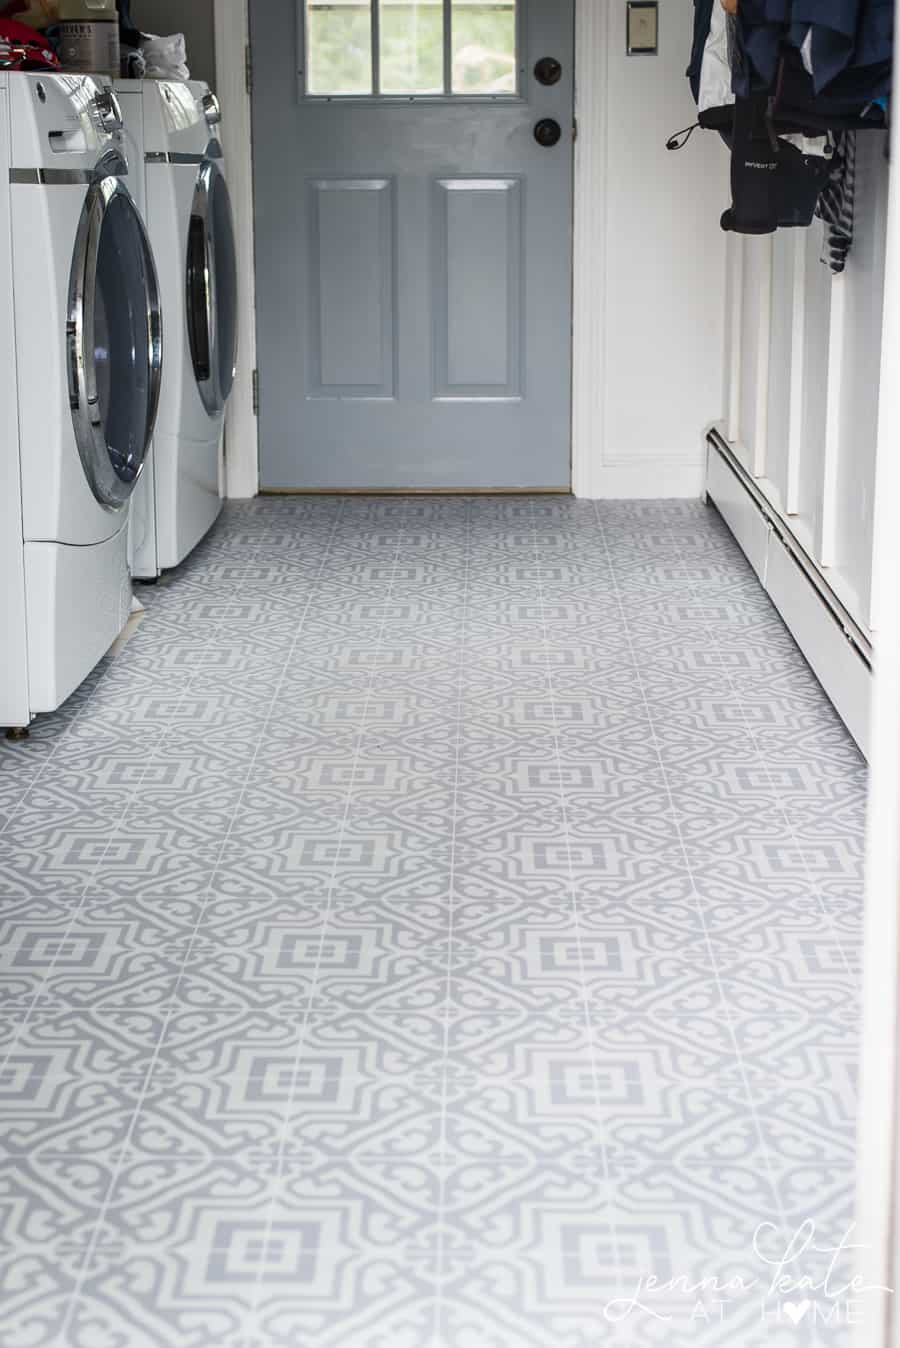
It’s quite the dramatic update for a few hours of work, right? I did the entire laundry room floor in about 3 hours, so it really is a good afternoon project.
The floor feels nice and warm underfoot, too. Also, because these are full sheets and not individual tile stickers, they are really durable and long lasting. We’ve had this flooring installed for 3 weeks now and it sweeps up beautifully and washes really well with a regular wet Swiffer wipe. We love it!
I’m putting the finishing touches on the rest of the laundry room this week so I should have the final reveal for you shortly!!

Install Vinyl Tile Floor Decals
Durable yet gorgeous, this vinyl sticker floor is a quick and simple improvement to any room!
Materials
- Vinyl Peel & Stick tiles (preferably sheets)
Tools
- Straight edge (like a credit card) to smooth out bubbles
Instructions
- Ensure that the floor is free of any dirt, lint or grease.
- Before starting to lay down your vinyl sticker floor, take notice of how you want the pattern and grout lines placed.
- When you are ready to start, you are going to need a straight line to work with. I used the existing "grout" lines on my linoleum as my guide but if you don't have those, use a chalk line or laser to get a straight line to follow.
- Pull some of the backing off the floor sticker and place it down, making sure it is straight along the top and sides. Using a credit card (or something similar), rub the decal onto the floor, removing any air bubbles as you go.
- Continue pulling the backing paper off, a bit at a time, and using the credit card to smooth it out. If you have an air bubble that won't budge, just pull the sticker up and smooth it out again.
- When you get to a spot that requires cutting, use the space as a template. Without removing the backing paper, align the decal where you want to place it. Push it into the corner and using a Xacto knife, cut out the shape.
- Follow this process for the rest of the pieces, being careful to match up the "grout" lines on the floor decals.
Notes
Protect your knees by using knee pads while you're laying out your new vinyl sticker sheets.
UPDATE: See the full laundry room reveal by clicking here
Think These Vinyl Floor Decals Are Something You Might Like? Here’s Some More Fun Prints!
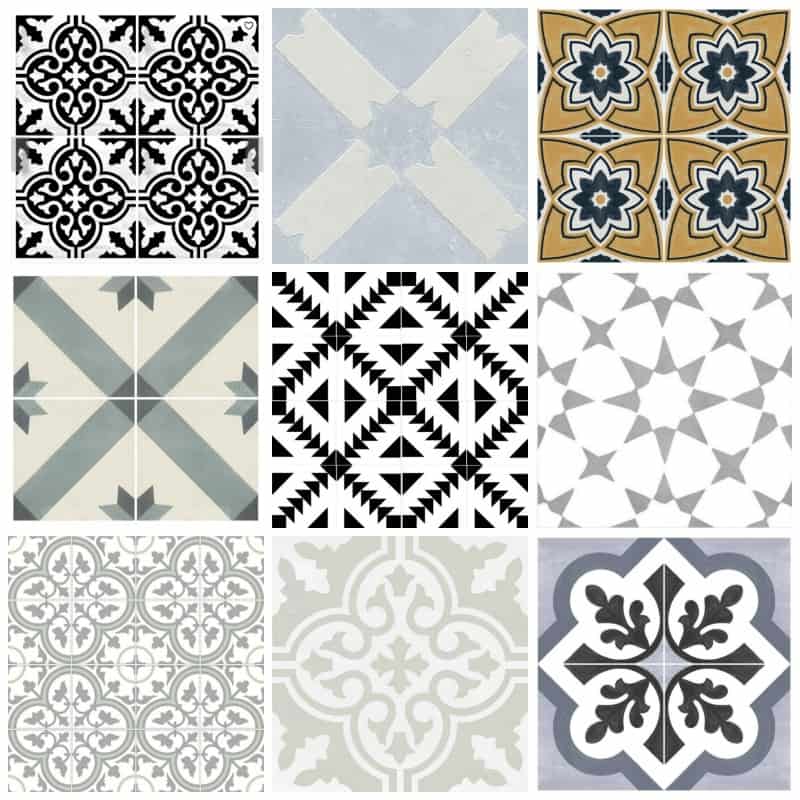
Black & White // Light Blue //Ochre
Green & Bone // Black & White Geometric // Gray Star
Gray & Green // Stone // Blue & Gray
Found a print that you like but it’s the wrong color? Most of the companies can customize the colors as well as the tile size, so go ahead and ask them!


Hi! When you say “full sheet” was it the 13×13 that you used?
Hi Sam, only the 12 x 48 and 24 x 48 are “sheets” the other options are individually cut out, which I don’t advise getting as the edges will peel up too easily.
Hi
Can I use this on basement concrete floor?
Thanks
Molly
Hi Molly – no, it’s only designed to go over tile or linoleum.
Hi Molly-
This is fantastic. Where can I purchase these sheets?
Thank you
Cheri
I’m sure you don’t plan on ripping it up anytime soon (it’s beautiful btw!)… but do you know if or what it would do to the flooring beneath it? I’m trying to convince the hubs this is the way to go but he’s being a bit apprehensive;-) thanks
I pulled it up a few times when I was installing it to reposition some pieces and it came up very easily and didn’t damage or leave the underneath sticky – keeping in mind that it’s designed to be installed specifically over linoleum or tile.
Did you need to polyurethane it for wear and tear protection?
Nope! It’s vinyl so it doesn’t need anything extra.
How much did you need to complete this diy?
Wow! That is incredible! I have two spaces in mind that I think this would be perfect for! Thanks for sharing, I had no idea this product existed!