Content may contain affiliate links. When you shop the links, I receive a small commission at no cost to you. Thank you for supporting my small business.
A hallway console table is a great beginner DIY. All you need are a few basic tools and inexpensive wood and you’ll have your own entryway table in just a few hours!
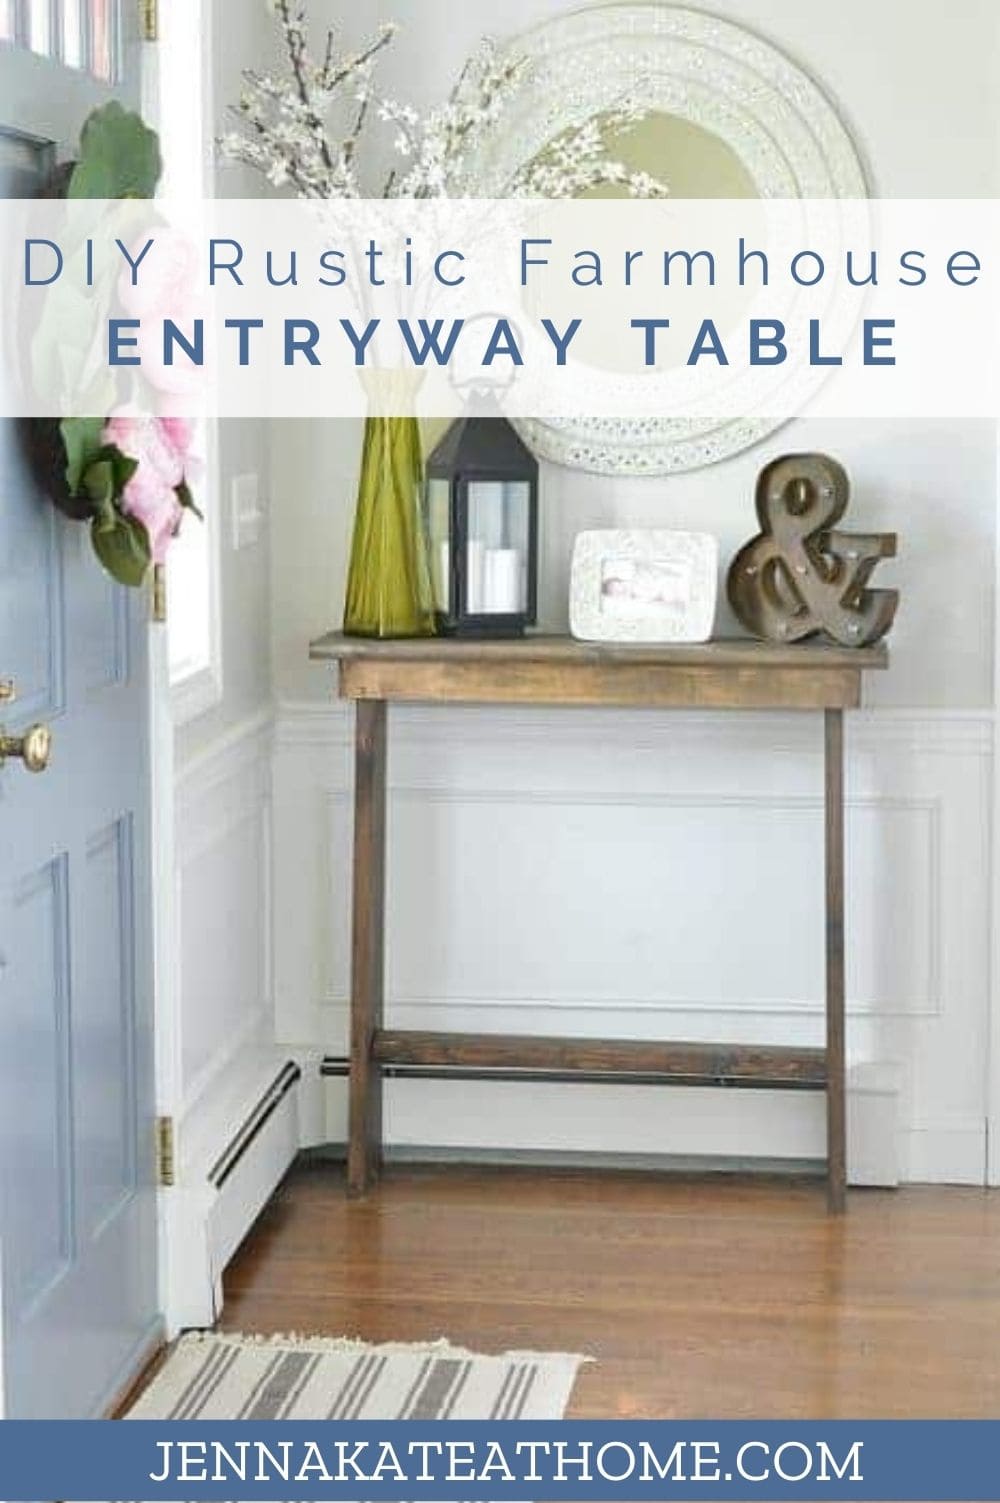
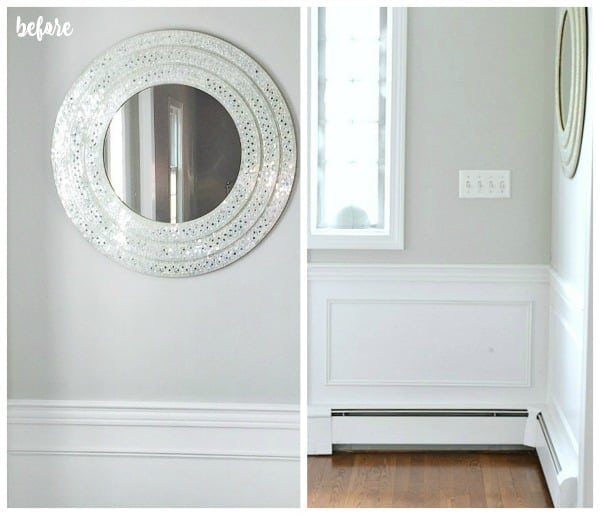
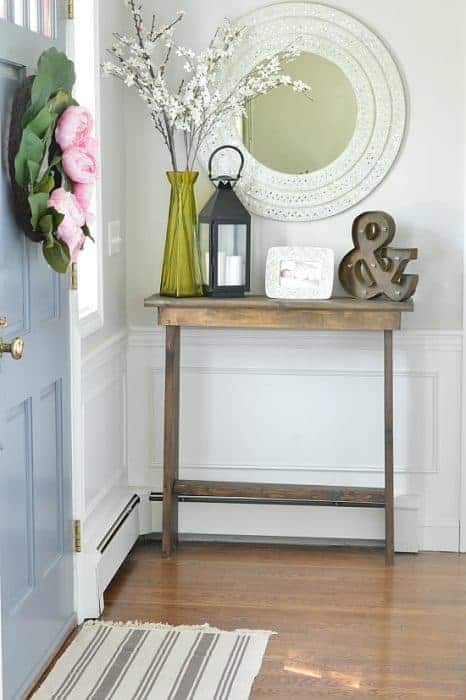
Our entryway needed something in this bare corner – our large, iridescent mirror was all dressed up but had no company! But no matter where I looked, I couldn’t find a piece of furniture shallow enough or the right width.
Instead, I drew a picture, Brian figured out all the math, and we built our very own hallway console table! I was inspired by this tutorial from Jenna Sue Design Co. – she gave a simple guide that was easy to follow and adapt to our needs.
So, we attempted to build our first ever piece of furniture – an entryway table – and it was unbelievably easy!
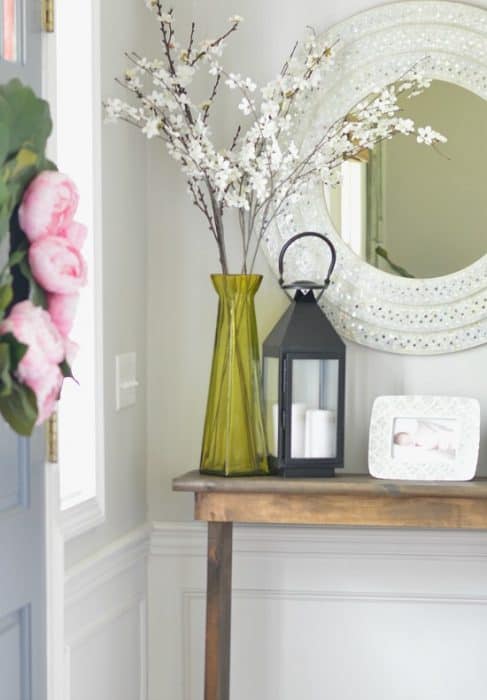
The best part? We only spent $30 on wood! You can’t find a custom-built piece of furniture for that price anywhere. Once it was built, I turned to my favorite console table decor ideas to perfectly decorate it for our space.
The dimensions for this piece will be different depending on what you need for you own space. My console table is only a foot deep but you may want something deeper so you will have to modify accordingly. The process to build it will be the same, just the measurements will be different.
What You’ll Need To Build Your Hallway Console Table:
- Measuring Tape
- Level
- Wood Nails (2 1/2 or 3 inches long)
- Drill/Electric Screwdriver
- Wood Glue
- Sandpaper or Electric Sander
- Stainable Wood Putty
- Stain
- Polyurethane (optional)
- Wood in the sizes of your choice (see below)
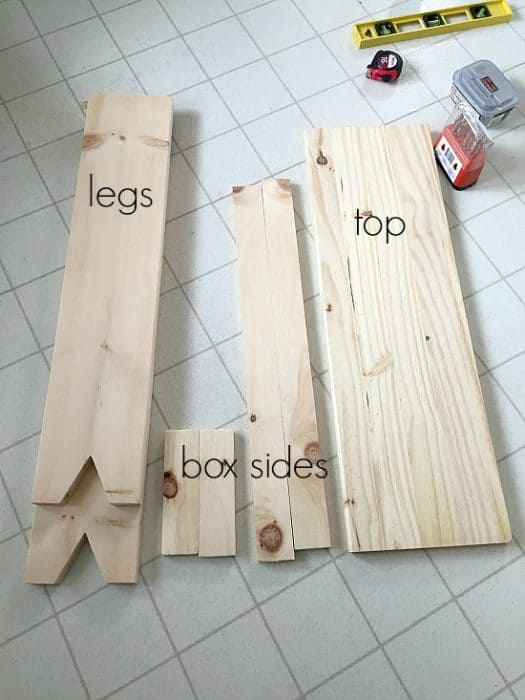
Precut the wood
We precut our wood based on the dimensions we had figured out. The legs are 1 x 12’s and the top is also 12 inches wide. We also cut down our 1 x 4’s to build the frame for the tabletop. You will have to adjust based on what size you want. Just make sure that your “box” is centered on the tabletop and allows for a bit of overhang (more on that in the next step).
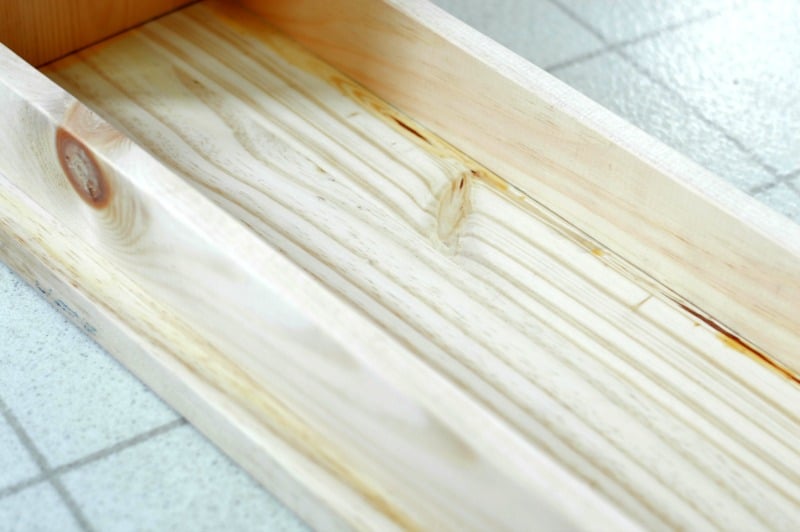
Build the top of the entryway table
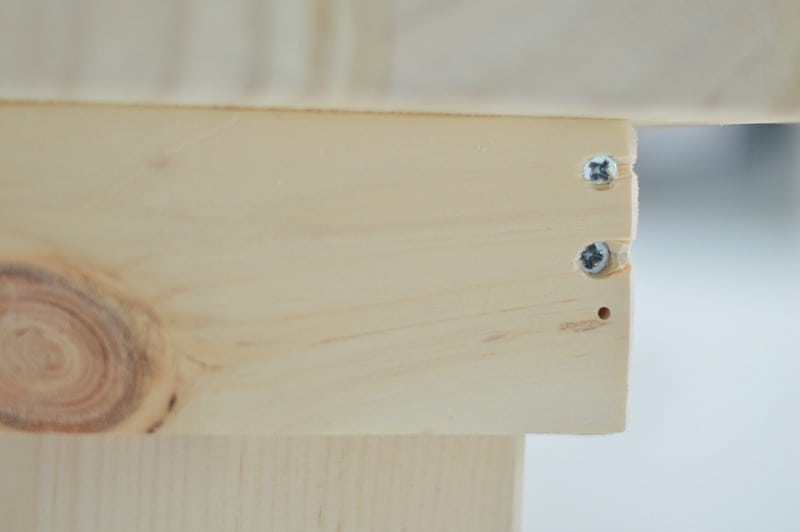
The next thing you will want to do is build the box for the top of the console table. We used 1 x 4’s to build a simple frame. Then, we glued the joints and countersunk the screws. It’s important to countersink so that you can later fill with putty and cover the holes.
NOTE: We knew we would have to also screw the legs into these corners, so we were careful to screw on the top and bottom edges of the boards so that we would have space in the middle to screw through the legs.
We then attached the table top (which, in this case, is actually a stair tread – it had the perfect dimensions!). We attached it with glue and let it dry with weights on top of it. It’s very sturdy:
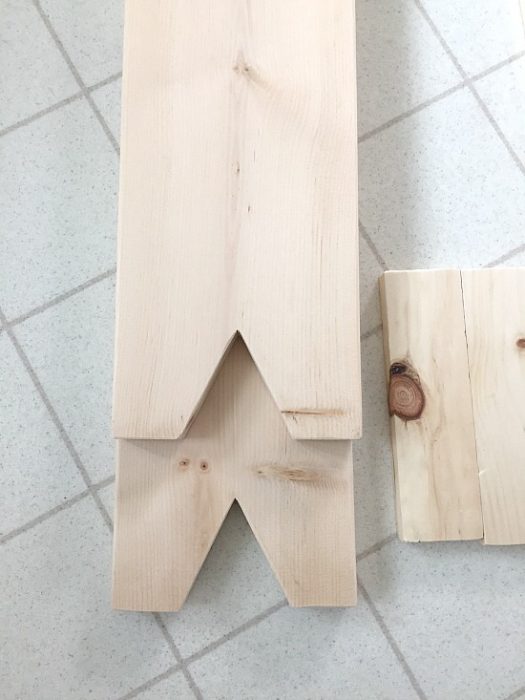
I decided to add a little cut to the bottoms of the table legs to give it a little farmhouse flair. I then sanded the edges to smooth them out:
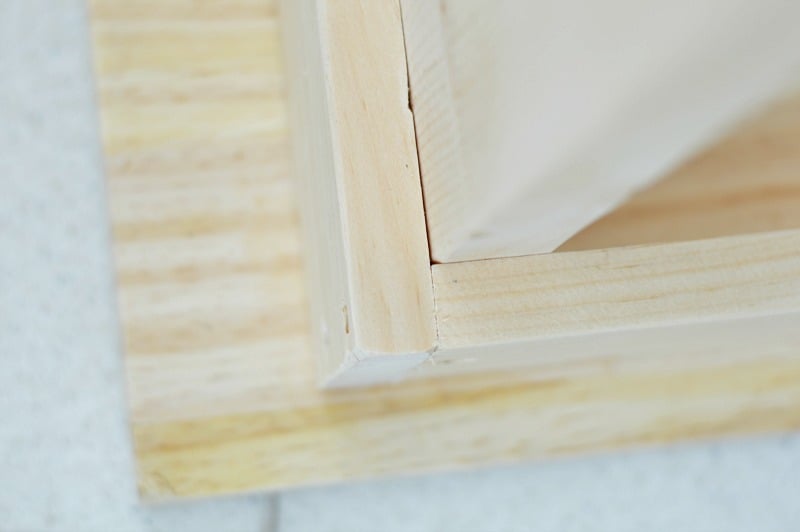
Attach the legs
To attach the legs, we first predrilled holes in the frame. Then, I applied glue to each leg and braced them tightly against the side of the frame while Brian screwed the screws through the frame and into the legs, again making sure to countersink.
When we turned it over, I placed a bunch of heavy books on top to make sure that it would support weight. It also helped to aid the glue drying on the top. I left it to sit like that in my kitchen for 48 hours!
Once the glue was completely dry, there was a little wobble between the legs so we decided to attached a 2 x 2 brace. It added extra support but also finished the look of the table!
I filled all the screw holes with putty and sanded any rough edges. Then, I stained everything with two coats of Minwax Dark Walnut.
That’s it! Easy right?
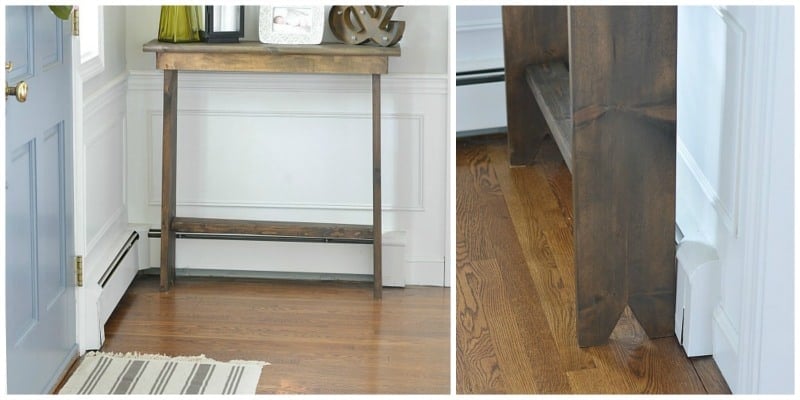
This table is perfect for beginners and took a total of 3 hours from start to finish – staining included! Once I was done, I was eager to set up and style this DIY console table. Since we built it ourselves, it’s the ideal size for our entryway and I’m so happy that my beautiful mirror from Nicole Miller Home is now surrounded by an equally stunning display.
Other Places to Use Your Console Table
While this table is perfect for my entryway, it’s also a pretty versatile piece of furniture. You could easily use this DIY table in your living room as a sofa table or living room console.
Wherever you decide to put it, this DIY console table is a simple piece of furniture to make, and will certainly look great in your home!
Other DIY Projects You’ll Like

DIY Rustic Farmhouse Entryway Table
Create the perfect entryway table for your home! This table works great as a console table when walking in your front door or as a sofa table in your living room. Follow the tutorial and you'll have your own table in just a few hours.
Materials
- Wood
- Wood nails (2 1/2- 3 inches long)
- Wood glue
- Sandpaper
- Sustainable wood puddy
- Wood stain
Tools
- Measuring tape
- Level
- Drill/electric screwdriver
Instructions
- Precut the wood based on the dimensions you would like for your console table
- Build the box for the top of the console table. Glue the joins then countersink the screws.
- Attach the table top with wood glue and let it dry (tip: set to dry with weights set on top of it).
- Attach the legs by predilling holes in the frame. Then apply glue to each leg and brace them tightly against the side of the frame while screwing screws through the frame and into the legs. Make sure to countersink!
- Let dry for approximately 48 hours.
- Fill screw holes with putty and sand rough edges.
- Stain the wood with two coats of wood stain.
I love it Jenna! It came out so cute and a great homemade piece to keep forever and pass on to you children. I like the Farmhouse style you did with the legs. Amazing that it was only 30 dollars and in the store would be a huge price I am sure. Way to go!
Thanks, Sue! :-)
This is a cute table! Good work! I am going to be building a new dining room table with a friend in a couple weeks. I am very excited, but pretty nervous too because I have to use the table saw…that thing scares me!
We are going to tackle a new kitchen table next, too!! EEK!! I refuse to use the table saw; scares the crap out of me, too!