Content may contain affiliate links. When you shop the links, I receive a small commission at no cost to you. Thank you for supporting my small business.

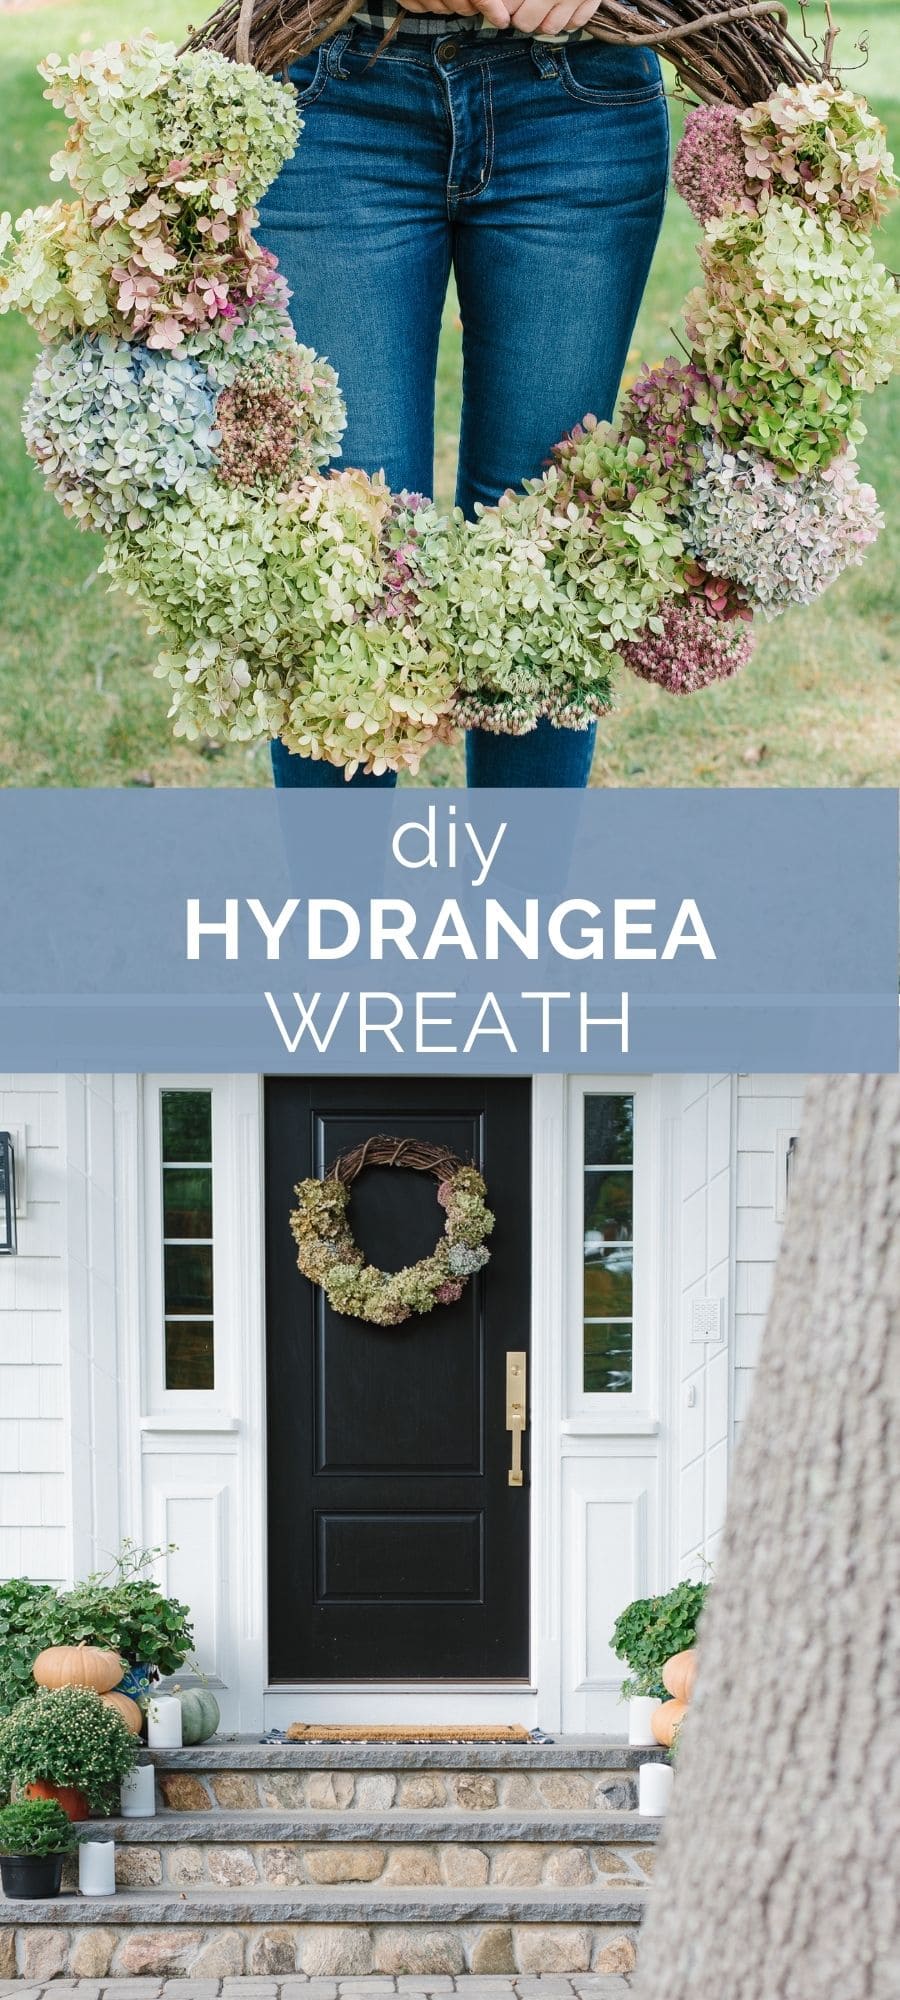

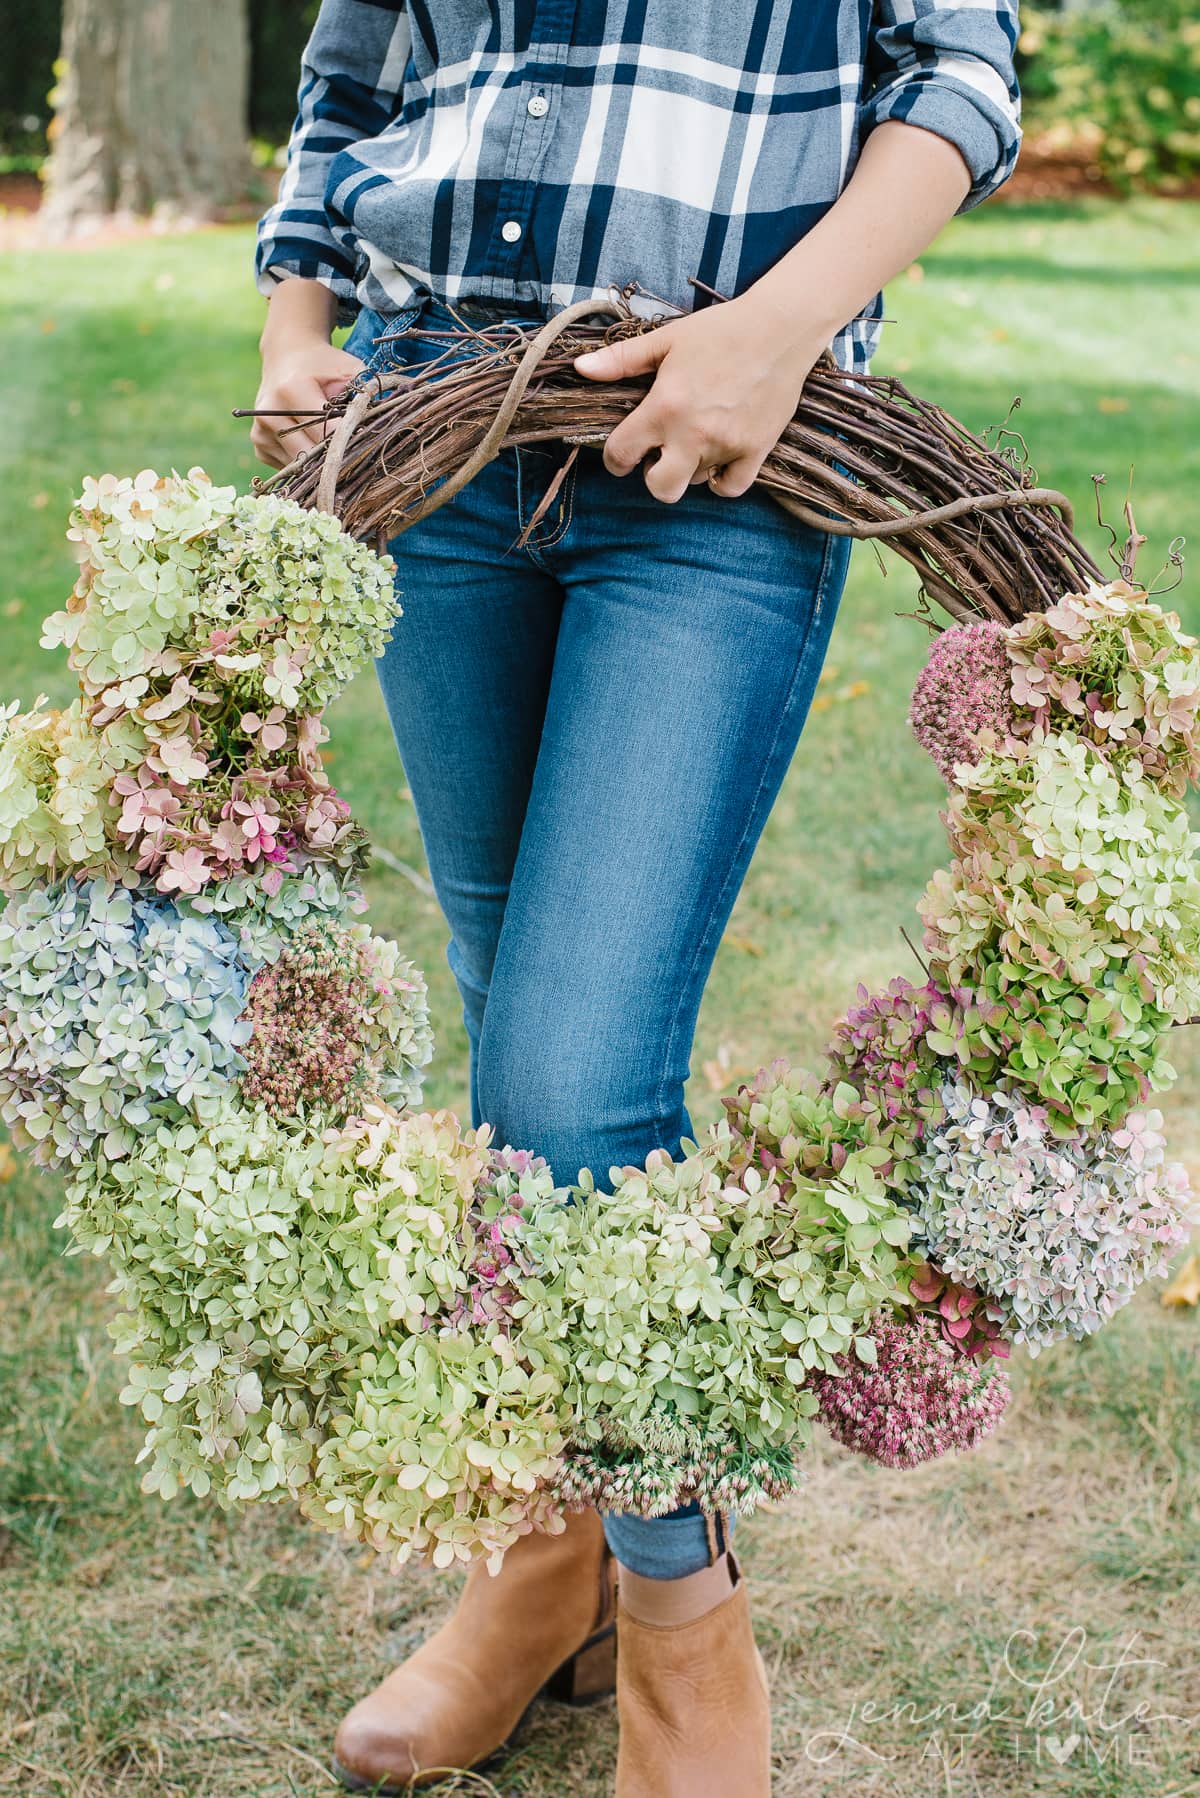
This dried hydrangea wreath DIY project is made from a simple grapevine wreath and hydrangeas that can be cut from your garden. With this easy tutorial, you can make your own beautiful piece of fall decor in only 10 minutes!
Looking to add some new decor to your front door? A DIY hydrangea wreath is a great way to add texture and personality! This beautiful wreath is perfect for the fall season and can be customized to fit your personal style.
In this step-by-step tutorial, I will show you how to make your own hydrangea wreath at home!
When to Cut Hydrangeas
While you can opt for artificial hydrangeas or faux flowers if necessary, cutting your own flowers really makes this wreath special and helps bring nature indoors! If you are picking your own hydrangea blooms straight from the garden, there are peak times to do so.
Ideally, try to let your hydrangeas dry on the plant prior to picking them, or allow them to start changing color before picking. White hydrangeas should be green and blue ones should be turning purple.
This is usually in early fall between late August and early November. If this is not feasible, just let them fully dry outpost-picking.
How to Dry Hydrangeas
The beauty of hydrangeas is how easily they dry out and remain beautiful for a long time. Simply cut several, bring them indoors and allow them to dry out in a vase. If you hang them upside down, they will dry out quicker but I like to enjoy them the second they enter my home.
RELATED: How to stop cut hydrangeas from wilting.
What to Do With Dried Hydrangeas
When it’s early October and your beautiful hydrangeas are nearing the end of the season, what can you do with them? I like to bring as many indoors as possible so that I can enjoy them even when the time of year changes.
The great thing about this DIY Hydrangea flower wreath is that you can make it with either faux, fresh flowers, or dried hydrangeas. I actually used both – the ones I had already dried (and because I needed more than I anticipated!) and fresh ones cut directly from my hydrangea plant.
Having worked with both, I can say it’s definitely easier to work with those picked straight from hydrangea bushes since you don’t have to be as careful with them. The dried flowers are crispy and will disintegrate if you’re too rough with them. Luckily, the fresh hydrangeas dry out naturally on the wreath!
DIY Wreath Tutorial
You’re going to be surprised at just how simple it is to make your own hydrangea wreath. In fact, I debated even writing this tutorial because it seemed too simplistic. But, sometimes it’s nice to see exactly how something is made so that you’re not second guessing what you’re doing, right?
You’re welcome to watch the tutorial (sound on!) but I’ve also written out the instructions for you below if you prefer that format (plus, you can print it!).
Types of Hydrangea To Use
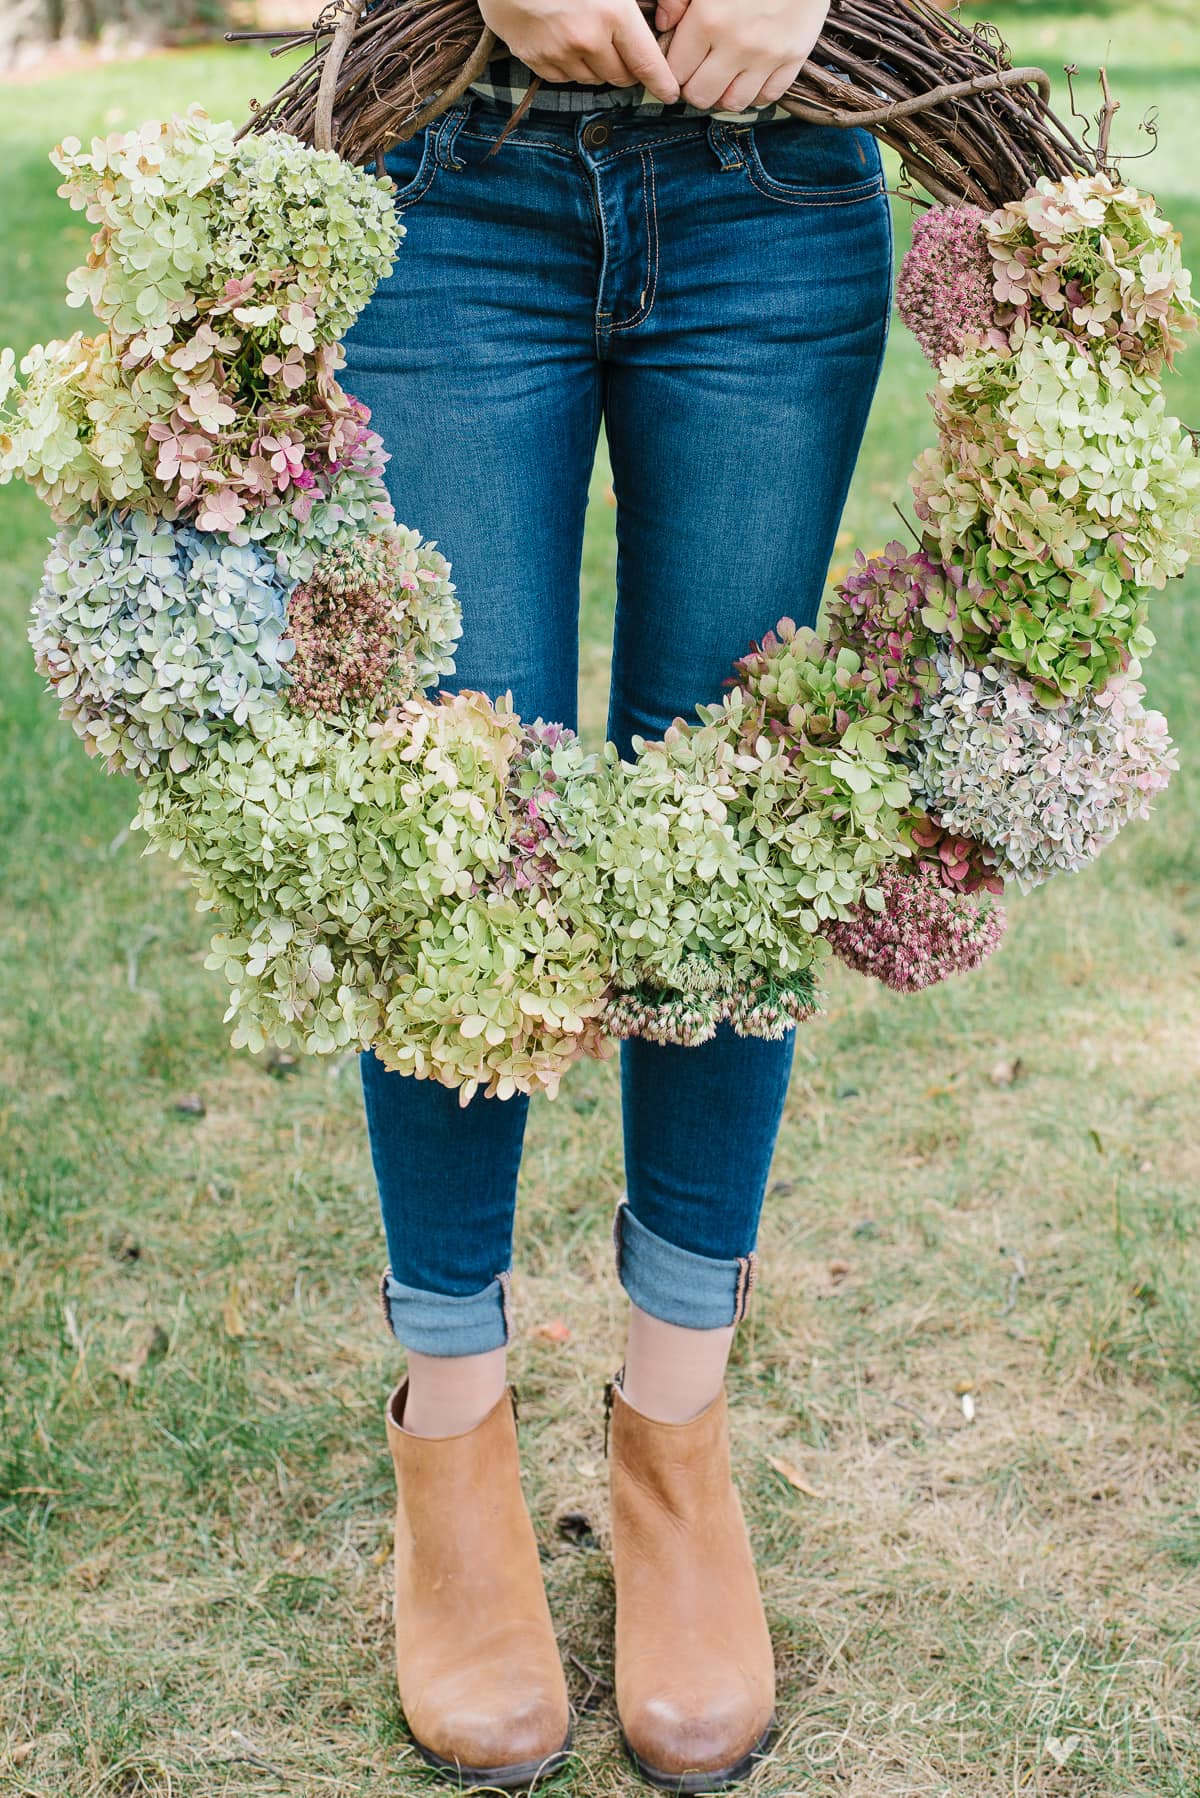
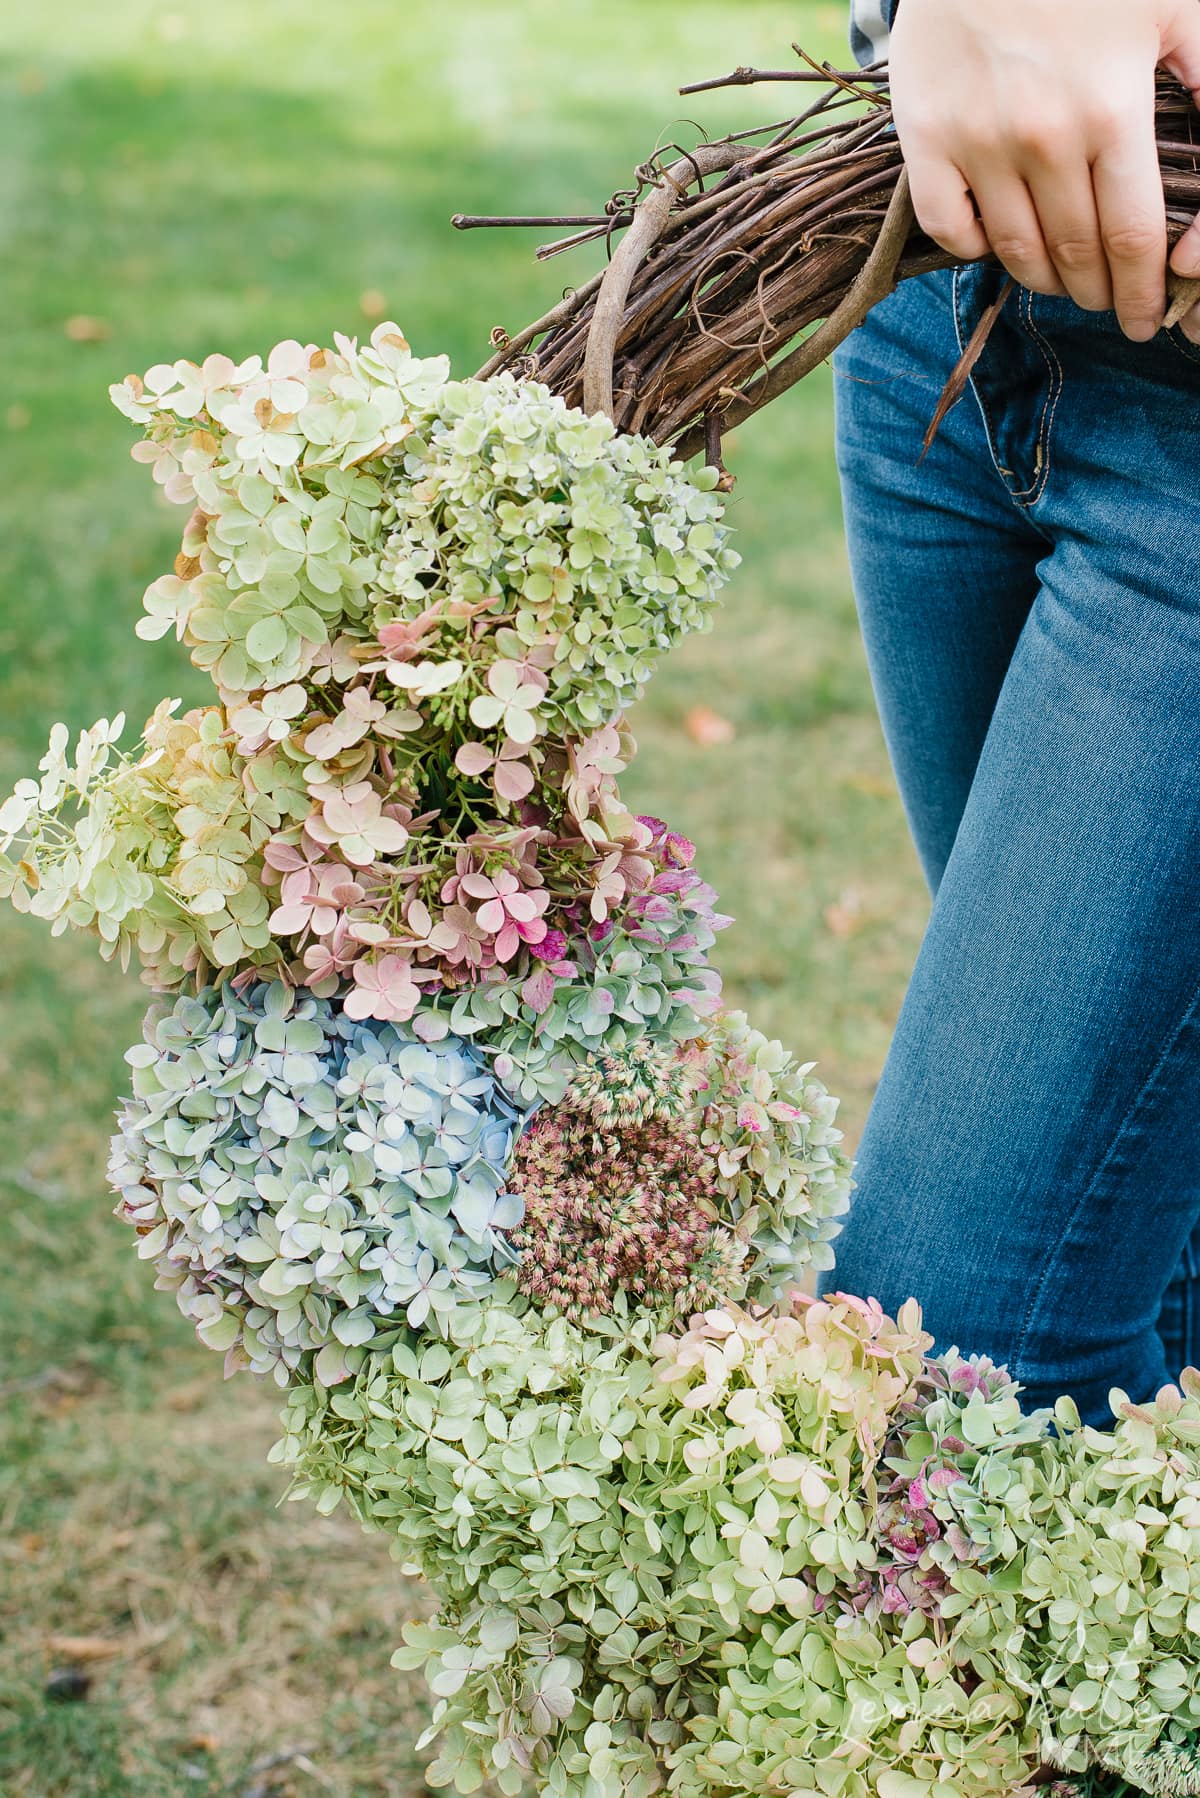
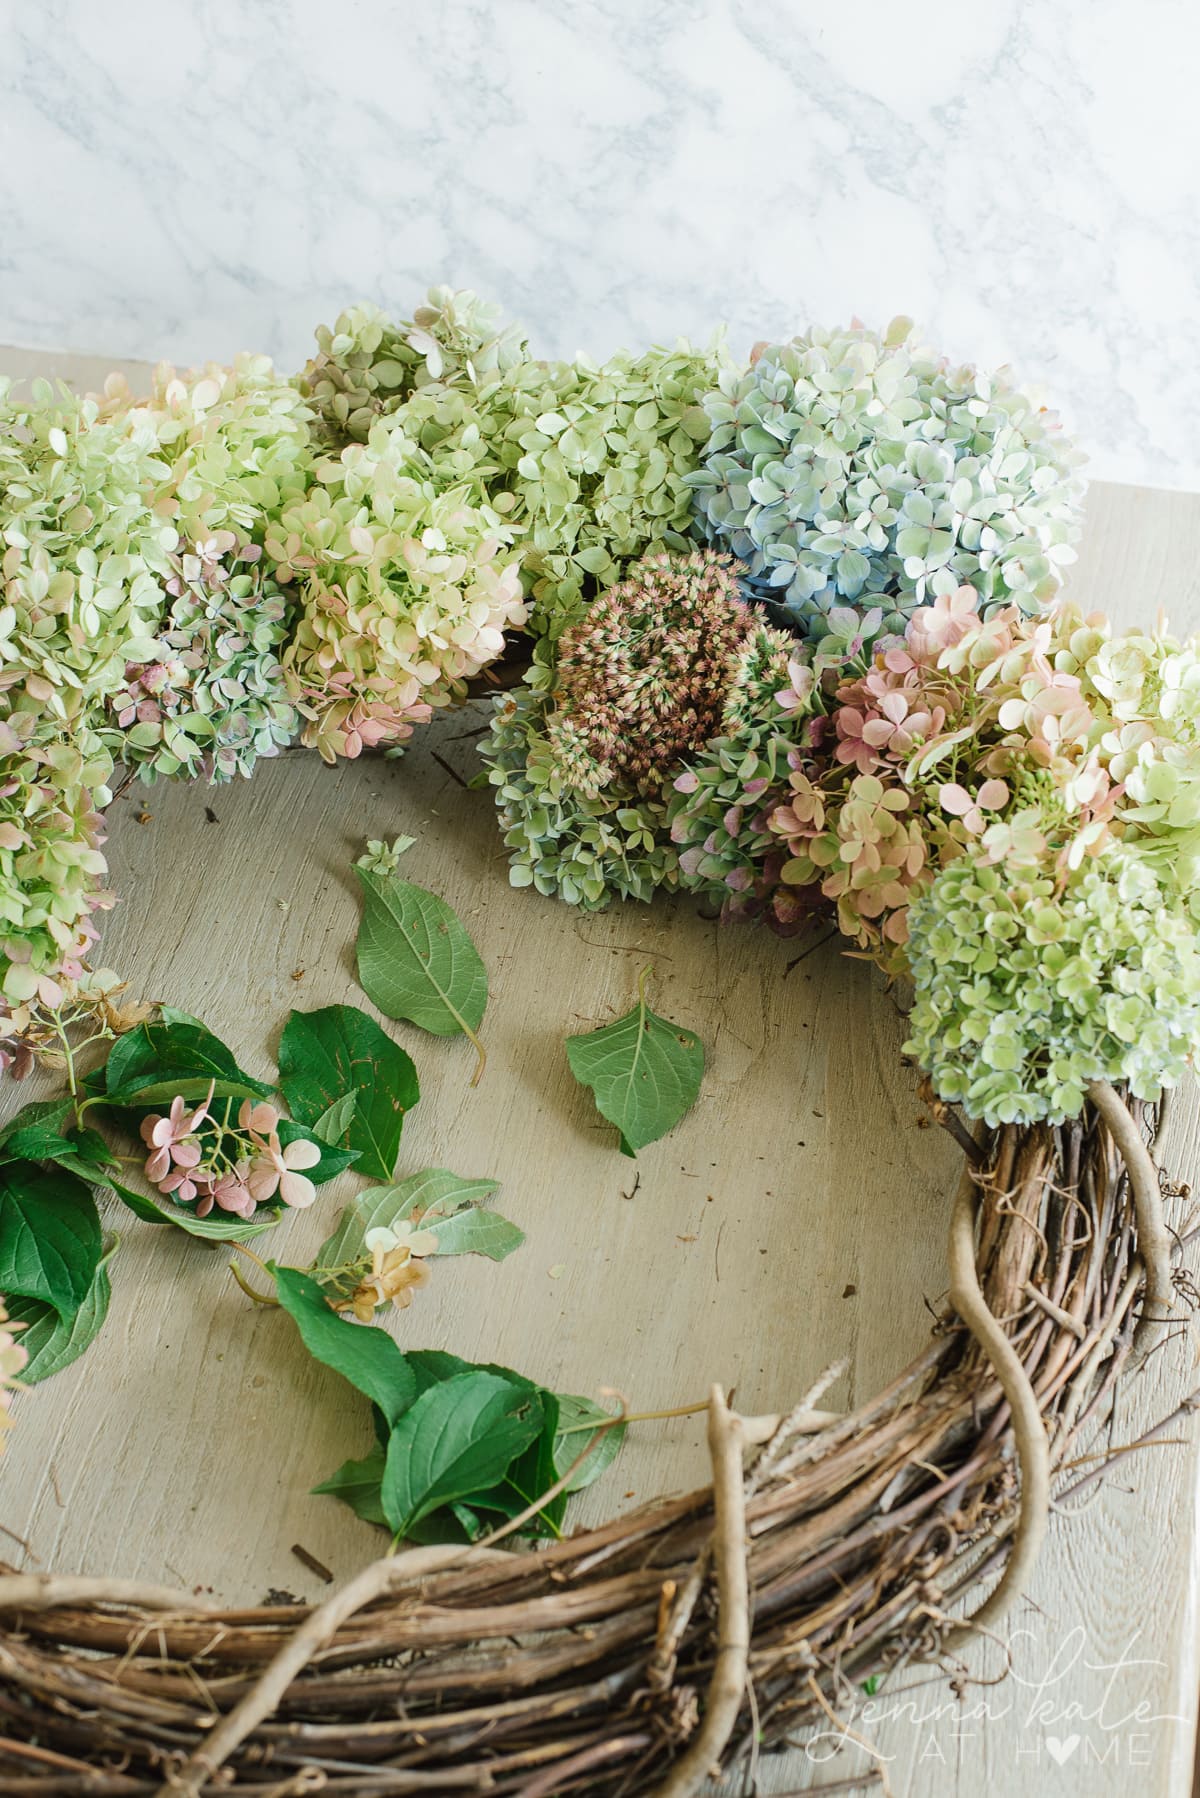
I used a variety of hydrangeas that I have growing in my garden: Limelight, Vanilla Strawberry and Endless Summer. Limelight hydrangeas are my favorite! At this time of the year, they are various shades of green, pink and purple and look absolutely stunning. You can of course use only one variety if that’s all you have.
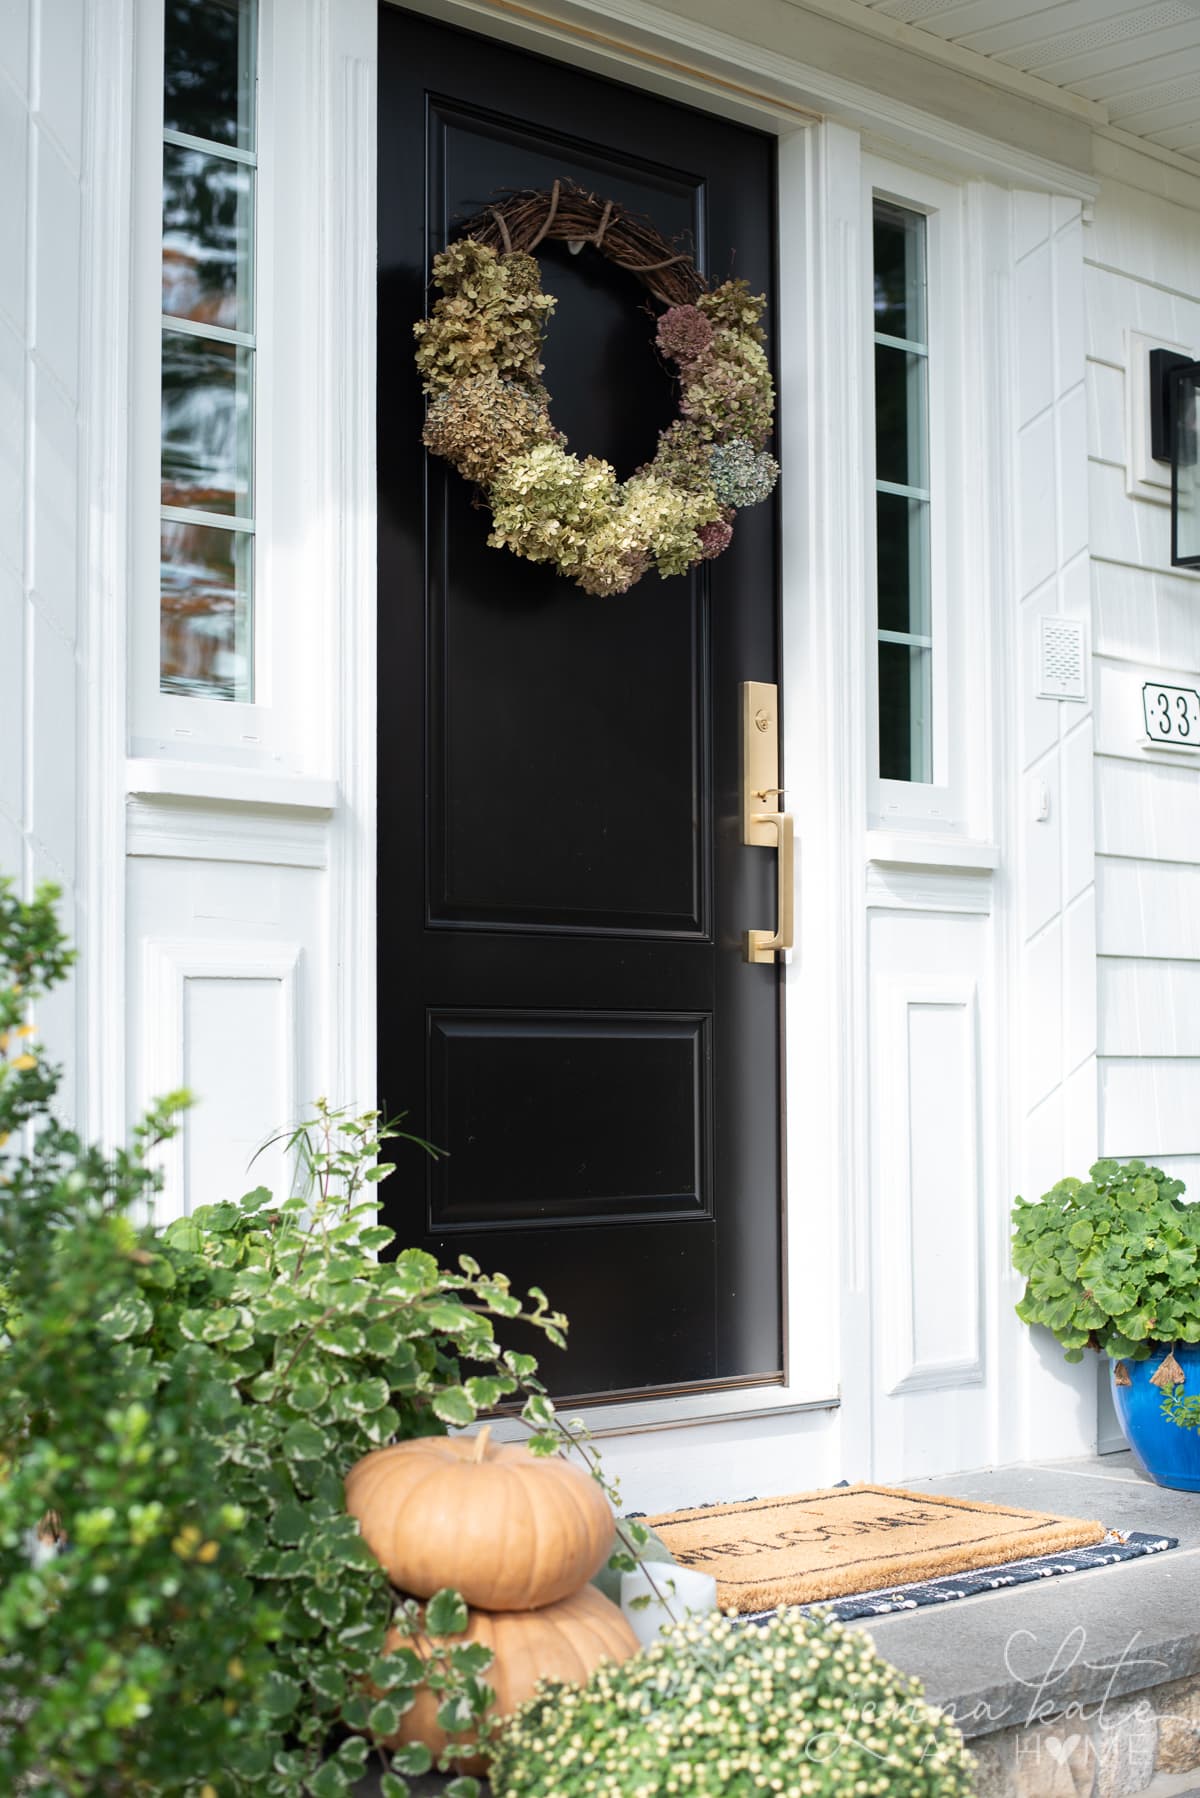
Depending on which type you choose, you can coordinate the colors to your existing porch decor to display this wreath right on the front door.
What You’ll Need
- Hydrangeas with a long stem, leaves removed
- Grapevine wreath (whatever size you want – I bought mine at Michael’s with a 50% off coupon and I’ve reused the same grapevine wreath for 4 years. Hobby Lobby runs frequent sales, too!)
- Scissors or pruning shears
- Floral Wire
- Optional: Additional flowers ( I used some pink sedum) or a piece of ribbon
How to Make The Hydrangea Wreath
Follow these simple steps to easily create your own wreath!
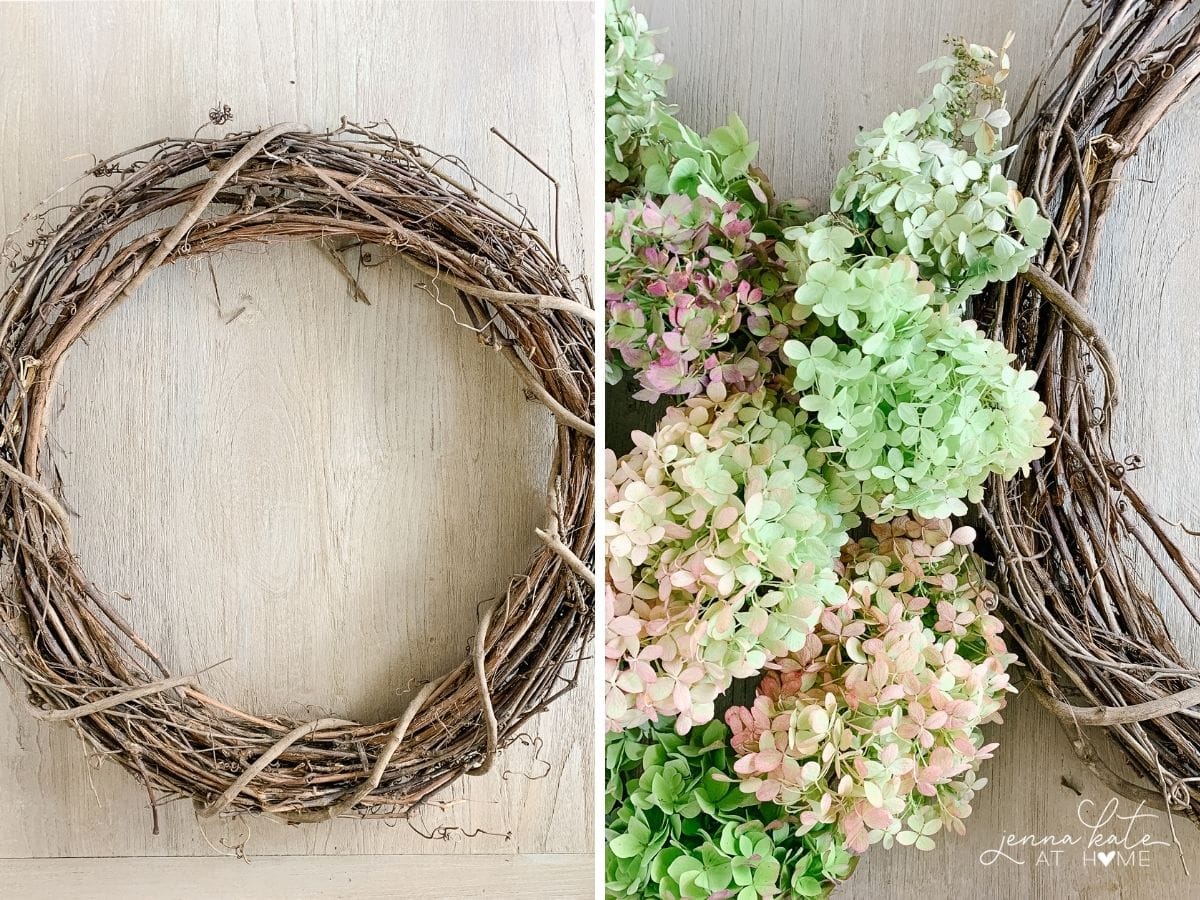
1. Attach Flowers
Basically, all you need to do is push the hydrangea flowers through the wreath at an angle so that they are somewhat secure. Then, keep filling the wreath until it’s full of flowers.

You don’t want to see any bare spots, so make sure the flowers are close together and that you’re pulling them quite tight against the wire wreath form.
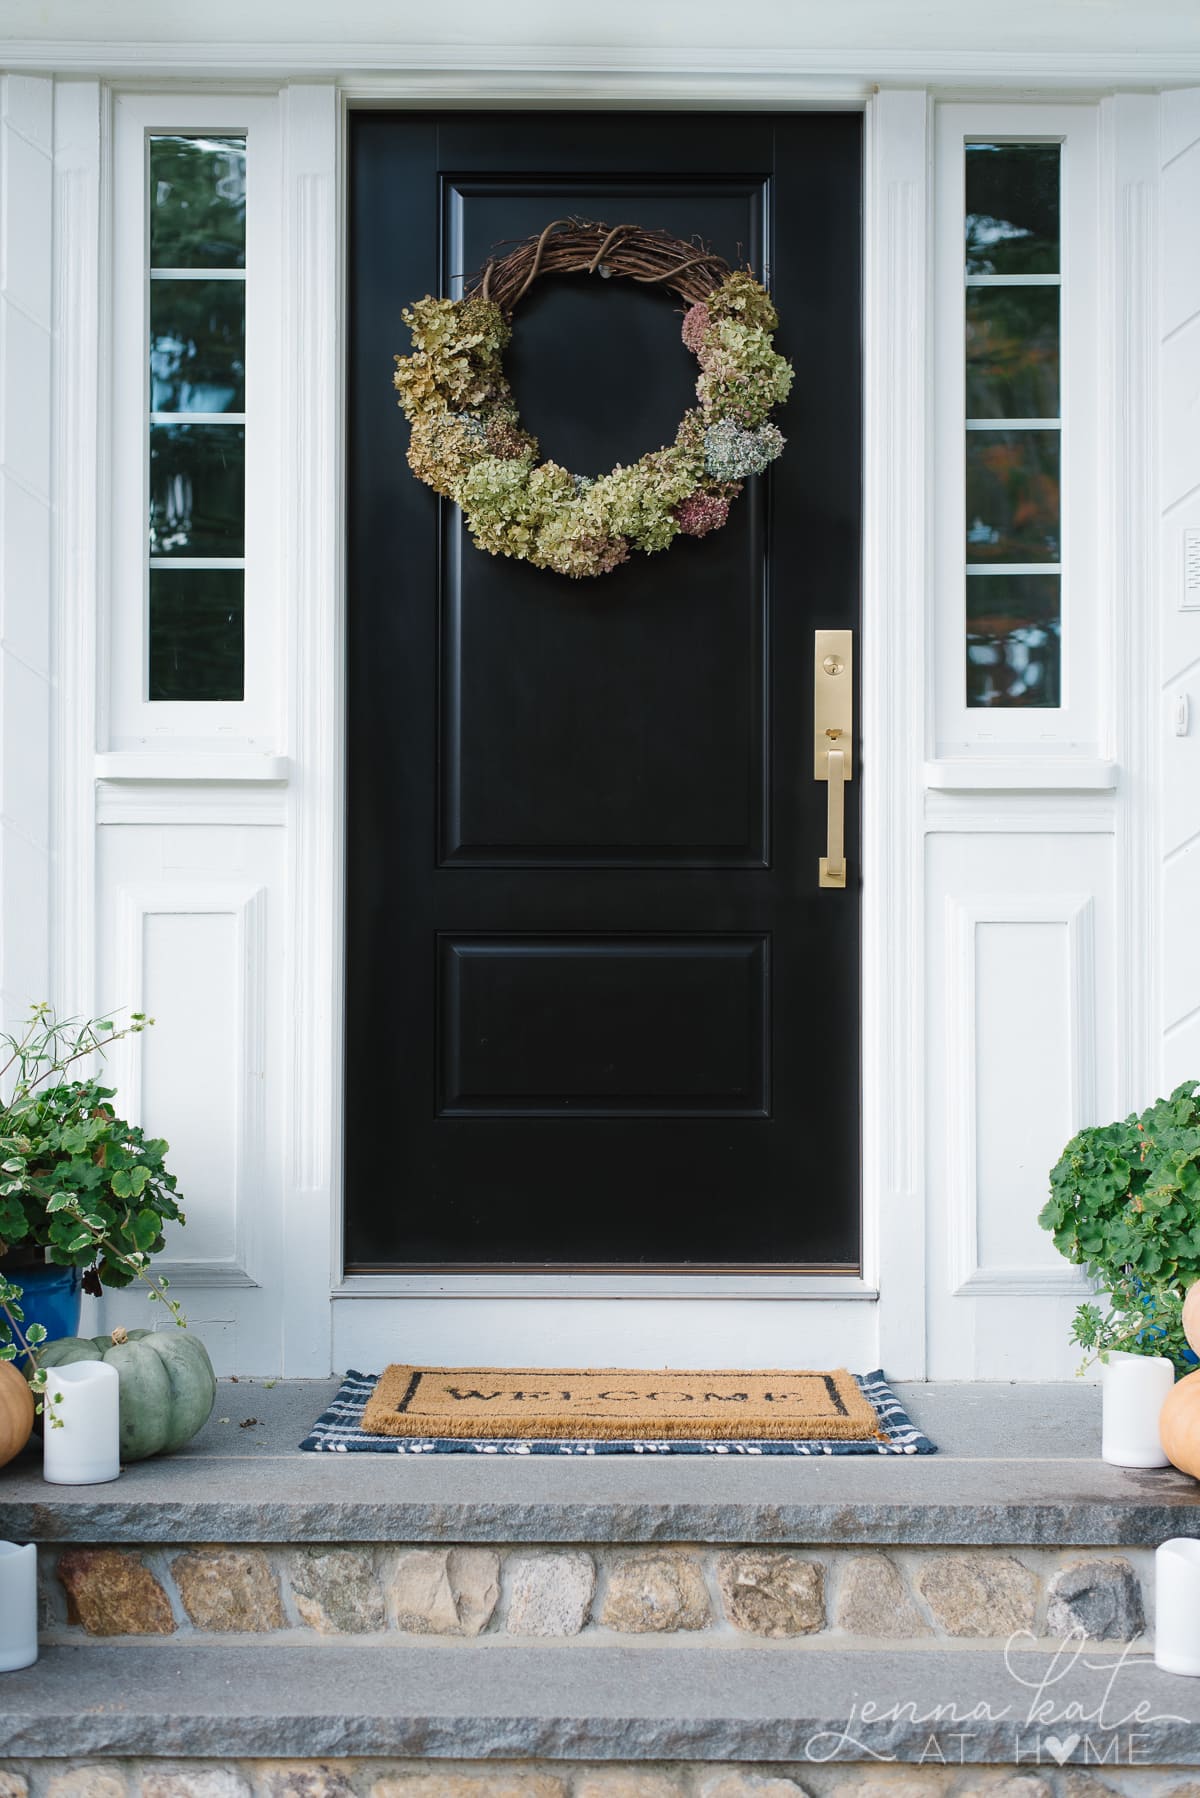
You can choose to fill the entire wreath, but for a more modern look, I like to fill it anywhere bout two-thirds full, with the rest of the grapevine exposed. This gives it some additional color and texture.
2. Fill in Gaps
If you don’t have enough hydrangeas to fill any remaining gaps, feel free to add in other favorite flowers. I particularly like pink sedum with this wreath, and last year I added in a few for extra color.
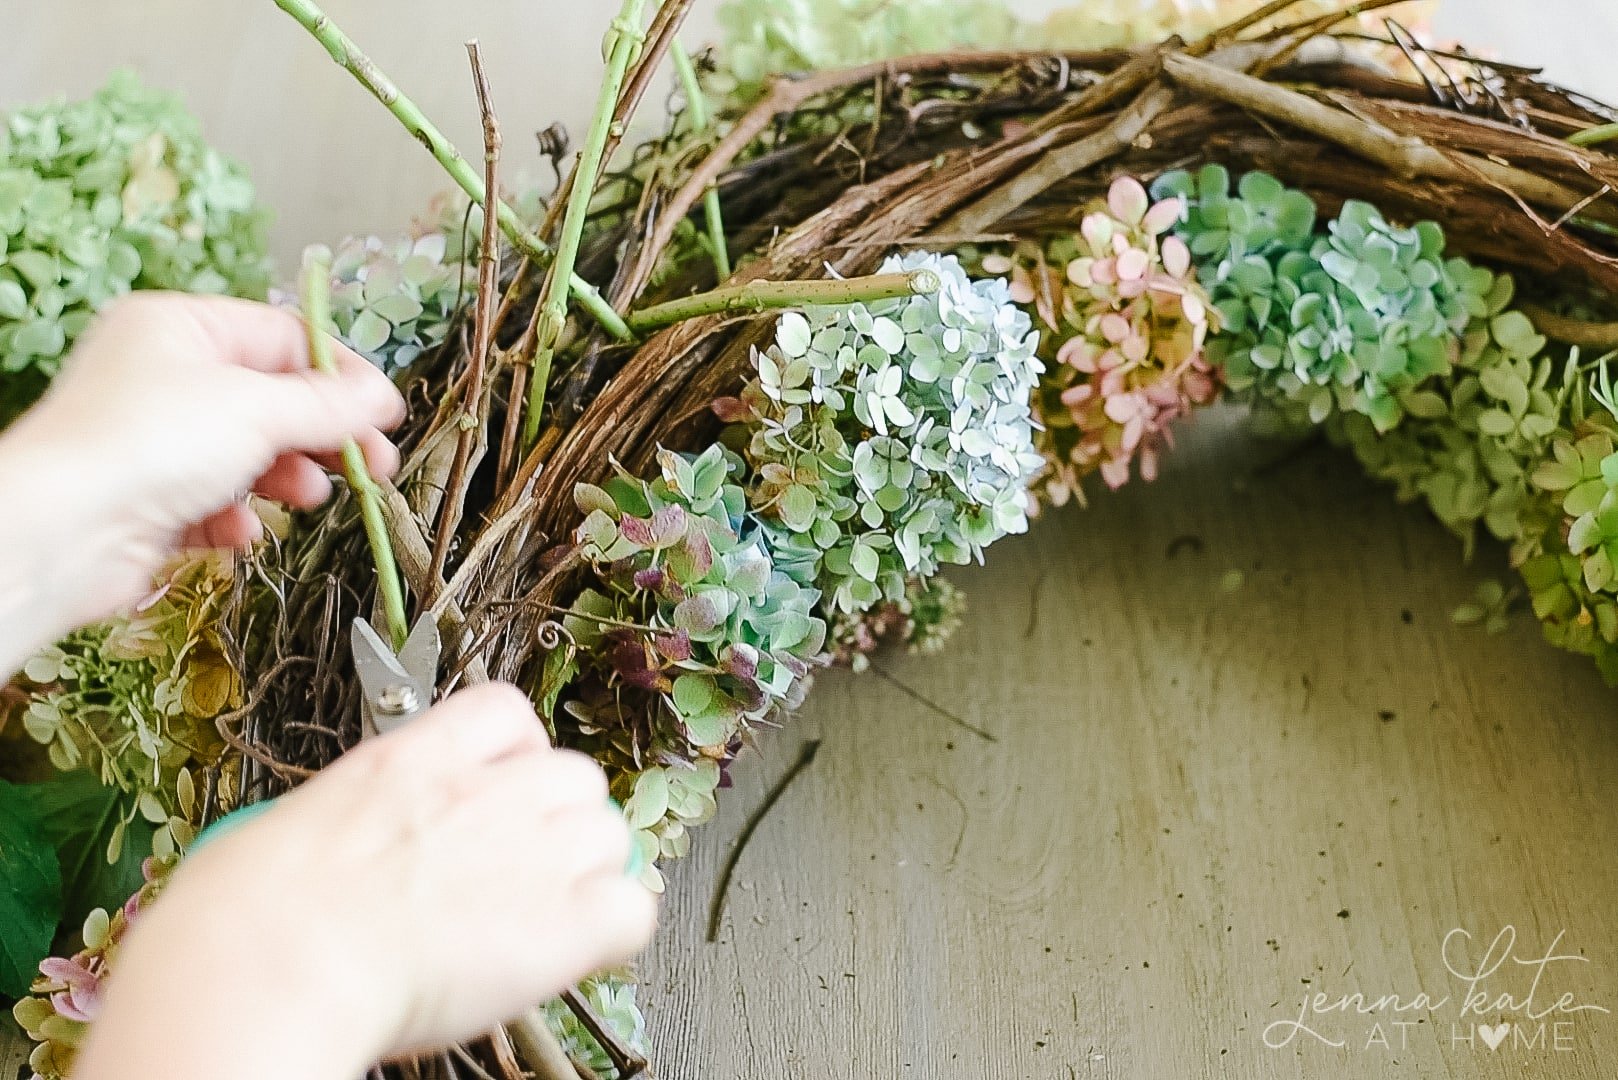
3. Clean Up The Stems
Once you’re done, use wire cutters to remove the hydrangea stems from the back of the wreath and secure any loose ones with a piece of wire so that they don’t fall out. Short stems are fine, but be sure and remove it if it is a long stem.
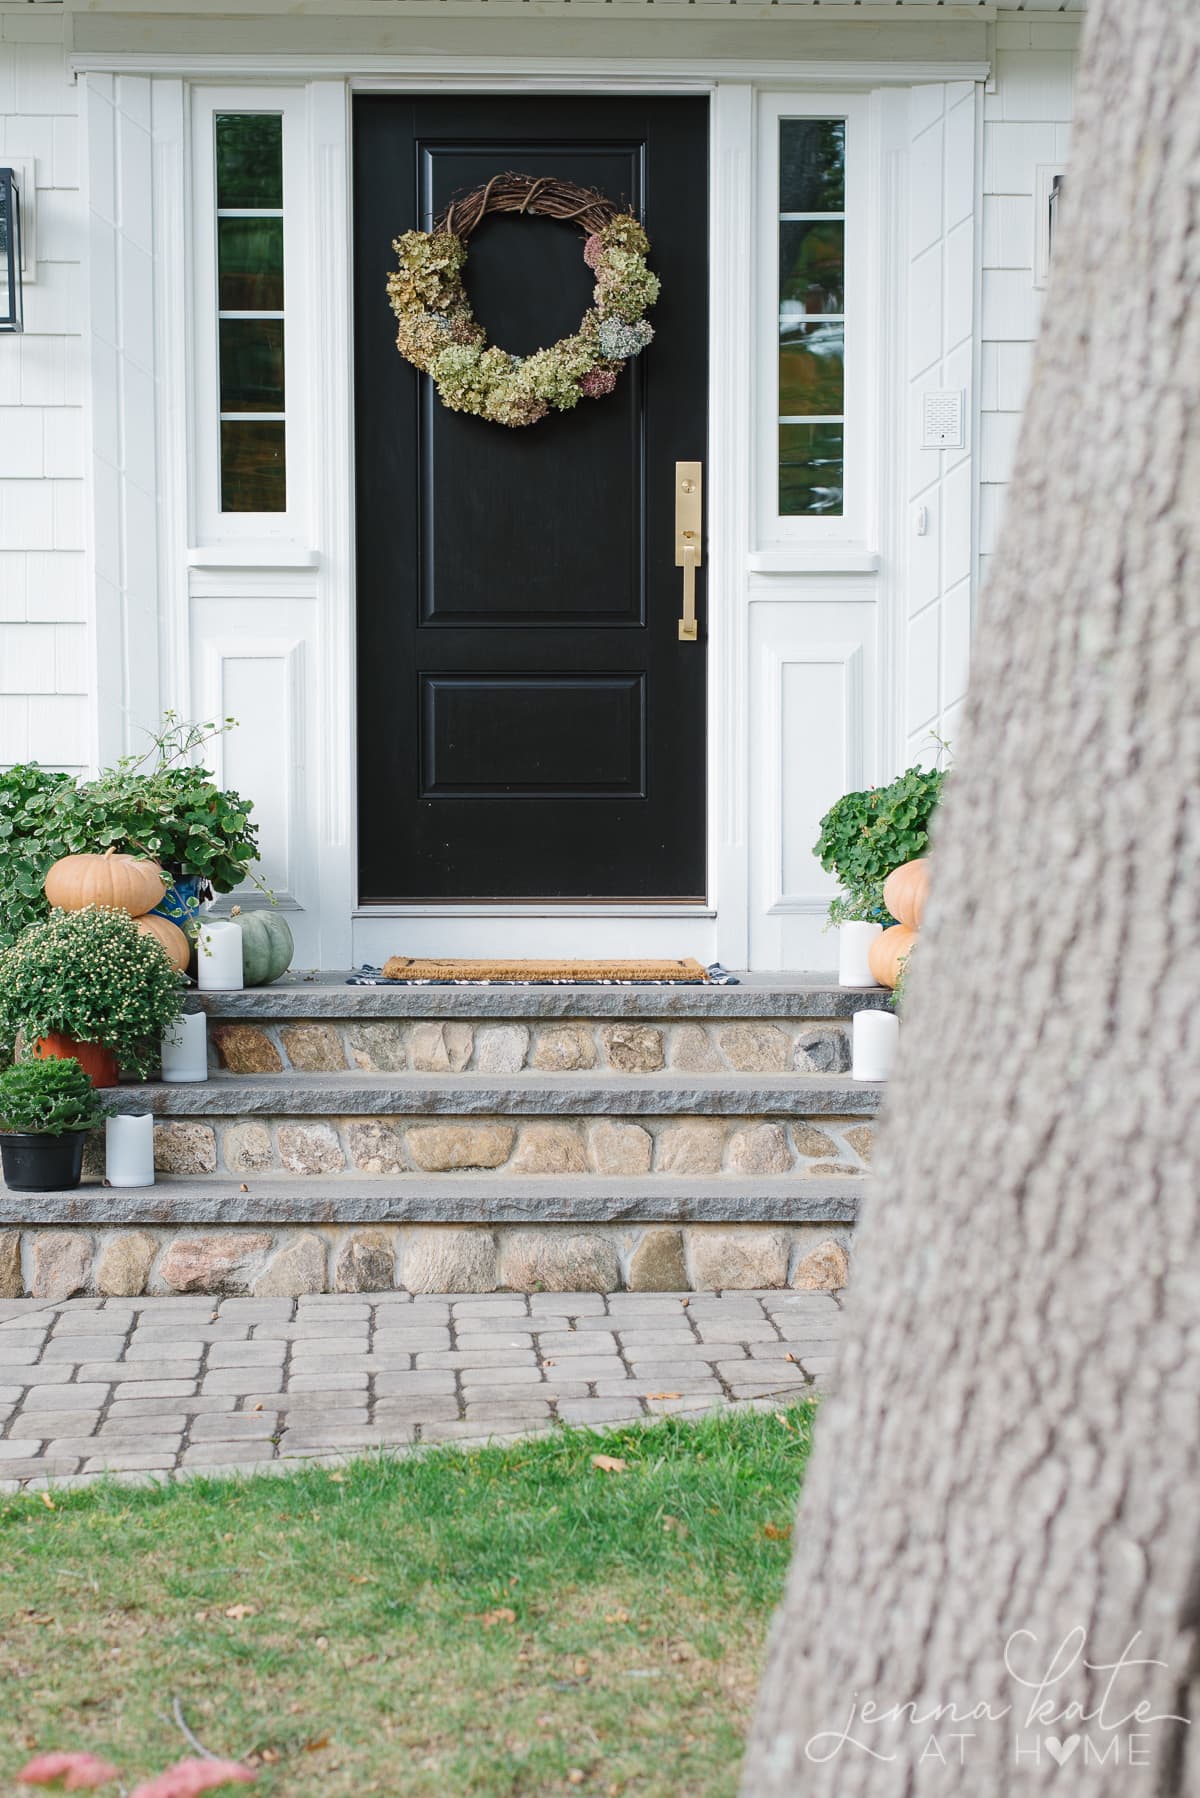
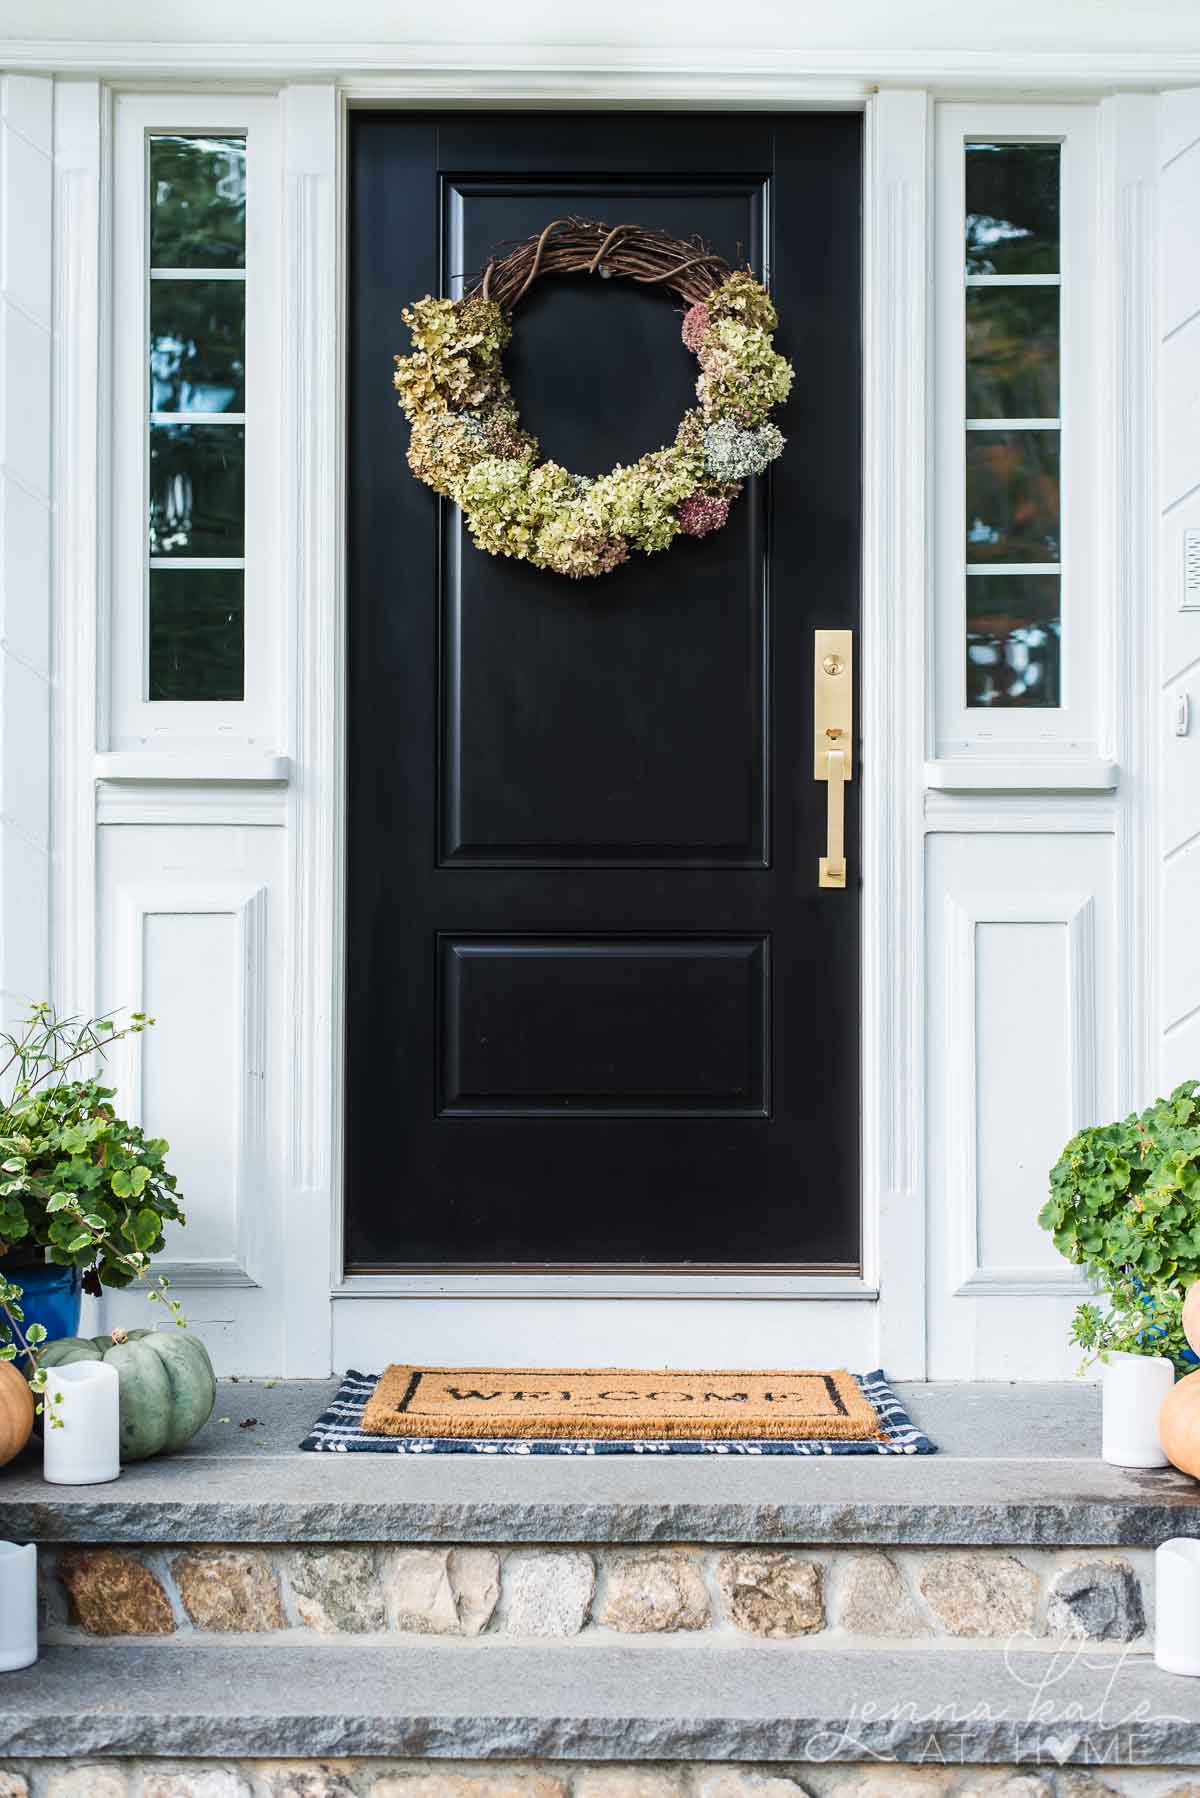
4. Hang The Wreath
I use a large 3M Command Hook to hang wreaths on my new door so that I don’t have to worry about any damage, but you can hang it using a nail or a wreath hanger, too!
5. Add Finishing Touches
Once you have completed the main part of your DIY hydrangea wreath, you can add a few finishing touches. Or, enjoy the simplicity of it just the way it is.
You have the option to add additional flowers, ribbon, and decorative elements such as ivy or eucalyptus. Simply use a hot glue gun to attach those if desired. You can really get creative here if you prefer a busier wreath. For a sleek, simple appeal just omit any additional decorations.
Final Thoughts
Remember, you can always switch up the colors of the hydrangeas to match your decor for the season. I’ve reused the base wreath for years adding in different elements throughout the changing seasons!
Don’t forget to hang your beautiful fall wreath in a prominent place where it can be admired by everyone. It will add a touch of character to your space!


DIY Dried Hydrangea Wreath
Materials
- • Hydrangeas with long stems, leaves removed
- • Grapevine wreath (whatever size you want)
- • Floral Wire
- • Optional: Additional flowers ( I used some pink sedum)
Tools
- scissors or pruning shears
Instructions
- Start by placing one hydrangea flower stem through the wreath form so that it comes
out through the back. Try insert it at an angle so that it's secure. - Insert the next flower directly alongside the first, and repeat until you have as much
as the wreath filled as you like. For a modern look, fill the wreath
asymmetrically - anywhere from 1/3 to 2/3 full, with the rest of the wreath
bare. - Fill any gaps with more hydrangeas or other seasonal flowers, like sedum for some
additional color and texture. - Once you're happy with the front of the wreath, gently flip it around to the back.
Cut the long stems down so that they are flush with the wreath form and secure
any loose ones with floral wire. - Hang the wreath up (I used a 3M command hook for damage-free hanging) and enjoy it
throughout the fall season!


Do you spray anything on your hydrangeas to help them stay together and not fall apart so easy? I am cutting a bunch of hydrangeas now and was wanting to make one. Just don’t want it to fall apart in a month.
I didn’t! But you can use an anti-dessicant spray like Wilt Pruf. If you allow them to dry out naturally (and don’t keep moving them around), they hold up pretty well! I got a good 3 months out of my wreath before it was covered in snow. Then I just removed the hydrangeas, kept the form and made a fresh once again this year!
Beautiful! I love the simplicity and the soft colors and texture Of this wreath!
Thank you, Gail!