Content may contain affiliate links. When you shop the links, I receive a small commission at no cost to you. Thank you for supporting my small business.
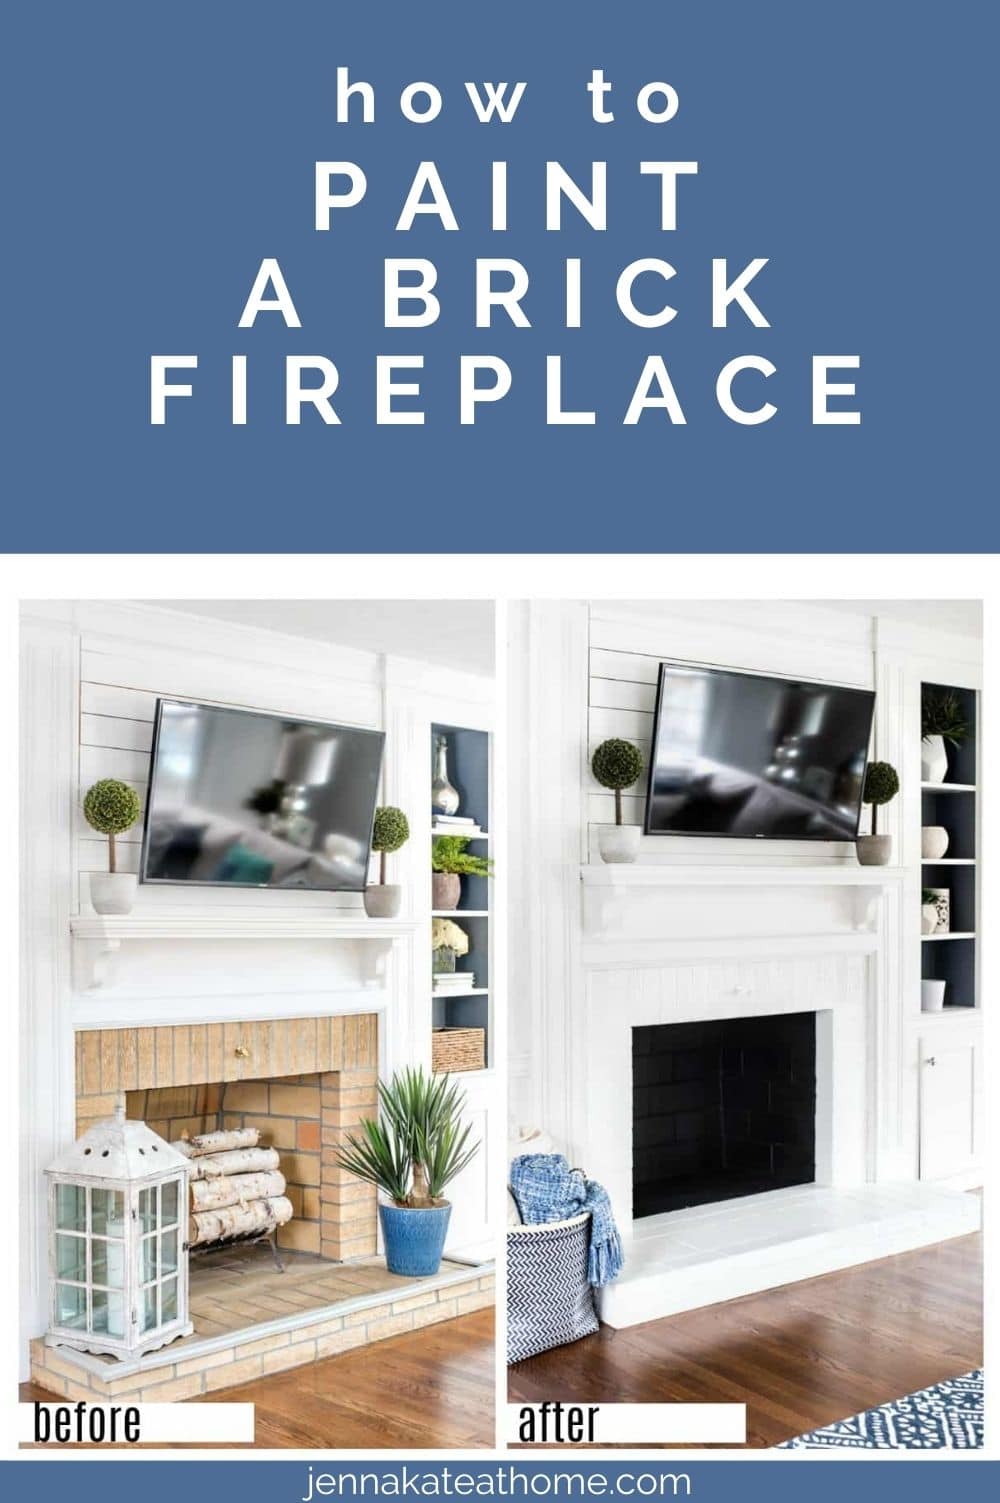
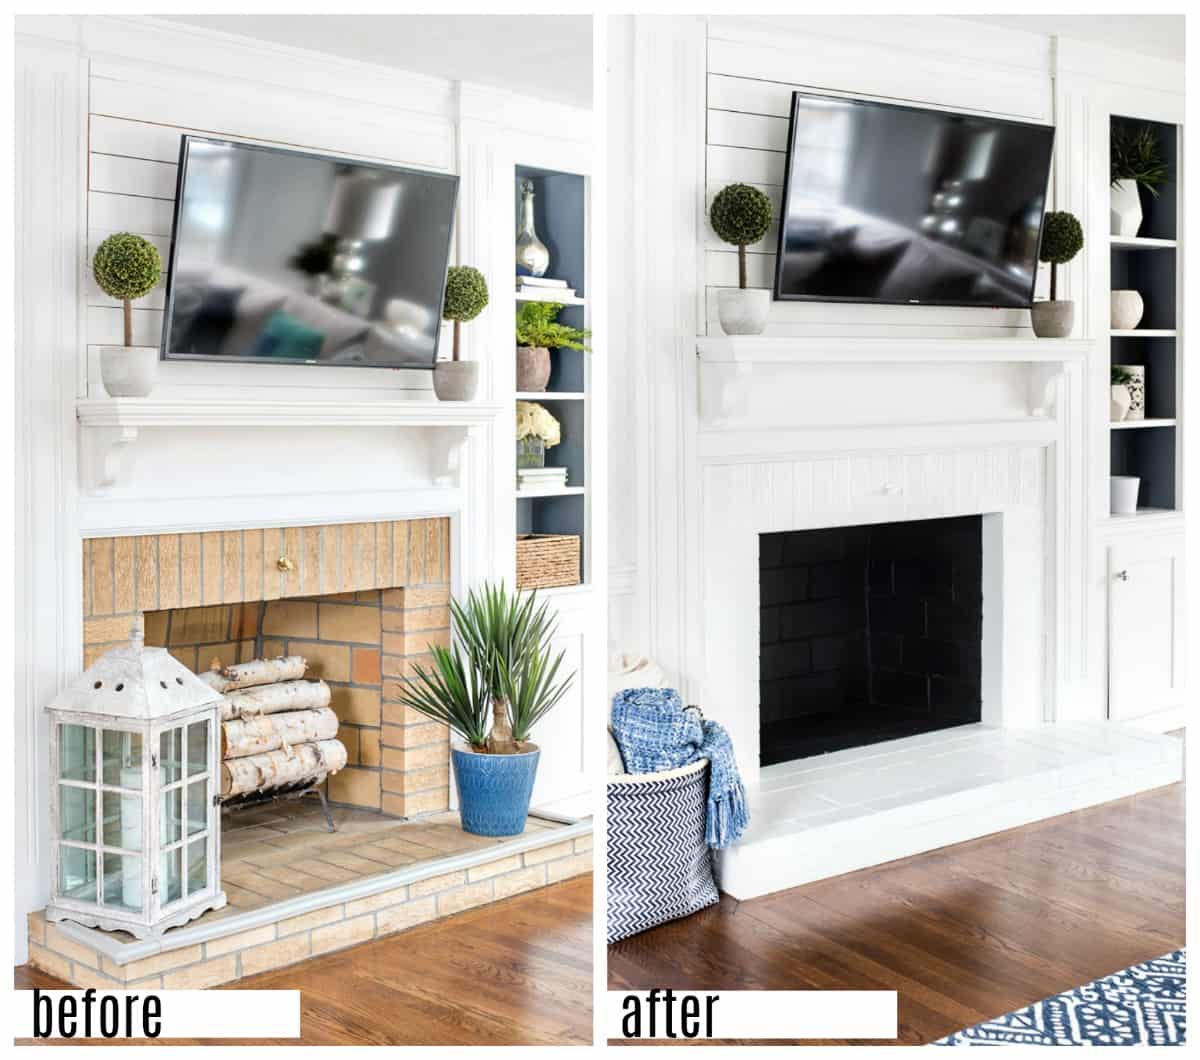
Are you ready to transform your living room with a fresh new look? You can give your family room a makeover by simply painting your brick fireplace white! This DIY tutorial will show you how easy it is to paint your fireplace, as well as how to prevent soot stains from bleeding through.
If you’re looking for a way to update your living space, painting your brick fireplace can be a great option. Not only will it give your room a fresh new look, but it can also be a fun DIY project to tackle.
However, painting a brick fireplace can be a bit tricky, so it’s important to know what you’re getting into before you start.
RELATED: How to Build a Fireplace Surround
Why Paint a Brick Fireplace?
When it comes to enhancing areas of your home without spending a fortune, painting a brick fireplace can give your living space a fresh and updated look easily. It can also help to cover up any stains or discoloration on the brick.
If you’re tired of the old, outdated look of your brick fireplace, painting it can be a cost-effective way to modernize your home by the very next day!
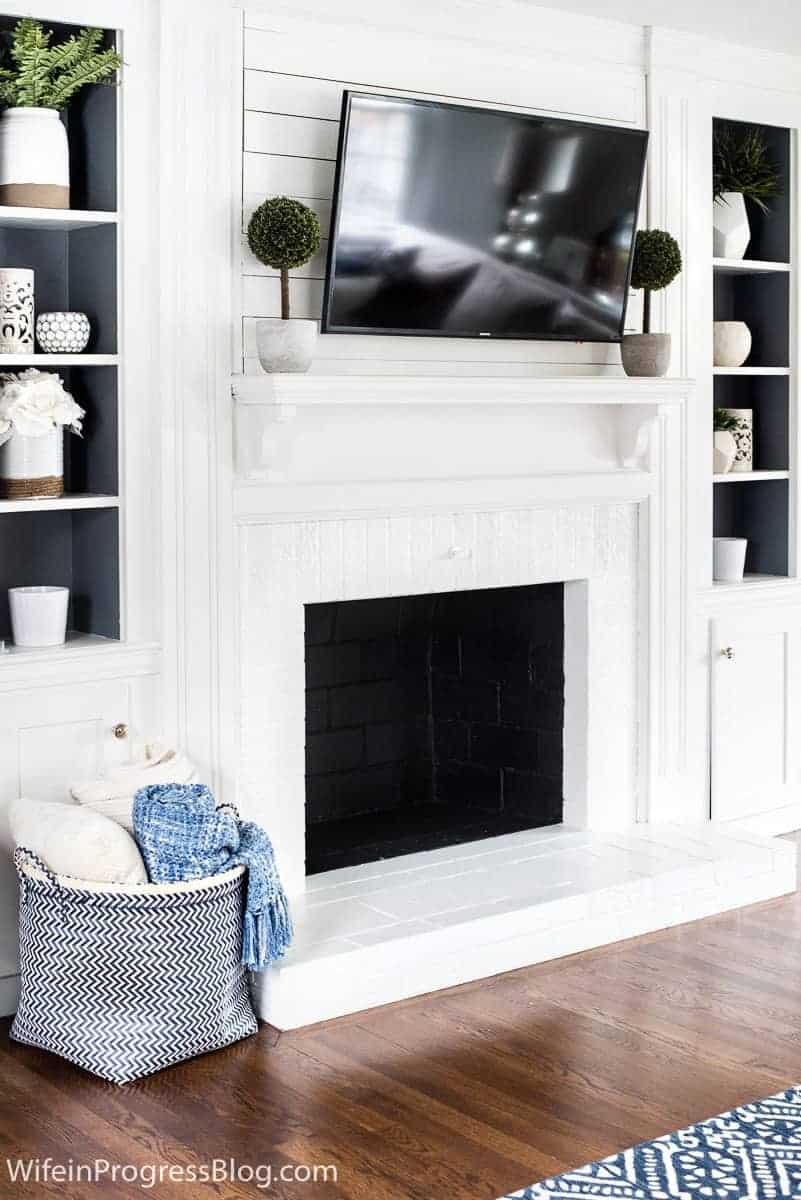
My white fireplace is now bright, crisp and clean; exactly the look I wanted. Whatever your reason, completing a fireplace makeover will be the first thing you’ll want to check off your to-do list!

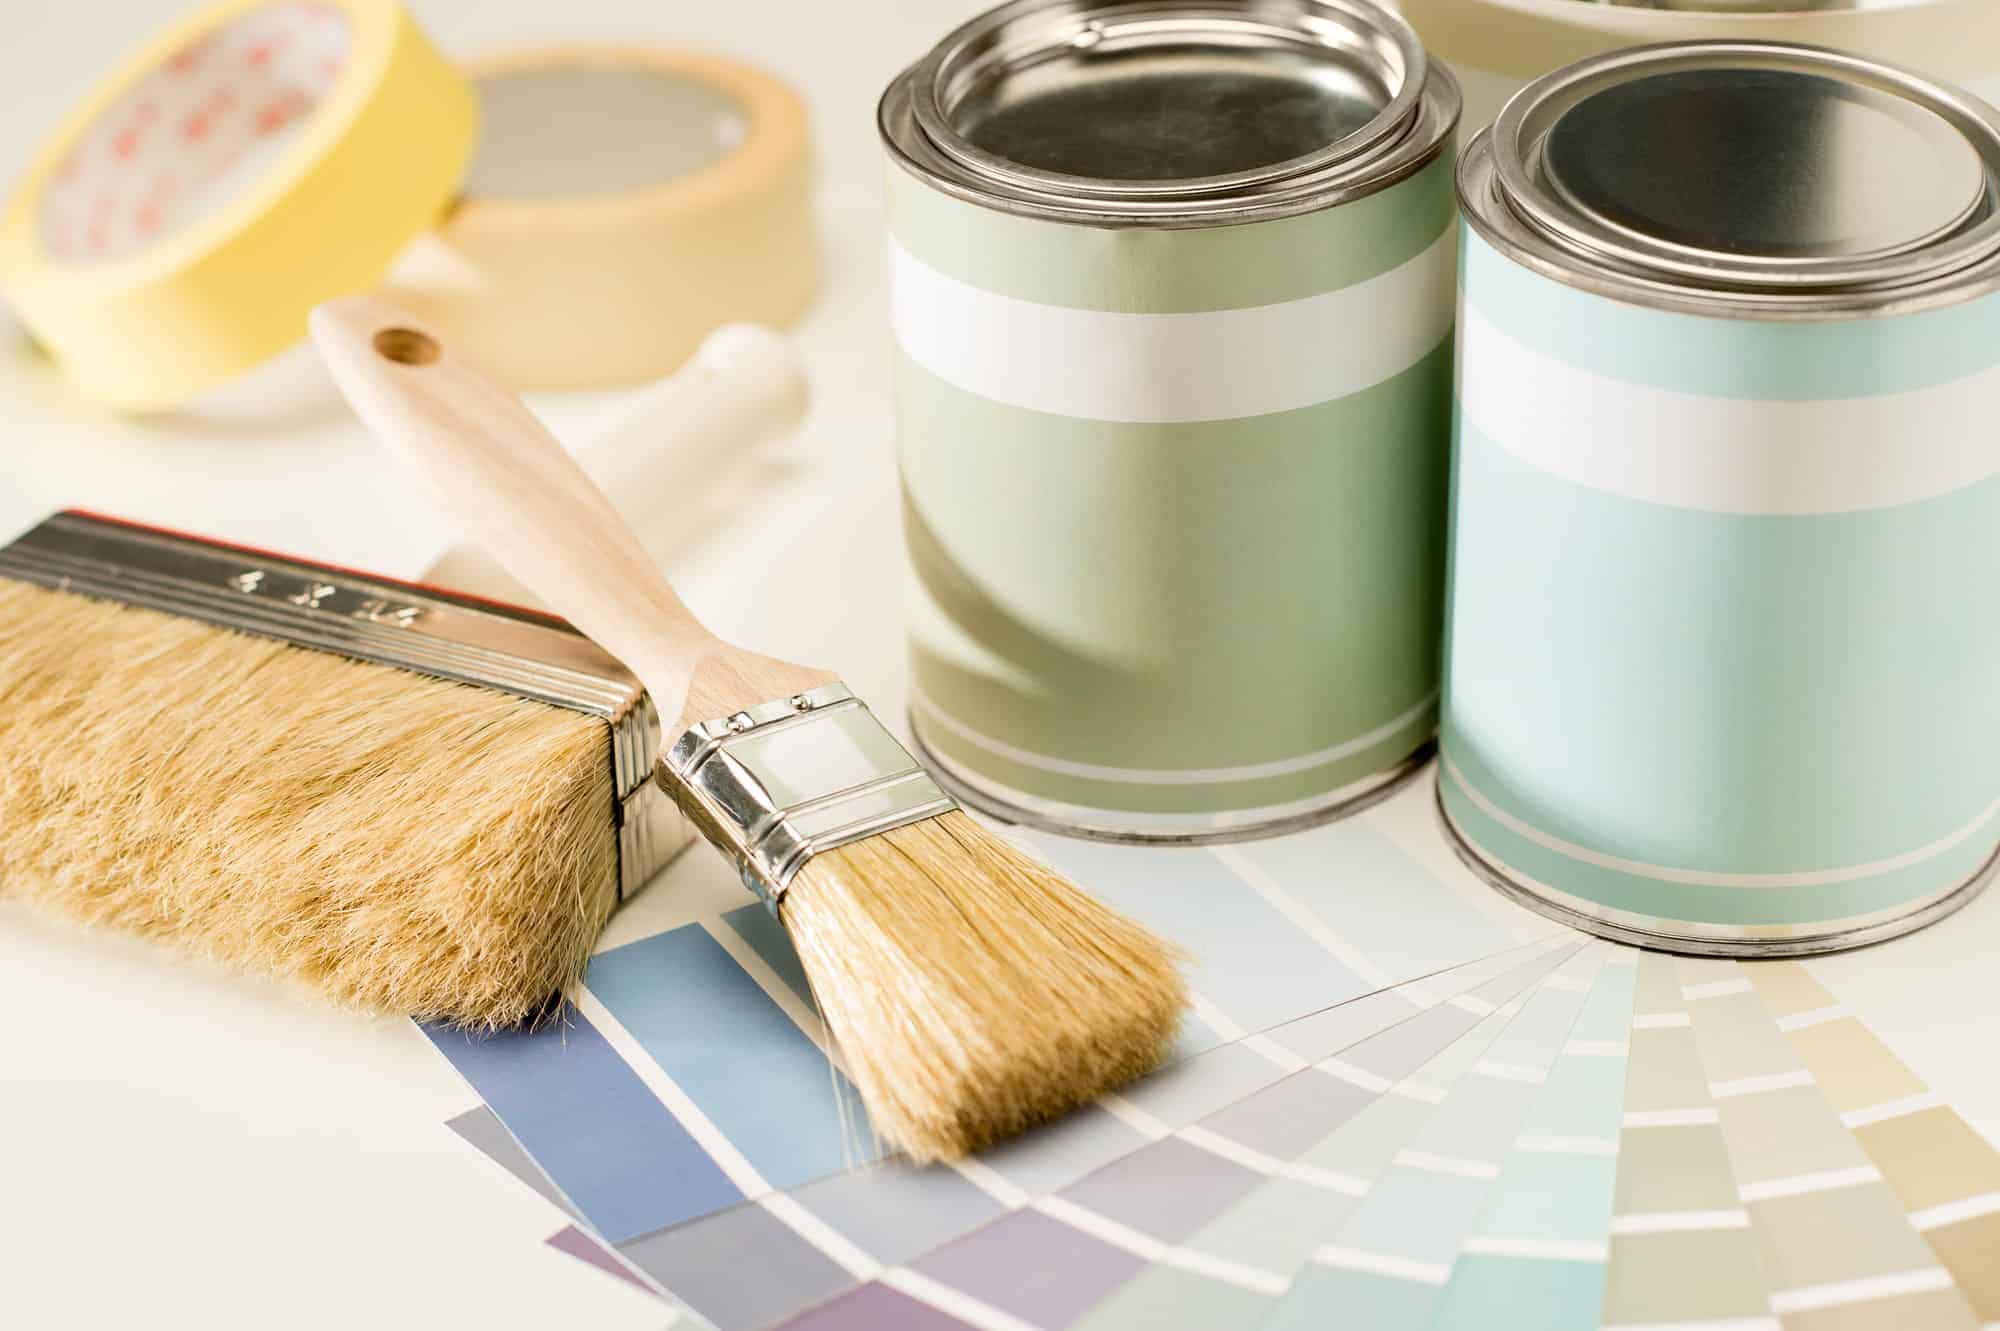
Paint Types
Before you begin the paint job, you’ll want to determine what kind of paint will be best for your fireplace. Ideally, choose a paint that is heat-resistant and can withstand the high temperatures that a fireplace can generate. Here are some types of paint that are suitable for brick fireplaces:
- Latex Paint: This type of paint is a water-based paint and is a popular choice for fireplace brick. It is easy to clean up and can be applied with a brush, paint roller, or sprayer.
- Epoxy Paint: Epoxy paint is a two-part paint that is highly durable and heat-resistant. It is a great choice for high-traffic areas and can withstand the heat generated by a fireplace.
- Masonry Paint: Masonry paint is specifically designed for use on brick, concrete, and other masonry surfaces. It is highly durable and can withstand the elements, making it a great choice for many fireplaces.
- Acrylic Paint: I used white acrylic paint for a smooth and luxurious finish. It is designed to withstand tough wear and tear.
I chose to use Sherwin Williams’ ProClassic Enamel paint in Extra White. This paint is less likely to peel or chip off, it’s self leveling, doesn’t leave paint strokes and is non-yellowing. A second coat is vital though, so don’t skip that step! I chose the extra white finish so that it would stand out from the white trim surrounding it.
What other Materials do you Need?
Now that you’ve selected what paint you’ll use to paint your brick fireplace, you’ll need to gather a few more supplies before you begin.

You can find most of these items at your local Home Depot, Lowe’s, or online through Amazon.
A few necessary materials include:
- Paint primer: A high-quality paint primer will help the paint adhere to the brick surface. I highly recommend Sherwin Williams Loxon Concrete & Masonry Primer.
- Paint: Choose a high-quality paint from the options above that can withstand wear and tear. I am partial to a white or neutral paint color.
- Painter’s tape: Use painter’s tape to protect any adjacent surfaces that you don’t want to get paint on. Opt for a thin and narrow roll of tape to get in the tiny areas.
- Paintbrushes: You’ll need a variety of paintbrushes in different sizes to apply the primer and paint.
- Roller: A paint roller can help you cover large areas quickly and evenly.
- Paint tray: Pour the paint into a paint tray to make it easier to load onto the roller. This is essential to avoid spilling paint directly from the can in the living room.
Prep Surrounding Areas
Prepping the surrounding area prior to starting anything else in the transformation process is more optional than other steps, but still important. If you have a fireplace with built ins, it might be a good idea to tidy those up and remove anything to close to the actual fireplace.
You can cover the floor with a drop cloth or plastic sheeting. This will catch any paint drips and protect your flooring.
I’d suggest using painter’s tape to mask off any areas that you don’t want to paint, such as the mantel or the walls around the fireplace. Be sure to press the tape firmly to ensure it adheres well.
Protect any nearby furniture or decor with plastic sheeting or old towels and blankets. This will protect them from paint splatters.
Prepare the Brick Fireplace for Painting
First, prepare a clean surface. If your fireplace has never been used, a quick sweep will do. If you’ve previously used yours, you’re going to want to use some TSP to scrub down any dirt or soot on the brick wall.
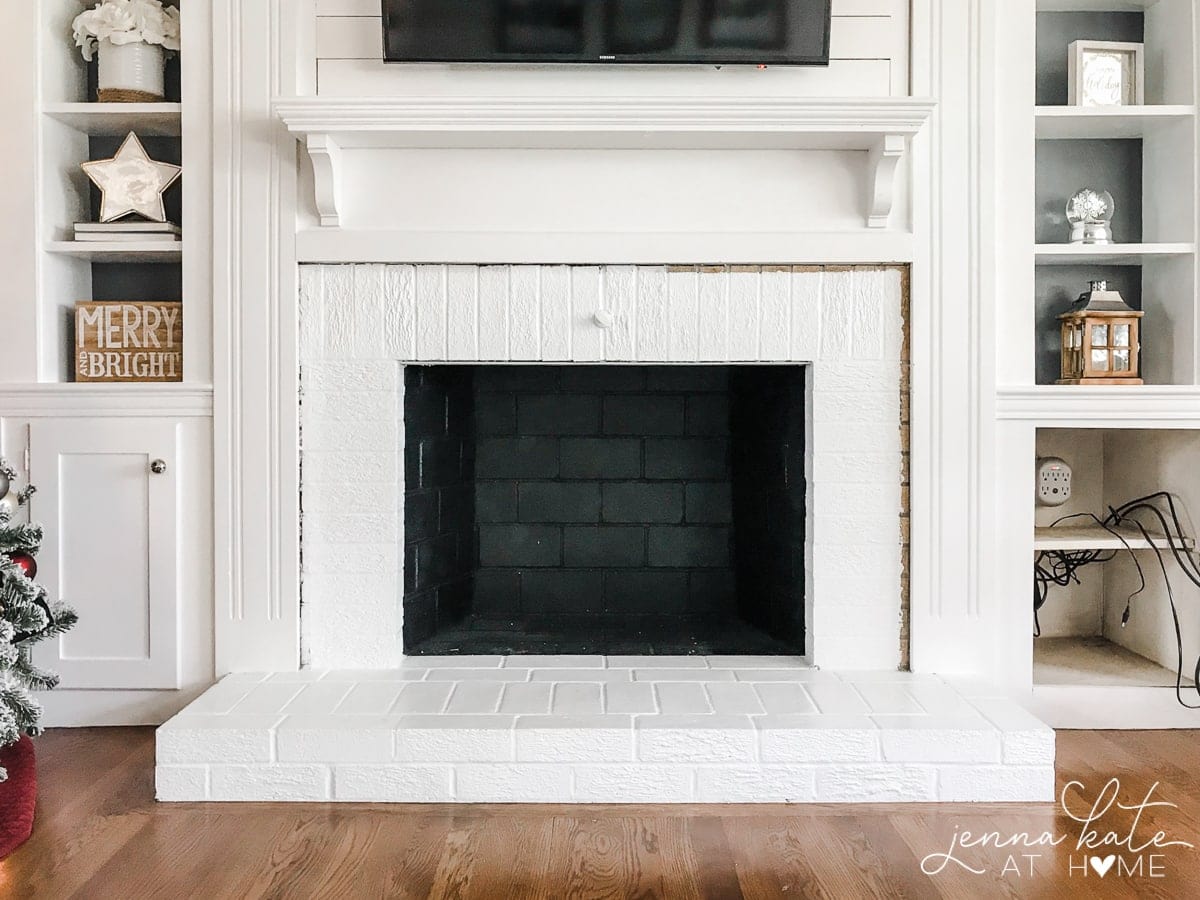
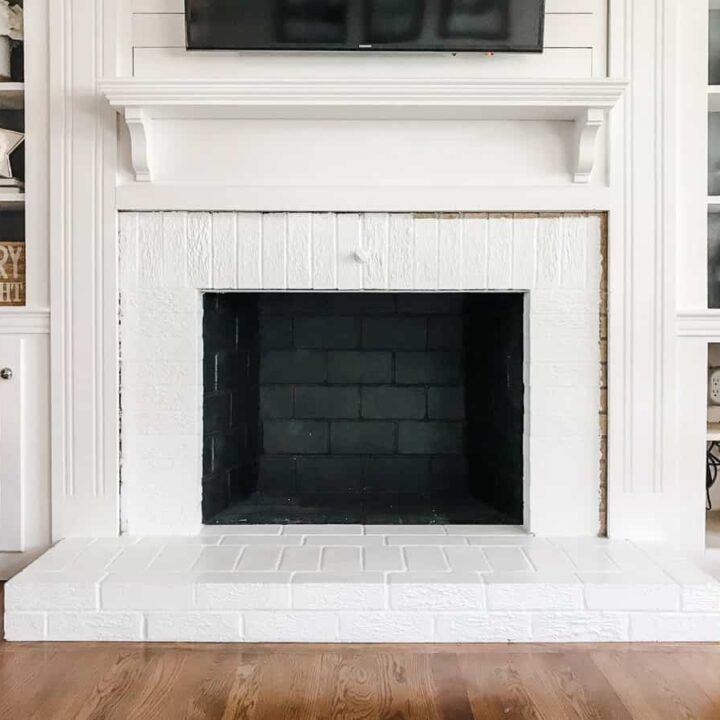
Next, apply a coat of primer to the brick. It is crucial to use a good primer. I highly recommend Sherwin Williams Loxon Concrete & Masonry Primer. It seals both imperfections in the brick as well as stains so that soot stains won’t bleed through onto your newly-painted bricks.

I applied it with a 4 inch nappy roller and used a paint brush for the edges and to really get into any cracks. I primed the firebox first, then painted it and then primed the hearth before painting it. That way, I could paint the entire inside of the fireplace without worrying about putting my hand in wet primer on the hearth.
You may need one or two coats of primer based on the thickness of your strokes. Once you’ve cleaned your fireplace and finished priming the brick, you are ready to start painting!
Paint the Interior Brick
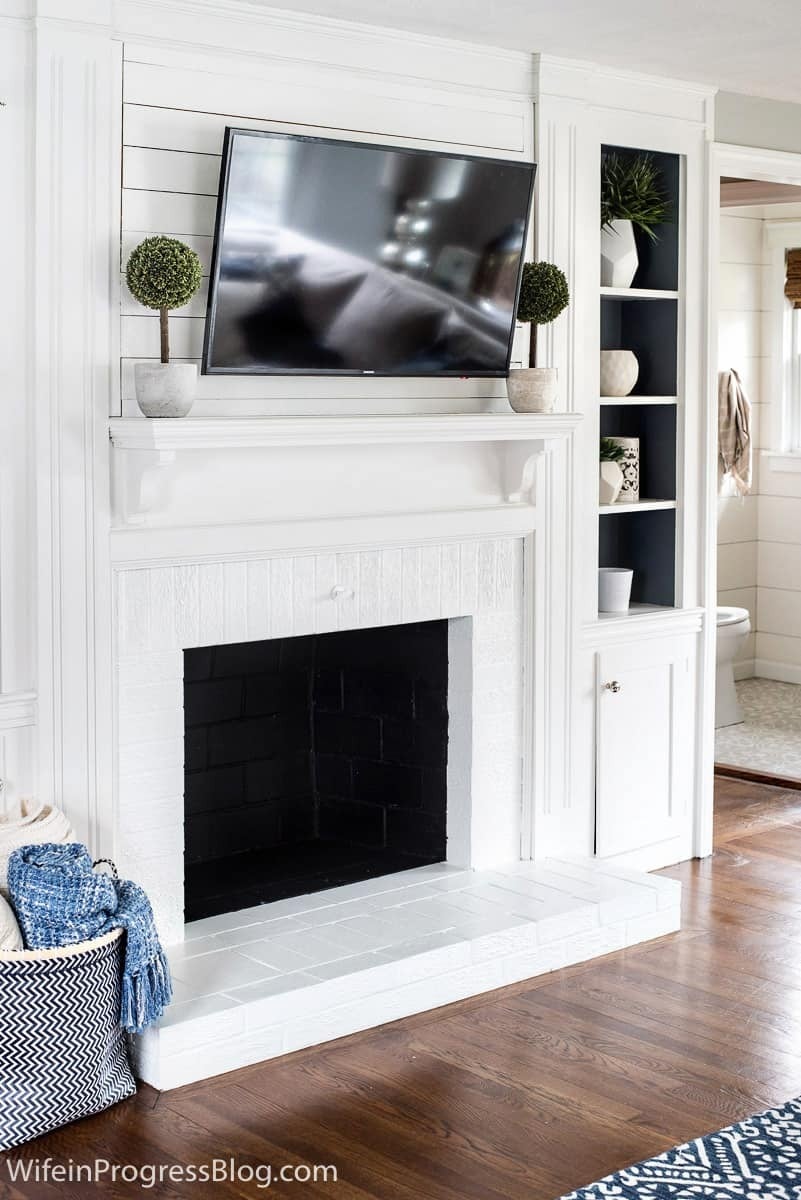
As I mentioned, I painted the firebox black to avoid it being the focal point. Both a satin or flat finish will work for this step. You will more than likely need two coats of paint. Because both the firebox and hearth were the same brick (i.e. same color), I had to create an artificial line where the firebox ended and hearth started. To keep the line neat and straight, I used a small artist’s paintbrush.

Paint the Hearth
Once the firebox has been painted, the hearth needs a minimum of two coats of white paint. Start with a light base coat of Sherwin Williams’ ProClassic Enamel paint in Extra White. Throughout the painting process, take a few steps back to review the progress periodically.
Use a paintbrush or roller to apply the paint to the brick surface. Start from the top and work your way down. Make sure that you cover the entire surface evenly. If you are using a roller, make sure that you use a nap roller that is suitable for rough surfaces.
You may need to reach for some smaller brushes for the edges and grout lines. Once the first coat is dry, apply a second coat of paint. This will ensure that the color is consistent and that the surface is fully covered. By now, the entire fireplace should be showcasing new paint.
Post-Painting Care Tips
Let the paint dry completely before using the fireplace. This may take several hours or even a day or two depending on the type of paint you used. Wait to style the rest of the fireplace or bring your decor back out until you know it is fully dry.
Clean your new fireplace often with a soft-bristled brush or a vacuum with a soft brush attachment to remove dust and debris from the surface. Avoid using harsh chemicals or abrasive cleaners that could damage the paint. Soapy water and a damp rag should do the trick!
Over time, the paint may start to chip or fade. To keep it looking fresh, touch up any areas with a fresh coat of paint that need it with a small brush and matching paint.
If you have small children, adding some fireplace doors or a fireplace screen is a good idea to protect the area and prevent accidental damage or injury.
Final Thoughts
After you have successfully transformed your old, outdated brick fireplace into a beautiful focal point in your home, you’ll love your new living room oasis. Painting a brick fireplace can seem like a daunting task, but with the right tools, preparation, and a few simple steps, it can be a simple and rewarding DIY project.
This weekend DIY project that completely upgraded the look of my living room was well worth it! I truly feel like I have a brand new fireplace.
How to Paint a Brick Fireplace
A dramatic fireplace makeover that you're totally ready for! Paint over your fireplace bricks and revamp this classic feature of your home.
Materials
- TSP Cleaner
- Concrete & masonry primer
- Black paint for inside of firebox
- White paint for outer bricks
Tools
- Paint brush
- Paint roller
- Paint tray
- Painter's tape
Instructions
- Apply painter's tape to the edge of the bricks to protect the walls and flooring.
- Prime the entire fireplace, including firebox and hearth.
- Apply two coats of a satin or flat finish paint inside the firebox - I used black to avoid it being the focal point.
- Once the firebox is painted, apply two coats of white paint to the rest of the bricks on the outside.
Notes
Because both the firebox and hearth were the same brick (i.e. same color), I had to create an artificial line where the firebox ended and hearth started. To keep the line neat and straight, I used a small artist's paintbrush.
If you found this DIY tutorial on How to Paint a Brick Fireplace White helpful, let me know in the comments! And of course, if you have any questions about my method or the products I used, let me know, too!