Content may contain affiliate links. When you shop the links, I receive a small commission at no cost to you. Thank you for supporting my small business.
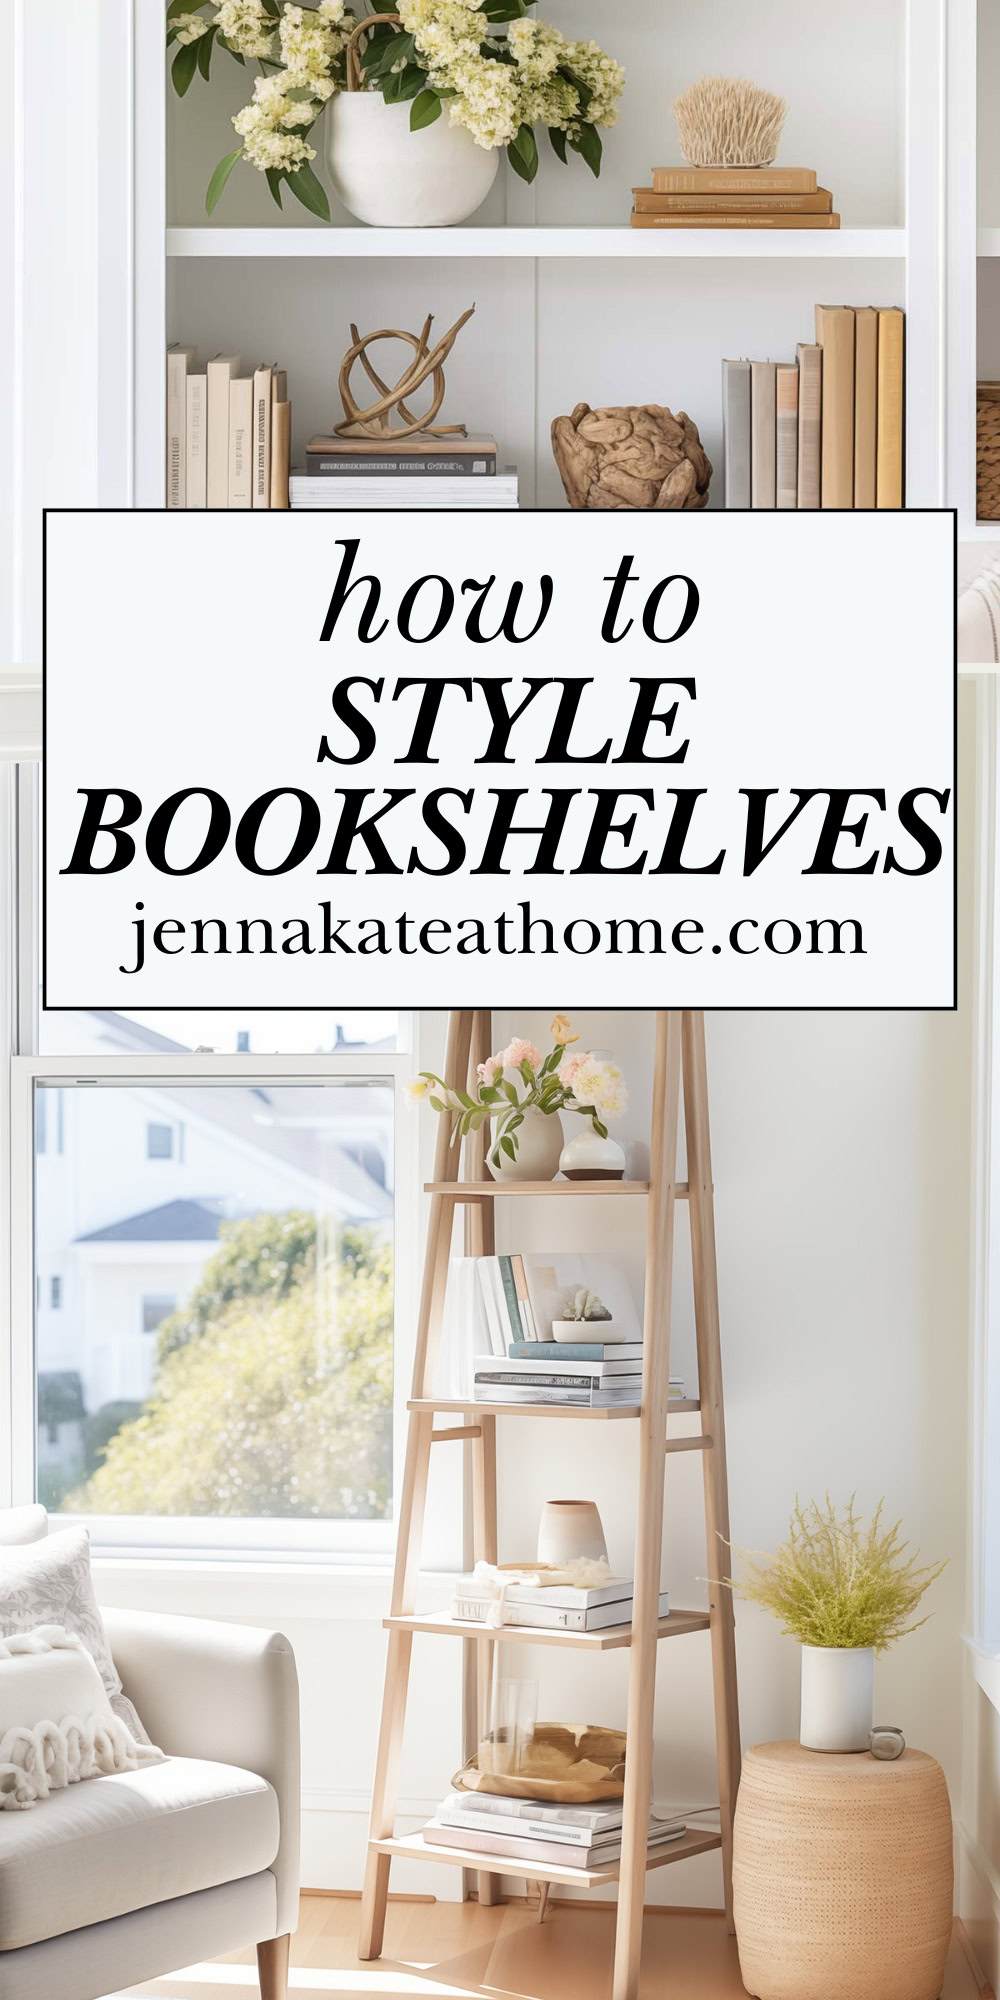
Styling a bookcase can feel overwhelming, especially when you’re staring at blank shelves – or overflowing ones. Whether you’re a design lover, an avid reader, or you just want your shelves to look cohesive instead of cluttered, this guide will help you decorate with confidence.
Forget the showroom-perfect shelves. This post is for real people with real books, photos, collections, and lives. Let’s make those bookcases not only beautiful, but personal and purposeful.
Why Shelf Styling Matters
Bookcases are more than just storage. They’re vertical spaces to showcase your personality, add texture and color to a room, and create a polished design moment. When styled with intention, a bookcase can become the visual anchor of a space – or the perfect complement to it.
How NOT to Style Your Shelves
Before we dive into what works, let’s get a few no-no’s out of the way:
- Cramming every item you own on every shelf
- Lining up only books in rows with no variation
- Over-symmetry (everything perfectly matched)
- Using only small objects (no height variation = flat look)
5 Bookcase Styling Formulas That Actually Work
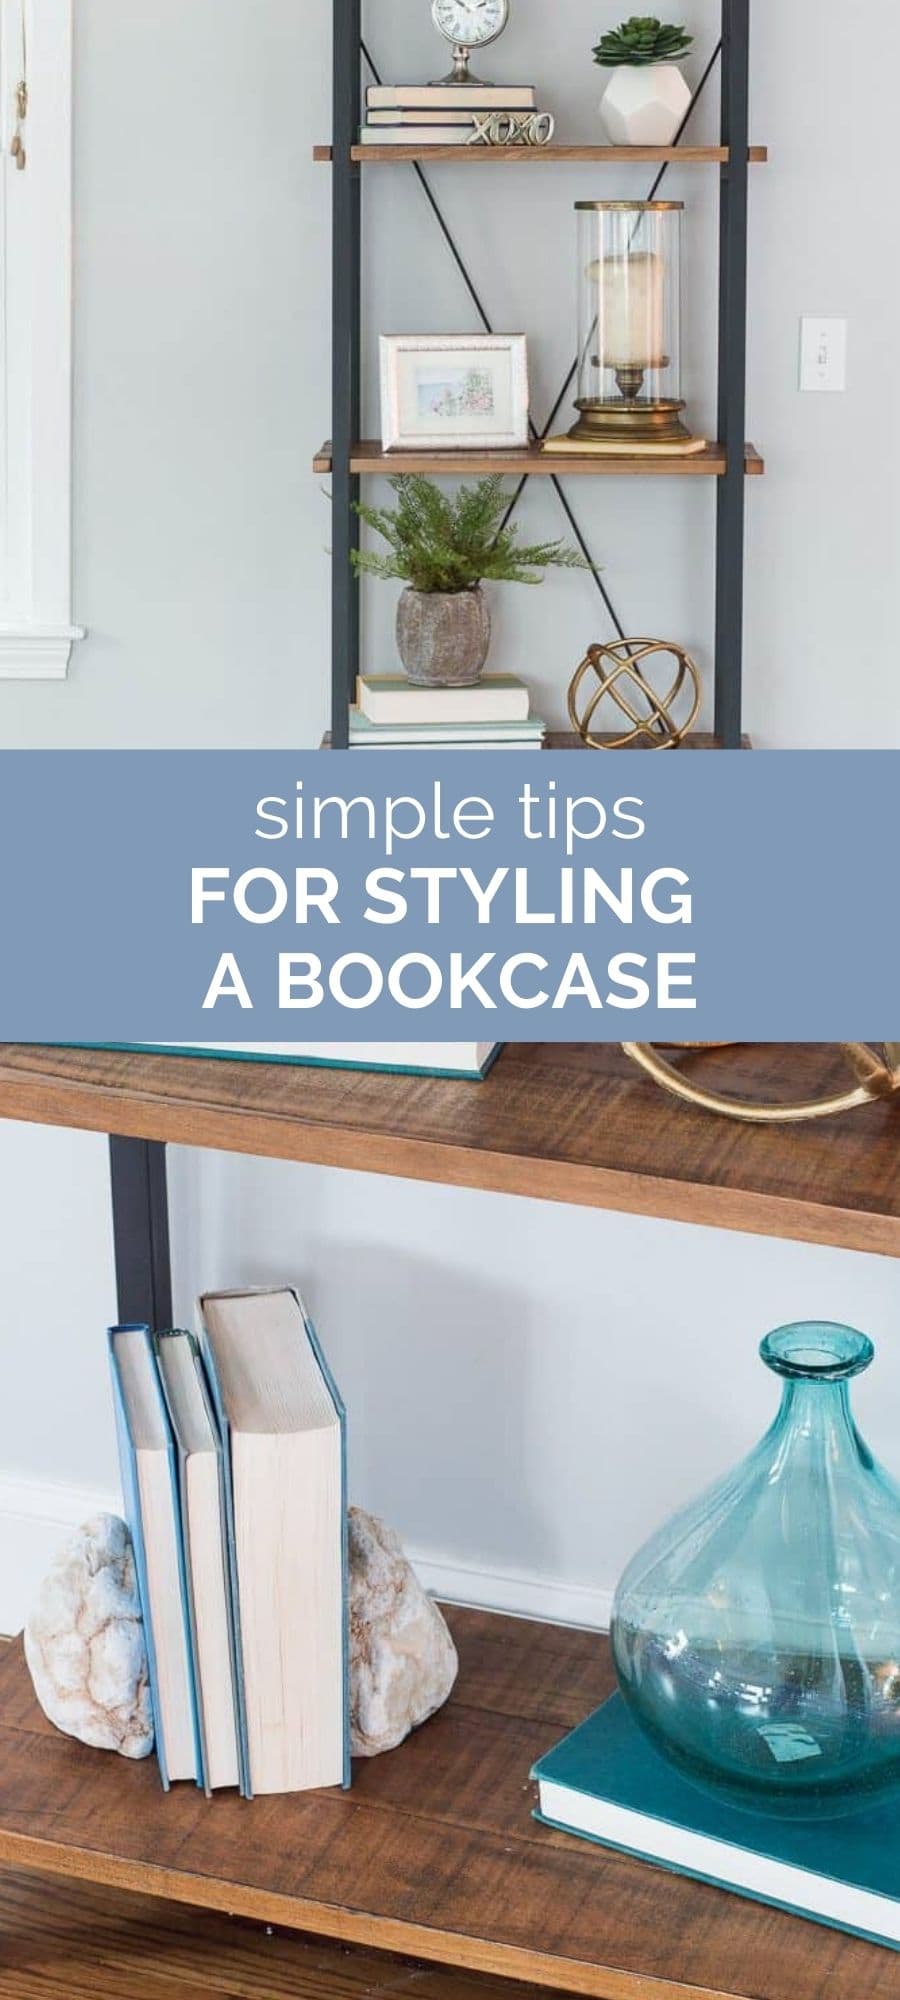
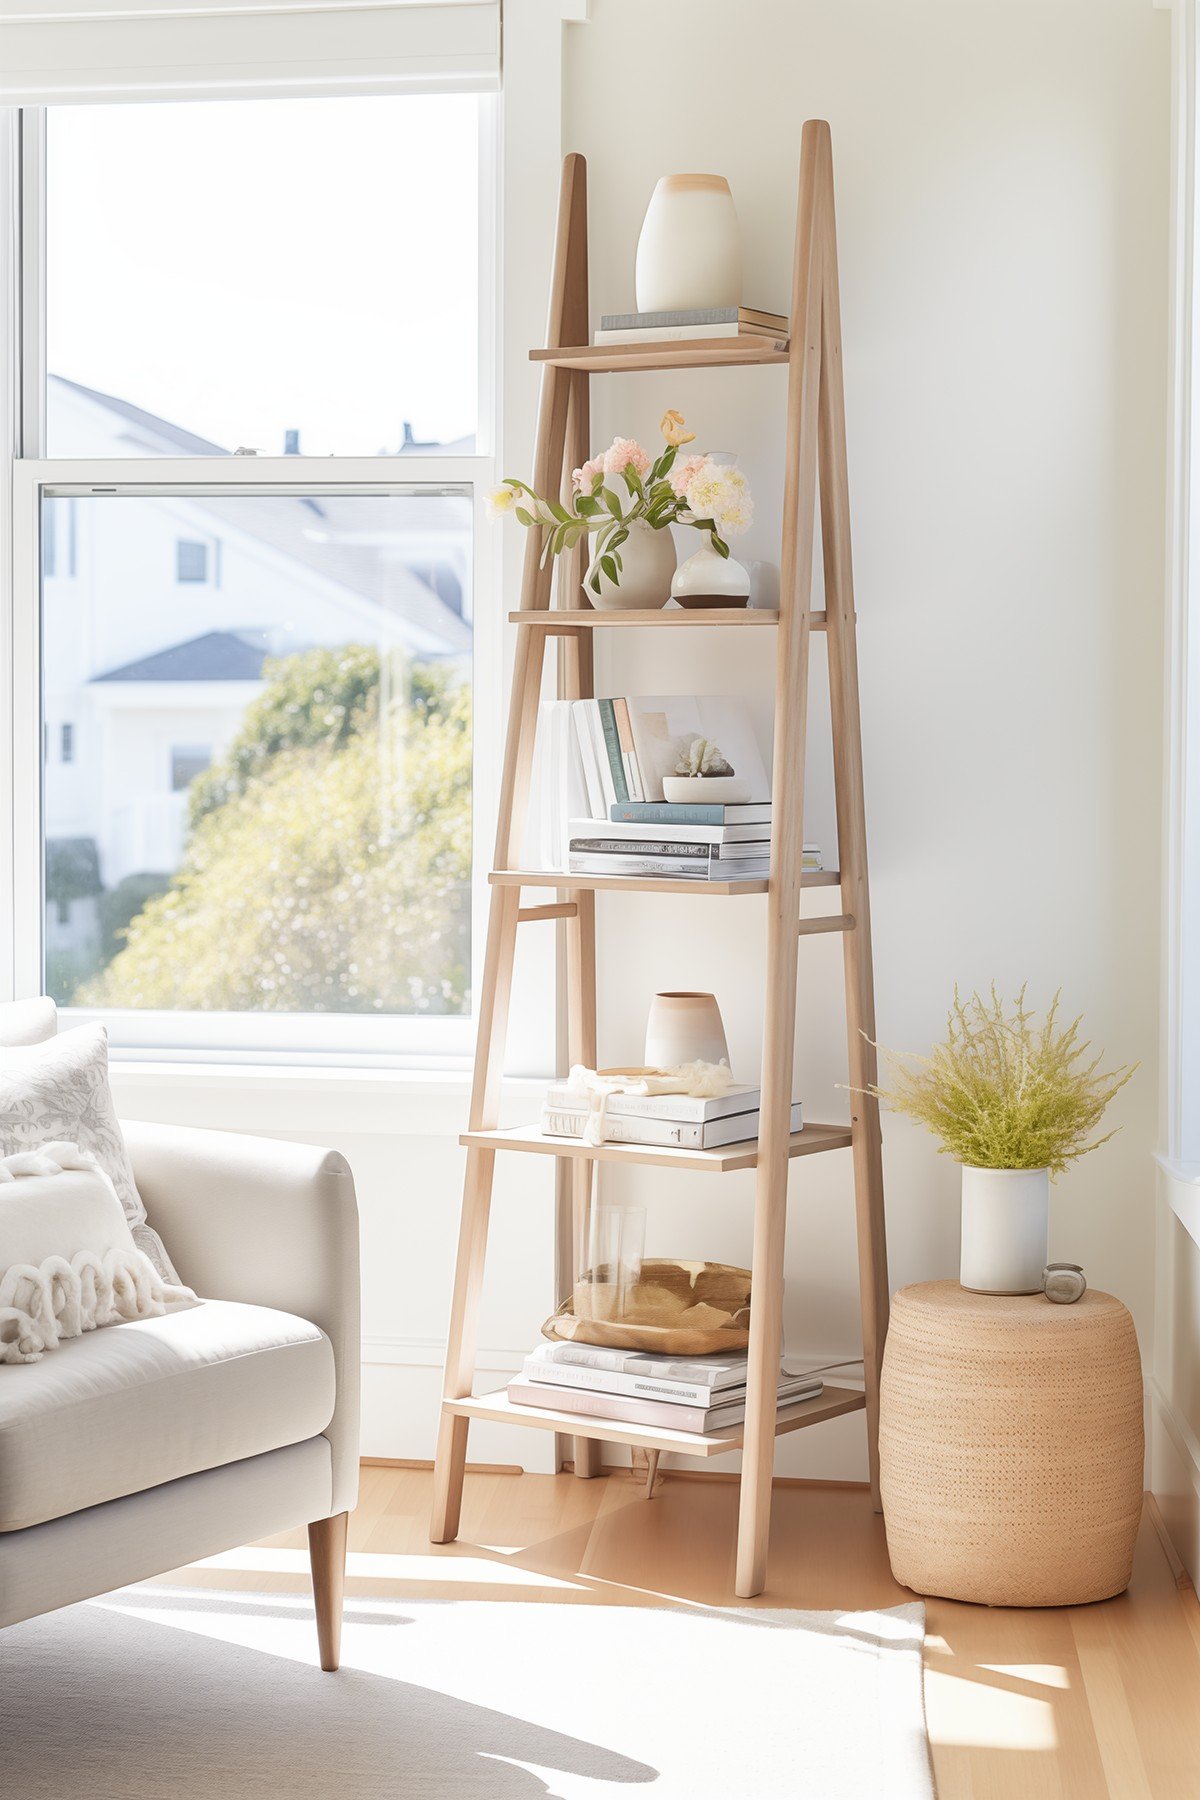
1. The Anchor + Stack + Accent
- One tall object (vase or sculpture)
- One horizontal stack of books
- One small object (bowl, box, bead strand) on top of the stack
2. The Backdrop + Layer
- Lean art or a framed photo against the back
- Layer smaller objects in front (shorter vases, candles, boxes)
3. The Reader’s Grid
- Books organized by theme or genre
- Horizontal stacks to break up visual weight
- A small item (like a paperweight or magnifying glass) every 2–3 shelves
4. The Basket Balance
- Basket or box on lower shelves for texture and storage
- Stack of 3 books + a small object on top
- One statement piece (sculpture or plant) on the opposite side
5. The Rule of 3 (With Texture)
- Group items in threes: different height, shape, and finish
- Think: shiny ceramic + woven rattan + matte stone
jenna’s Tip
Alternate the side with the tallest object as you move shelf to shelf. It helps keep things balanced and interesting.
Basic Shelf Decorating Formula
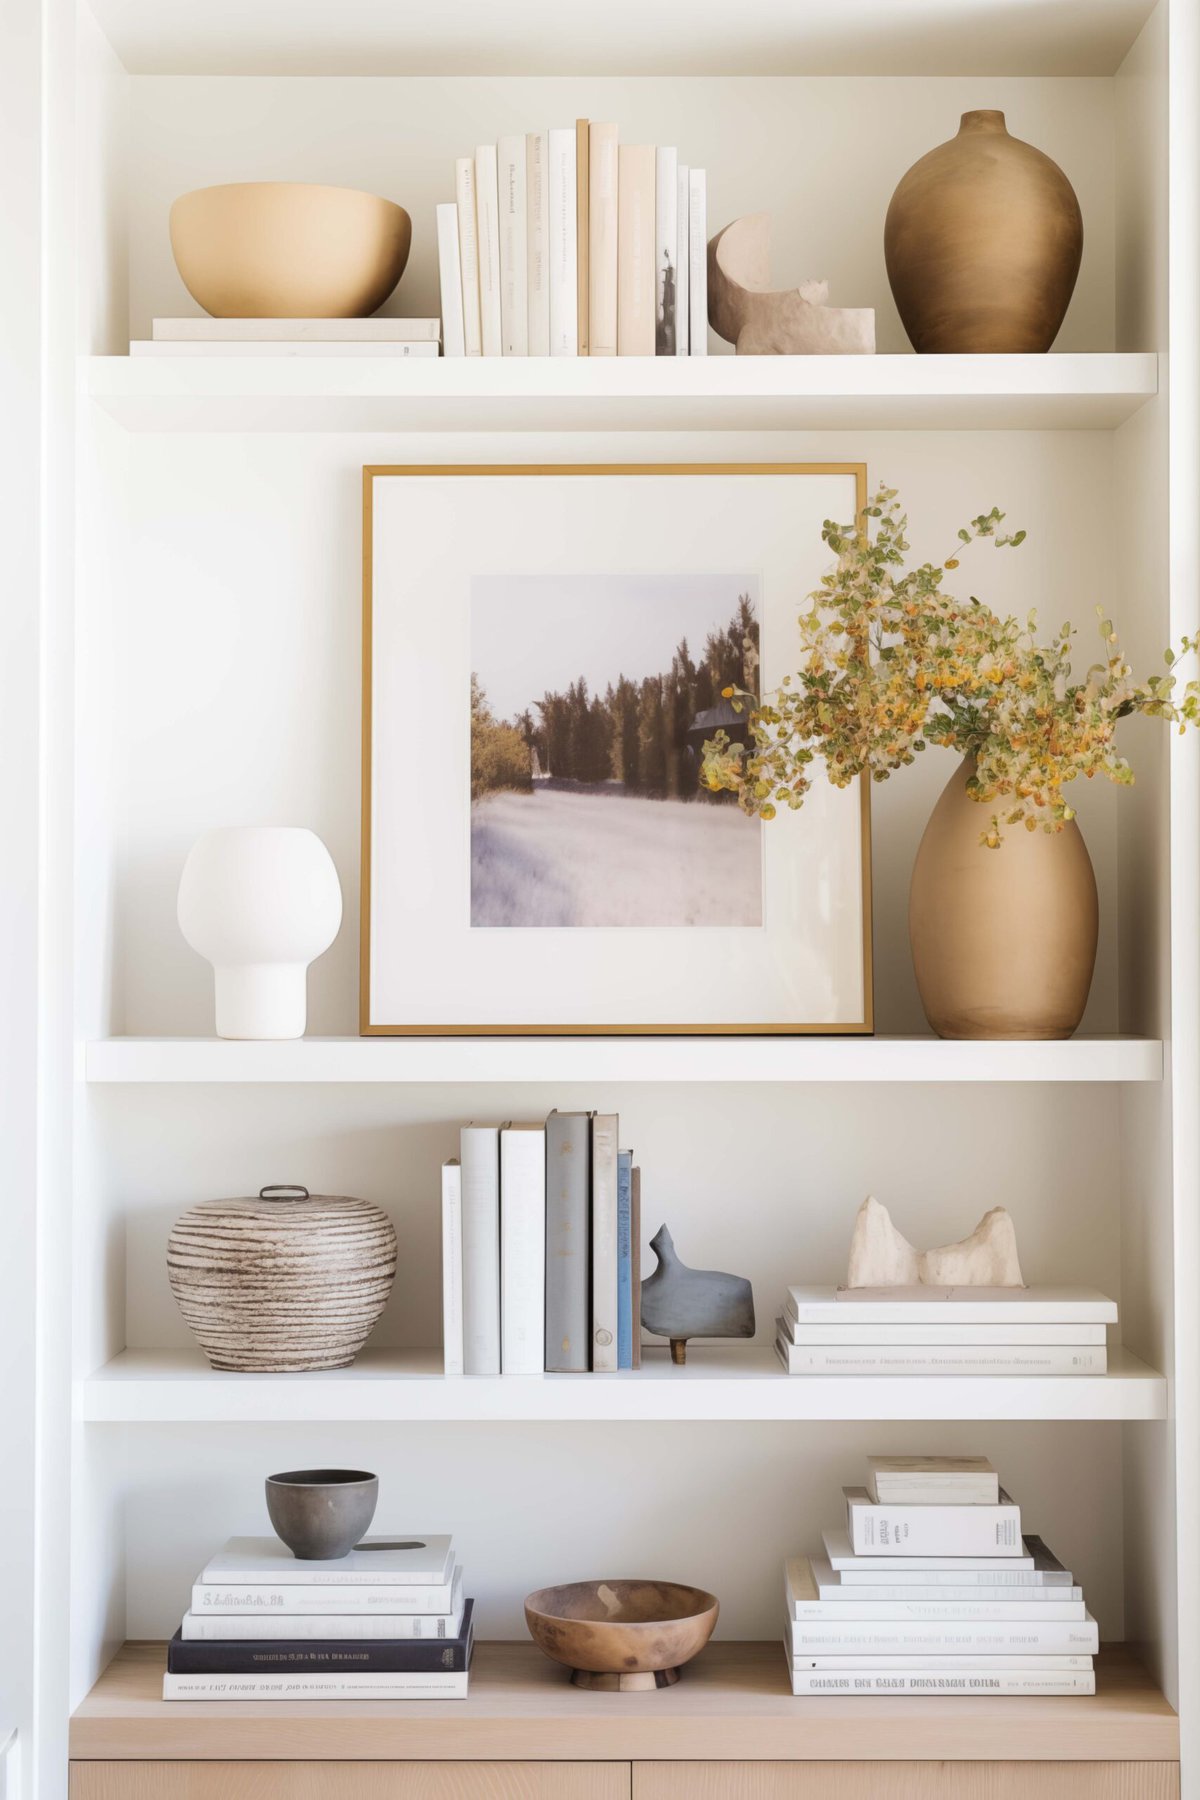
1. The Rule of 3
Grouping items in odd numbers, particularly threes, can create a visually pleasing and balanced arrangement. When you place three objects together, it allows for a sense of movement and dynamism. The eye naturally moves between the items, creating a more engaging experience than a single item or a pair might.
While the rule of three is a great guideline, it’s not set in stone. It’s okay to play around and see what looks best in your space. Sometimes, one, two or four items might work better, depending on the size of your shelf and the items you’re working with.
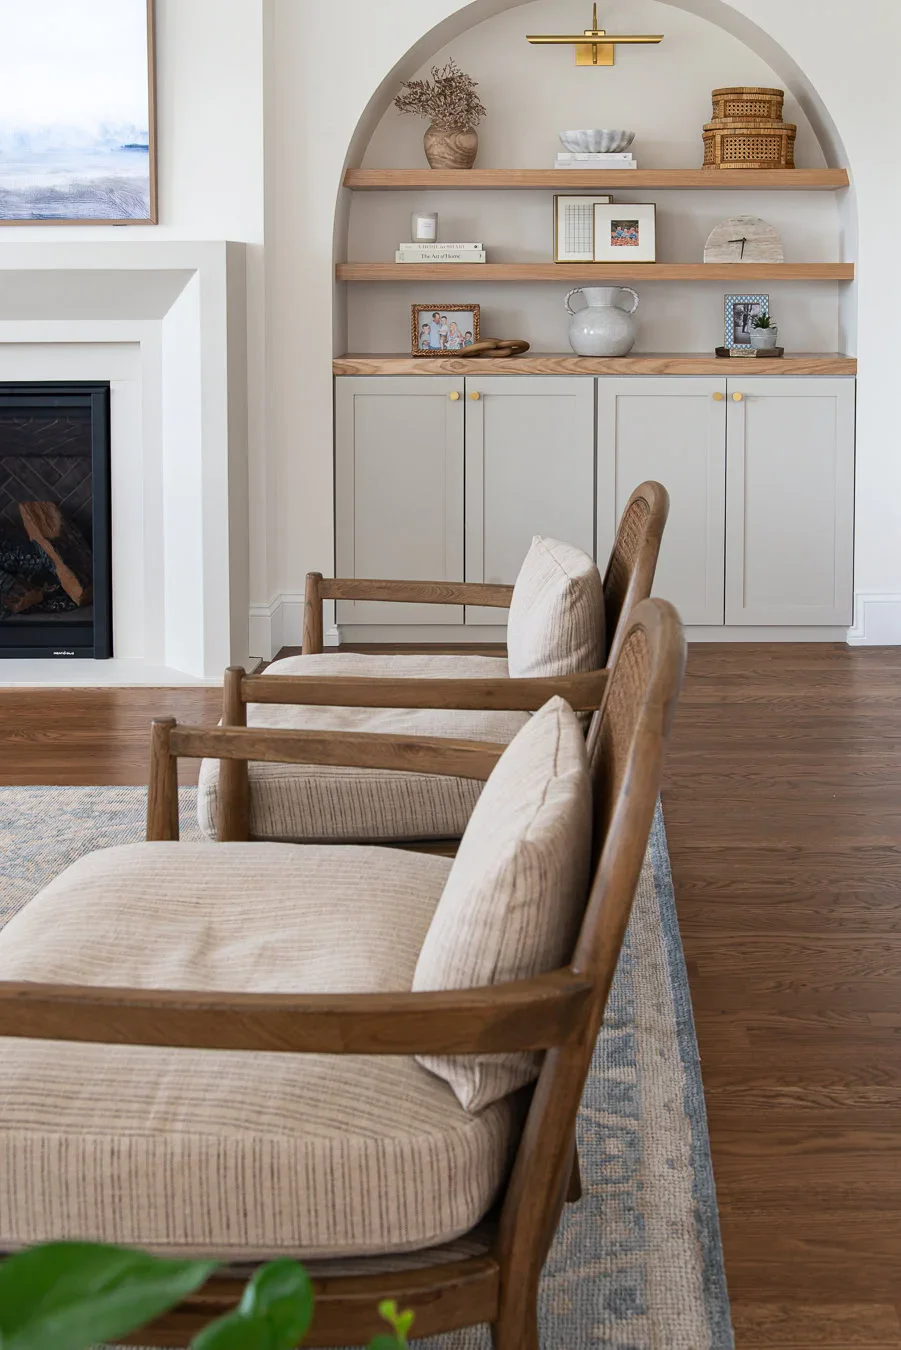
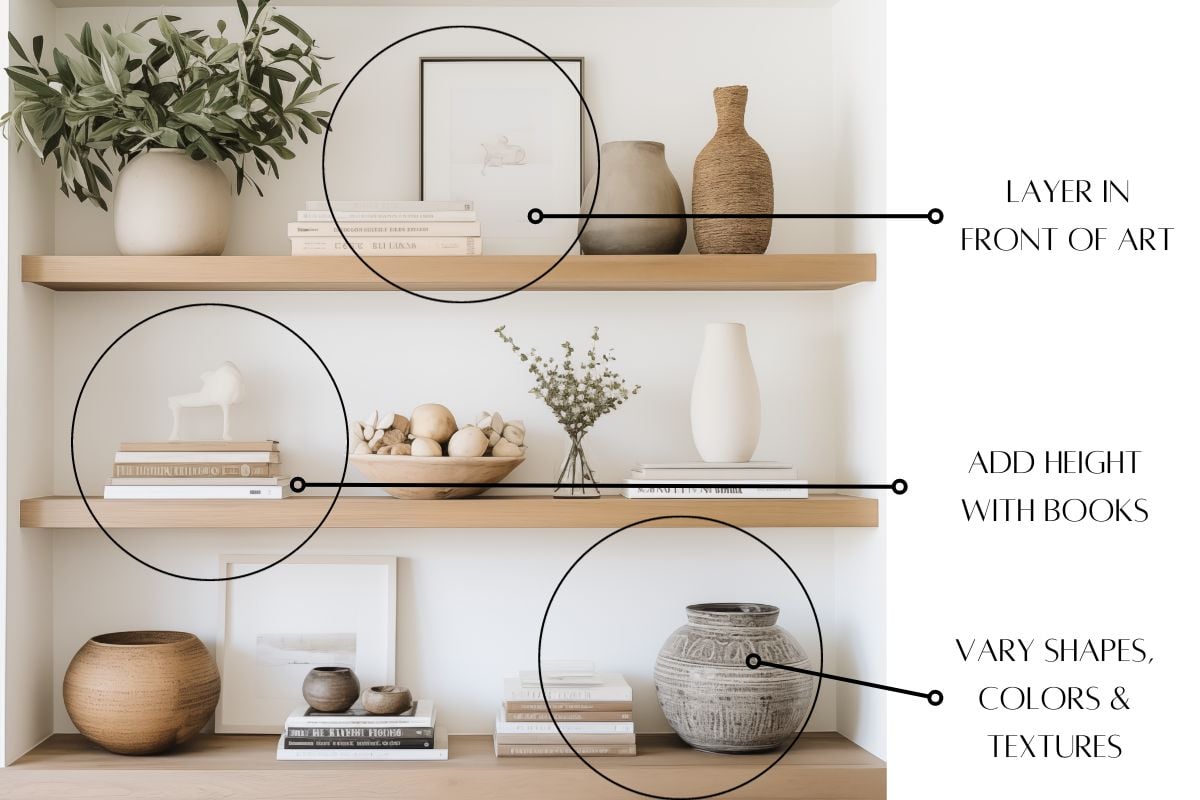
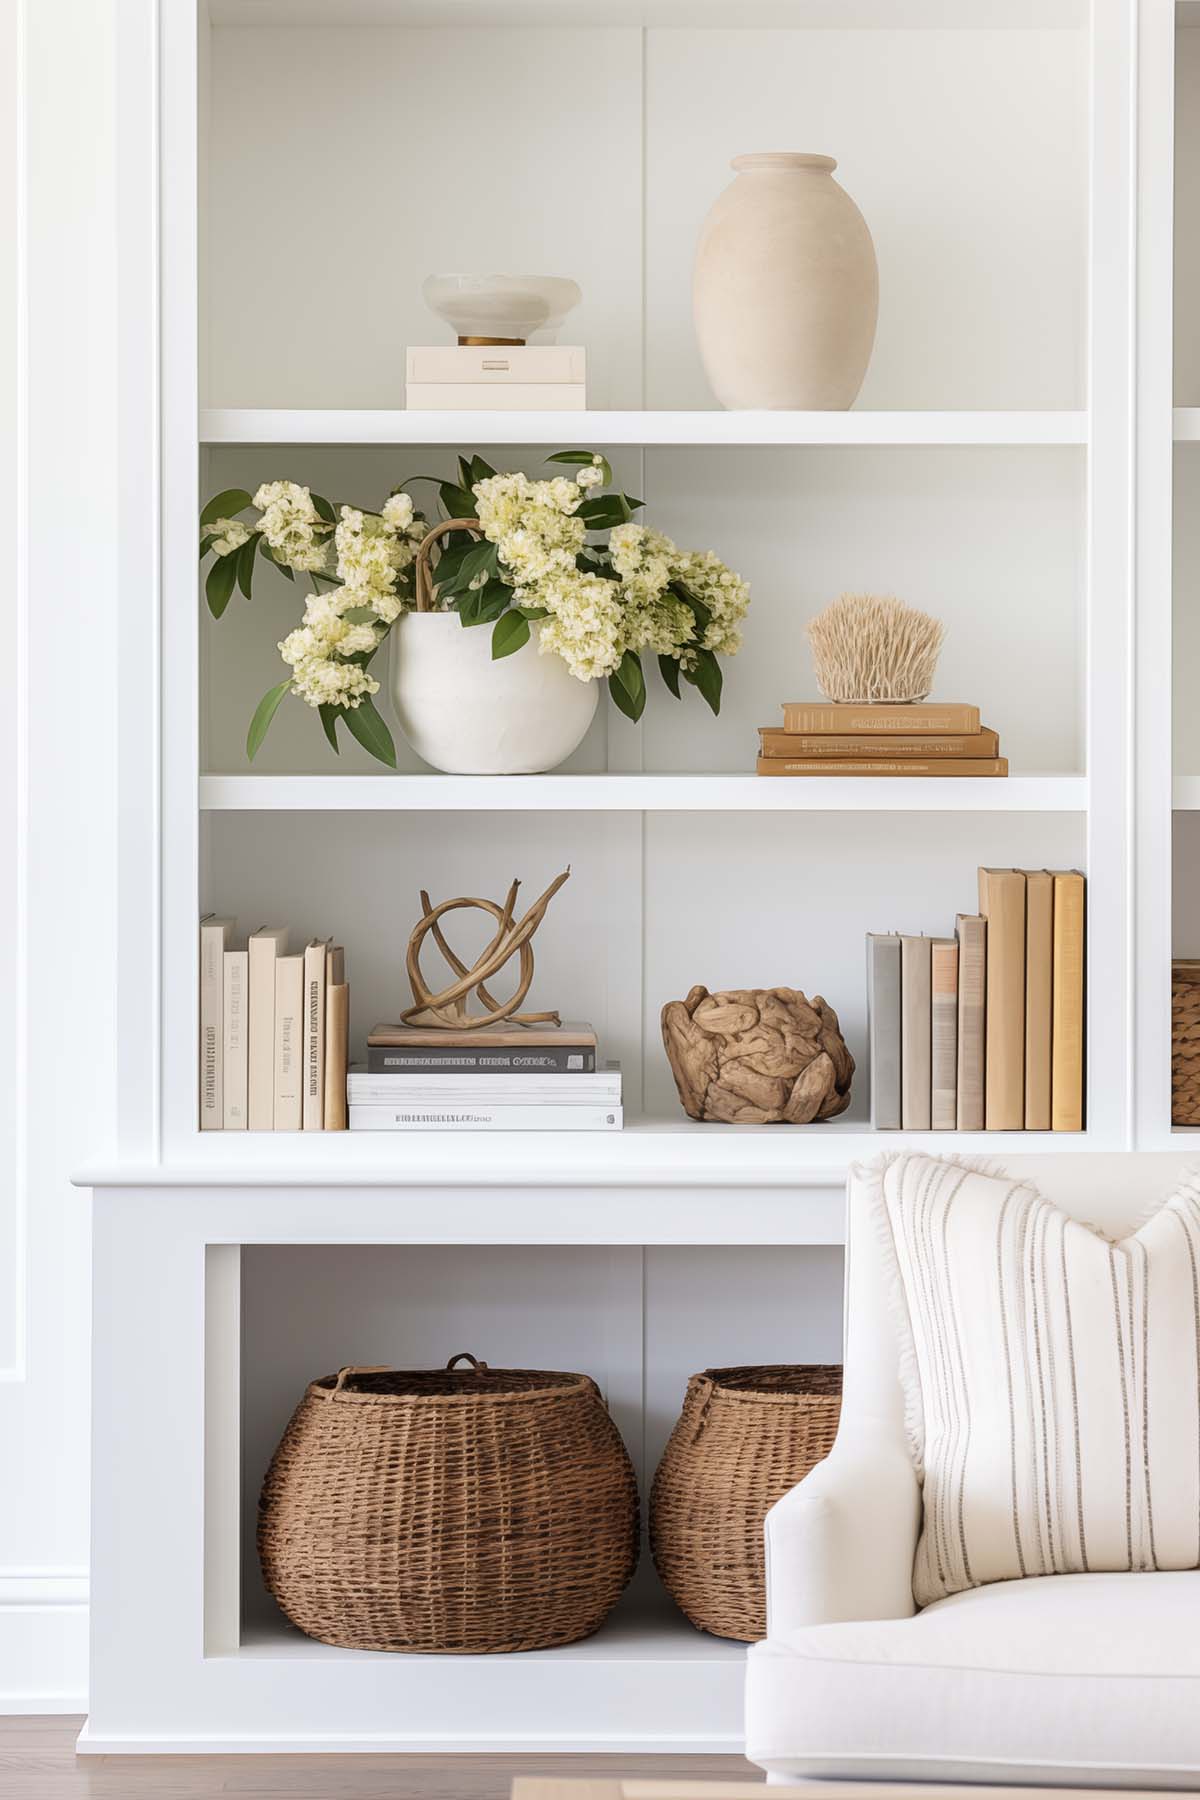
2. Vary the Height, Shape and Texture
Incorporate objects of different dimensions to keep the eye moving. A tall vase next to a short, round bowl creates a dynamic contrast. Add varying heights by stacking coffee table books and placing items on top. Mix and match different textures like glossy ceramics, rustic wood, or sleek metals for a sense of visual interest.
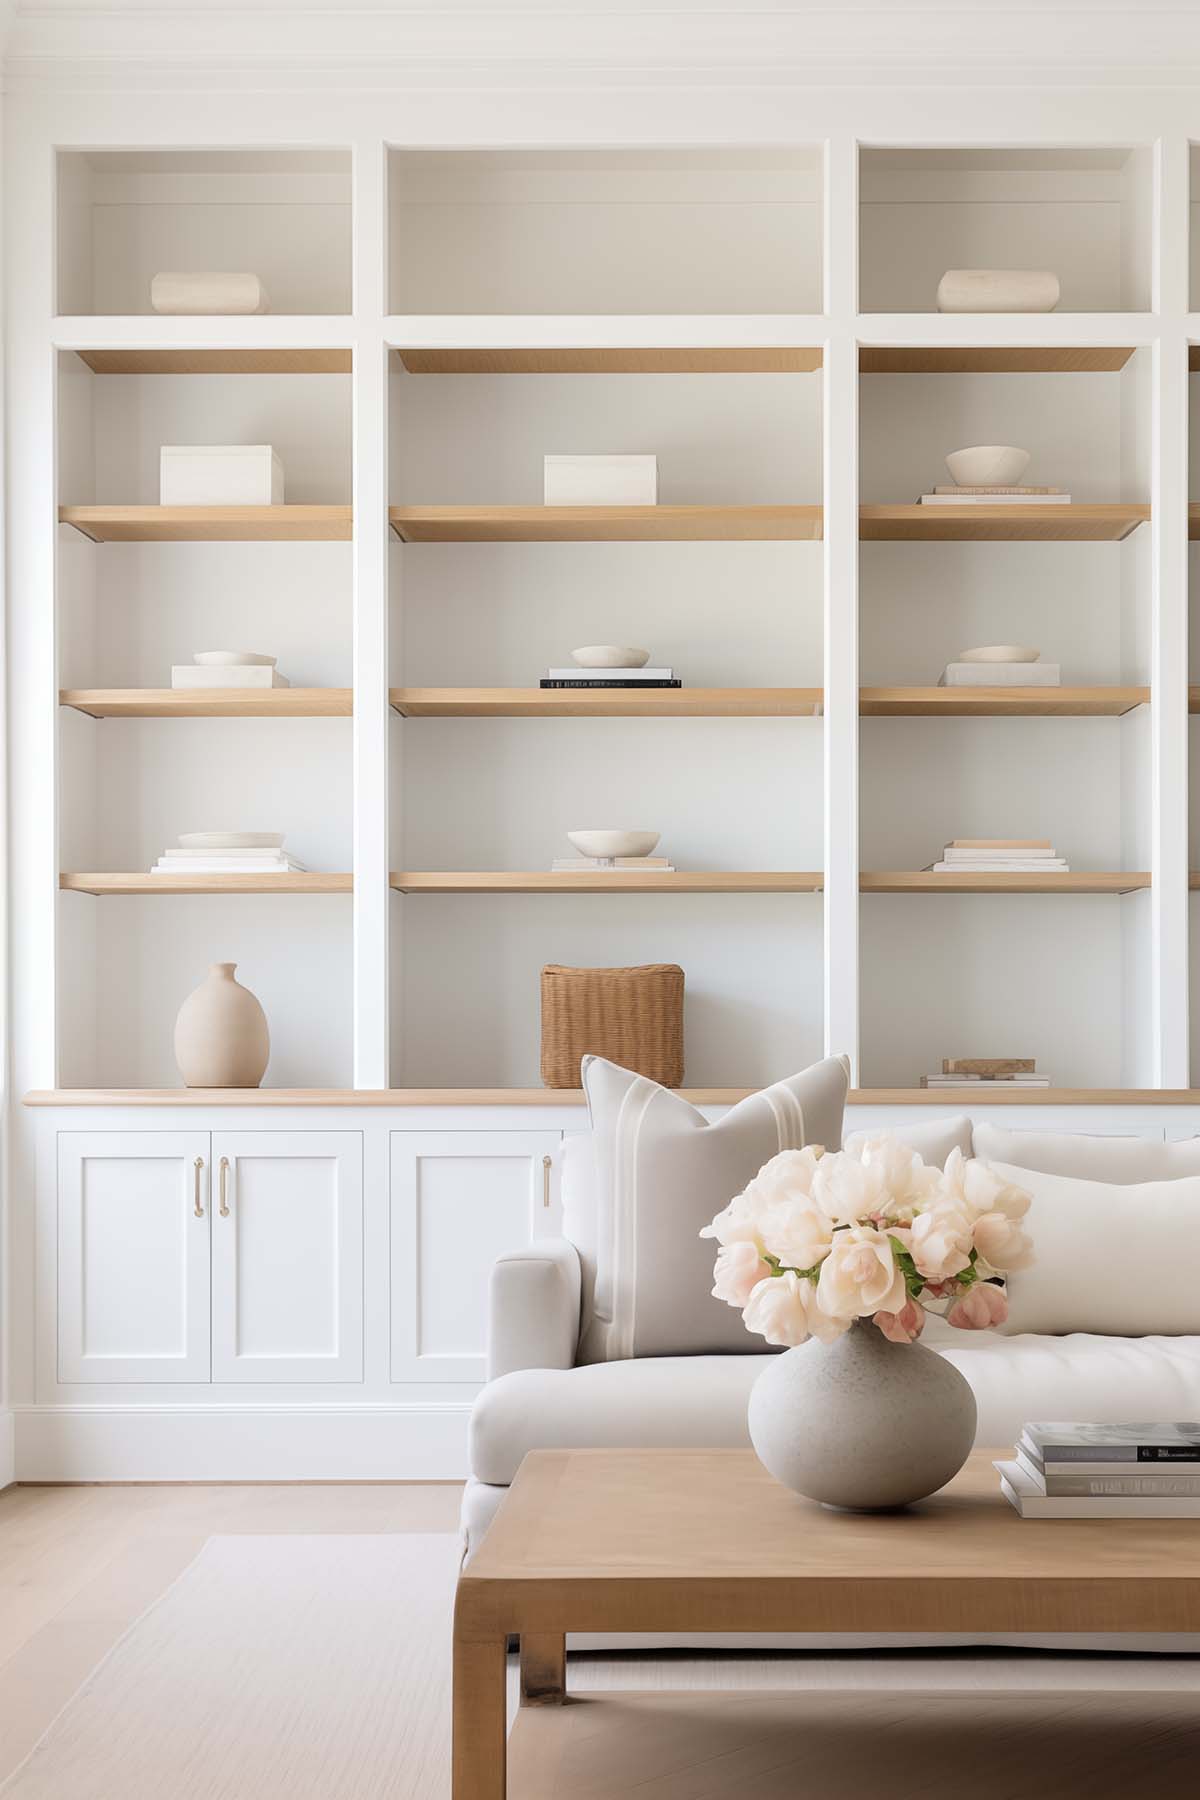
3. Create a Sense of Balance
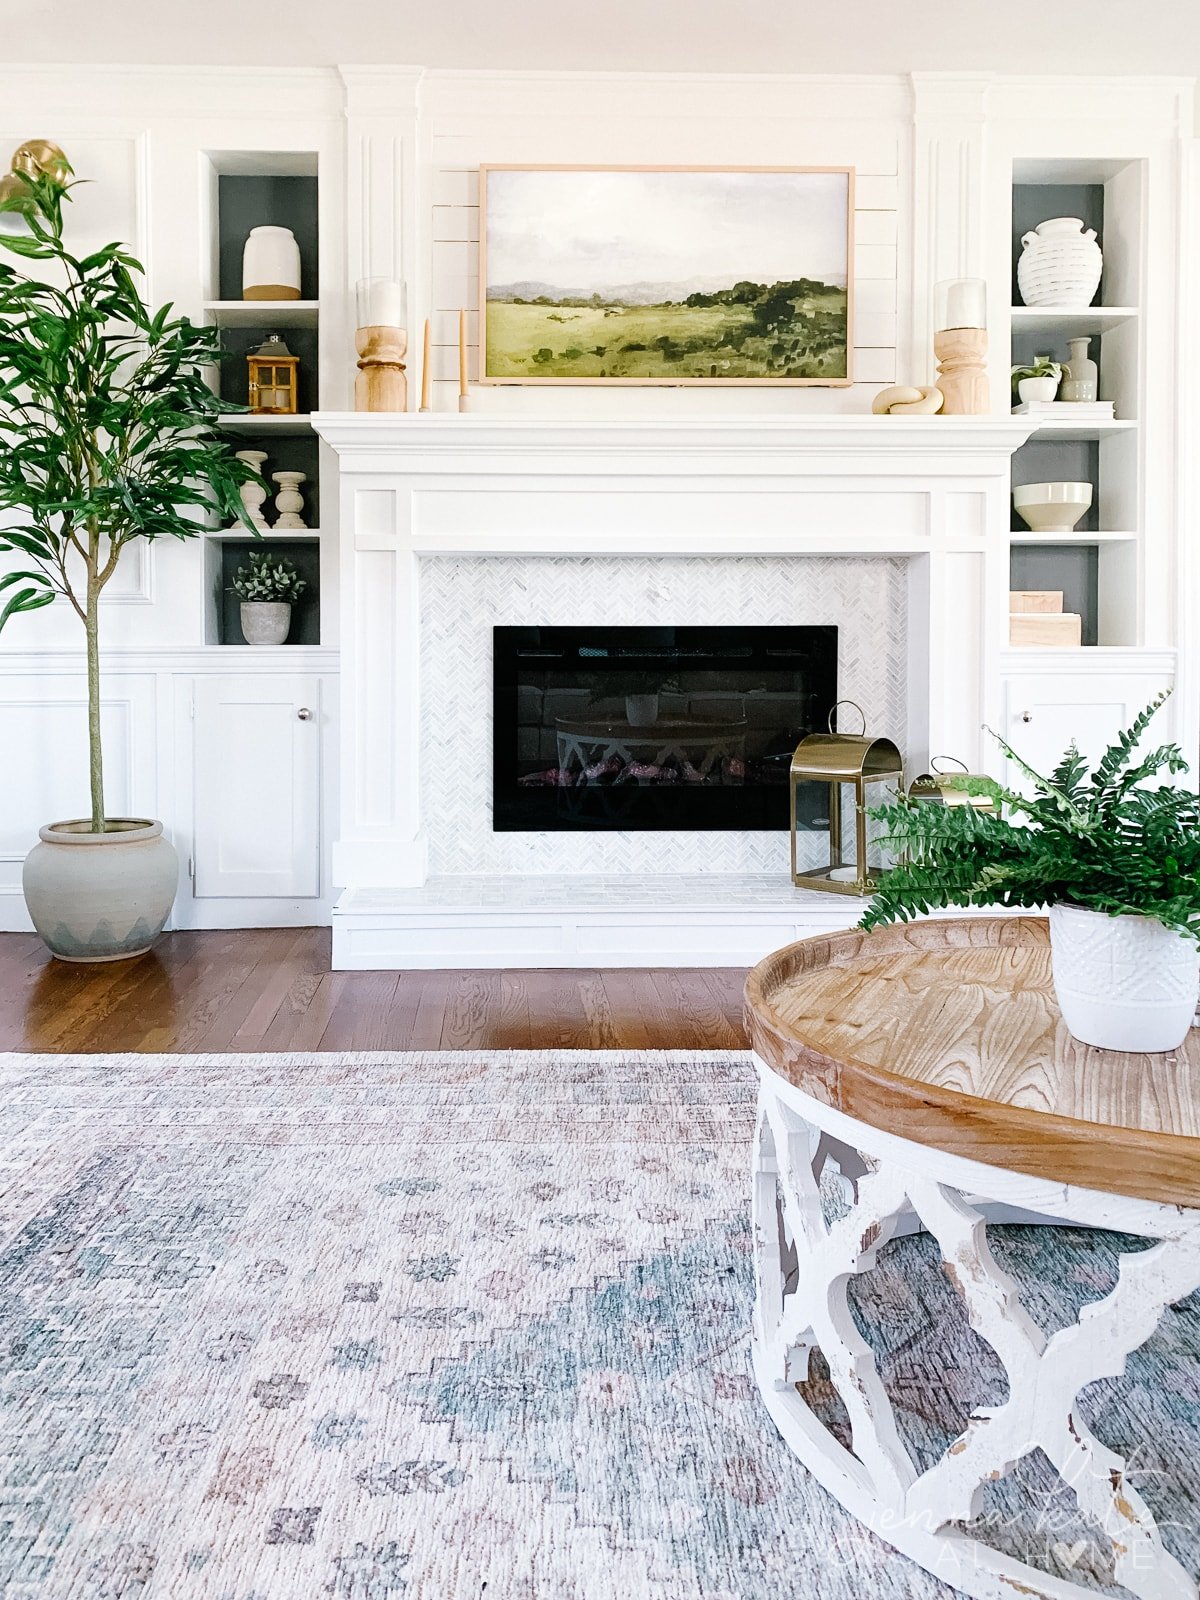
Creating a sense of balance on your built-in bookcases is crucial in achieving a visually pleasing and harmonious display. Alternating the side with the taller object is an excellent strategy for maintaining balance and symmetry. Here are some detailed tips on how to implement this approach effectively:
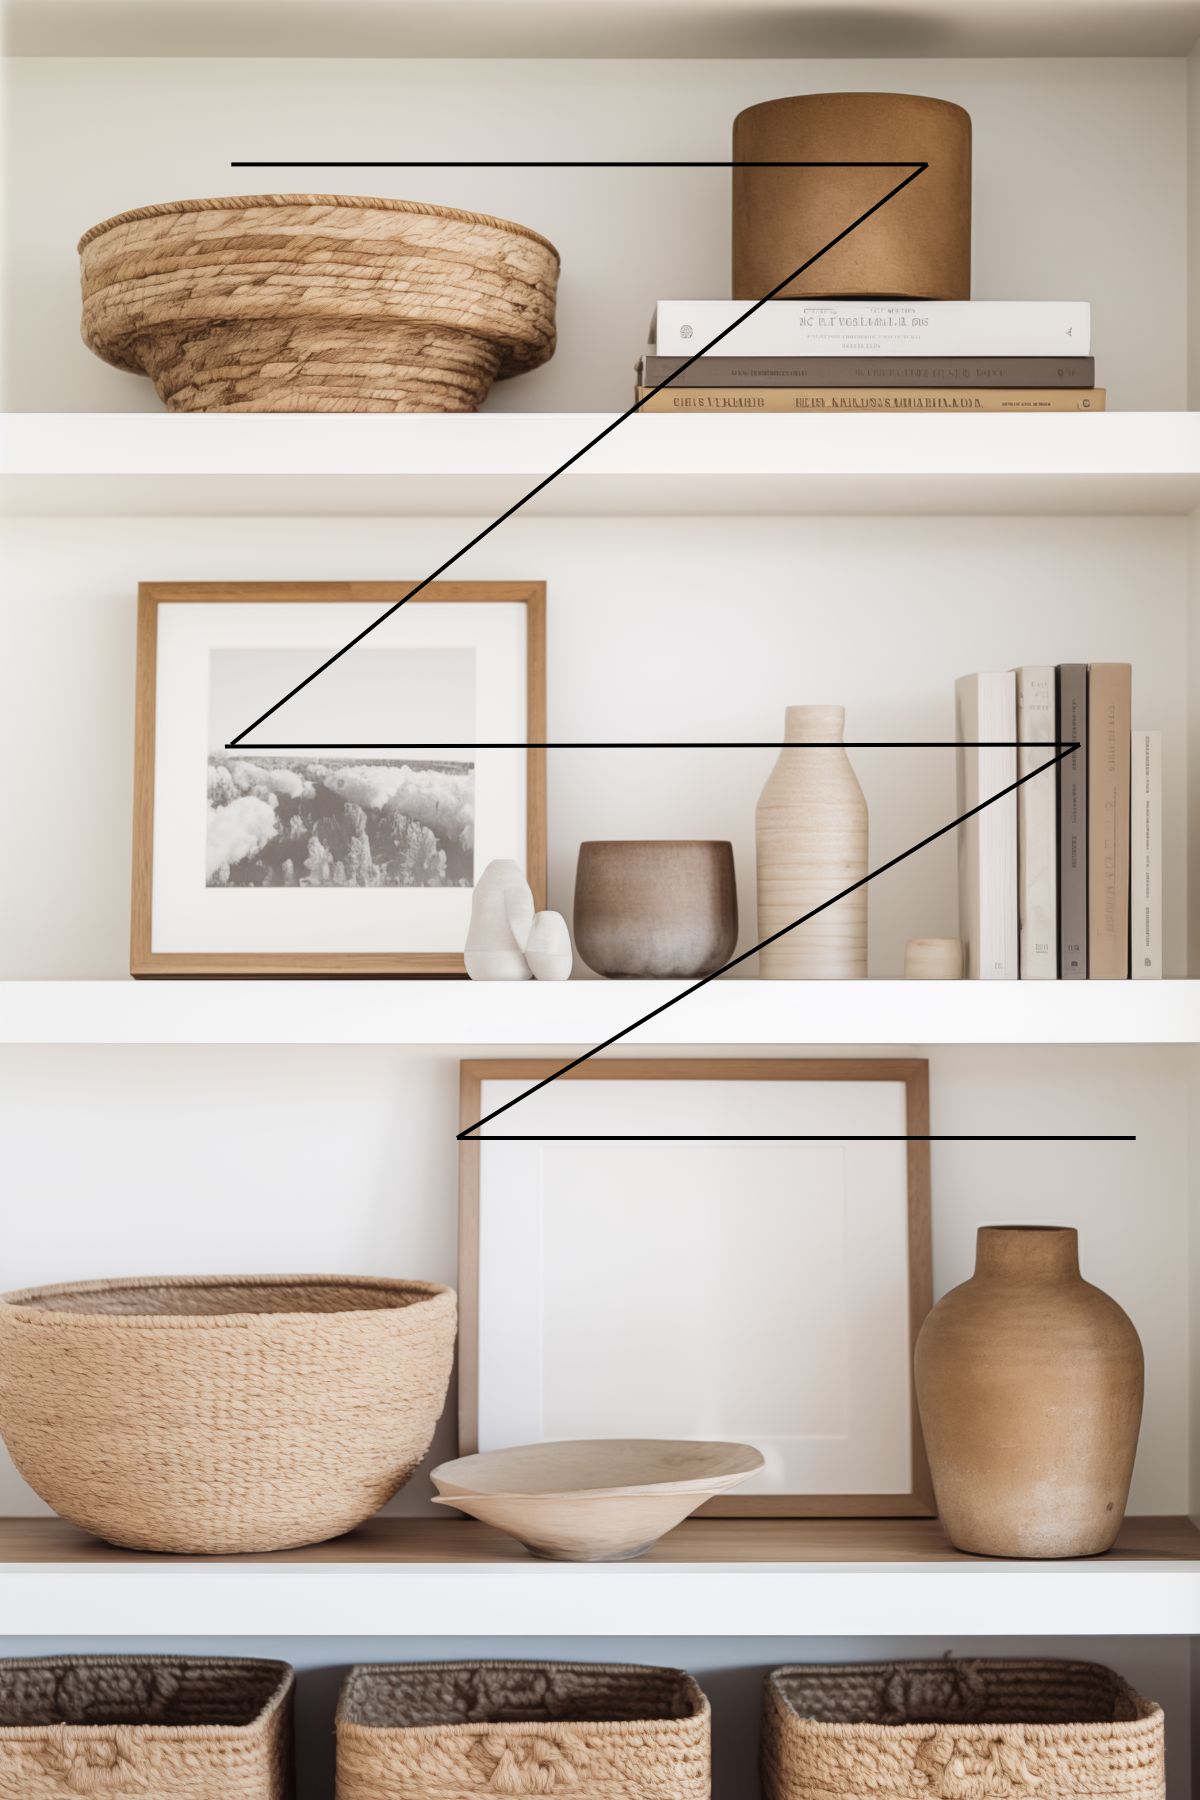
- Alternate Heights: When arranging items on multiple shelves, place the taller objects on opposite sides from one shelf to the next. This creates a zigzag effect that’s pleasing to the eye and keeps the overall display from feeling lopsided.
- Symmetry and Asymmetry: While symmetry is often equated with balance, asymmetrical arrangements can also be balanced. The key is to distribute visual weight evenly across the shelf. This doesn’t mean that everything needs to match perfectly, but rather that the overall composition feels stable and harmonious.
- Visual Weight Consideration: Balance isn’t just about the physical size of items, but also their visual weight. Darker or more vibrant colors, dense textures, and complex patterns can make an object appear heavier. Keep this in mind and try to distribute these elements evenly across the shelf.
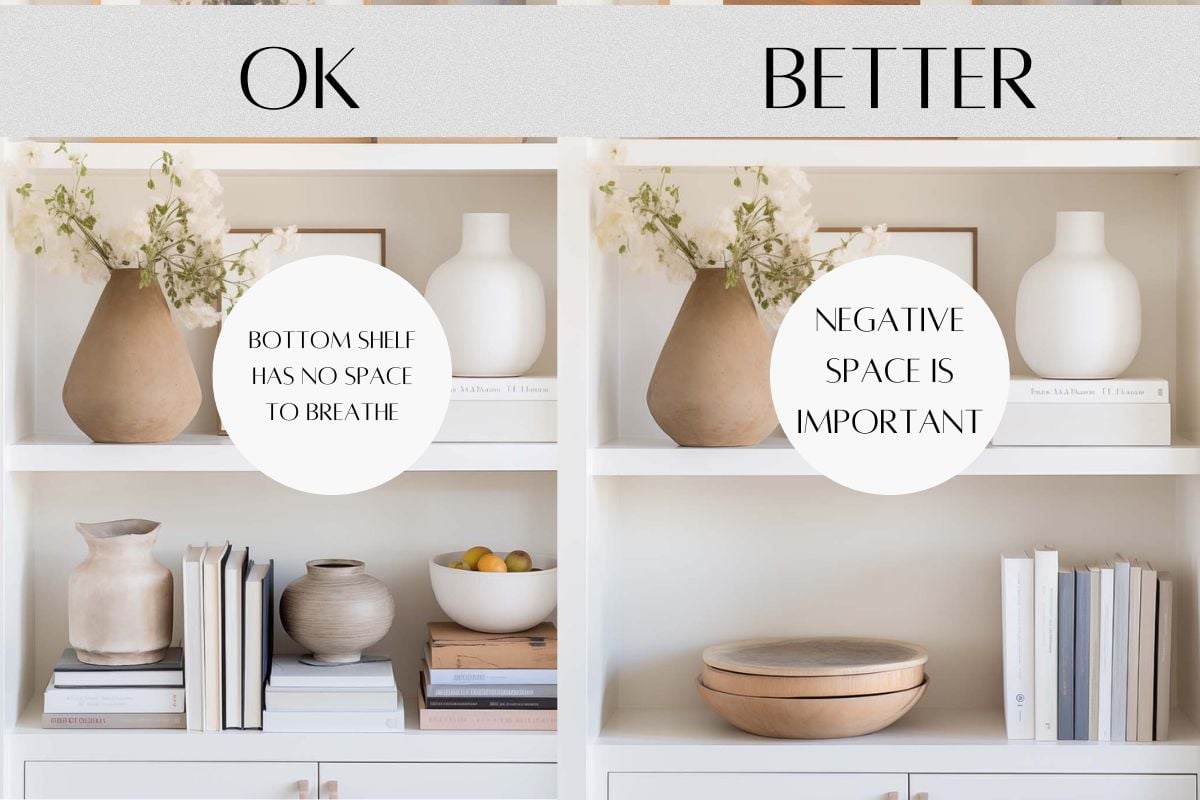
- Grouping Small Items: If you have multiple small objects, group them together to form a larger visual unit. This can then be balanced with a single larger item on the opposite side of the shelf.
- Use of Negative Space: Balance isn’t always about filling space; it’s also about where you choose not to place items. Negative space, or the empty space around and between objects, plays a crucial role in creating a sense of balance. Ensure that the spacing between items is thoughtful, allowing each piece room to breathe.
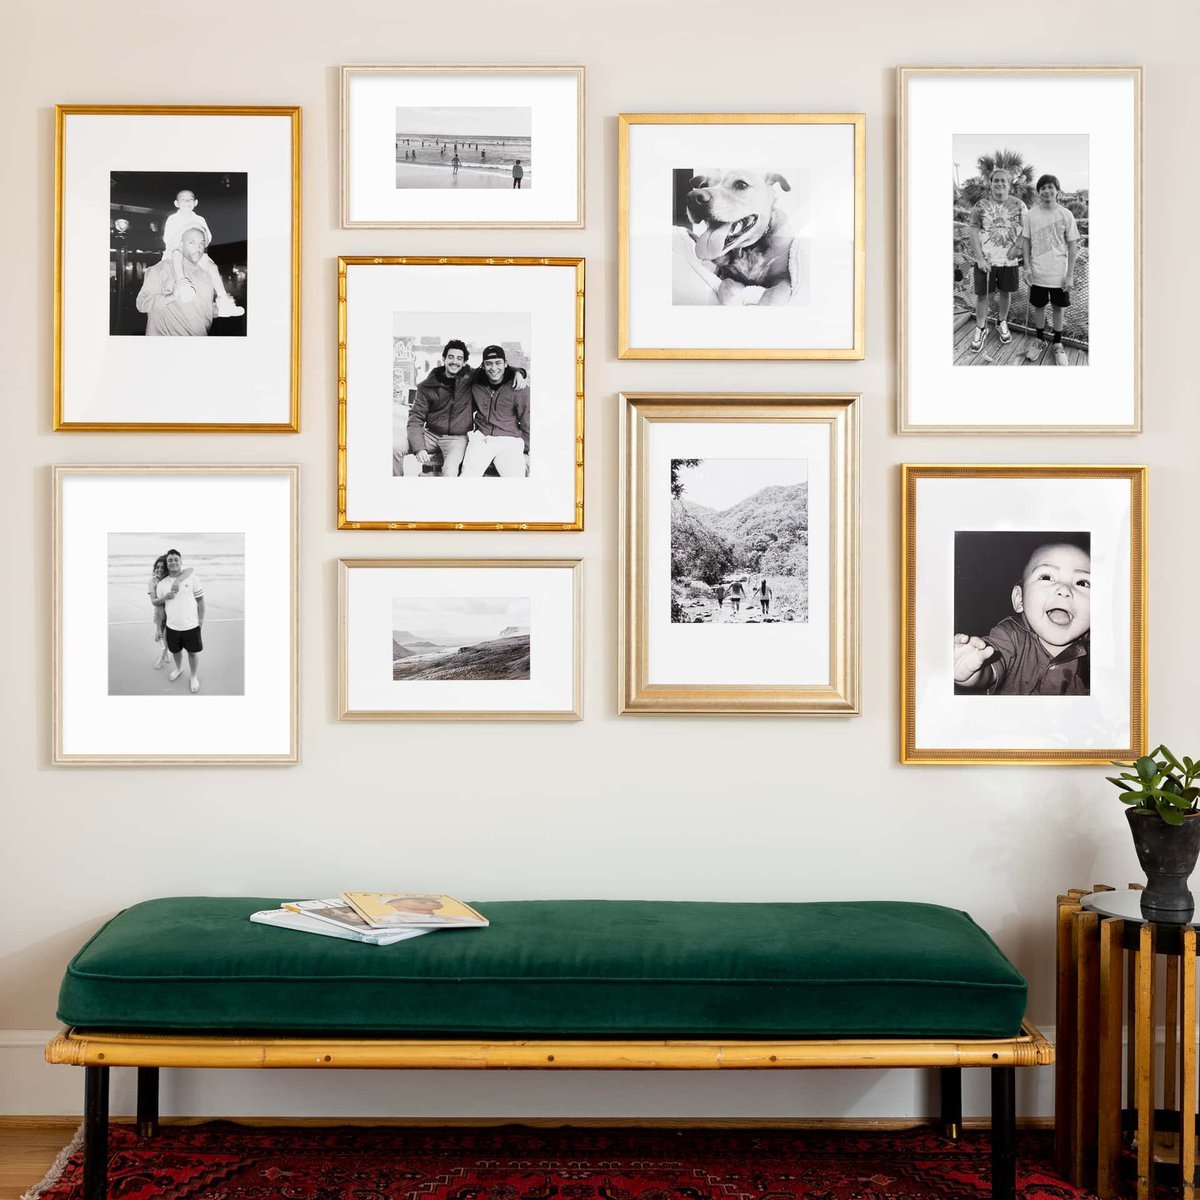
5. Layering Art, Vases, and Objects: Adding Dimension and Depth
Adding layers to your bookshelf is one of the easiest ways to give your display character and depth. This technique involves strategically placing items in front of or behind each other to create a rich, textured look.
- Art Layering: Start with larger art prints at the back, leaning against the back of the bookshelf. These can serve as the backdrop for your display. Then, layer smaller pieces or even family photos in front so that the ends overlap. You don’t want the entire frame covered. The picture frames can be a vertical or horizontal, but make sure whatever is in front is shorter.
- Varying Vase Heights: Vases can be both functional and decorative. By choosing vases of different heights and shapes, you can create a staggered effect that adds vertical interest. Place taller vases behind shorter ones, or group small vases together on top of a stack of books.
- Decorative Objects: When it comes to decorative objects, think about how their placement affects the overall composition. A small bowl or a collection of decorative boxes can be nestled in front of taller items, while smaller items, like thrift store finds or interesting objects, can be positioned to fill the gaps.
5. Personal Touches: Tell Your Story
Your shelf should be a reflection of who you are.
- Display Personal Items: Integrate items like travel souvenirs, photo frames, or a special collection. These pieces infuse your personality into the space.
- Mindful Arrangement: While personalizing, balance is key. Avoid clutter by thoughtfully placing each item and leaving some negative space.
6. Seasonal Switch-Ups: Keeping It Fresh
One of the joys of shelf styling is the ability to adapt and change.
Rotate items with the seasons – bright, airy objects for spring, warm tones for autumn, festive decor for the holidays.
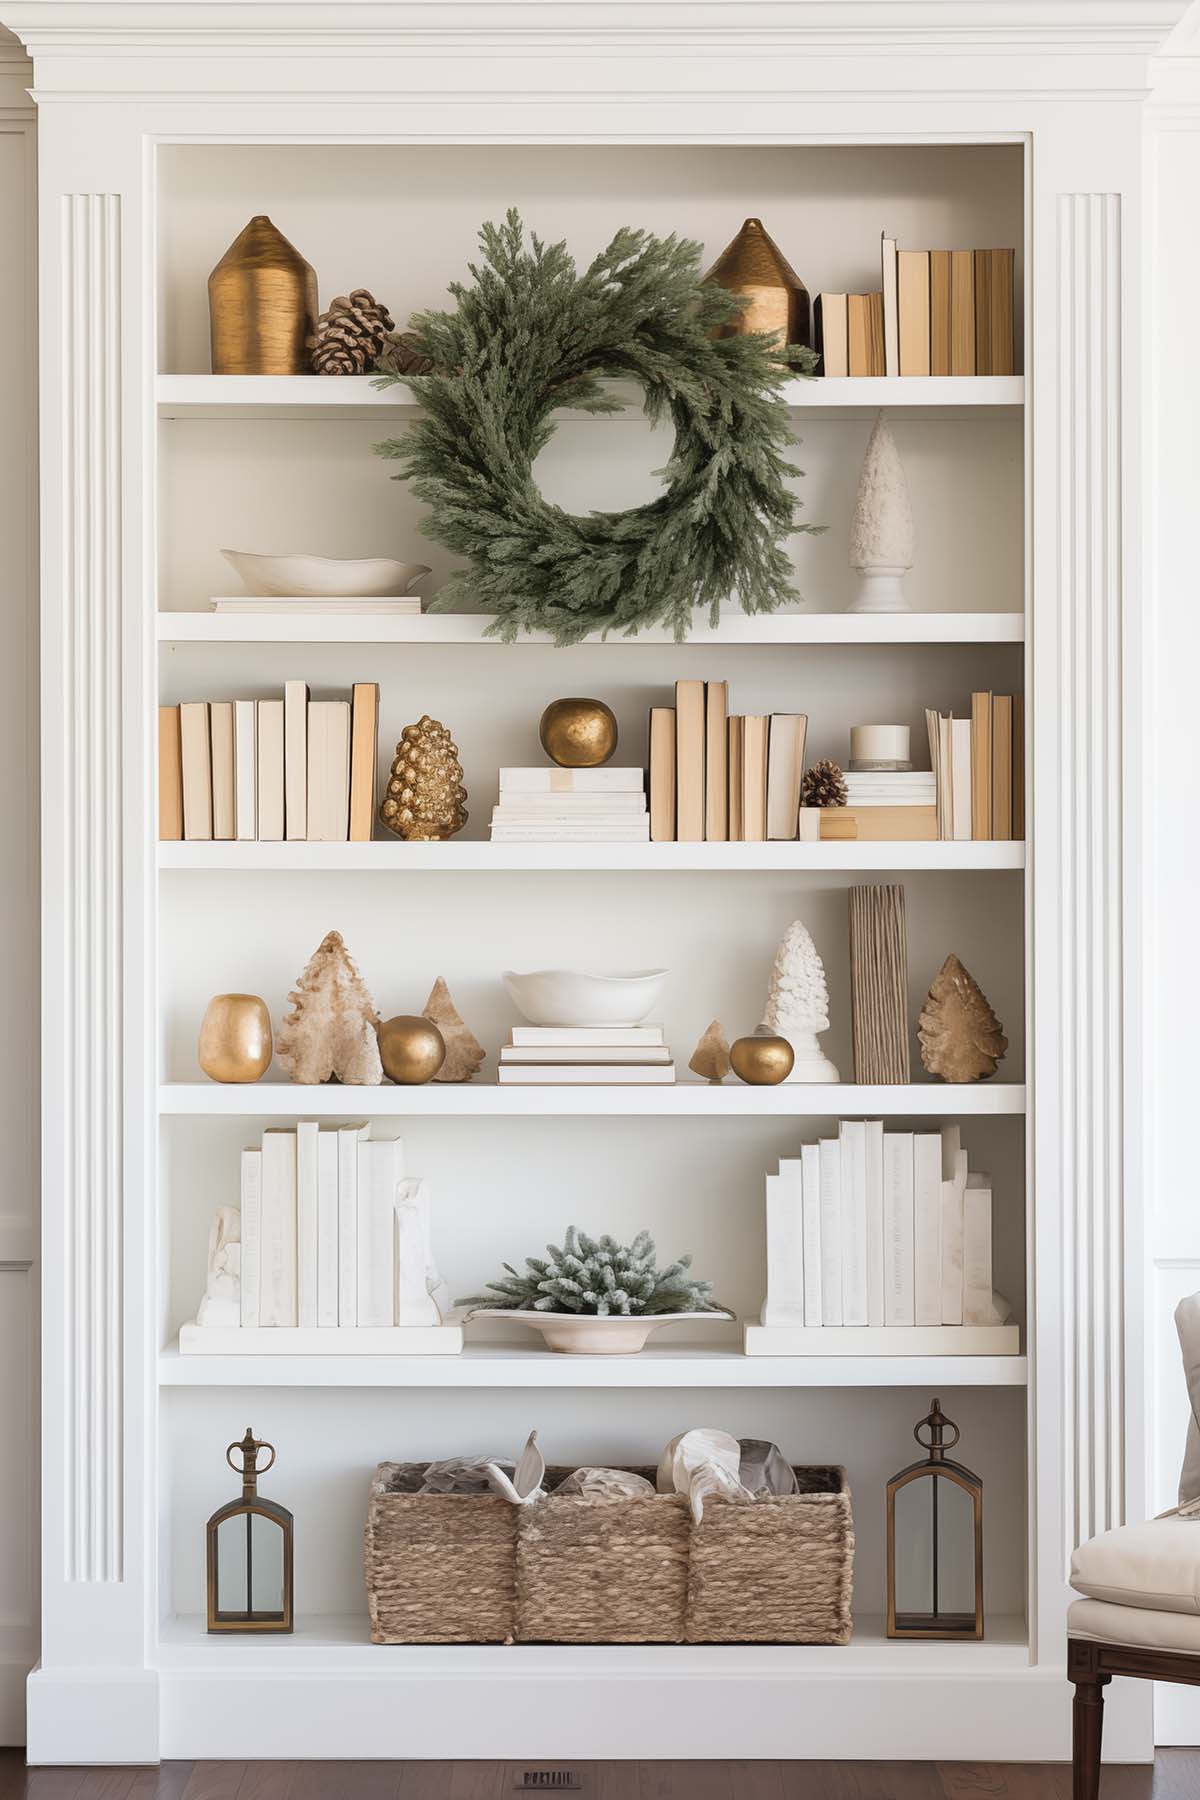
In this example of a bookcase decorated for Christmas, there’s touches of gold as well as lots of white. Pinecones have been strategically placed and a wreath has been from the top shelf. You could easily replace the gold with a few pops of red for a more traditional look.
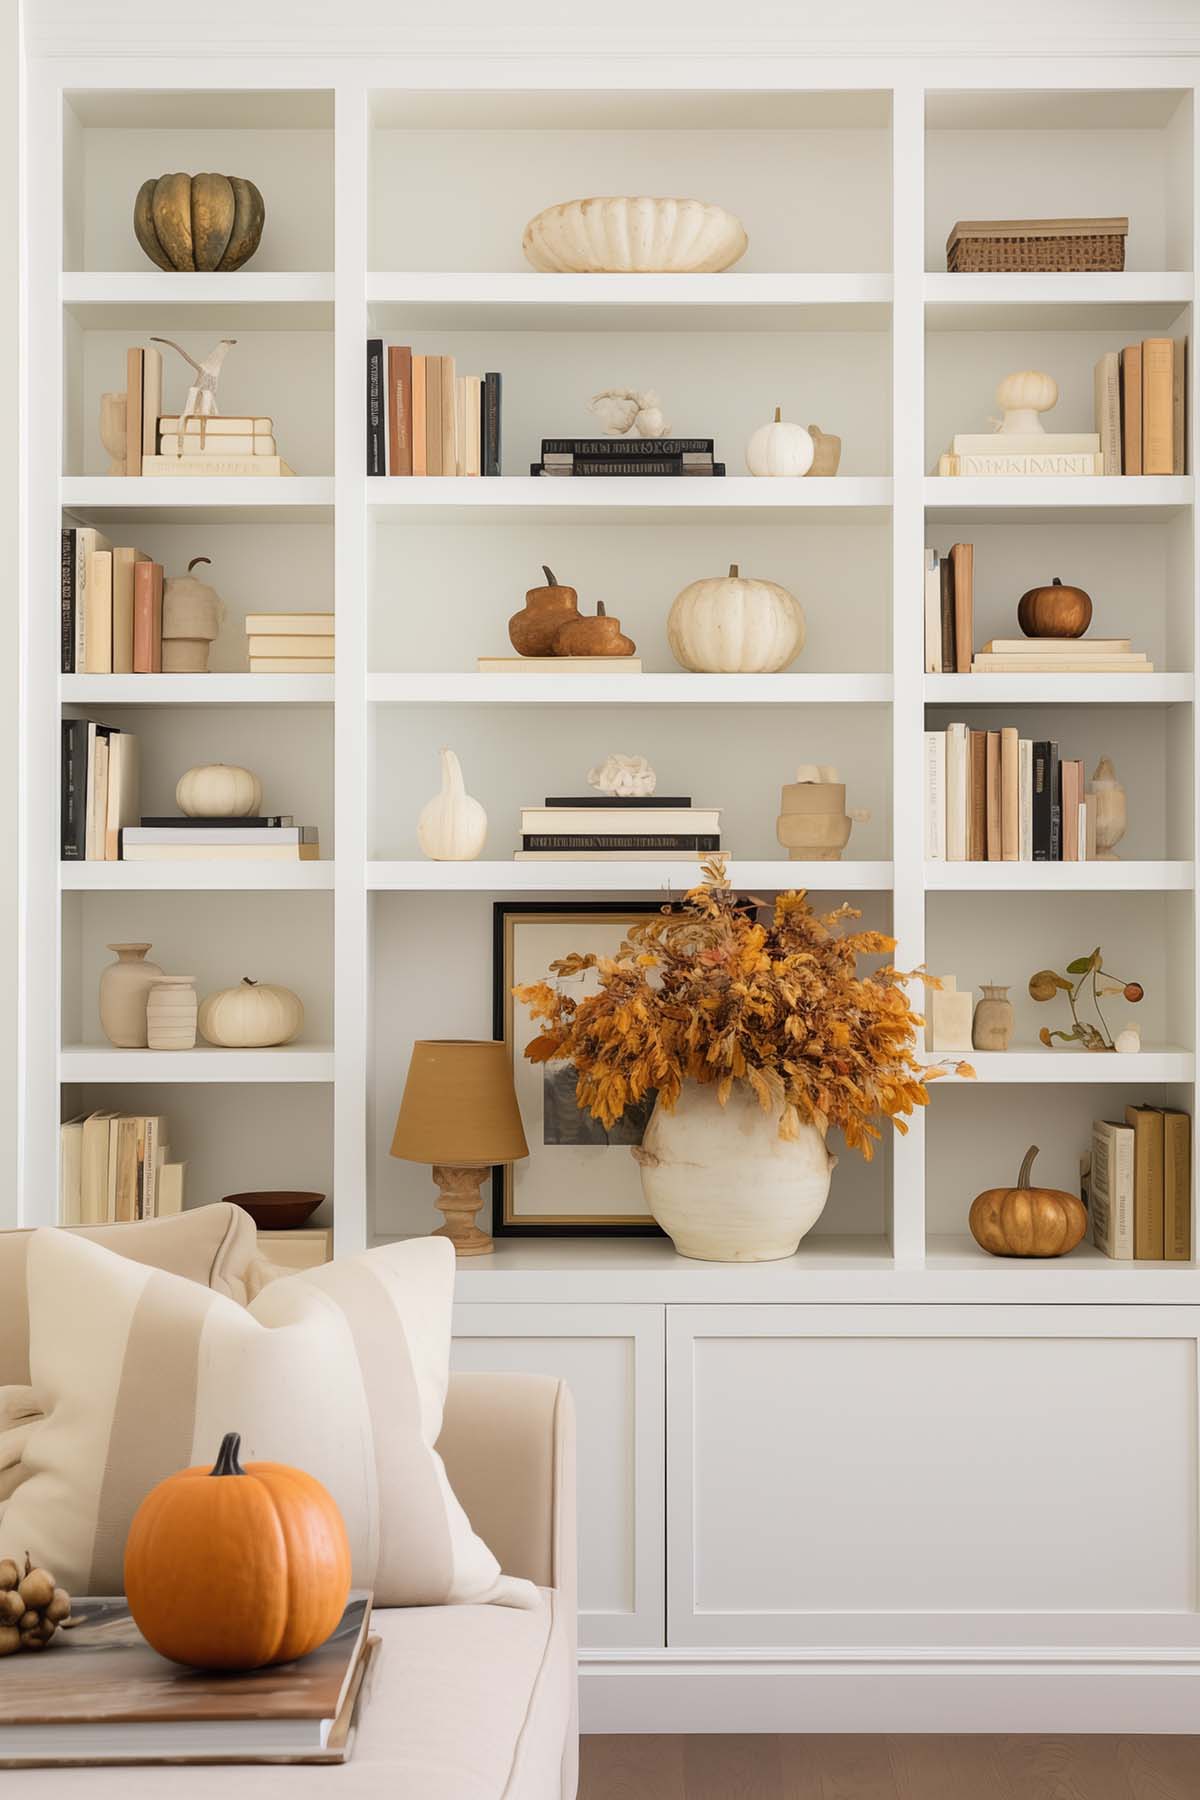
For fall, lots of warmth has been brought in with various pumpkins, a vase of beautiful fall stems and an overall neutral color palette.
Things much more light and airy for spring and summer, with pretty flowers and natural textures.
Final Thoughts
Decorating bookshelves is not just an art; it’s a way to showcase your style and interests. Whether it’s the vintage books you’ve collected over the years, the ginger jars passed down from your grandmother or photos from your travels, each choice reflects a part of you.
With these best practices and tips, you’re well on your way to creating a well-styled bookshelf that is not only a great place to showcase your favorite things but also enhances the feel of any room.
Whether you’re an avid reader looking to showcase your stacks of books or an interior designer curating a space, remember these simple steps can lead to an impressively designed space.

I thought you meant decorating for Christmas! You mean STYLING! Decorating is something else…at least to me.
So when I talk about “home decorating” that only means Christmas? I think not…
Jenna, this is so helpful! I know tons of people who could benefit from your tips. I’ve heard shelves are nice when they have 1/3 EACH books, decor and open space. That seems to have worked well for me. Thanks for the great post!
Your bookcase looks so light and airy. It’s beautiful! Our problem is that most of our bookcases are functional and not just decorative, so there’s a LOT of stuff that needs to be put in them. Definitely going to give these basic tips a try next time I style a bookcase, though.